This quick tutorial shows you how to easily install Oracle Java JDK 6, JDK 7 and/or JDK 8 (includes JRE) in Ubuntu 14.10 Utopic via PPA.
Thanks to Webupd8 Team for providing the installer scripts in PPA that automatically downloads Oracle Java package from its official site and installs it on your system.
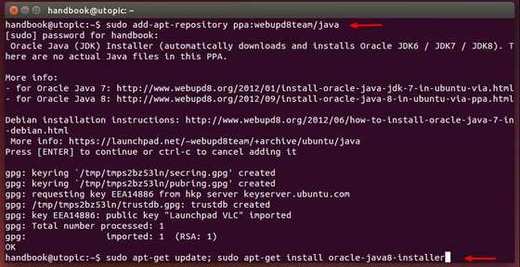
1. To add the PPA, press Ctrl+Alt+T on keyboard to open the terminal. When it opens, paste the command below and hit enter.
sudo add-apt-repository ppa:webupd8team/java
Type in your user password when prompts. Note that there’s no visual feed back when typing your password.
2. After added the PPA, run commands below one by one to install Java (you may replace number 8 in the code with 6 or 7):
If you have two or more Java versions installed on your system, run command below to set Oracle Java to default (you may replace number 8 with 6 or 7):
sudo apt-get install oracle-java8-set-default
Finally, check out java version via:
java -version
You’ll see something like this:
java version “1.8.0_20”
Java(TM) SE Runtime Environment (build 1.8.0_20-b26)
Java HotSpot(TM) 64-Bit Server VM (build 25.20-b23, mixed mode)
This quick tutorial is going to show you how to turn off the Apport error reporting system in Ubuntu 14.10 Utopic Unicorn.
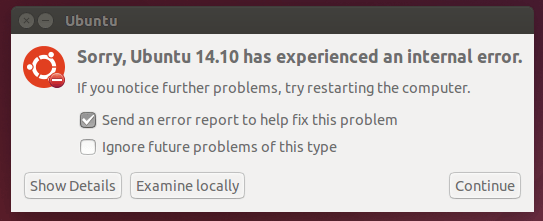
Apport is a system which gathers potentially useful information about the crash and the OS environment. If any process in the system crashes, a dialog pops up and asks user to send error report to help fix the problem.
Reporting bugs is important, it helps improving system stability, but if you’re constantly getting crash report popups, you may want to disable it.
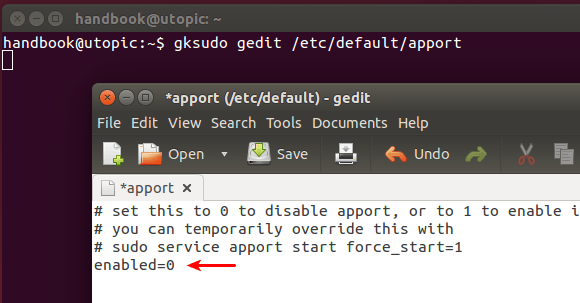
To get started, press Ctrl+Alt+T on keyboard to open terminal. When it opens, paste the command below and run to edit the config file:
sudo gedit /etc/default/apport
You can use gksudo to replace sudo, but install gksu first from Ubuntu Software Center.
When the file opens, change the value of ‘enable’ from ‘1’ to ‘0’ and save it.
After that, stop the Apport process so you don’t have to restart your computer:
Ubuntu 14.10 Utopic Unicorn Beta 2 and its official flavors are now available for download.
This Beta features images for Kubuntu, Lubuntu, Ubuntu Gnome, UbuntuKylin, Ubuntu Studio, Xubuntu, and Ubuntu Cloud.
The Ubuntu team is pleased to announce the final beta release of Ubuntu 14.10 Desktop, Server, Cloud, and Core products.
Codenamed “Utopic Unicorn”, 14.10 continues Ubuntu’s proud tradition of integrating the latest and greatest open source technologies into a high-quality, easy-to-use Linux distribution. The team has been hard at work through this cycle, introducing new features and fixing bugs.
This beta release includes images from not only the Ubuntu Desktop, Server, Cloud, and Core products, but also the Kubuntu, Lubuntu, Ubuntu GNOME, Ubuntu Kylin, Ubuntu Studio and Xubuntu flavours.
The beta images are known to be reasonably free of showstopper CD build or installer bugs, while representing a very recent snapshot of 14.10 that should be representative of the features intended to ship with the final release expected on October 23rd, 2014.
According to Ubuntu 14.10’s release schedule, there will be:
Kernel Freeze on October 9th
Final Freeze and Release Candidate on October 16th
Final Release of Ubuntu 14.10 (Stable) on October 23rd
What to expect in the Ubuntu 14.10 Final:
Both Unity 8 (Mir) and Unity 7 (X.org) available.
Ubuntu 14.10 will bring better 3G mobile modems.
Kubuntu 14.10 will be using KDE Plasma 5.
Download Ubuntu 14.10 Beta 2:
For Unity: http://cdimage.ubuntu.com/releases/14.10/
For Kubuntu: http://cdimage.ubuntu.com/kubuntu/releases/14.10/
For Lubuntu: http://cdimage.ubuntu.com/lubuntu/releases/14.10/
For Ubuntu Gnome: http://cdimage.ubuntu.com/ubuntu-gnome/releases/14.10/
For UbuntuKylin: http://cdimage.ubuntu.com/ubuntukylin/releases/14.10/
For UbuntuStudio: http://cdimage.ubuntu.com/ubuntustudio/releases/14.10/
For Xubuntu: http://cdimage.ubuntu.com/xubuntu/releases/14.10/
For Ubuntu Cloud: http://cloud-images.ubuntu.com/releases/utopic/
Ubuntu MATE 14.10, an unofficial Ubuntu flavor maintained by Ubuntu community, has just reached its second beta release.
What’s Ubuntu MATE?
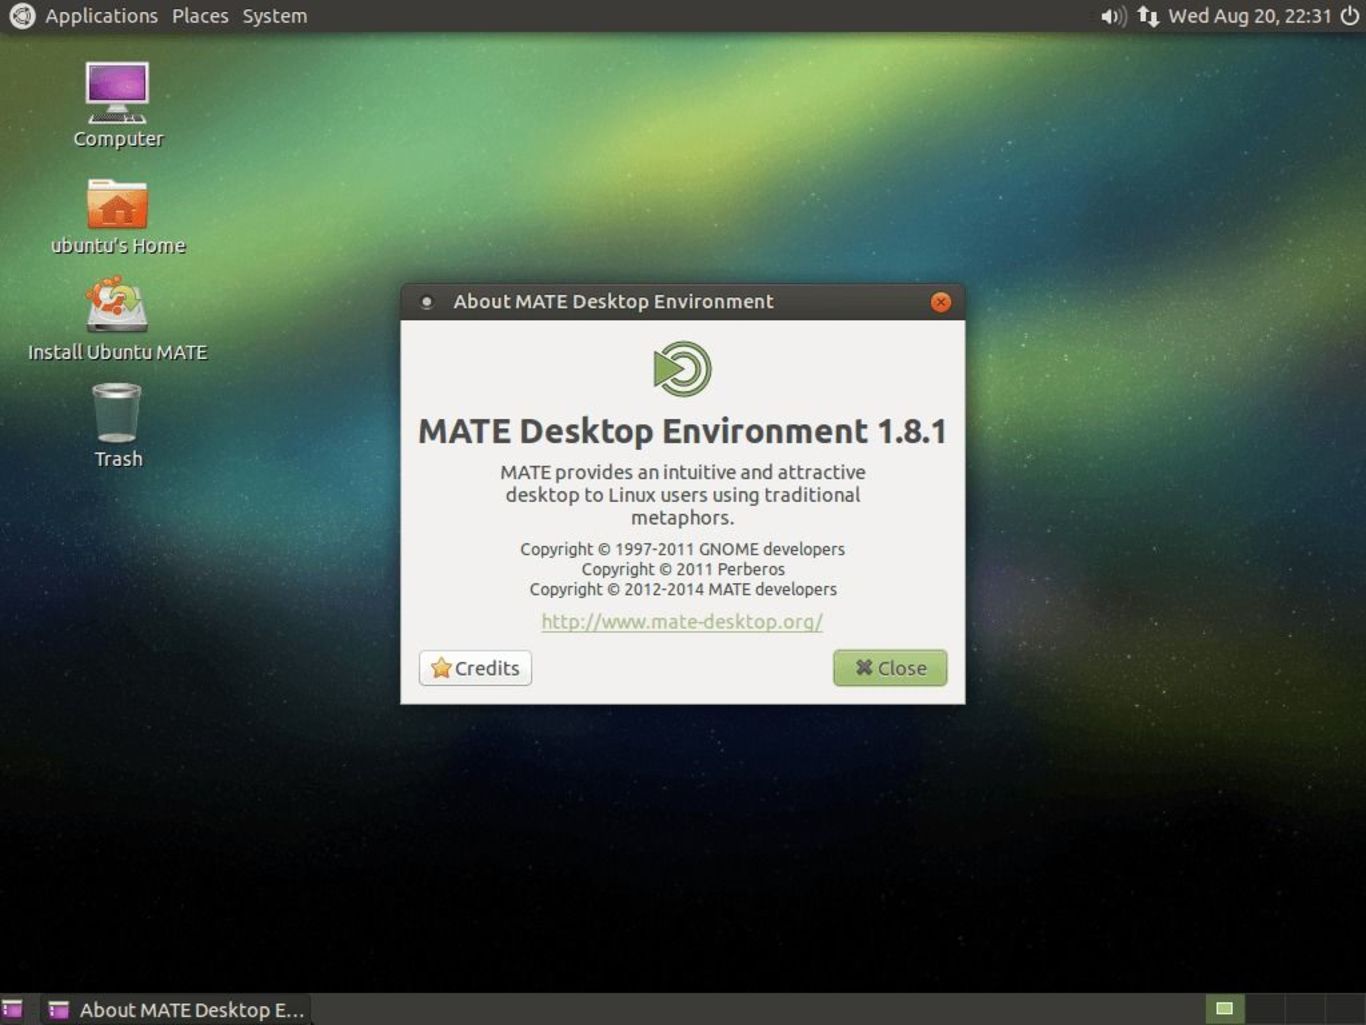
Ubuntu MATE is a new Ubuntu flavor started a few months ago. The first release will be Ubuntu MATE 14.10, Ubuntu 14.10 Utopic integrated with MATE Desktop Environment.
Ubuntu MATE is a Ubuntu community project developed by the core MATE Desktop development team, and maintained by the heroes from the Debian packaging team.
At the moment, Ubuntu MATE is not an official Ubuntu “flavor”. The team are working towards that.
MATE Desktop Environment is the continuation of classic GNOME 2. It provides an intuitive and attractive desktop environment using traditional metaphors for Linux and other Unix-like operating systems.
Ubuntu MATE
The Beta2 release has been focused on fixing broken things and improving what was already present in Beta1. See the official release note for details.
This tutorial is trying to help those who want to create AP wifi hotspot in Ubuntu Laptop but stuck at “Wifi Hotspot: Access Point Mode Is Not Supported By This Device” error message.
I’ve written three tutorials about how to turn Ubuntu Laptop into a wifi hotspot for Android, and Windows phones. Access Point Mode does not support issue is one of the most asked questions from my readers. Below I will show how to fix it using Broadcom bcm4313 as example.
UPDATE: THIS TUTORIAL IS OUTDATED! It does NOT work anymore in current Ubuntu releases!
1. Press Ctrl+Alt+T on keyboard to open terminal. When it opens, run the command below to tell your wireless chip information:
Using Unity’s Default Network Manager with a little hack. See below
Below I will show you how to use Unity’s default network manager to create a wireless hotspot with Android devices support, tested in 64-bit Ubuntu 1404 with Nexus 4 and Sumsung Galaxy ace3.
1. Disable WIFI and plug in an internet cable to your laptop so that your Ubuntu is connect to a wired internet and wireless is disabled.
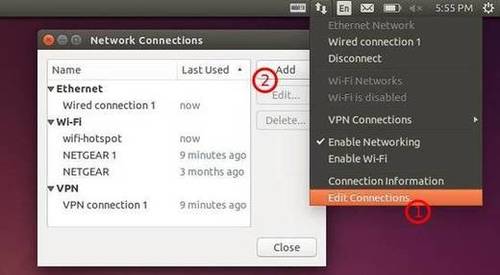
2. Go to Network Icon on top panel -> Edit Connections …, then click the Add button in the pop-up window.
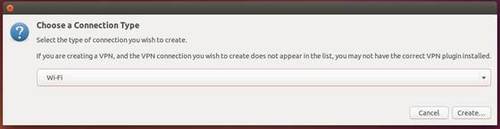
3. Choose Wi-Fi from the drop-down menu when you’re asked to choose a connection type:
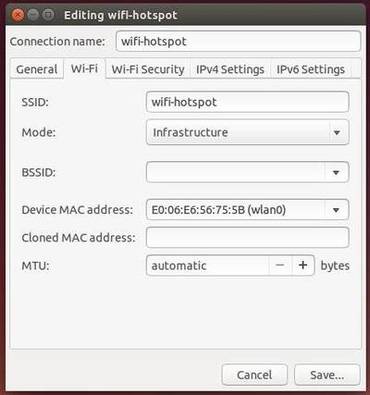
4. In next window, do:
Type in a connection name. The name will be used later.
Type in a SSID
Select mode: Infrastructure
Device MAC address: select your wireless card from drop-down menu.
5. Go to Wi-Fi Security tab, select security type WPA & WPA2 Personal and set a password.
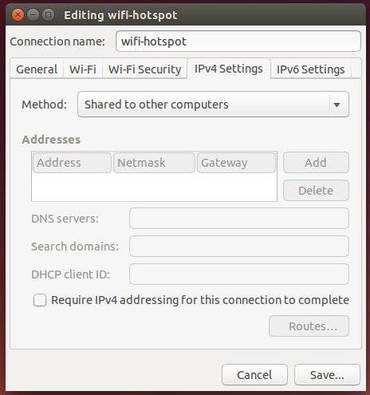
6. Go to IPv4 Settings tab, from Method drop-down box select Shared to other computers.
When done, click the save button.
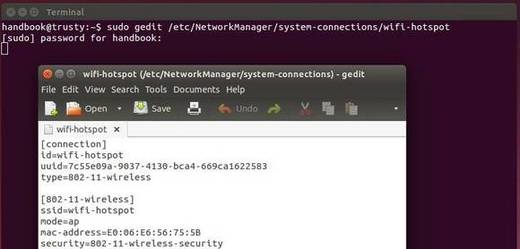
After above steps, a configuration file created under /etc/NetworkManager/system-connections directory. File name is same to the connection name you typed in step 4.
Now press Ctrl+Alt+T on keyboard to open terminal. When it opens, paste the commands below and hit enter to edit the configuration file:
Replace wifi-hotspt with the connection name you typed in step 4.
When the file opens, find out the line mode=infrastructure and change it to mode=ap. Finally save the file.
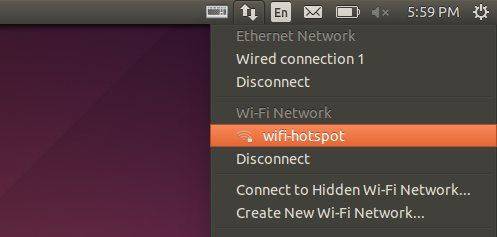
When everything’s done, enable WIFI from Network Manager icon on the panel. It should automatically connect to the hotspot you created. If not, select “Connect to Hidden Wi-Fi Network …” and select it from the drop-down box.
Now you can search and connect the access point from your Android mobile and enjoy!
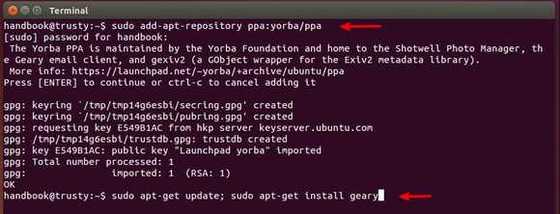
Yorba Team has recently announced its Geary Mail Client 0.8 with lots of new features and improvements. Here’s how to upgrade it in Ubuntu 14.04 LTS.
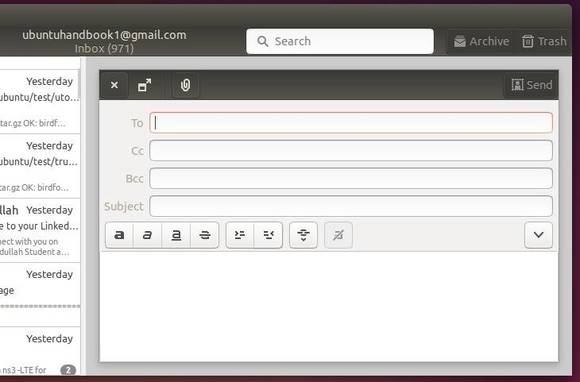
According to the release note, Geary 0.8 now looks a lot sharper and more modern than before. The compose new message and reply window are now inline the main window. You can still pop the composer out into a separate window through the Detach button.
Compose new message and Reply window are now inline the main window
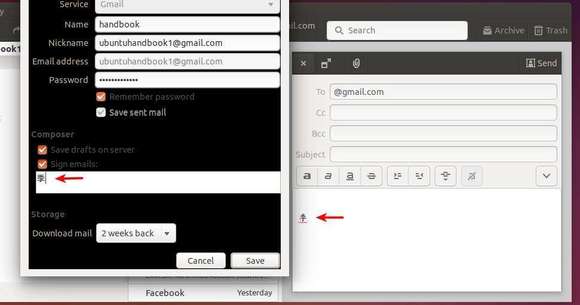
Another new feature is that signature support has been made into Geary. It will automatically insert a signature of your design into an email, whether new or replying to another.
Geary with signature support
Also the new release brings great improvement on database speed and IMAP connection stability, and more:
Saving drafts to server can be disabled
Improved interface, now using GtkHeaderBar and modern widgets
Database speed optimizations to reduce lags and improve read times
Improved connection handling and reestablishment
Show attachments lacking a Content-Disposition
Important bug fixes
Updated translations
Install Geary 0.8 in Ubuntu 14.04 or Linux Mint 17:
UPDATE: The step below is outdated! See how to guide instead.
Press Ctrl+Alt+T on keyboard to open the terminal. When it opens, run commands below one by one:
Above commands will add the official PPA and install the latest geary packages in your Ubuntu. For those don’t want to add the PPA, you can grab the .deb directly from the Launchpad Page.
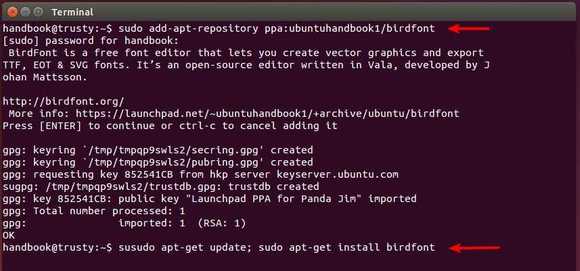
BirdFont is a free font editor that lets you create vector graphics and export TTF, EOT & SVG fonts. It’s an open-source editor written in Vala.
BirdFont is developed by Johan Mattsson with a good number of people contributing translations and patches. The editor now is at version 1.3 and has around 42 000 lines of code.
BirdFont has been made into default Ubuntu repositories since 14.10 Utopic. But the packages are old at the moment.
I’ve upload the latest build into PPA with the debian files belong to Ubuntu official. The PPA so far supports Ubuntu 14.10 and derivatives, such as Linux Mint 17.
To install the latest BirdFont (1.3 so far) in Ubuntu:
Press Ctrl+Alt+T on keyboard to open the terminal. When it opens, paste the commands below and run one by one:
Nvidia has just announced a new version of graphics driver 343.22 for Linux with new GPUs support and various fixes.
According to the release highlights, Nvidia 343.22 added support for GeForce GTX 970 and GTX 980, removed support for G8x, G9x, and GT2xx GPUs, and motherboard chipsets based on them. Ongoing support for new Linux kernels and X servers, as well as fixes for critical bugs, will be included in 340.* legacy releases through the end of 2019.
The new drive contains various fixes and/or new features:
Fixed a bug that prevented the “sync to vblank” setting from being honored for EGL applications.
Fixed a bug that could cause some OpenGL programs to encounter out of memory during a mode switch.
Fixed a bug that prevented the NVIDIA OpenGL driver from honoring the __GL_SHADER_DISK_CACHE_PATH environment variable.
Fixed a bug that caused disabled displays to be implicitly included in the target selection for some queries and assignments on the nvidia-settings command line interface, in the absence of any explicit target selection.
Added a new attribute to the NV-CONTROL API to query the current utilization of the video decode engine.
Fixed a bug where the Exchange Stereo Eyes setting in nvidia-settings didn’t work in certain stereo configurations.
Worked around a Unigine Heaven 3.0 shader bug which could cause corruption when tessellation is enabled by implementing an application profile that uses the “GLIgnoreGLSLExtReqs” setting. See the documentation for the __GL_IGNORE_GLSL_EXT_REQS environment variable for more details.
Fixed a memory leak when destroying EGL surfaces.
Added support for multiple simultaneous EGL displays.
Fixed a bug that could cause nvidia-installer to unsuccessfully attempt to delete the directory containing precompiled kernel module interfaces, on packages prepared with –add-this-kernel.
Updated nvidia-installer to log uninstallation to a separate file from the installation log, and to attempt uninstalling previous driver installations using the installer program from the previous installation, when available.
Install or Upgrade to Nvidia 343.22 in Ubuntu:
NOTE: Ubuntu provides “nvidia-current” driver, available in Software Center, which may interact better with your distribution’s framework, and you may want to use this rather than NVIDIA’s official package.
There are two ways installing this driver in your Ubuntu system, using the official .run installer or a third-party PPA repository.
To install Nvidia 343.22 via official installer:
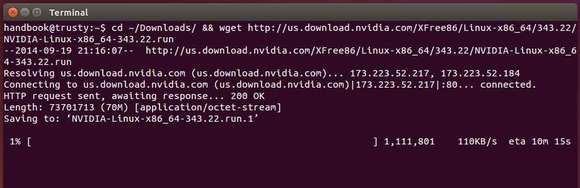
1. Press Ctrl+Alt+T to open terminal, run command below to download the driver:
For 32-bit system, run:
cd ~/Downloads/ && wget http://us.download.nvidia.com/XFree86/Linux-x86/343.22/NVIDIA-Linux-x86-343.22.run
For 64-bit system, run:
cd ~/Downloads/ && wget http://us.download.nvidia.com/XFree86/Linux-x86_64/343.22/NVIDIA-Linux-x86_64-343.22.run
2. , run command to remove the previous driver and install latest update-dev package:
3. When back, press Ctrl+Alt+F1 (or F2~F6) to switch to command console and log in with your user name and password. There will no visual feedback when typing a password, just type in mind and hit enter.
4. When you’re logged into command console, stop the graphics session by running the command below:
sudo service lightdm stop
For Ubuntu Gnome edition and Linux Mint, you may replace ligthdm with gdm or mdm
5. After the graphics session closed, you can now starts the official Nvidia installer, by running below commands:
chmod +x ~/Downloads/NVIDIA-Linux-*-343.22.run && sudo sh ~/Downloads/NVIDIA-Linux-*-343.22.run
Follow the onscreen prompt and done!
6. (Optional) To uninstall this driver, run below command in console:
sudo sh ~/Downloads/NVIDIA-Linux-*-343.22.run --uninstall
To install the driver from PPA repository (easier way):
First check out the PPA page to see if the packages are ready: xorg-edgers PPA. Check out the package version of “nvidia-graphics-drivers-343”.
Once the driver is made into the PPA, you can run below commands one by one to install it in Ubuntu 14.04 or Ubuntu 14.10:
Enlightenment 0.19.0 stable has been released recently. One of the best new features in E19 is the full wayland support.
In this quick tutorial I’ll show you how to install the Enlightenment window manager 0.19.0 (E19) in Ubuntu easily with a bash script. Tested in Ubuntu 14.04.1 64-bit.
Enlightenment E19 session in Ubuntu 14.04
Before getting started, you may take a look at what’s new in the latest E19 release:
greatly improved wayland support
E_WL_FORCE environment variable for forcing output types
e_uuid_store: Add infrastructure to store window/surface properties.
Add a tiling profile.
per-screen desklock logo visibility config
Tiling: Merge the tiling module rework..
check udisks1 DevicePresentationHide flag
ACTIVATE_EXCLUDE window active hint policy
show video resolution in filepreview widget
add fileman option to clamp video size for video previews
handle xrandr backlight using a single, accurate handler
blanking options for wakeup on events (urgent + notify)
packagekit module for package manager integration
ibar now optionaly triggers its menu on mouse in
selective redirection toggling
new focus option “raise on revert focus”
add PIN-style desklock for lokker module
make desklock hookable, break out current desklock into module, move pam stuff to separate file
revive personal desklock passwords
allow moveresize visuals to be replaced
allow desk flip animations to be handled completely externally
E16-style live pager returns!
comp config is no longer a module
E_FIRST_FRAME env variable
new compositor API
add E_MODULE_SRC_PATH for setting current module src path without needing to install modules
use non-recursive makefiles for entire build system
filemanager popups no longer span multiple monitors
system operations no longer dim screen until action has begun
window stacking and focus restore is more accurate across restarts
gstreamer1 is now used for media previews
improved multiple monitor setup reliability
shaped windows now render more accurately
Install Enlightenment E19 in Ubuntu 14.04:
UPDATE: The link to the script is broken. As an alternative, install E19 from PPA by running below commands one by one from PPA:
Thanks to batden, there’s now a bash script to make it easy to install / upgrade / uninstall the E19 (git version) in Ubuntu 14.04 LTS. All you need to do is download & install the script and answer on screen prompts during the installing process.
1. To download the script, right-click the link below and click “Save link as …” and save the file nineteen.sh to Downloads folder..
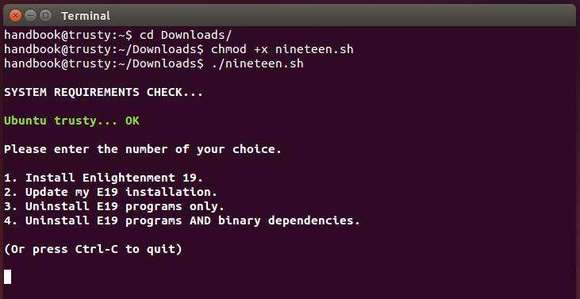
2. After you downloaded the script, make it executable and run it.
To do so, press Ctrl+Alt+T on keyboard to open the terminal. When it opens, run the commands below one by one:
cd ~/Downloads/ && chmod +x nineteen.sh && ./nineteen.sh
3. When the script starts, type a number to select install, update, or uninstall E19 (see above picture.) and hit Enter.
After that, it will pop up a information dialog and then ask you to insert your user password. Not that, terminal does not give visual feed back when typing a password, just type in mind and hit enter.
4. After that, the script will update & upgrade your system, download all Enlightenment packages, and finally compile them on your system. Depends on your internet connection, the process will cost a few minutes.
During this period of time, it will ask two or three questions, so don’t go too far away!
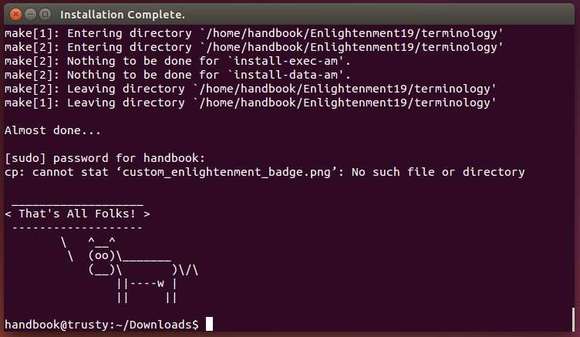
5. When everything’s done, you should see something like below.
Restart your computer and select log in with Enlightenment when you’re at Unity Greeter and enjoy!