This quick tutorial is going to show you how to change the display name of drives, partitions (under Devices) in the left pane of Nautilus file browser.
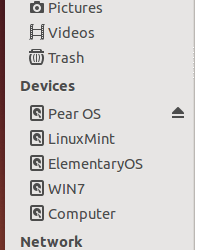
Besides Ubuntu 14.04, I have 4 other partitions in my laptop. However, the Nautilus file manager only displays them as “x GB Volume” and I was always annoyed to find out which is which!
See the result first:
Before
After
How to fix it by changing drive label:
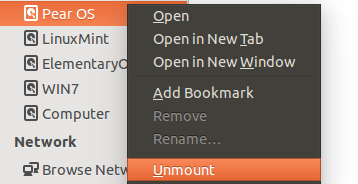
1. First make sure all the drives under Devices are unmounted in Nautilus file browser.
2. Search for and install Gparted in Ubuntu Software Center.
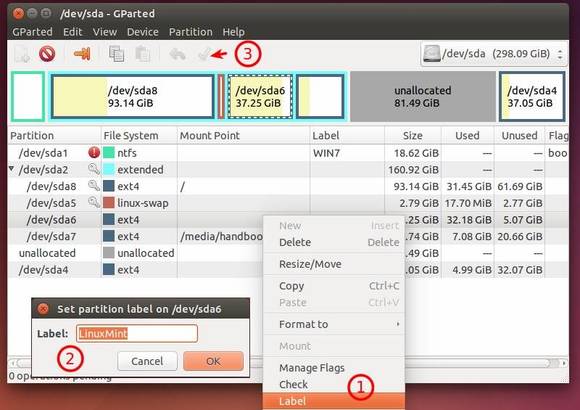
3. Launch Gparted. When it opens, do below one by one:
Right click on a drive/partition and choose Label
On pop-up dialog box, give a name.
Click the green check mark button to apply changes.
The first point release, Ubuntu 14.04.1 LTS (Long-Term-Support) for its Desktop, Server, Cloud, and Core products, as well as other flavors, has been announced just a few hours ago.
José Antonio Rey said in the release note:
As usual, this point release includes many updates, and updated installation media has been provided so that fewer updates will need to be downloaded after installation. These include security updates and corrections for other high-impact bugs, with a focus on maintaining stability and compatibility with Ubuntu 14.04 LTS.
Users of Ubuntu 12.04 will soon be offered an automatic upgrade to 14.04.1 via Update Manager. If you’re running on Ubuntu 14.04, regular update via Software Updater will bring you to this point release.
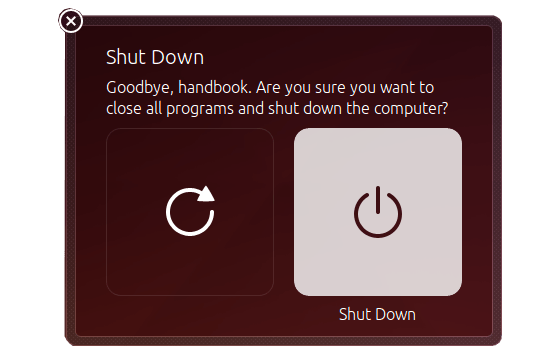
Every time you click the Shutdown option in Ubuntu Unity, it pops up a dialog box that asks for your confirmation whether to shutdown or not.
If you find this is annoying, this quick tutorial will show you how to disable the Shutdown and Log Out confirmation dialog box.
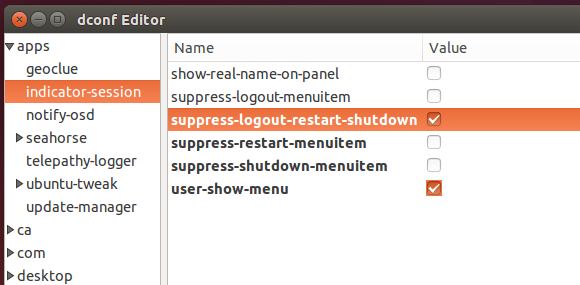
1. Search and launch the dconf Editor from Unity dash.
2. Navigate to apps -> indicator-session.
3. Check the value box after “suppress-logout-restart-shutdown”
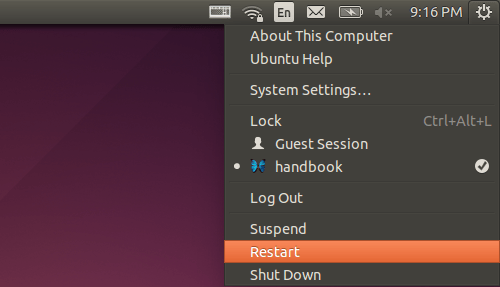
After that, you’ll see Restart option available in system menu and all shutdown, restart or log out options will be implemented immediately without confirmation when you click on one of them.
Remove Confirmation Dialog Box When you’re at Login Screen:
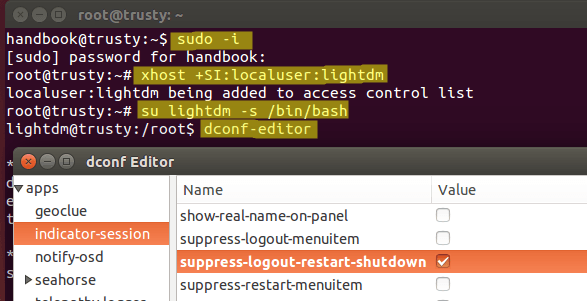
Previous steps will not work if you are logged out and try to shutdown or restart your computer at the Unity Greeter (LightDM login screen).
To make it work, you need to start dconf Editor with lightdm user privilege:
1. Press Ctrl+Alt+T on keyboard to open the terminal. When it opens, run below command and type in your user password to get the root (super user) privilege:
sudo -i
2. After that, in this terminal window run command to allow user lightdm to create a connection to the X server:
xhost +SI:localuser:lightdm
3. Next switch to user lightdm in this terminal window:
su lightdm -s /bin/bash
4. Finally launch dconf Editor and do the changes:
Nomacs image viewer has finally reached v2.0 with plugins support and other new features. It’s available in its official PPA for Ubuntu 14.10, Ubuntu 14.04, and Ubuntu 12.04.
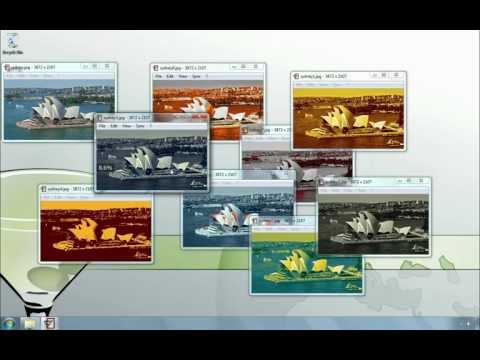
Nomacs is small, fast image viewer that handles the most common image formats including RAW images. Additionally it is possible to synchronize multiple viewers. A synchronization of viewers running on the same computer or via LAN is possible. It allows to compare images and spot the differences (e.g. schemes of architects to show the progress).
Nomacs features:
VIEWING: most common formats (including RAW), thumbnail preview, framless view, slideshow, and more.
EDITING: crop, resize, rotate, drag and drop images, color adjustments, multi page TIFF export, and more.
SYNCHRONIZATION: synchronize multiple instances.
See the video about the viewer:
New features in Nomacs 2.0:
nomacs now supports plugins (windows only for now)
Recent Files/Folders on start-up
Threaded file loading/saving
UPnP support that allows for detecting nomacs in WLAN networks
Remote control via WLAN/LAN
Fading for fullscreen/slideshow
Option for syncing all actions
Auto file updating (without locks)
Full exif support on linux (fixes issue #192)
White list to automatically connect with your computers
Gamma correction on down sampling (fixes #322)
New (improved) cacher
Improvements in the Thumbnail Preview
Install Nomacs 2.0 in Ubuntu:
Press Ctrl+Alt+T on keyboard to open the terminal. When it opens, run the commands below one by one:
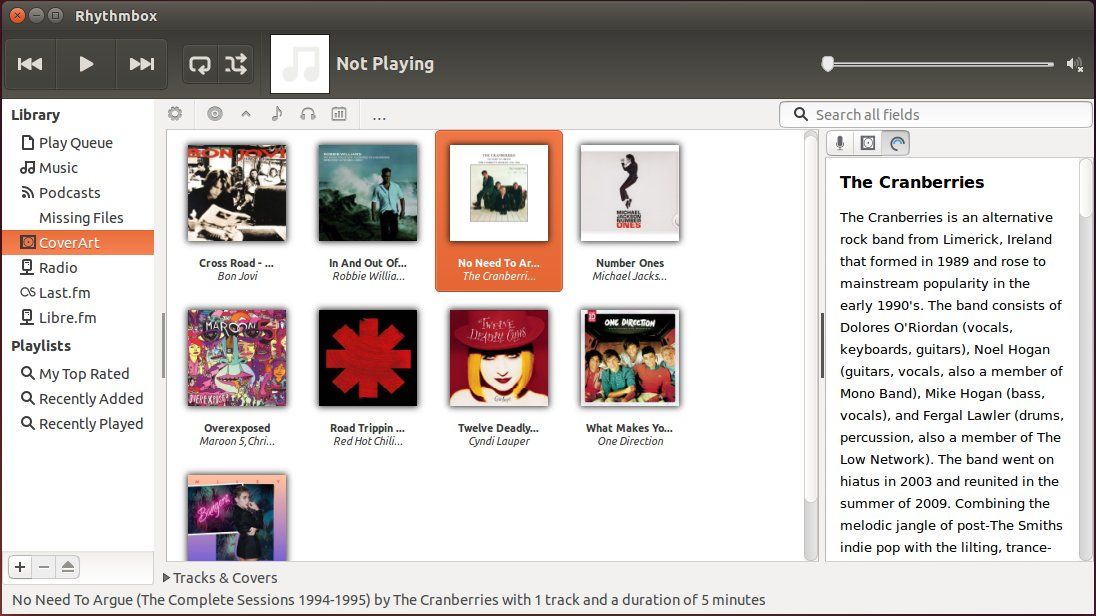
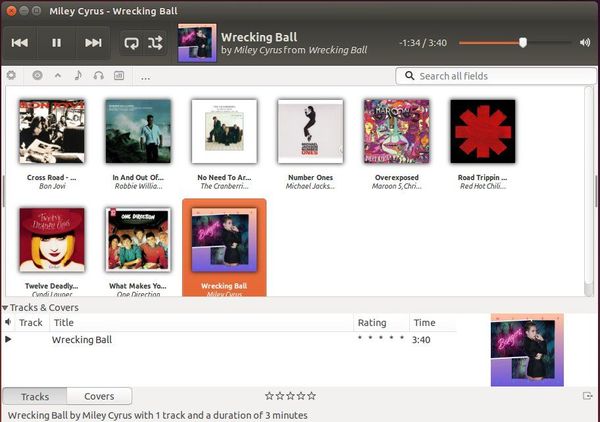
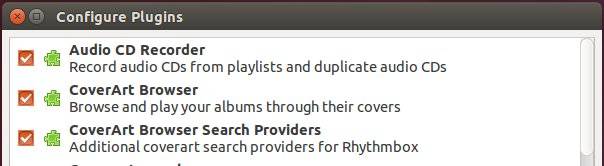
Cover art browser plugin v2.0 for the pre-installed Rhythmbox music player was finally announced by the developer, available for Ubuntu 14.04 and later.
For the uninitiated, the CoverArt Browser plugin for Rhythmbox allows you to find, play and queue both albums & individual tracks through various views:
Tile-View – a grid like view completely customisable – you can have a iTunes like layout, xnoise or any other media player grid layout.
Flow-View – swipe through your albums using different types of flows
Artist-View – list all album-artists graphically and find their albums
Music Library View – deep integration with standard rhythmbox – move to the Track-based layout and back to the other views in the same way via a toolbar menu (“…”)
Play Queue View – new to this release, further deeper integration – move to the Play Queue to see what you have manually queued.
Taken together, you no longer need the side-pane – press F9 to hide and enjoy the increased screen-space to view and play your albums.
Single click has improved in this release – play – pause – add albums with one click. For detailed changes, see the link at the end of post.
Install Cover Art Plugin 2.0 in Ubuntu 14.04:
Press Ctrl+Alt+T on keyboard to open the terminal. When it opens, run the commands below one by one:
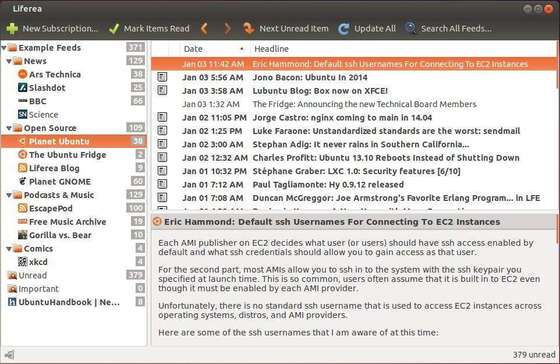
Liferea, a free feed reader for Linux desktop, has updated to v1.10.10 with various bug fixes and improvements.
Liferea is an abbreviation for Linux Feed Reader. It is a news aggregator for online news feeds. It supports a number of different feed formats including RSS/RDF, CDF and Atom. There are many other news readers available, but these others are not available for Linux or require many extra libraries to be installed. Liferea tries to fill this gap by creating a fast, easy to use, easy to install news aggregator for GTK/GNOME.
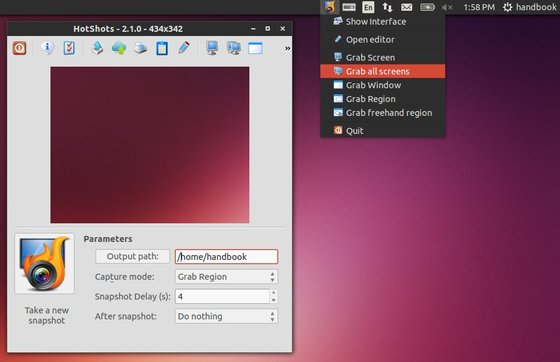
HotShots is a screen capture tool with some editing features. It is particularly suitable for writing documentation (as used in the following chapters) but you can use it to highlight some details on a map image or what ever you want.
Because HotShots is written with Qt. Compare to Shtter, it has few dependencies and uses lower computer resources.
Features:
Grab current screen, all monitors (in case of multi-monitors configuration), current window or a part of the desktop.
Save the screenshot in multiple formats (PNG, JPG, BMP, …).
Automatically save the screenshot to clipboard, disk or launch the editor tool.
Automatically scale the screenshot to a given size.
Use “system” shortcuts to take a screenshot.
Add automatically some “post-effects” to the screenshot (drop shadow, rotation, border, …).
Add annotation items (text, arrows, rectable, …) to the snapshot.
Can be minimized to system tray and work in background.
Can be launch at system start-up (Windows).
Export edited image in multiple formats (PNG, JPG, BMP …).
Save/Restore edited image in proprietary format.
Send image directly to printer or to web service.
…
Install HotShots in PPA:
HotShots does not provide .deb package or apt repository for Ubuntu user so far, but you can always install the latest release from the launchpad PPA, works for Ubuntu 14.10, Ubuntu 14.04 and Ubuntu 12.04.
To add the PPA, press Ctrl+Alt+T on keyboard to open the terminal. When it opens, paste the command below and hit enter:
sudo add-apt-repository ppa:ubuntuhandbook1/apps
After that, update package lists and install the screen capture:
sudo apt-get update

sudo apt-get install hotshots
Once installed, open it from Unity dash or application menu and enjoy!
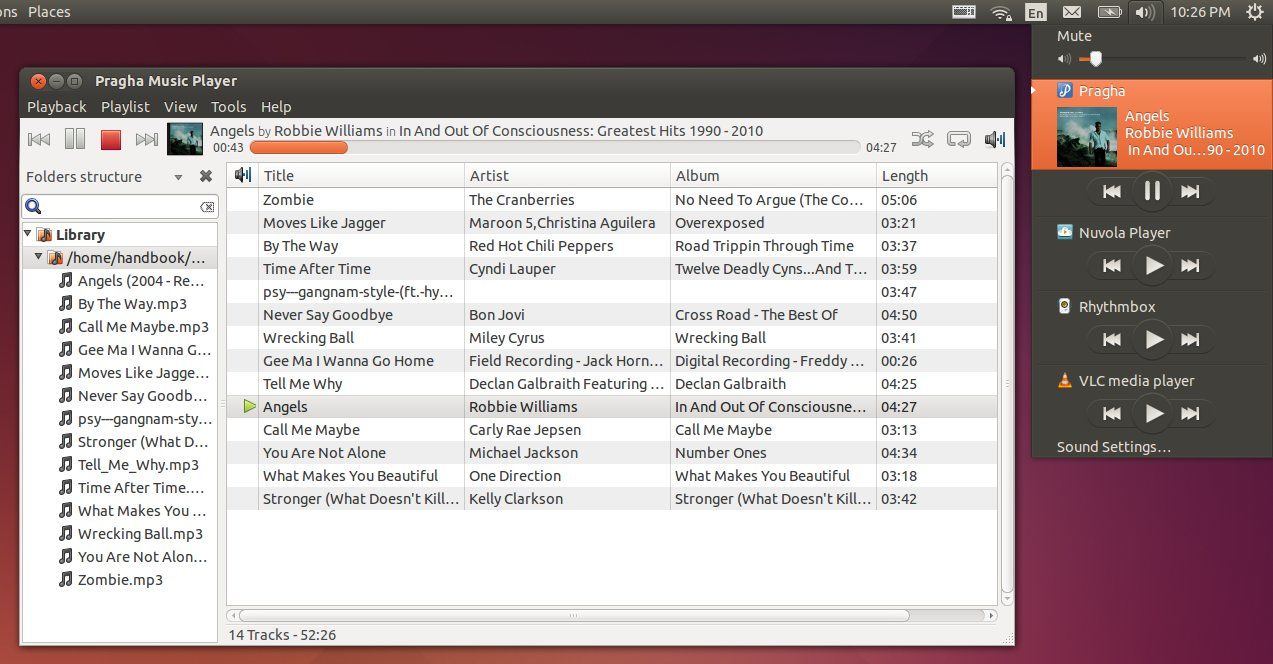
Pragha is a Lightweight Music Player for GNU/Linux, based on Gtk, sqlite, and completely written in C, constructed to be fast, light, and simultaneously tries to be complete without obstructing the daily work.
History of Pragha:
Consonance, An excellent player emerged in the archlinux forums, was discontinued. The author, Sacamano said in his blog:
“Which doesn’t mean that it won’t be maintained. I would still be fixing bugs, but major feature additions are not in the pipeline, because I have completed all that I wanted to see in Consonance. It has been a fun project. :)”
Well.. Dissonance is the project to continue developing Consonance, and its result is Pragha Music Manager. A New reproducer of music.
Features:
Full integration with GTK+3, but always completely independent of gnome or xfce.
Two panel desing inspired on Amarok 1.4. Library and current playlist.
Library with multiple views, according tags or folder structure.
Search, filtering and queue songs on current playlist.
Playing and edit tag of mp3, m4a, ogg, flac, asf, wma, and ape files. Limited only by codecs installed and taglib version used.
Playlist management. Exporting M3U and read M3U, PLS, XSPF and WAX playlists.
Play audio CDs and identifies this with CDDB.
Playback control with command line and MPRIS2.
Native desktop notifications with libnotify.
Install Pragha in Ubuntu via PPA:
Seems that there’s no apt repository for Ubuntu users to make it easy to install the player, so I built the latest v1.2.2 into my PPA, available for Ubuntu 14.04, Ubuntu 12.04, Ubuntu 14.10 and their derivatives.
Press Ctrl+Alt+T on keyboard to open the terminal. When it opens, run the commands below one by one to add the PPA and install the player:
Sorry that the Ubuntu 12.04 build excludes libglyr (>= 1.0.1) which allows to get lyrics and artist bio over many internet services, and download missing album cover art from Last.fm. Please email me if you know how to build libglyr for Ubuntu 12.04 Precise.
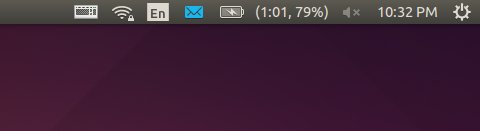
This quick tip is going to show you how to display your laptop’s battery percentage and time remaining to Ubuntu 14.04 panel. So that your system tray area battery icon will look like this:
This can be done easily by doing a little changes through dconf Editor, install it via Software Center if you don’t find it in application menu or Unity dash.
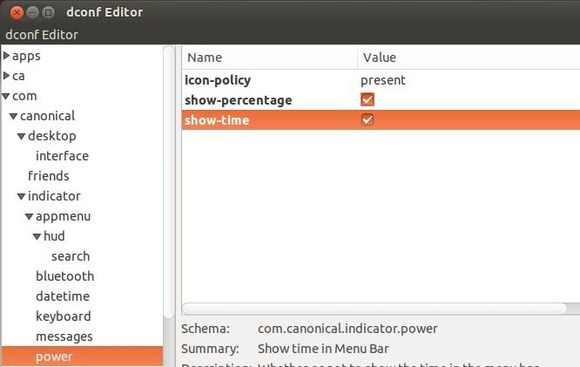
1. Open dconf Editor. On the left side, navigate to com -> canonical -> indicator -> power.
2. Check the boxes that say “show-time” and “show-percentage” on the right.
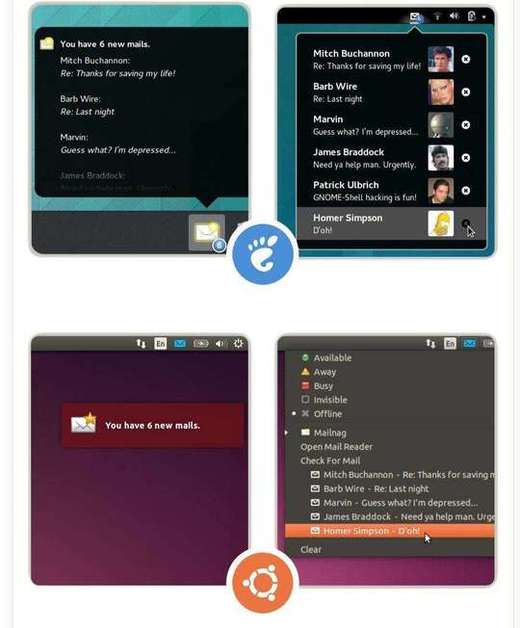
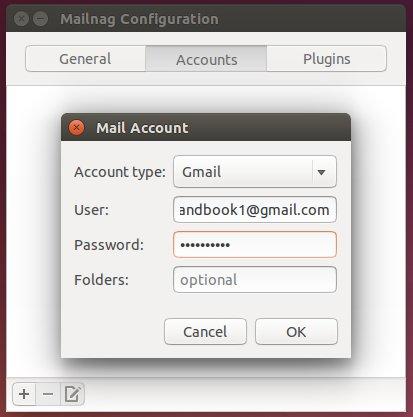
Mailnag is a mail notification daemon for Gnome 3 and Unity that checks POP3 and IMAP servers for new mail.
On mail arrival it performs various actions provided by plugins. Mailnag comes with a set of desktop-independent default plugins for visual/sound notifications, script execution etc. and can be extended with additional plugins easily.
This notifier has an official PPA, available for Ubuntu 14.10 and Ubuntu 14.04, which contains the latest Mailnag packages as well as Gnome Shell and Unity plugin.
Press Ctrl+Alt+T on keyboard to open the terminal. When it opens, run the commands below one by one to add the PPA and install the notifier: