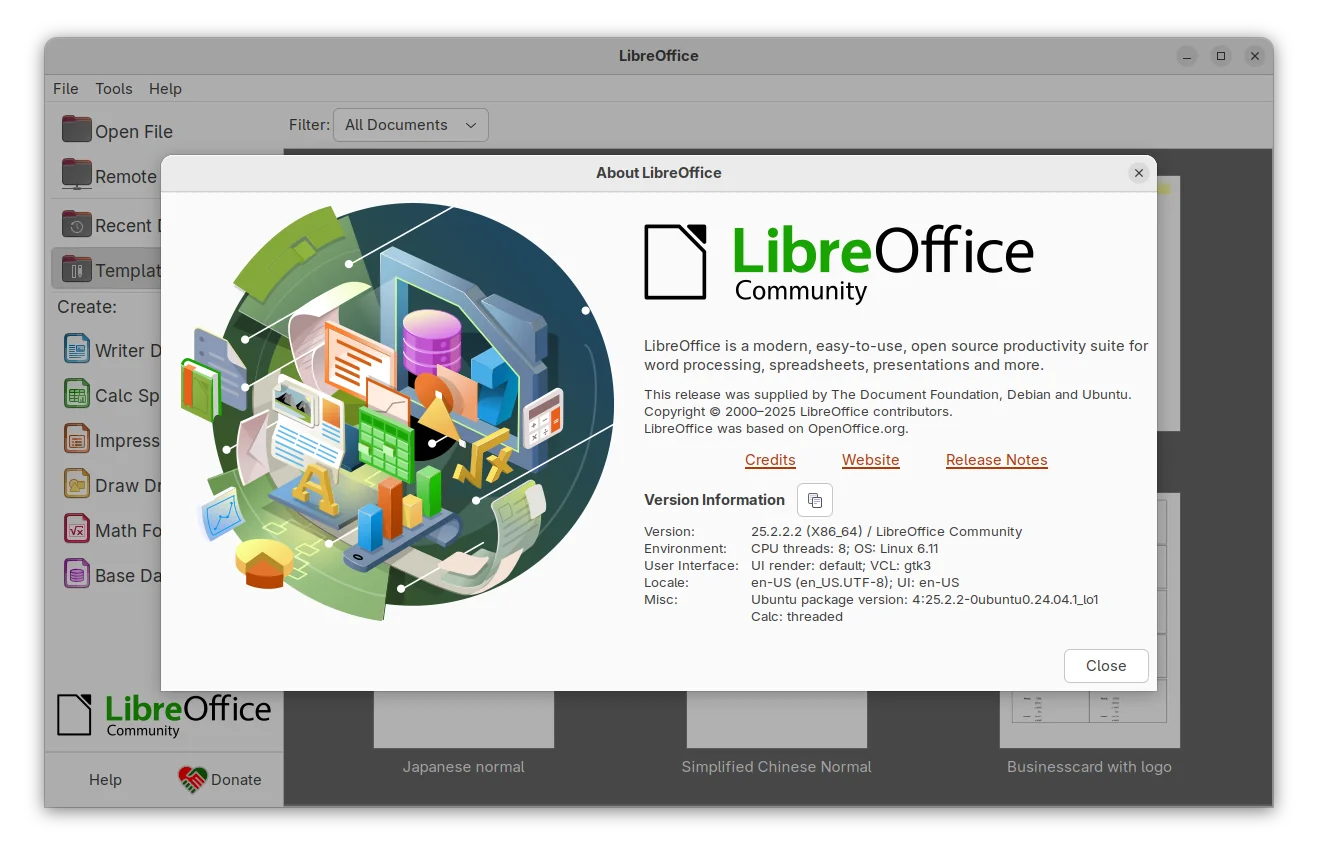
Archives For November 30, 1999

Celluloid, formerly GNOME MPV, released version 0.26 yesterday.

Celluloid is a free open-source video player uses mpv as backend, and is default in Linux Mint 21 Cinnamon. Since v0.24, it’s been ported to GTK4 and Libadwaita that looks native in modern GNOME desktop environment.

In the new 0.26 release, the ‘About‘ and ‘Preferences‘ dialog are also ported to LibAdwaita to follow GNOME’s step. Which, is adaptive to fit different screen sizes.

The ‘Toggle Playlist‘ option has been removed from the ‘≡’ menu. Instead, it added a new button in bottom right to show/hide the playlist. Though, it has wrong tooltip shows ‘Toggle Fullscreen’.

Other changes in Celluloid 0.26 include:

  • Remove media keys support, since it already uses MPRIS.
  • Remove support for X11 window embedding, since it doesn’t work with GTK4.
  • Fix header bar auto-hiding even when a menu is open.
  • Mark “Extra mpv options” for translation
  • Remove --mpv-options
  • Remove ‘vo‘ from the list of default options.
  • Take screenshots in .PNG file format instead of the previous .jpg.
  • Remove the old GSettings schema file (io.github.GnomeMpv.gschema.xml).
  • Export the Position property
  • Sync translations from Weblate

How to install Celluloid 0.26 in Ubuntu

The video player has an official Ubuntu PPA. Due to updated LibAdwaita library requirement, the new 0.26 release is available in the PPA for Ubuntu 23.04 and Ubuntu 23.10. While 22.04 stuck at v0.24.

1. Firstly, press Ctrl + Alt + T on keyboard to open terminal. When it opens, run the command below to add the official PPA:

sudo add-apt-repository ppa:xuzhen666/gnome-mpv

Type user password (no asterisk feedback) when it asks and hit Enter to continue

2. Then either use “Software Updater” (or Update Manager) to update the player if stock version was installed.

Or, run the command below to install/upgrade the app:

sudo apt update && sudo apt install celluloid

For Ubuntu 20.04 and Ubuntu 22.04 users who want to try the latest 0.26 release, just search for and install the Snap package from Ubuntu Software. Though, it runs in sandbox.

Uninstall:

To uninstall the celluloid video player, just run the command below in terminal:

sudo apt remove --autoremove celluloid

Also remove the Ubuntu PPA by running command:

sudo add-apt-repository --remove ppa:xuzhen666/gnome-mpv

For the snap package, uninstall it either via Ubuntu Software or by running command:

snap remove celluloid

For best integration, the LibreOffice PPA is finally updated with the LibreOffice 7.6.x packages for Ubuntu.

LibreOffice 7.6 was released almost one months ago. It features document themes support, zoom gestures in the main view, new “Page Number Wizard” dialog for Writer, new compact layout for pivot tables in Calc, and various other changes. See release note for details.

LibreOffice provides official packages through Flatpak in Flathub.org, Snap in Ubuntu Software. However, both run in sandbox. It also provides official .deb packages, which are however build against a very old baseline for maximum compatibility.

For those hate the office suite run in sandbox, the LibreOffice PPA maintained by Ubuntu members is the best choice. Though, it always has quite a few or even weeks delay for the new major release packages. And, LibreOffice 7.6 is finally available via the PPA, after almost 4 weeks by releasing the first point 7.6.1 version.

Install LibreOffice 7.6 (7.6.1 so far) in Ubuntu via PPA

1. First, press Ctrl+Alt+T on keyboard to open a terminal window. When terminal opens, run command to add the PPA:

sudo add-apt-repository ppa:libreoffice/ppa

Type user password (no asterisk feedback) when it asks and hit Enter to continue. NOTE: the new release is available for Ubuntu 22.04, Ubuntu 23.04, Ubuntu 23.10, and derivatives at the moment.

2. After adding the PPA, just search for and launch “Software Updater” (or Update Manager), then update the packages from the pre-installed office suite.

Or, run the command below in terminal instead:

sudo apt install libreoffice

Linux Mint needs to run sudo apt update first to update package index first.

Uninstall/Restore

To uninstall the packages, just purge the PPA, which will also downgrade LibreOffice to the original pre-installed versions depend on your Ubuntu edition.

To do so, open terminal (Ctrl+Alt+T) and run commands:

  • install PPA purge tool:
    sudo apt install ppa-purge
  • purge LibreOffice PPA:
    sudo ppa-purge ppa:libreoffice/ppa

An Overview of New Features in Ubuntu 23.10

Last updated: October 18, 2023 — 1 Comment

Ubuntu 23.10, code-name “Mantic Minotaur”, has reached Beta stage. See what’s new in the upcoming release of the popular Linux Distribution.

Ubuntu 23.10 will use Linux Kernel 6.5, and GNOME Desktop v45.

New App Center

Ubuntu Software, aka the previous GNOME Software and current Snap Store, is really painful! It does NOT work quite often in my case.

It’s always stuck at either “Downloading Software catalog“, or the spinning loading circle.

Now, in Ubuntu 23.10, the new Google Flutter based App Center is in the place for installing/updating applications.

New App Center

Personally, I really like the new ‘App Center’. It’s fast, and just works!

The only issue so far in the development build is that it support Snap packages only… It now supports both Snap and classic .deb package since Beta.

New Firmware Updater app

Ubuntu 23.10 also introduced a new “Firmware Updater” application, that is available out-of-the-box.

With it, user can update hardware firmware as easy as few mouse clicks.

TPM-backed Full Disk Encryption

Ubuntu 23.10 adds experimental support for TPM based full disk encryption. Meaning passphrases will be no longer needed on supported platforms, and that the secret used to decrypt the encrypted data will be protected by a TPM and recovered automatically only by early boot software that is authorised to access the data. See HERE for more about it.

GNOME 45

GNOME 45, developed by another group of people, is the default desktop environment in Ubuntu 23.10.

Features in GNOME 45, include new ‘workspace indicator’ in top-left to replace ‘Activities’ button, removal of current app menu in top-bar.

The top-right corner system status menu, aka Quick Settings, can now be opened/closed via Super (Windows logo key) + S shortcut key. And, it supports for toggle keyboard backlight with a flat button.

Super + S to open Quick Settings

The ‘Files’ (Nautilus File Manager) and Settings (Gnome Control Center) has been redesigned to look even more modern. To follow the steps in GNOME 44, it also redesigned the ‘About’ and ‘Privacy’ pages.

In the release of Ubuntu Desktop, it also introduced a new system extension called “Ubuntu Tiling Assistant“. It features “Tiling pop-up” and “Tiling Groups”, and allows to tile window to half or quarter screen size, either by dragging or keyboard shortcuts.

Other Gnome desktop changes include:

  • Camera usage indicator, but not work for Cheese.
  • Drag’n’drop to save web image to file.
  • New ‘keyboard’ option in top-right system menu to toggle keyboard backlight
  • New default wallpaper with dark variant.

Default to “Minimal” installation

Don’t know why (probably due to Snap), but Ubuntu’s .iso image is getting bigger and bigger in recent releases. The 64-bit Ubuntu 18.04 image is only 2.3G, while 22.04 & 23.04 now take about 4.6G.

To lose weight, Ubuntu Team proposed to drop some applications from the default install, by introducing new “Default” option.

The change does not apply to Ubuntu 23.10, instead, the Ubuntu installer choose “Minimal” installation by default. It’s still called “Default Installation”, but excludes many applications, such as LibreOffice, Thunderbird. Though, the old default “Full” installation is still available for choice.

Other Changes

Ubuntu PPA now uses deb822 .sources files instead of the classic .list files in ‘/etc/apt/sources.list.d’. And, it includes the key code directly in the source file instead of saving as a separated file.

The network manager now uses Netplan as it’s default settings storage backend. All the config files are located in /etc/netplan now.

The pre-installed Firefox now uses Wayland by default instead of XWayland, which has better touchpad / touch-screen user experience.

New fonts-ubuntu-classic package for those who prefer system font in Ubuntu earlier than 23.04.

For more about Ubuntu 23.10, see the official release note, though it’s not finished yet.

Have many extensions installed on your GNOME desktop? Here’s a new tool to help managing them with a more efficient way.

Without launching Gnome Extensions app or Extension Manager every time, the new “Glass Grid” allows user to either press a keyboard shortcut or click the indicator on panel to quickly trigger an overview of all the installed extensions.

Then, user can either click on extension name to open its preference dialog. Or, use the buttons right beside them to turn on/off, refresh or configure extensions. There’s also a global ON/OFF switch in top-right to toggle all extension with one click. If you have too many extensions more than a page capacity, it supports scrolling horizontally with either mouse or keyboard arrow keys.

The extension grid view can be triggered either via keyboard shortcut or indicator applet. And, it will disappear when pressing Esc or clicking anywhere outside. It has a dark mode layout, and support quick launching extensions.gnome.org and Gnome Extensions app (if installed) via header buttons.

Extension Glass Grid dark layout

How to Install the ‘Glass Grid’ extension in GNOME

The extension so far supports GNOME 42, 43 & 44. Meaning, you can install it in Ubuntu 22.04/23.04, Fedora Workstation, Debian 12, and Arch etc with GNOME.

For Ubuntu, first search for and install “Extension Manager” from Ubuntu Software.

Install Extension Manager in Ubuntu 22.04+

Then, launch “Extension Manager” and navigate to ‘Browse’ tab. Finally, search for and install the Extensions Glass Grid extension.

For other Linux with GNOME, just go to link below in your web browser:

Then, use the ON/OFF switch to install it. If you don’t see the toggle switch, then install browser extension and refresh the page.

Once you installed the extensions, either click top-right corner indicator or press Super (Windows Logo key) + E to trigger the grid view and enjoy!

The popular free open-source Kdenlive video editor released version 23.08.0 more than a week ago. For those who are sticking to the native .deb package format, the official Ubuntu PPA finally updated with the new release package!

Kdenlive 23.08.0 introduced 2 new effects Audio Seam and Auto Fade, added AV1 NVENC profile, and had bug-fixes to Whisper engine with Nvidia GTX 16xx series.

There are also some usability improvements, such as new “Fit all tracks in view” context menu option, Shift + z shortcut adjusts timeline zone to selected clips, and keyboard shortcut to toggle between timeline tabs. See the release note for more details.

How to Install Kdenlive 23.08 in Ubuntu:

Kdenlive provides official Linux packages through AppImage, Flatpak, and Ubuntu PPA.

While the first two run in sandbox, the last PPA is a good choice for Ubuntu/Linux Mint users, which so far supports Ubuntu 22.04, Ubuntu 23.04, and Ubuntu 23.10.

1. First press Ctrl+Alt+T on keyboard to open terminal, or search for and launch ‘Konsole‘ from start menu in KDE. When it opens, run command:

sudo add-apt-repository ppa:kdenlive/kdenlive-stable

Type user password (no asterisk feedback) when it asks and hit Enter to continue.

2. After adding PPA, user can either open Software Updater (or Update Manager) to update the software package from an existing version:

Or run the command below to install or update the video editor:

sudo apt install kdenlive

NOTE: Linux Mint user has to run sudo apt update first to manually refresh package cache

And, if you got overwriting files issue due to the old dependencies: libmlt-data and melt, run command to remove them and then re-run the apt command above:

sudo dpkg -r melt libmlt-data

Once installed, press Super (Windows logo key) to open ‘Activities’ overview or start menu, and search for and open Kdenlive.

Uninstall Kdenlive

To remove Kdenlive, either use your system package manager or run the command below in a terminal window:

sudo apt remove --autoremove kdenlive

And remove the Ubuntu PPA either by running command in terminal:

sudo add-apt-repository --remove ppa:kdenlive/kdenlive-stable

Or use “Software & Updates” utility to remove the source line under “Other Software” tab.

This simple tutorial shows how to install the latest Firefox Nightly in all current Ubuntu releases!

Firefox Nightly is the bleeding edge version of the web browser that updates twice a day. It contains features that are still in developments months or even years before they become mainstream.

The Nightly build is more likely to crash than the stable release. For testing purpose or power-user who prefer the very latest features, here you can install Firefox Nightly via 3 ways!


Method 1: Install Firefox Nightly via Snap package

The easiest way to get Firefox Nightly is using the Snap package. It receives updates automatically, however, will override the pre-installed Firefox, by updating it to the latest edge channel.

Ubuntu 22.04 and higher users, can simply open Ubuntu Software (or App Center). Search Firefox and switch channel/source to “latest/edge”.

Or, press Ctrl+Alt+T on keyboard to open terminal. When terminal opens, run the command below instead to install Firefox Nightly:

snap refresh firefox --channel=latest/edge

NOTE: The Snap package will take use the previous profile. In the case, you can open about:profiles page, then create a new profile and set it as default.

Method 2: Use New Apt Repository

Mozilla announced new official apt repository recently. It contains the .deb package of most recent Firefox Nightly package for all current Ubuntu and Debian releases.

1. First, press Ctrl+Alt+T on keyboard to open terminal. When terminal opens, run command to download & install the key for that repository:

wget -q https://packages.mozilla.org/apt/repo-signing-key.gpg -O- | gpg --dearmor | sudo tee /etc/apt/keyrings/packages.mozilla.org.gpg > /dev/null

2. Next, add the apt repository by running the single command below:

echo "deb [signed-by=/etc/apt/keyrings/packages.mozilla.org.gpg] https://packages.mozilla.org/apt mozilla main" | sudo tee -a /etc/apt/sources.list.d/mozilla.list > /dev/null

This command will create the ‘mozilla.list‘ file under /etc/apt/sources.list.d directory and write the source line into it.


3. Finally, refresh the system package cache:

sudo apt update

And, install the Nightly build of Firefox from that repository by running command:

sudo apt install firefox-nightly

Method 3: Install Firefox Nightly via Ubuntu PPA

For choice, there’ a daily build PPA maintained by Ubuntu members. Which, so far supports Ubuntu 20.04, Ubuntu 22.04, Ubuntu 23.10, and Ubuntu 24.04

The PPA is a good choice, since it contains native .deb package. It will NOT override any other Firefox Stable package (neither deb nor snap), and uses its own profile for storing user data.

1. To add the PPA, first press Ctrl+Alt+T on keyboard to open terminal. When it opens, run command:

sudo add-apt-repository ppa:ubuntu-mozilla-daily/ppa

Type user password (no asterisk feedback) when it asks and hit Enter to continue.

2. Linux Mint user needs to manually update the system package cache after adding PPA, though its done automatically in Ubuntu 20.04 and higher:

sudo apt update

3. Finally, install the Firefox Nightly build by running command:

sudo apt install firefox-trunk

After installing the package, launch it from ‘Activities’ overview screen or app menu depends on your desktop environments. And, you can use “Software Updater” (or Update Manager) every day to keep the package up-to-date.

Uninstall Firefox Nightly

For the Snap package, just open terminal and run command will restore to the pre-installed Firefox package:

snap refresh firefox --channel=latest/stable

However, the restored Firefox Snap will create a new user profile instead of using the original one, though you can manually backup and restore your important data.

For the apt repository package, open terminal (Ctrl+Alt+T) and run command to remove it:

sudo apt remove --autoremove firefox-nightly

To remove the source repository, just delete the source file and key by running the 2 commands below one by one:

sudo rm /etc/apt/sources.list.d/mozilla.list
sudo rm /etc/apt/keyrings/packages.mozilla.org.asc

And, refresh system package cache via sudo apt update to apply change.

For the PPA package, run the command below to remove it:

sudo apt remove --autoremove firefox-trunk

Also remove the Ubuntu PPA by either running command:

sudo add-apt-repository --remove ppa:ubuntu-mozilla-daily/ppa

or use “Software & Updates” utility under ‘Other Software’ tab by removing the source line.

This simple tutorial shows how to install the latest PyCharm IDE (2024.2 updated) in Ubuntu 22.04, and Ubuntu 24.04.

The PyCharm Python IDE released version 2024.1 a few days ago. The new release features:

  • Documentation previews for Hugging Face models and datasets
  • local ML-based full line code completion for JavaScript and TypeScript
  • sticky lines in the editor
  • in-editor code review
  • New Terminal in Beta.
  • And new AI assistant functionality (Pro only)

The new release is available to install in Ubuntu via different ways. They include Snap, Flatpak, official tarball, and Ubuntu PPA. Choose either one that you prefer.

Method 1: Install PyCharm via Snap package

JetBrains provides official Linux package through both Snap and tarball. Which is super easy to install for Ubuntu users.

The Snap package Features:

  • Official package by JetBrains.
  • Run in sandbox environment.
  • amd64 (x86_64) only.

For all current Ubuntu releases, just launch Ubuntu Software (or App Center), then search and install pycharm-community or pycharm-professional.

Or, run command below in a terminal window (Ctrl+Alt+T) instead to install the package:

snap install pycharm-community --classic

The snap package installs updates automatically. To manually check (and install if any) updates, use command:

snap refresh pycharm-community

Method 2: Install PyCharm via Flatpak package

Another easy way to install PyCharm is using Flatpak package. Which works in most Linux, though also run in sandbox environment.

The Flatpak package Features:

  • Community maintained.
  • Run in sandbox environment.
  • amd64 (x86_64) and arm64 support.

Ubuntu users just need to press Ctrl+Alt+T on keyboard to open terminal. Then run the 2 commands below one by one to install the package.

  • First, run command to install the Flatpak daemon:
    sudo apt install flatpak

  • Then, run the command below to install PyCharm as Flatpak:
    flatpak install https://dl.flathub.org/repo/appstream/com.jetbrains.PyCharm-Community.flatpakref

    You may replace Community in command with Professional to install the professional edition.

If you’re first time installing app as Flatpak, log out and back in for the app icon visible in system app launcher.

To update the Flatpak package, use command:

flatpak update com.jetbrains.PyCharm-Community

Method 3: Install PyCharm via Official Tarball

If you don’t like or have issue for the IDE running in sandbox, then use the official Linux tarball instead!

The Linux Tarball Features:

  • Official package by JetBrains.
  • Portable, no installation required.
  • amd64 (x86_64) and arm64 support.

1. First, go to the official download page via the link below:

Depends on you needs, either download the Professional, or scroll down and select the Community edition. For ARM64, click the down arrow (▿) icon to select from drop-down menu.

2. After downloaded the tarball, just extract and move the source folder to any location that you want for long time use.

In my case, I created a “Apps” folder in user home, and put PyCharm source folder into it as sub-directory.

3. Without installation, you can now go to the ‘bin‘ sub-folder, right-click on “pycharm.sh” and select “Run as Program” to launch the IDE.

4. Create app shortcut, so to launch from start/application menu.

  • First, press Ctrl+H in file manager and navigate to .local/share/applications directory. Then, create a new document and re-name to ‘pycharm.desktop’.For choice, you may open terminal (Ctrl+Alt+T) and run command to create the file instead:
    gedit ~/.local/share/applications/pycharm.desktop

    Replace gedit with gnome-text-editor for Ubuntu 24.04 or other text editor according to your desktop environment. Or use nano that works in most desktops

  • Then, paste following lines into the file you just created and save it.
    [Desktop Entry]
    Name=PyCharm Community
    Exec=/path/to/pycharm-executable-file
    Icon=/path/to/pycharm-icon-file
    Terminal=false
    Type=Application
    Categories=Application;Development;
    Keywords=ide;python;charm;
    StartupWMClass=jetbrains-pycharm-ce

    Here, you need to replace the values of ‘Exec‘ and ‘Icon‘ according where you put the source folder. And, change ‘Name’ value for Professional edition.

If everything’s done correctly, you can then search for and launch PyCharm from app launcher or the overview screen depends on your DE a few moments later:

Method 4: Install PyCharm .deb package via Ubuntu PPA

Another choice to avoid Snap and Flatpak, is using an Ubuntu PPA. However, there are only third-party maintained PPAs.

The PPA features:

  • Third-party maintained.
  • PyCharm Community only so far.
  • amd64 (x86_64) only so far.
  • supports Ubuntu 22.04, Ubuntu 24.04 only so far.

As far as I know, the xtradeb PPA is keeping updated with the most recent packages including PyCharm Community.

To install PyCharm from the PPA, press Ctrl+Alt+T on keyboard to open terminal. And, run commands below one by one:

  • Add the PPA by running command:
    sudo add-apt-repository ppa:xtradeb/apps

  • Then install the IDE:
    sudo apt install pycharm-community

NOTE: Linux Mint user needs to run sudo apt update after adding PPA to manually refresh system package cache.

Uninstall PyCharm

For the Snap package, just remove it from Ubuntu Software or App Center, or use command:

snap remove --purge pycharm-community

For the Flatpak package, open terminal (Ctrl+Alt+T) and run command to remove it:

flatpak uninstall --delete-data com.jetbrains.PyCharm-Community

And, run flatpak uninstall --unused to remove useless run-time libraries.

For PyCharm installed via the official Tarball, just remove the source folder as well as .desktop file under .local/share/applications directory.

For the Ubuntu PPA package, open terminal and run command to remove it:

sudo apt remove --autoremove pycharm-community

Also remove the Ubuntu PPA by running command:

sudo add-apt-repository --remove ppa:xtradeb/apps

This simple tutorial shows how to install the latest Intellij IDEA 2024.2 in Ubuntu 22.04 and Ubuntu 24.04.

IntelliJ IDEA 2024.2 was released on August 7. See the release note for the new features.

This release enhances Spring Data JPA support, simplifies cron expression management, and upgrades the HTTP Client with the GraalJS engine. Startup efficiency is improved, allowing you to dive into coding faster. Additionally, the new version integrates K2 mode (Beta) to boost the IDE’s performance and stability for Kotlin.

Intellij IDEA is available to install in Ubuntu via different ways. They include Snap, Flatpak, official tarball, and Ubuntu PPA. Choose either one that you prefer.

Method 1: Install Intellij IDEA via Snap package

JetBrains provides official Linux package through both Snap and tarball. Which is super easy to install for Ubuntu users.

The Snap package Features:

  • Official package by JetBrains.
  • Run in sandbox environment.
  • amd64 (x86_64) only.

For all current Ubuntu releases, just launch Ubuntu Software (or App Center), then search and install ‘Intellij IDE Community, Ultimate, or Educational.

For choice, you may press Ctrl+Alt+T on keyboard to open terminal, and run command instead the install the Snap package:

snap install intellij-idea-community --classic

The snap package installs updates automatically. You can check (and install if any) updates manually by running command:

snap refresh intellij-idea-community

Method 2: Install Intellij IDEA via Flatpak package

Another easy way to install the IDE is using Flatpak package. Which works in most Linux, though also run in sandbox environment.

The Flatpak package Features:

  • Community maintained.
  • Run in sandbox.
  • amd64 (x86_64) and arm64 support.

Ubuntu users just need to press Ctrl+Alt+T on keyboard to open terminal. Then run the 2 commands below one by one to install the package.

  • First, run command to install the Flatpak daemon:
    sudo apt install flatpak

  • Then, run the command below to install IDEA as Flatpak:
    flatpak install https://dl.flathub.org/repo/appstream/com.jetbrains.IntelliJ-IDEA-Community.flatpakref

    You may replace Community in command with Ultimate to install the Ultimate edition.

And, if you’re first time installing app as Flatpak, log out and back in for the app icon visible in system app launcher.

To update the Flatpak package, use command:

flatpak update com.jetbrains.IntelliJ-IDEA-Community

Method 3: Install IntelliJ IDEA via Official Tarball

If you don’t like or have issue for the IDE running in sandbox, then use the official Linux tarball instead!

The Linux Tarball Features:

  • Official package by JetBrains.
  • Portable, no installation required.
  • amd64 (x86_64) and arm64 support.

1. First, go to the official download page via the link below:

Depends on your need, either download the Ultimate, or scroll down and select the Community edition. For ARM64, click the down arrow (▿) icon to select from drop-down menu.

2. After downloaded the tarball, just extract and move the source folder to any location that you want for long time use.

In my case, I created a “Apps” folder in user home, and put IDEA source folder into it as sub-directory.

3. Without installation, you can now go to the ‘bin‘ sub-folder, right-click on “idea.sh” and select “Run as Program” to launch the IDE.

4. Create app shortcut, so to launch from start/application menu.

  • First, press Ctrl+H in file manager and navigate to .local/share/applications directory. Then, create a new document and re-name to ‘idea.desktop’.For choice, you may open terminal (Ctrl+Alt+T) and run command to create the file instead:
    gedit ~/.local/share/applications/idea.desktop

    Replace gedit with gnome-text-editor for Ubuntu 24.04, or other text editor according to your Ubuntu edition and desktop environment.

  • Then, paste following lines into the file you just created and save it.
    [Desktop Entry]
    Version=1.0
    Type=Application
    Name=IntelliJ IDEA Community Edition
    Comment=Develop with pleasure!
    Exec=/PATH/TO/IDEA/EXECUTABLE
    Icon=/PATH/TO/IDEA/ICON-FILE
    Terminal=false
    StartupNotify=true
    StartupWMClass=jetbrains-idea-ce
    Categories=Development;IDE;Java;

    Here, you need to replace the values of ‘Exec‘ and ‘Icon‘ according where you put the source folder. And, change ‘Name’ value for Ultimate edition.

If everything’s done correctly, you can now search for and launch the IDE from app launcher or the overview screen depends on your DE a few moments later:

Method 4: Install IntelliJ IDEA via Ubuntu PPA

Another choice to avoid Snap and Flatpak, is using an Ubuntu PPA. However, there are only third-party maintained PPAs.

The PPA features:

  • Third-party maintained.
  • IDEA Community only.
  • amd64 (x86_64) and arm64.
  • supports Ubuntu 22.04, 24.04 only so far.

As far as I know, the xtradeb PPA is keeping updated with the most recent packages including the IDEA Community.

To install the IDE from the PPA, press Ctrl+Alt+T on keyboard to open terminal. And, run commands below one by one:

  • Add the PPA by running command:
    sudo add-apt-repository ppa:xtradeb/apps

  • Then install the IDE:
    sudo apt install intellij-idea-community

NOTE: Linux Mint user needs to run sudo apt update after adding PPA to manually refresh system package cache.

Uninstall IntelliJ IDEA

For the Snap package, just remove it from Ubuntu Software or App Center.

For the Flatpak package, open terminal (Ctrl+Alt+T) and run command to remove it:

flatpak uninstall --delete-data com.jetbrains.IntelliJ-IDEA-Community

And, run flatpak uninstall --unused to remove useless run-time libraries.

For IDEA installed via the official Tarball, just remove the source folder as well as .desktop file under .local/share/applications directory.

For the Ubuntu PPA package, open terminal and run command to remove it:

sudo apt remove --autoremove intellij-idea-community

Also remove the Ubuntu PPA by running command:

sudo add-apt-repository --remove ppa:xtradeb/apps

This simple tutorial shows how to replace ‘Recent Used‘ with current working directory as default in GTK file chooser in Ubuntu.

Many apps use “Recent Used” as default in their “Open File” dialog. It’s great, but there’s a choice to make it default to the directory of current editing files.

GTK4 File Chooser

This is quite useful when working with many files in same directory. For example, when editing image via GIMP, press Ctrl+O (or Ctrl+Alt+O) will open file chooser and automatically open the directory of current image, instead of always ‘Recently Used’.

For GTK2 Apps

There are still some popular applications, such as GIMP, use GTK2 toolkit for their user interface.

1. First, open ‘Files’ (the file browser), press Ctrl+H to show hidden files/folders. Then navigate to .config -> gtk-2.0.

2. In that folder, click edit the ‘gtkfilechooser.ini‘ file. When file opens, change StartupMode=recent to StartupMode=cwd and save the file.

For GTK3/GTK4 Apps

GTK3 file chooser in Ubuntu 22.04/23.10 by default selects current working directory, but GTK4 chooses recent files as default. And, they have hidden option to configure this behavior.

Option 1: Use gsettings command

For those who are OK with Linux commands, just press Ctrl+Alt+T on keyboard to open a terminal window.

When terminal opens, run command to set current working directory as default for GTK3 file chooser:

gsettings set org.gtk.Settings.FileChooser startup-mode 'cwd'

For GTK4 applications, run this command instead in terminal window:

gsettings set org.gtk.gtk4.Settings.FileChooser startup-mode 'cwd'

Option 2: Use Dconf Editor (Graphical)

For graphical way, first search for and install ‘Dconf Editor‘ in Ubuntu Software:

or run command in terminal to install the tool, in case the Software App does not work for you:

sudo apt install dconf-editor

Then, search for and launch the ‘Dconf Editor’ tool:

When it opens, navigate to ‘org.gtk.Settings.FileChooser’. Finally, click ‘startup-mode’,turn off ‘Use default value’ and set custom value to ‘cwd’.

Also, navigate to ‘org.gtk.gtk4.Settings.FileChooser’ and change the value of ‘startup-mode’ to ‘cwd’ for GTK4 file chooser.

After making the changes, all your GTK file chooser dialog should use current working directory as default instead of ‘Recently Used’ immediately!

Ubuntu 23.10 with GNOME 45 has replaced the top-left ‘Activities’ with a workspace indicator. By hovering over it, you can use mouse scroll to switch workspaces.

This is done by a simple extension called “Workspace Scroll”. Like the volume icon, with that extension, you can move mouse cursor over the top-left indicator, then scroll the middle mouse button to switch workspaces (aka Windows’ Virtual Desktop).

This can be useful for mouse heavily users, since it saves you a few mouse clicks!

UPDATE: THIS BEHAVIOR NOW IS DEFAULT OUT-OF-THE-BOX!!! You don’t have to follow any tutorial, just move mouse cursor over the workspace indicator and scroll middle button.

How to Install Workspace Scroll

To install the extension for this feature, firstly press Ctrl+Alt+T on keyboard to open terminal.

Then, run command to install “Extension Manager” app:

sudo apt install gnome-shell-extension-manager


Next, click on top-left button to open overview, search for and launch “Extension Manager”.

Finally, use the tool to search and install the “Workspace Scroll” extension under ‘Browse’ tab.

For other Linux with GNOME 45, such as the upcoming Fedora 39, Arch/Manjaro etc, just open the link below:

Then use the ON/OFF switch to install that extension. If you don’t see the switch, install browser extension via the link in the page and refresh.

After installed the extension, just move your cursor to top-left indicator button, and scroll the middle wheel to verify.