![]()
The Whisker Menu for Xfce recently released version 1.2.1 with bug fixes and improvements.
As you may know, Whisker Menu is an alternate application launcher for Xfce. With it, you can browser, search, and marked as favorites through all of your installed applications. Changes in version 1.2.1:
- Fix incorrect comparison for checking icon sizes
- Add window title to allow identifying menu window
- Add tips to README for popup script and compiz workaround
- Improve build system files
- Translation updates: Asturian, Catalan, Chinese (Taiwan), Czech, German, Estonian, French, Hungarian, Indonesian, Persian, Russian, Spanish, Turkish
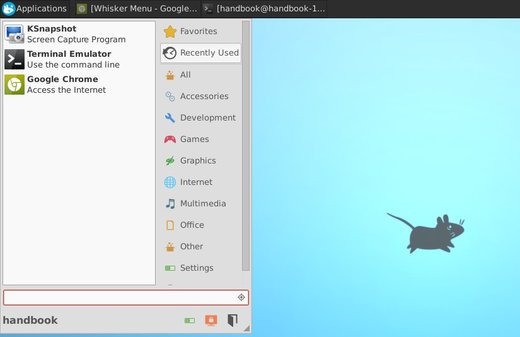
whisker menu in Ubuntu 13.10 Xfce4
For Ubuntu 14.04, Ubuntu 13.10, Ubuntu 13.04, Ubuntu 12.10, Ubuntu 12.04, Linux Mint and their derivatives you can easily install or upgrade to this release by running commands below one by one in terminal (Ctrl+Alt+T):
sudo add-apt-repository ppa:gottcode/gcppa

sudo apt-get update

sudo apt-get install xfce4-whiskermenu-plugin
For Arch Linux, OpenSUSE, Debian, Fedora, and other Linux, get the Whisker Menu from its website