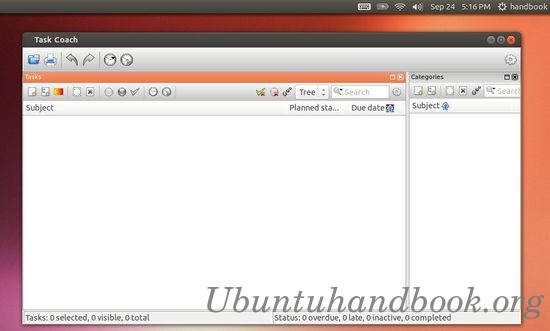
As you may know, Task Coach is a free flexible open source todo manager featuring hierarchical tasks. It grew out of frustration about other programs not handling composite tasks well. In addition to flexible composite tasks, Task Coach has grown to include prerequisites, prioritizing, effort tracking, category tags, budgets, notes, and many other features. However, users are not forced to use all these features; Task Coach can be as simple or complex as you need it to be.
Task Coach has reached 1.3.32 with lots of bug fixes. It has been added to Ubuntu 13.10 Saucy’s universe repository, so it can be easily installed via Ubuntu Software Center.
For Ubuntu 13.04 Raring and earlier version, deb package can be download at sourceforge.net
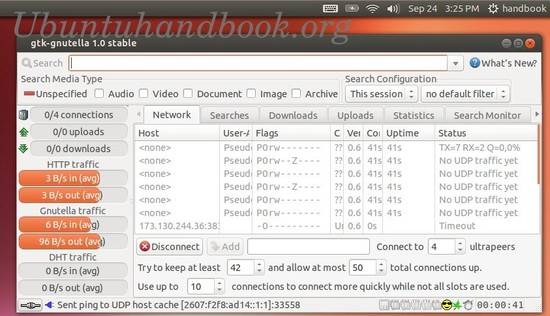
Gtk-gnutella is the graphical Unix Gnutella client, efficient, reliable and fast, written in C. It has been optimized for speed and scalability, with low-memory consumption. It is meant to be left running 24×7, using little CPU and only the configured bandwidth.
Gtk-gnutella 1.0.0 is a major release correcting a few bugs and adding small but interesting features such as the ability to limit dropping of received UDP messages, making the DHT keys and values persistent across sessions, SDBM file auto-compaction at startup, and last but not least, rarest-chunk downloading to optimize download efficiency when facing partial sources.
New Feature:
Let users define a maximum lease time for UPnP and NAT-PMP mappings.
Made DHT keys and values persistent across sessions.
When there are partial sources for a file, download the rarest chunks first.
Improvements:
[GTK1] Optimize massive updating of the download source list.
[GTK] Dynamically update the list of available chunks in the file (blue line).
Files used to persist information across sessions are now auto-compacted.
The UPnP layer can now monitor more types of Internet Gateway Devices.
After unclean shutdown, rename existing core file in crash directory.
Detect servers that choke when receiving pipelined HTTP requests.
Added the Mersenne Twister Pseudo-Random Number Generator.
Remember when user requests an auto-restart, to keep the same session going.
Increased maximum download buffer size to 1 MiB and default to 128 KiB.
Install gtk-gnutella 1.0.0 via PPA:
The Sourceforge provides the Deb packages for gtk-gnutella, but I can’t install it on my machine due to dependency problem. Fortunately there’s a PPA repository makes it easy to install it in Ubuntu and its derivatives.
To get started, press Ctrl+Alt+T on your keyboard to open terminal. When it opens, run below command to add the ppa:
sudo add-apt-repository -y ppa:zapman/gtkg
Then update package lists and install the package via:
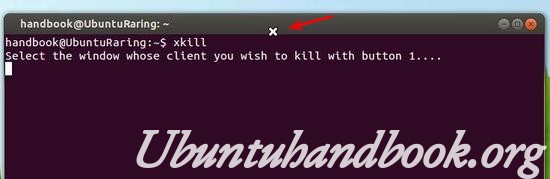
This tutorial shows you how to easily kill / force quit an application or window that freezes or stops responding using xkill & shortcut key.
Xkill is a utility for forcing the X server to close connections to clients. This program is very dangerous, but is useful for aborting programs that have displayed undesired windows on a user’s screen. It works on Ubuntu, Linux Mint, Elementary OS, and other Linux systems.
You can run Xkill from terminal, Alt+F2 run command box or even via a keyboard shortcut. When it runs, your cursor becomes a cross (‘X’). Click on any window will kill it instantly.
Warning: Don’t click on Desktop and Panel when running xkill, it will also kill them and break your desktop and you need to restart to restore.
To create a shortcut key for xkill, go to System Settings -> Keyboard -> Shortcut -> Custom shortcuts. Click add to create the shortcut and give a key combination.
After that, press the key combination and then click on the window you want to kill.
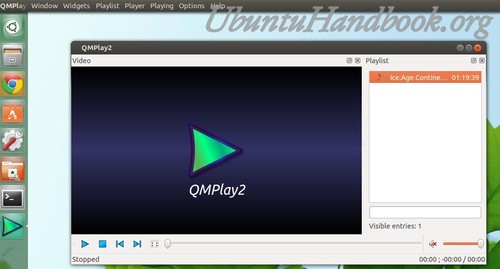
Qmplay2 is a Qt-based Media Video Player for Ubuntu Linux and Windows. It plays all formats and stream supported by ffmpeg and libmodplug (including J2B). It has integrated Youtube browser.
This simple and brief tutorial is going to show you how to install Qmplay2 in Ubuntu 13.10 Saucy, Ubuntu 13.04 Raring, Ubuntu 12.04 Precise, Ubuntu 12.10 Quantal, Linux Mint and Elementary OS via the PPA repository
To get started, press Ctrl+Alt+T on your keyboard to open terminal. When it opens, run below command to add the PPA:
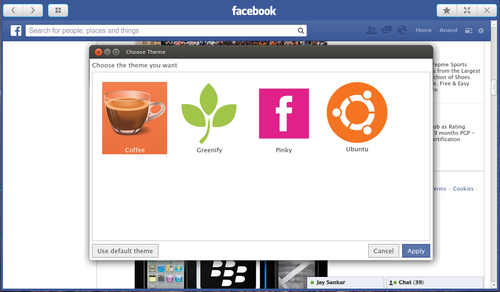
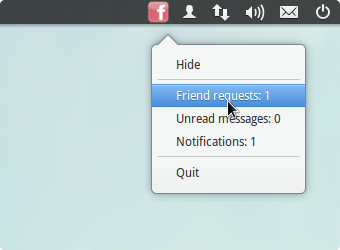
This tutorial is going to show you a simple and stylish Facebook browser for your PC. This app provides native Facebook experience in a Facebook styled window plus a system tray icon for providing notifications. This app doesn’t disturbs you by popping out notifications, but it notifies you silently by changing the system tray icon color.
This app uses a simple approach for delivering notifications in the system tray. It reads the number of notifications, messages and friend requests directly from the facebook page, using Javascript calls, without using any components from Facebook SDK.
Install Facebook Desktop App:
This app works on Windows, Mac and Ubuntu (64-bit only). I’ve tested on Ubuntu 13.04 Raring, unfortunately the indicator applet didn’t work for Unity Desktop.
Download the Deb:
For Windows & Mac user, download it from qt-apps.org
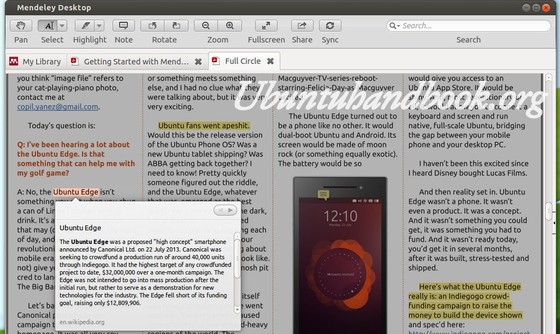
Want to annotate PDF file in Linux systems? Well, Mendeley Desktop is one of the best choice. Besides being able to highlight & add note to text / rectangle of PDF, it can also display definition of selected text from en.wikipedia.org, share the document via E-mail and sync library with Mendeley Web.
Features:
Mendeley is available as a basic free version, and also in premium payable versions.
Mendeley Desktop, based on Qt, runs on Windows, Mac and Linux.
Automatic extraction of metadata from PDF papers.
Back-up and synchronization across multiple computers and with a private online account.
PDF viewer with sticky notes, text highlighting and full-screen reading.
Full-text search across papers.
Smart filtering, tagging and automatic PDF file renaming.
Citations and bibliographies in Microsoft Word, OpenOffice.org and LibreOffice.
Import of documents and research papers from external websites (e.g., PubMed, Google Scholar, Arxiv) via browser bookmarklet.
BibTeX export/file sync
Private groups to collaboratively tag and annotate research papers.
Public groups to share reading lists.
Social networking features (newsfeeds, comments, profile pages, etc.).
Usage-based readership statistics about papers, authors and publications.
iPhone app
iPad app
Install Mendeley Desktop in Ubuntu & Other Linux OSs
For Ubuntu 13.10, Ubuntu 13.04, Ubuntu 12.04, Linux Mint, Elementary OS and others, download the DEB from the link below:
You may check your system type (32-bit or 64-bit) via System Settings ->Details utility. Once downloaded, install it via below command in terminal (Ctrl+Alt+T).
During installation, the Mendeley Ubuntu repository will be added to your list of software sources. You can then use the standard Ubuntu/Debian software update tools to keep Mendeley up to date.
For other Linux, Windows, and Mac, download Mendeley Desktop installer fromthis page.
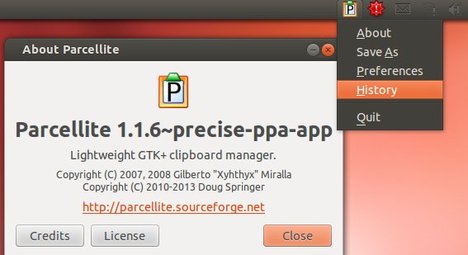
Parcellite is a lightweight GTK+ clipboard manager for Ubuntu Linux. The latest version has reached 1.1.6 with updates and bug fixes. Here’s how to install it in Ubuntu 13.10 Saucy, Ubuntu 13.04 Raring, Ubuntu 12.04 Precise, Ubuntu 12.10 Quantal and Linux Mint as well as the indicator on Unity Desktop.
Changes in version 1.1.6:
Fixed Bug #99, Broken CLI functionality. Now looks at XDG_SESSION_COOKIE, XDG_SEAT, and DISPLAY, introduced by multi-user fix.
Fixed bug where if fifo are not found in client mode, parcellite segfaults.
Apply patch for typo in German translation, patch #30.
Updated parcellite.pot (./extract_strings.sh).
Changed name of history file from hist.test to history (debug escape). To restore the history, Quit Parcellite, then cd to $HOME/.local/share/parcellite mv hist.test history
Added script to generate parcellite.pot & check in file, and gets run before each release from rel.sh.
Updated Brazilian Portuguese translation.
Install / Upgrade Parcellite 1.1.6:
You can get the latest packages from the PPA. Press Ctrl+Alt+T on your keyboard to open terminal. When it opens, run below command to add the Parcellite PPA:
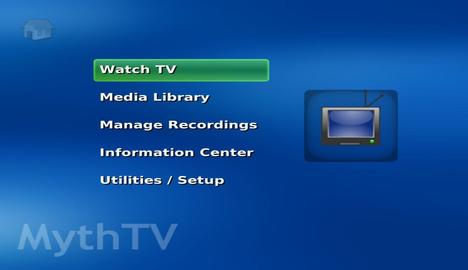
MythTV, the Digital Video Recorder and home media center has reached a new stable release 0.27. Now it features Airplay photo sharing. This tutorial shows what’s new and how to get it in Ubuntu 13.04 Raring, Ubuntu 12.04 Precise and Ubuntu 13.10 Saucy.
Highlights of MythTV 0.27:
Support has been added for streaming music stations in mythmusic
Airplay photo sharing is now available
Airtunes OSD has been implemented
The Interactive TV support has been improved for the users in UK and Ireland
The recording scheduling interface has received a number of important improvements
Other changes:
Remove the Timeslot and Weekslot recording rule types.
Remove the Channel Record recording rule type. Add a This channel filter to maintain that functionality. Automatically convert existing Channel Record rules to All Record rules with the This channel filter enabled.
Provide accurate position/duration/seeking with non-constant frame rates. Note that to get the benefit of these changes for preexisting recordings, it may be necessary to run “mythcommflag –rebuild” on affected recordings.
Remove the AutoRecPriority feature.
Remove redundant “All Programs – ” text in Watch Recordings screen.
Improve the group filter display on the Watch Recordings screen.
Default to local time for mythshutdown --setwakeup, use --utc if required.
As promised in the 0.26 Release Notes, the legacy CEA-608 teletext (not closed-captioning) support has been removed.
The Set Recording Priorities screen has been removed (use the “Manage Recording Rules” screen.)
The Reschedule higher priorities setting has been removed. The scheduler now always does this.
Use recording rule priority as the primary scheduling priority.
The Delete Recordings screen has been removed.
Change the ADJUSTSTRETCH action to also support toggling.
In mythtv-setup/Capture cards, some Card type: names have been changed/corrected. The list was also reordered.
Card type name changes
Old
0.27
HDHomeRun DTV tuner box
HDHomeRun networked tuner
DVB DTV capture card (v3.x)
DVB-T/S/C, ATSC or ISDB-T tuner card
Analog V4L capture card
Analog capture card
MJPEG capture card (Matrox G200, DC10)
Analog to MJPEG encoder card (Matrox G200, DC10, etc
MPEG-2 encoder card
Analog to MPEG-2 encoder card (PVR-150/250/350, etc)
H.264 encoder card (HD-PVR)
HD-PVR H.264 encoder
USB MPEG-4 encoder box (Plextor ConvertX, etc)
Analog to MPEG-4 encoder (Plextor ConvertX USB, etc)
Install MythTV 0.27 via PPA:
The new release is available in Ubuntu Software Center for Ubuntu 13.10 Saucy. For Ubuntu 13.04 Raring and Ubuntu 12.04 Precise, press Ctrl+Alt+T to open terminal. WHen it opens, run below commands to add the PPA:
PAC Manager 4.5.3 has been released with bug fixes and improvements. This tutorial shows how to install / upgrade it in Ubuntu 13.04, Ubuntu 13.10, Ubuntu 12.04 and Linux Mint.
As you may know, PAC is a Perl/GTK replacement for SecureCRT/Putty/etc. It provides a GUI to configure SSH/Telnet connections. The latest release 4.5.3 has following changes:
Added support for SOCKs proxies!
Added support for defining proxies configuration PER CONNECTION! :)
Added an option to “Auto save” every PAC change in realtime, without user interaction
Added preliminary date/time information on disconnections
Added support for Perl 5.18
Fixed a minor bug with PAC substitution variables
Changed PAC’s behaviour to prevent password from appearing on “ps” command for RDP (both rdesktop and xfreerdp commands)
Install PAC Manager 4.5.3:
Download the Deb and double-click to install via pop-up Ubuntu Software Center.
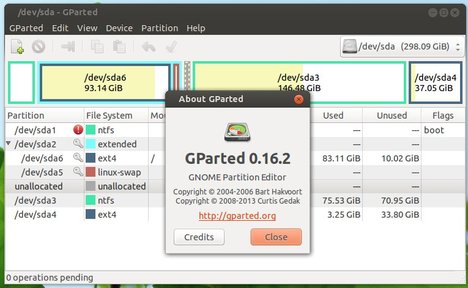
Gparted 0.16.2 has been released with important bug fixes and language translation updates. Here’s how to install or upgrade in Ubuntu 13.04 Raring, Ubuntu 12.04 Precise and Linux Mint 13 Maya, 15 Olivia.
Key changes include:
Fix crash if click apply before pending operations fully displayed
Fix FAT16/32 labels are sometimes shown corrupted
Fix regression which broke linux-swap resize
Fix to not hide the progress of the tools used (e.g., ntfsresize)
GParted is a GTK+ front-end to GNU Parted and the official GNOME Partition Editor application besides Disks. It’s available in Ubuntu Software Center, but old. The GetDeb repository contains the latest packages for Ubuntu 13.04 Raring, Ubuntu 12.04 Precise and their derivatives.
Install / Upgrade Gparted:
First click the link below to download the getdeb package, then double-click to install it via pop-up Ubuntu Software Center. It will add getdeb repository to your system.