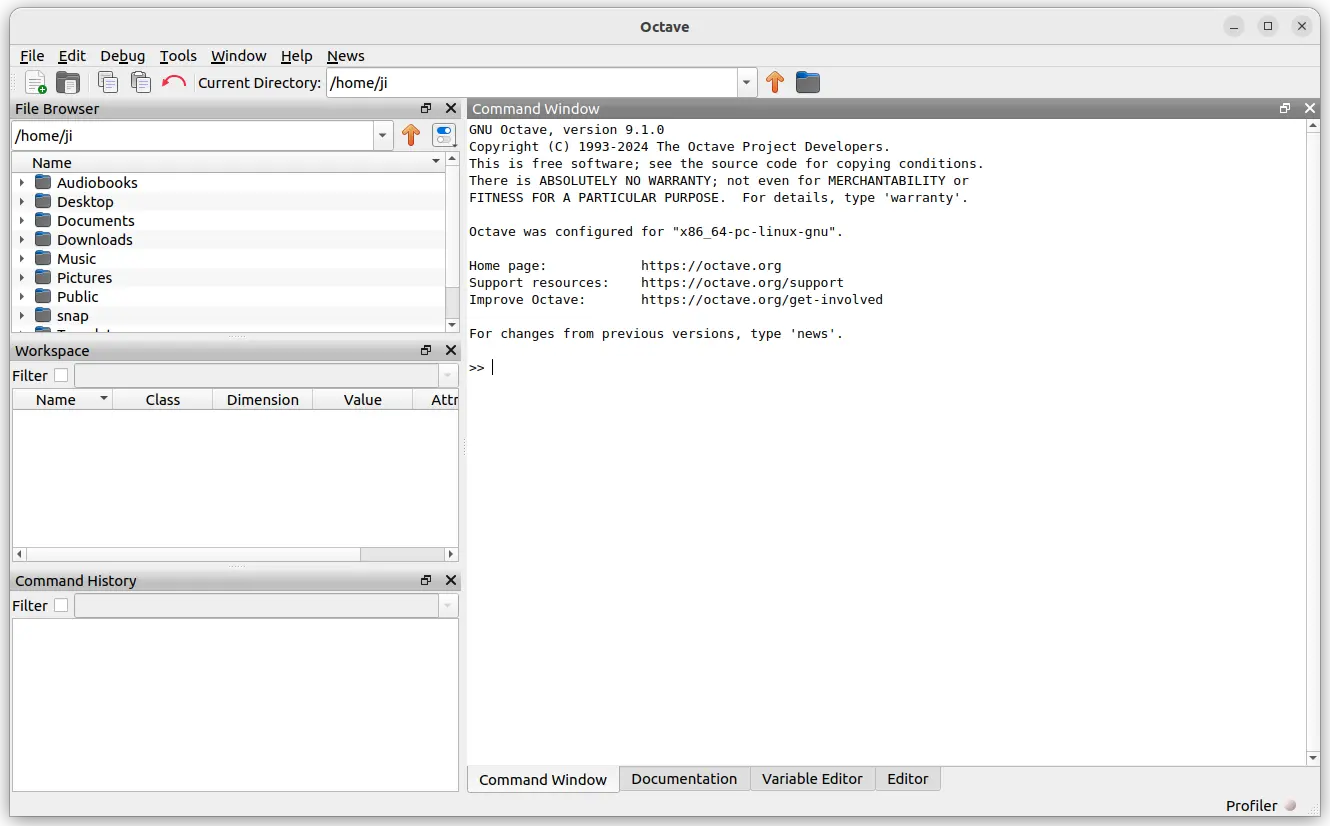
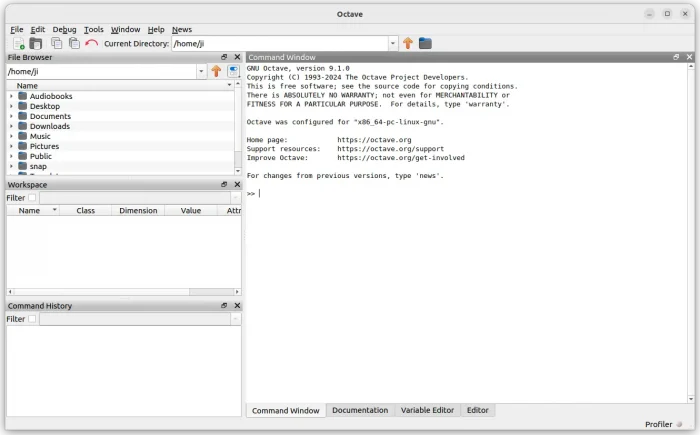
SMPlayer media player released version 23.12 few days ago, with important bug-fixes and new API.
The new released fixed the compatibility issues when using MPV 0.37 as backend. They include video playback can not be resumed from pause, as well as the issue getting the audio and video codec on mpv 0.37.
SMPlayer 23.12 also implemented the new OpenSubtitles API. Since, the old API on OpenSubtitles.org is deprecated, and to be turned off by the end of 2023. If you use the service for getting subtitles, then it’s highly recommended to upgrade as soon as possible.
SMPlayer 23.12
For Ubuntu 23.10, the SMPlayer 22.7.0 installed from system repository, either freezes or pops-up following error on video playback:
“Oops, something went wrong. MPlayer/mpv has finished uxexpectedly. Exit code: 1”
The issue has been fixed in my test by installing the new version 23.12.
Other changes in SMPlayer 23.12 include:
Fix loading playlists with extension m3u8.
Fix video jitter/shudder when clicking on timeline bar.
Other bug fixes.
How to Install SMPlayer 23.12
The player provides official .exe for Windows, .dmg for MacOS, and .rpm/.deb/.snap/.flatpak/.AppImage for Linux, which as available to download at Github releases page:
For Ubuntu, user can choose to install the Snap package (run in sandbox), directly from Ubuntu Software or App Center. Or, use the official PPA (with ARM devices support) by running the commands below one by one:
sudo add-apt-repository ppa:rvm/smplayer
sudo apt update
sudo apt install smplayer
It somehow does not provide package for Ubuntu 23.10. However, download & install the package for 22.04 works good in my case in 23.10 laptop.
For Debian from version 8 to 12 (Bookworm), SMPlayer is also available to install in both amd64 and i386 through the OBS repository.
Uninstall
For Ubuntu user, depends on which package you installed, either remove Snap from Ubuntu Software.
Or, remove the .deb package by running command in terminal (Ctrl+Alt+T):
sudo apt remove --autoremove smplayer
If the PPA was added, either remove it from “Software & Updates” tool under “Other Software” tab, or run command in terminal:
Next, open the Downloads folder, then either double click on the package or use right-click menu “Open With Other Application” and select open the .deb package you just downloaded via Software Install (or App Center). Finally, click install button to install it.
NOTE: The installing process may fail sometimes due to old package in your system, in the case, just uninstall the old one (go to bottom for how) then try to re-install again.
Once installed, search for and launch it either from start menu or ‘Activities’ overview depends on your desktop environment.
Step 2: Add VirtualBox repository to keep it up-to-date
The .deb package you installed via ‘Step 1’ used to automatically add the repository. However, it does NO longer do the trick in recent versions.
So, here’s how to do it step by step via the new Ubuntu PPA policy.
1. Download & install the key
First, press Ctrl+Alt+T on keyboard to open up a terminal window.
When it opens, run command to make sure “/etc/apt/keyrings” directory exist:
sudo mkdir -p /etc/apt/keyrings
Then, run command to use wget to download key, dearmor it (so unreadable), and finally save it to that directory:
You can finally verify the key file, by running command:
cat /etc/apt/keyrings/oracle-virtualbox-2016.gpg
As the screenshot above shows you, it should outputs unreadable text.
2. Add VirtualBox repository
Before adding the source repository, first run command to get system code name:
cat /etc/os-release
The apt repository so far only support Debian Stable (& old stable), Ubuntu 22.04 & 20.04 LTS (focal, jammy). For all their based systems, use the code-name you got via this command.
Then, in terminal window, run command to create & edit a sources file:
This simple tutorial shows how to install and setup the rEFInd boot manager in your Ubuntu 22.04, and/or Ubuntu 24.04 computer.
Most Linux uses Grub2 as default boot-loader. Though, there’s a good alternative called rEFInd. It’s a free open-source boot manager for EFI/UEFI enabled computers, such as all Intel-based Macs and recent (most 2011 and later) PCs.
rEFInd with Matrix theme
Why rEFInd:
Compare to Grub2, rEFInd has a more eye candy boot interface, and a simple and easy to tweak config file.
No need to update something, it auto-scans for all boot-able systems on every boot, and displays you the OS menu entries from both local disk and removable device, such as USB drive and CD-R.
It’s more reliable at booting Windows with Secure Boot active. And, it provides handy options to shutdown, restart, and/or go to BIOS settings.
How to Install rEFInd:
The boot manager is quite easy to install in Debian, Ubuntu, and Linux Mint, since it’s available in system repositories.
1. First, launch terminal (press Ctrl+Alt+T on keyboard) and run command to verify if UEFI enabled on your machine:
ls /sys/firmware/efi
The command will list content of ‘/sys/firmware/efi‘. It will show you No such file or directory, if UEFI not enabled.
2. To install rEFInd from system repository, simply run command:
sudo apt install refind
The package in system repository may be old. To install the most recent version, use the official PPA maintained by software developer.
Run command to add the PPA:
sudo add-apt-repository ppa:rodsmith/refind
Update system package index:
sudo apt update
Finally, re-run apt install command to install the package:
sudo apt install refind
Remove duplicate icons in boot menu
After installing rEFInd, you can now restart your machine to see the new boot menu.
In menu, use left/right arrow keys to switch menu entries, hit Enter to boot, or press Tab (or F2) for more options.
For duplicate icons issue, simply use left/right arrow to select the icon (menu entry), and hit Delete key on keyboard, finally answer yes to remove that icon (menu entry). Though, deleting icon may NOT work when 3rd party theme is in use.
Install Themes
The menu interface is easy to tweak by editing the refind.conf file under “/boot/efi/EFI/refind/” directory. Every option has description text telling what does it do and how it works.
Most themes have how to install steps in Readme file, they are usually:
Open “Files”, and navigate to “Other Location -> Computer (or system, root, etc) -> boot -> efi -> EFI -> refind”. (Some Desktop may need to open File Manager as root first!)
Create “themes” folder in that directory if not exist.
Drag and drop the themes you downloaded (extract & re-name first) into that “themes” folder.
Finally, apply new theme by editing the refind.conf file under “/boot/efi/EFI/refind/“, and adding new line in the end (replace rEFInd-glassy accordingly):
include themes/rEFInd-glassy/theme.conf
NOTE: the theme folder name, rEFInd-glassy in the case, is unique according to the PATH to icons/imgs in ‘theme.conf’ file.
In case the boot menu screen resolution is low, you may also add (or uncomment by removing #) resolution max line to set the maximum available resolution, or use resolution 1024 768 for certain resolution (Note that not all resolutions are supported).
Uninstall:
To uninstall refind in Debian and Ubuntu based systems, open terminal and run command:
sudo apt remove --autoremove refind
Also remove the PPA (if added) by running command:
HandBrake, the popular free open-source video transcoder, released a new update for the new 1.7 series yesterday.
The new release fixed encoding issue for AMD VCN, MPEG-2, MPEG-4, NVIDIA NVENC, and VP9 encoders, which could cause the creation of an excessive number of keyframes.
It fixed unintentional automatic pass through of closed caption side data when using NVIDIA NVENC encoder.
For Linux, the release includes performance improvements by removing duplicate graphic assets and reducing file size, as well as fixes to Flatpak file chooser, file destination path, and memory leaks in the graphical interface.
Other changes include:
Improved automatic selection of Dolby Vision Level
Fixed crash opening an empty folder, and crash using VideoToolbox encoders on Apple Silicon Ultra.
Workaround to prevent issues decoding H.264 video on Mac OS.
Added Automation Properties to some controls on the audio tab to assist screen readers for Windows.
Fixed NVIDIA NVDEC option being ignored in Windows.
Miscellaneous bug fixes and improvements
How to Install HandBrake 1.7.2
HandBrake provides official Windows, MacOS, and Linux packages available to download at Github releases page under Assets
For Linux users, it’s Flatpak package which also available in Flathub repository, though NOT updated at the moment of writing.
For Ubuntu & Linux Mint users who prefer the classic .deb package, I’ve uploaded the package into this unofficial PPA for Ubuntu 20.04, Ubuntu 22.04, Ubuntu 23.04, and Ubuntu 23.10.
1. First, press Ctrl+Alt+T on keyboard to open terminal. When it opens, run command to add the PPA:
Type user password (no asterisk feedback) when it asks and hit Enter to continue.
2. Linux Mint users need to manually update the system package cache, after adding PPA, by running command:
sudo apt update
3. Finally, install the new HandBrake package via command:
sudo apt install handbrake
For choice, you may also run sudo apt install handbrake-cli to install the command line tool
When installation done, search for and launch the video transcoder from either start/application menu or ‘Activities’ overview depends on your desktop environment.
Uninstall:
To uninstall the Ubuntu PPA, either open terminal (Ctrl+Alt+T) and run command:
Enlightenment window manager announced new 0.26.0 release few days ago.
The new release added some new features, including DDC option to backlight control of external monitors, bigger task previews, and watermark to wl mode to indicate E is in experimental wl mode.
Enlightenment 0.26.0 also added new APIs, including new eet disk sync API to ensure config it stored, logind’s lock/unlock dbus apis, API to play sound samples and support in notifications, and new eina API for EFL libraries.
Other changes include:
Support action desktop files in EFM to add file actions
Add org.freedesktop.ScreenSaver inhibit support
Add and enabl watchdog thread by default to detect mainloop hangs
Add option to Randr X11 support to use xrandr cmdline not direct API
Be agressive about forcing E’s blank settings if apps override them
Add params to mixer actions to allow to set amount up/down
Add option for input settings for flat accel + hires scrolling
Add option to set hidden state in netwm or not
There are also EFL 1.27 changes include JXL Evas loader/saver, QOI Evas image loader/saver, LibreSSL 3.5.x, remove GNUTLS support due to in favor of openssl3, and support ecore exe terminate with parent on windows. See more in the News page.
Get Enlightenment 0.26.0
Besides building from source, there seems no PPA or any 3rd repository for installing new release in Ubuntu.
To download the source, just go to its website via the link below:
Stellarium, the free open-source planetarium software, announced new 23.4 release few days ago.
The new release added experimental support for new plugin: Lens Distortion Estimator, and new sky culture: Tibetan Lunar Mansions.
With new release, user can now change the look of GUI through normalStyle.css config file. For Windows, it added new MESA for Windows packages, and package for ARM64 CPU architecture type.
Other changes include:
Support the origins of nomenclature names
Performance improvements on macOS with ARM64
Add script “Jupiter Moons”
Add filter, based on SATCAT Operational Status in Satellites plugin
Add AppImage package based on Qt6.
more simple calendar-based time steps (esp. for RemoteControl)
wrapper for too long star names
Temporary workaround for overlapping indicator and text in lists
Optional sorting rule for Search Tool
Text wrapper for pulsar notes, Modern (H.A. Rey) SC, and long origins of nomenclature names
Ability to make observing lists directory configurable via GUI
Add dpiAwareness option to manifest and send physical viewport size to Spout
Add DSO names
Add 2 new time steps for AstroCalc/Ephemeris tool
Remote control command to change window size
And various bug-fixes. See release note for details.
How to Install Stellarium 23.4
The software provides official packages for Linux, Windows, MacOS, as well as source code, available to download at Github release page:
Ubuntu user can search for and install Stellarium from either Ubuntu Software or App Center (for 23.10), though it’s Snap package runs in sandbox.
For Ubuntu & Linux Mint users who prefer the classic .deb package, the official PPA has built the package for Ubuntu 20.04, Ubuntu 22.04, Ubuntu 23.04, and Ubuntu 23.10.
1. First, press Ctrl+Alt+T on keyboard to open terminal. When it opens, run command to add the PPA:
This simple tutorial shows how to install Chatterino, a Twitch Chat app with enhanced features, in Ubuntu 22.04, 20.04, 23.10 via PPA.
Chatterino is a free and open-source chat app for Twitch.tv. With it, you can connect as many channels as you like to, either in tabs or in single tab side-by-side.
The client supports features, such as Chat Replies by right-clicking a message and choose “Reply to message”.
Left clicking a user will open dialog for user info, message history, as well as buttons to block, ignore highlight, etc. And, right-click on user allows to @ mention him/her in message.
It supports emotes from BetterTTV, FrankerFaceZ, and 7TV, allows to drag’n’drop image or paste image from clipboard to upload to custom service, such as imgur.com, though not enabled by default.
Other features include:
Hotkeys (customizable)
Link preview (not enabled by default)
Ignore or highlight messages
Search, filters, regular expressions
And more.
How to Install Chatterino via Ubuntu PPA
The app provides Windows .exe, macOS .dmg, Ubuntu .deb and Linux .AppImage packages for downloading in its Github releases page.
For Ubuntu/Linux Mint users, the official PPA is a better choice to keep the app up-to-date. Which, so far supports Ubuntu 20.04, Ubuntu 22.04, Ubuntu 23.04, & Ubuntu 23.10 on amd64 (Intel/AMD) and arm64/armhf (Apple M1/M2, Raspberry Pi) devices.
1. First, press Ctrl+Alt+T on keyboard to open terminal. Then, run command to add the PPA:
Type user password (no asterisk feedback) when it asks and hit Enter to continue.
2. Then, run command to install the chat client:
sudo apt install chatterino
Linux Mint user needs to run sudo apt update first to refresh system package cache.
After installation, you can launch the app from start menu, app grid, or Gnome overview depends on your desktop environment. And, use “Software Updater” (Update Manager) to receive updates.
Then, you can join Twitch channel by their names (the part after www.twitch.tv/ in channel URL). And, see the wiki for more usage.
Uninstall:
To uninstall the Twitch chat app, simply open terminal (Ctrl+Alt+T) and run command:
sudo apt remove --autoremove chatterino
Also remove the Ubuntu PPA, either by running command in terminal:
Darkable, the popular photography app and raw developer, released new major 4.6.0 version a day ago!
The new release introduced auto-save feature for editing history. By default, it save changes every 10 seconds. User can go to ‘Preferences -> storage‘ to change the time interval, or set it to 0 to disable it.
Darktable 4.6.0 also features new rgb primaries processing module. It allows delicate color corrections and creative color grading, by moving the red, green and blue primary colors around using “hue” and “purity” controls.
Darktable 4.6.0
The release also has a big performance improvements. OpenCL is now initialized in the background to speed up the app launching. Image display speed in the map view has been increased by 25%. And, the chromatic aberrations module is now approximagely 10% faster when run on the CPU.
Other changes in Darktable 4.6.0 include:
sigmoid module now includes a new primaries section, to gracefully handle difficult lighting situations (e.g. LEDs) and tune the overall look of the image
The full uncropped image is now always shown when working with the liquify and retouch modules.
The hot pixels module now supports monochrome images.
long-running import session can now be canceled.
built-in “Display P3” color profile
And much more! See the official release note for details
How to Install Darktable 4.6.0 in Ubuntu Linux
Option 1: Snap
Darktable is easy to install as Snap package, which runs in sandbox, using Ubuntu Software (or App Center for 23.10).
Option 2: Official deb package
The developer team offers official RPM and DEB packages for Debian, Fedora, Ubuntu, openSUSE, through the OBS building repository.
Also, it’s NOT updated to v4.6.0 at the moment of writing. Keep an eye on this page if you prefer the official package.
Option 3: Flatpak package
Darktable is also available to install as Flatpak package, another universal Linux package format runs in sandbox!
Linux Mint 21 user can directly search for and install the Flatpak package from Software Manager.
While, Ubuntu user can open terminal (Ctrl+Alt+T) and run the 2 commands below one by one to install the Flatpak:
Besides using the official DEB package (See Option 2), I’ve also upload the package into this unofficial PPA for Ubuntu 22.04, Ubuntu 23.04, and Ubuntu 23.10.
NOTE: The PPA includes updated libheif (1.16.2) library for Darktable to support HEIF in Ubuntu 22.04. Please report if it’s running into conflict with other packages in your system!!
1. First, press Ctrl+Alt+T on keyboard to open terminal. When it opens, run command to add PPA:
2. Linux Mint needs to update system package cache manually after adding PPA:
sudo apt update
3. Finally, install Darktable 4.6.0 via command:
sudo apt install darktable
In addition for old Ubuntu 20.04, 18.04, & 16.04, keep an eye on this PPA. However, it has tons of updated libraries that MAY run into dependency hell and/or package conflict!
Uninstall Darktable
Depends on which package your installed, remove Darktable via one of the commands below:
For Snap package, just remove it from Ubuntu Software.
This is a step by step beginner’s guide shows how to install iTunes in Ubuntu 22.04 and Ubuntu 24.04 LTS.
Windows app is easy to install in Ubuntu & other Linux, thanks to Wine. However, it’s not so easy for beginners to install & setup Wine.
So, here I’m going to show how to install iTunes using Bottles (a wine runner) to make things as easy as possible.
NOTE that, iTunes running with wine does NOT detect iPhone, at least not for me. But, it’s OK for syncing music via iCloud! For just transferring music files, VLC is a good alternative.
iTunes 12.8.0.150 in Ubuntu 22.04 LTS
NOTE 1: This tutorial is tested and works in Ubuntu 22.04. Though, it should work in most other Linux!
NOTE 2: In this tutorial I installed iTunes 12.8.0.150! Newer versions either crash frequently or run into blank window.
Step 1: Install Bottles
As mentioned above, Bottles is a wine runner to make running Windows apps in Linux super easy. The only downside could be that it’s only available as Flatpak runs in sandbox.
Firstly, press Ctrl+Alt+T on keyboard to open terminal. When it opens, run command to enable Flatpak support:
sudo apt install flatpak
Other Linux can follow official setup guide to enable Flatpak support.
Then, install Bottles as Flatpak by running command:
This command may have more than a thousand MB download due to run-time libraries. Don’t be worried about it. Installing Wine directly from its website will also has quite a few hundred MB files to download.
Step 2: Setup Permission for Bottles
Bottles is installed as Flatpak which runs in sandbox. By default, it has only file access to your user ‘Downloads‘ folder.
If you want to make apps, that are installed through Bottles, visible in start menu and/or dock, and access music files in other folders (such as ‘Music’ folder), then you have manually grant permissions.
Option 1: Use command to grant file access permission:
To allow Bottles to add apps into start menu, run command in terminal:
After installed the tool, launch it. Choose “Bottles” from left, and click add “Filesystem -> Other files” permission for:
xdg-music
xdg-data/applications
Step 3: Download iTunes (exe)
Apple website only shows the download for the latest version of iTunes, which is NOT working good (even not work so far) with current version of Wine.
For the old versions, there’s a 3rd party website that provides a large list of downloads. All download URLs in that page are official (point to apple.com), the website only lists them out for you.
In my tests, iTunes 12.9.x is the most recent version that installs, which however CRASH quite often. The iTunes 12.8.0.150 is the last that’s working good.
NOTE: Wine and Bottles keep updating with new features and bug-fixes. So, newer iTunes versions might be working in future when you see this tutorial. Try for your self.
Step 4: Install iTunes
Now, search for and launch “Bottles” from start menu or ‘Activities’ overview depends on your desktop environment.
NOTE: first time installing a Flatpak app, need a log out and back in to make app icon visible in start menu. For choice, you may run flatpak run com.usebottles.bottles command to start it from terminal.
In the first launch, follow the wizard to run the initial setup.
When done, click either “Create New Bottle…” button or the top-left “+” icon to get started.
Then, in next window type a name (‘iTunes’ in the case), select “Application” as environment type, and click “Create”.
Next, it automatically generate configuration and config Wine for the new ‘Bottle’ you just created.
When done, click to open the ‘Details’ page for the new bottle you just created. Click on “Run Executable” button, then browse and choose the “iTunes64Setup.exe” file you downloaded in last step.
Note in the file chooser dialog, you may need to switch bottom filter to “All Files“, so to make the .exe file visible.
After that, the installer wizard for iTunes should start. Just follow to install it until done.
Step 5: Launch iTunes
To launch iTunes, either go to ‘Details’ page for the Bottle in Bottles, and click the triangle icon “▸”.
Or, click the 3 dots “⋮” icon right after it, and select “Add Desktop Entry” menu option (need to done Step 2 first).
After that, you can start iTunes from start menu, just like other apps installed from Ubuntu Software.
Uninstall
To remove iTunes only, simply launch ‘Bottles’ and go to Details page for iTunes. Then use the top-right corner “⋮” menu option to delete bottle.
To remove Bottles app, open terminal (Ctrl+Alt+T) and run command:
Got local music files in your Ubuntu PC/laptop? Here’s how to transfer them to your iPhone.
It’s NOT hard to install iTunes in Ubuntu using Wine in today’s Linux. However, iTunes running in wine does not detect my iPhone, at least in my case in 22.04.
If you just want to transfer music from PC to your iOS device, then you don’t have to struggle with iTunes in Linux. There are easy alternatives! And, VLC is a very popular one of them.
This tutorial is tested on iPhone with iOS 16.1.1, and Ubuntu 22.04 with default GNOME.
Transfer Music from PC to iOS via VLC
1. First, go to “App Store” and install the free open-source VLC media player in your iPhone or other iOS device.
VLC media player in App Store
2. Not sure if it required, but you may launch VLC in iOS for the first time to generate app folder.
3. Now, connect your iPhone or other iOS device into Ubuntu. Then, open “Files” and go to the mounted folder from left panel.
In my case, it’s a phone icon with text “Document on iphone”. In that folder, click VLC icon. Finally, drag’n’drop your music files into the VLC sub-folder.
When done, you can now open VLC in iphone/iOS, and find out the local music files under “Audio” bottom tab.