For Ubuntu, Fedora Workstation, and other Linux with GNOME Desktop, there’s an extension to help you focus on reading on the screen.
It’s Reading Strip, a free and open-source app written in JavaScript. With it, a horizontal (and/or vertical) strip will be displayed and follow around your mouse cursor.
By settings its background color and opacity, it can highlight the sentence to help focus on reading for people affected by dyslexia.
It also supports focus strip mode, that hides (blurs) the previous and next ones on screen. Which, is great for helping children focus on reading very well.
ReadingStrip Focus mode
How to Install Reading Strip
As mentioned above, reading strip is available as an extension for GNOME Desktop. It so far supports for GNOME from version 3.36 to 44. Sadly, GNOME 45 is not supported due to bug. Meaning it works for all current Ubuntu LTS (20.04 and 22.04), Fedora 37/38, Debian 12, RHEL 9.
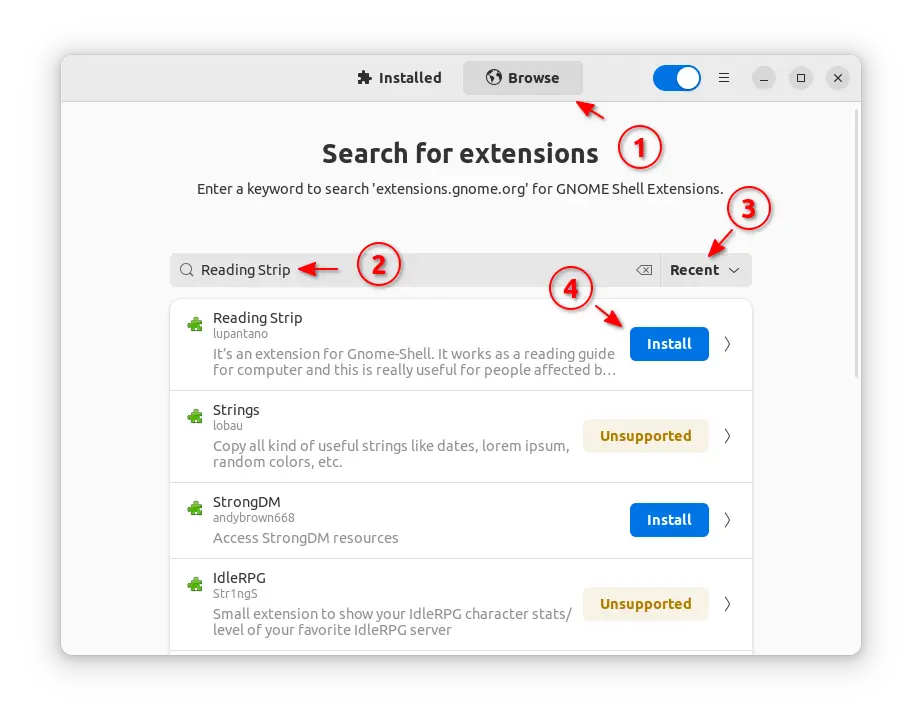
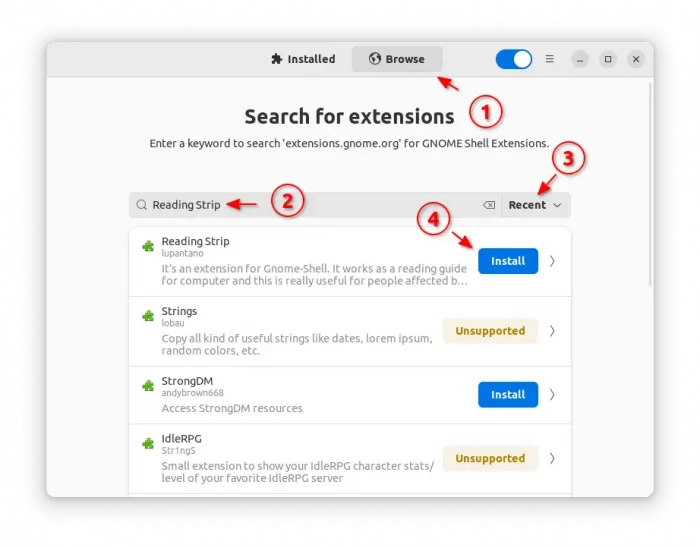
For Ubuntu 22.04, first search for and install “Gnome Shell Extension Manager” from Ubuntu Software.

Install Extension Manager in Ubuntu 22.04+
Then, launch the tool and use it to search & install “Reading Strip” under Browse tab.
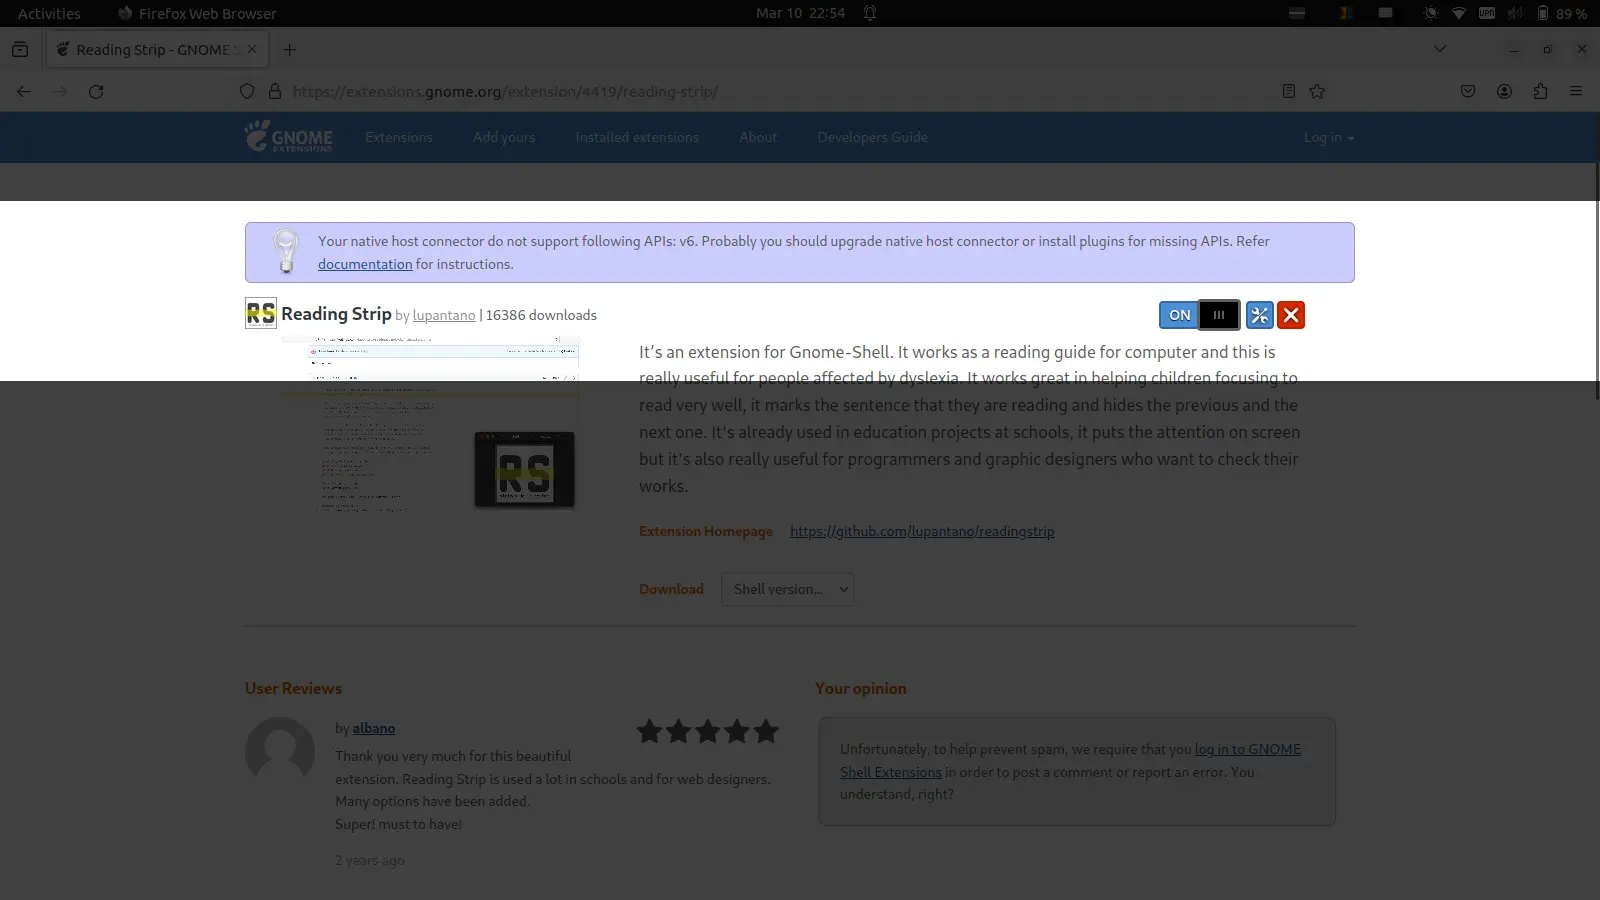
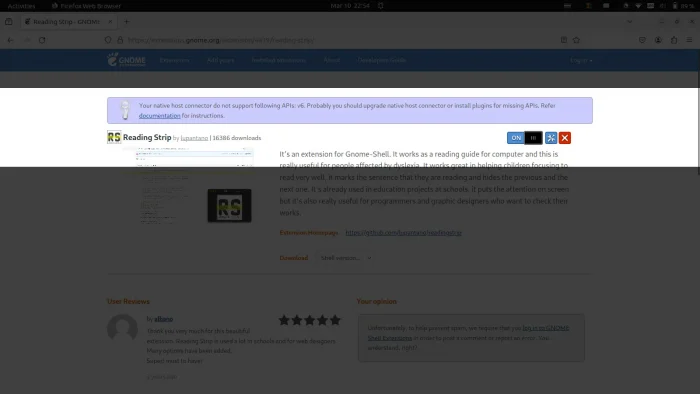
For Ubuntu 20.04 and other Linux with GNOME, just open web browser and go to the extension page via the link button below:
Install the browser extension if it prompts, refresh, and finally use the ON/OFF switch that page to install the GNOME Shell Extension.
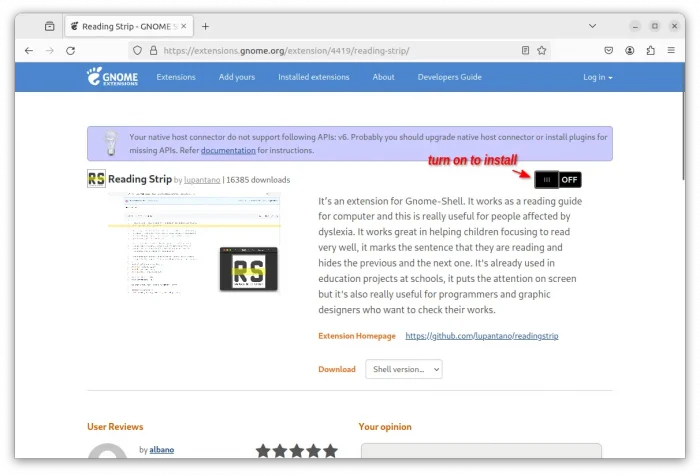
NOTE: Debian and Ubuntu may also needs to open terminal and run command sudo apt install chrome-gnome-shell to install the agent package first.
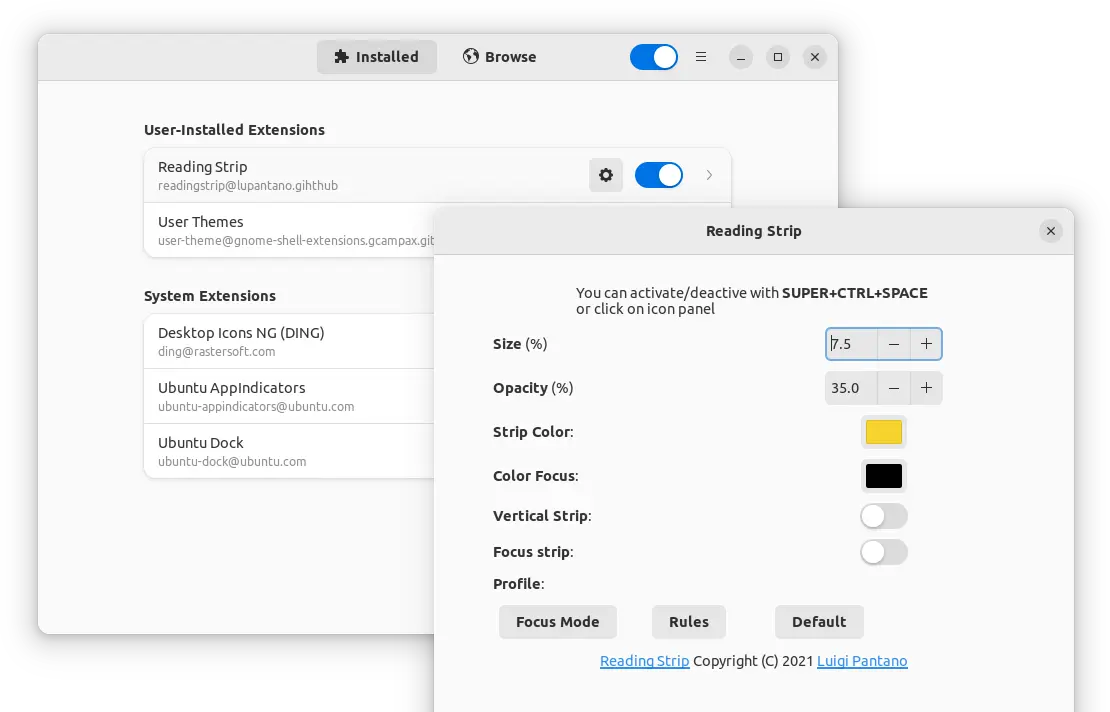
Configure & Use Reading Strip
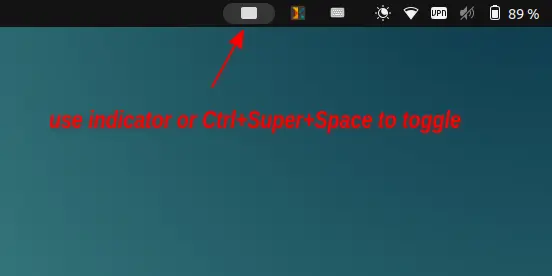
After properly installed the extension, an indicator applet should appear in top-right system tray area.
By clicking on the applet icon or using Ctrl + Super (Windows Logo) + Space key combination can toggle on/off the feature.
To change the strip size, background opacity, color, and/or enable focus mode, just install either Gnome Extensions or Extension Manager from either Ubuntu Software or Gnome Software.
Then, click on setting for the Reading Strip extension and do the changes as you want.

That’s all. Enjoy!