![]()

This quick tutorial shows how to easily set a solid color as background wallpaper in your Ubuntu 22.04 or Ubuntu 24.04 PC/laptop.
To stay focused and increase productivity, user may set a solid color desktop background which can also reduce eye strain. And, a black background will consume significantly less power especially for AMOLED displays.
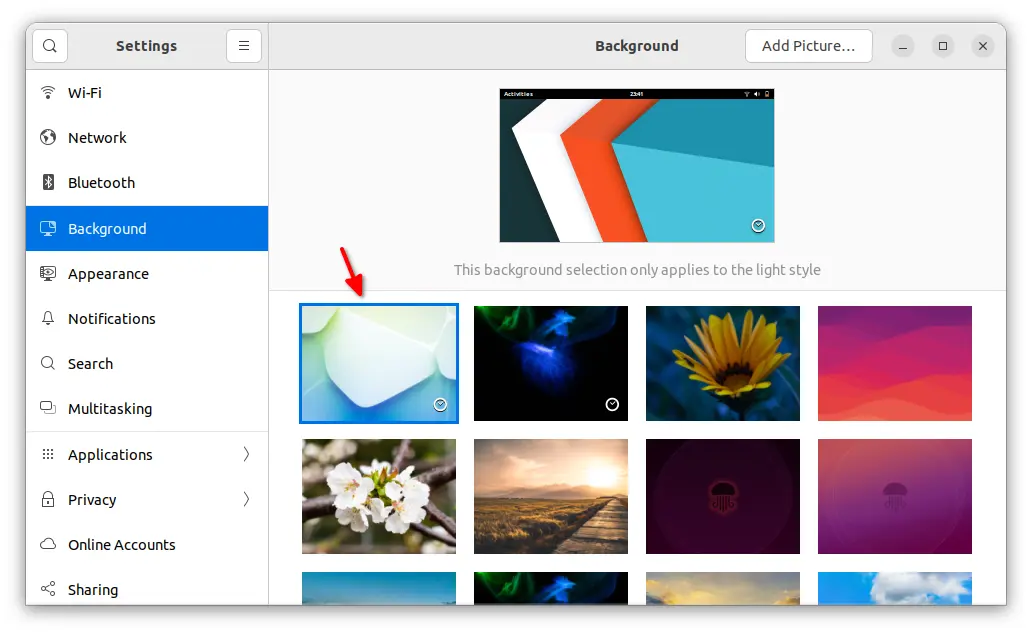
If you already downloaded a solid color wallpaper from web, or created one via an image editor, simply click the “Add Picture” button in system settings -> Background (or Appearance). Then, your image will be there as a choice.
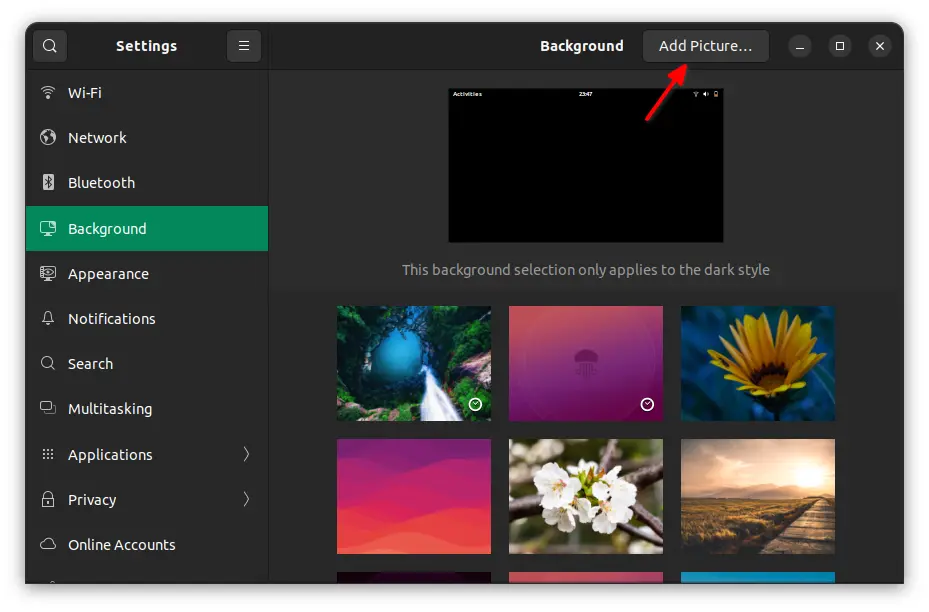
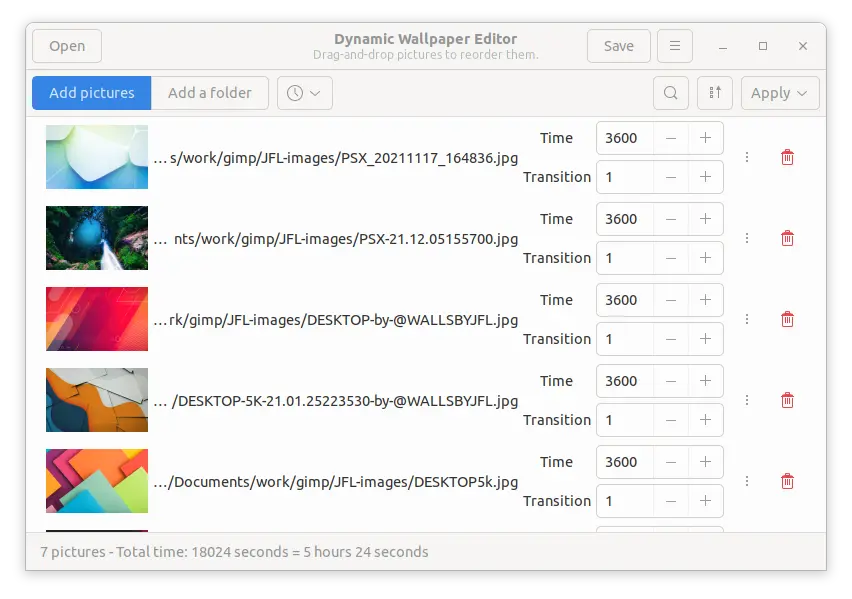
Add Personal Wallpapers
Set Solid color background via Dconf Editor
Instead of using an image file, there’s a hidden option that could work better! Not only for Ubuntu, it also works on Fedora, Debian, Manjaro, and other Linux with GNOME Desktop.
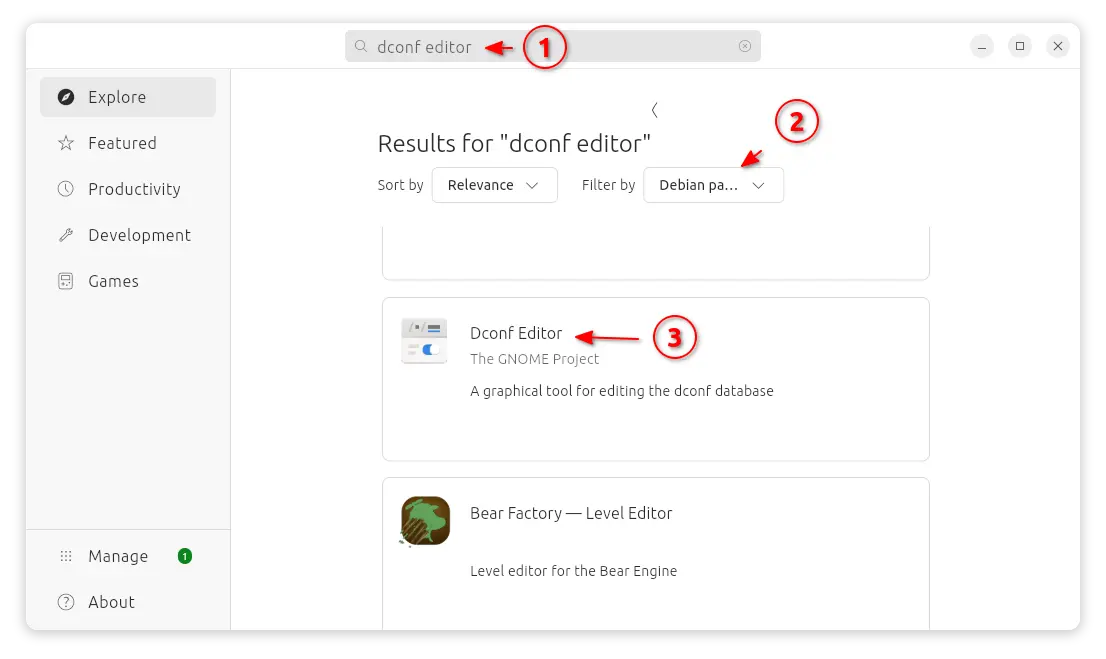
1. Firstly, search for and install “Dconf Editor” configuration tool from either Ubuntu Software or App Center:
Or press Ctrl+Alt+T on keyboard, and run the command below in pop-up terminal to install the tool:
sudo apt install dconf-editor
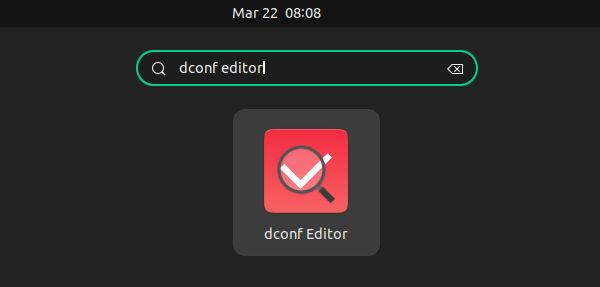
2. Once installed, either press Windows (Super) key on keyboard or click the top-left corner “Activities”, then search for and open ‘Dconf Editor’

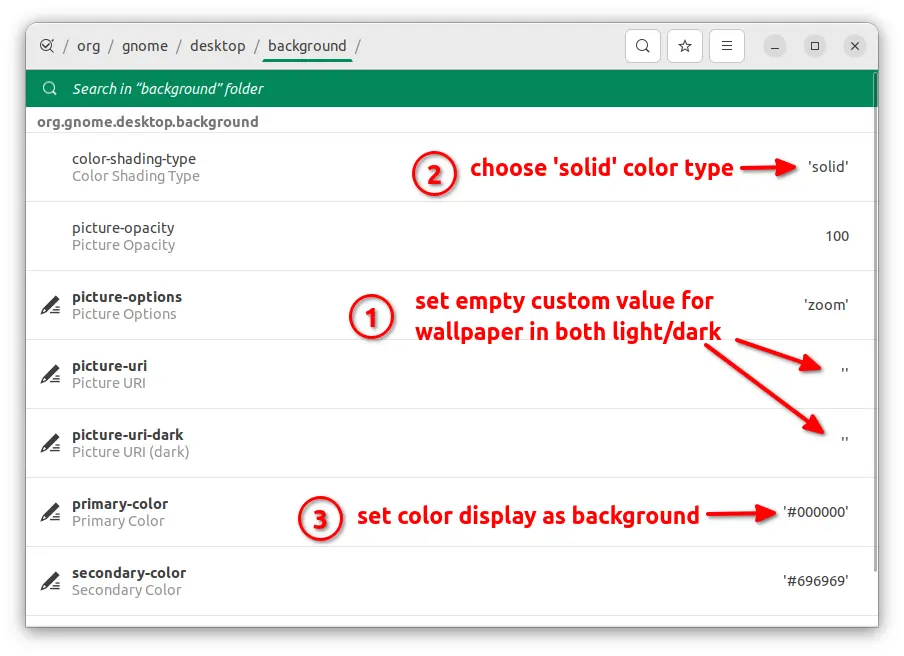
3. When the tool opens, navigate to ‘org/gnome/desktop/background‘ page. There you need to do:
- Clear the value of ‘picture-uri‘ and ‘picture-uri-dark‘ to disable current wallpapers for both light and dark mode. Click them one by one, disable “use default value”, and set empty content for custom value.
- Set ‘color-shading-type’ to ‘solid’ (usually default).
- Change value of ‘primary-color’ to display as background. (
#000000for dark,#fffffffor white. Or use color picker tool to get other color value)
For choice, you may set gradient color background, by setting ‘color-shading-type’ to ‘vertical’ or ‘horizontal’, and set color value of “secondary-color”.
Linux commands to set solid color background.
If you’re familiar with Linux command line, press Ctrl+Alt+T on keyboard to open a terminal window.
When it opens, run the commands below one by one to disable current wallpapers for light and dark mode:
gsettings set org.gnome.desktop.background picture-uri ''
gsettings set org.gnome.desktop.background picture-uri-dark ''
In case you’ve set gradient color background before, reset the “color-shading-type” via command:
gsettings reset org.gnome.desktop.background color-shading-type
Finally, run the command below in set a solid color background (total dark for example):
gsettings set org.gnome.desktop.background primary-color '#000000'
How to Restore:
To restore the changes, simply open Settings -> Background and select a wallpaper as you want. Just note that you need to do this in both Light and Dark mode in Ubuntu 22.04 LTS.
For other Desktop Environments:
The steps above was written for the default GNOME Desktop. For other desktop environments, see below:
XFCE (XUbuntu)
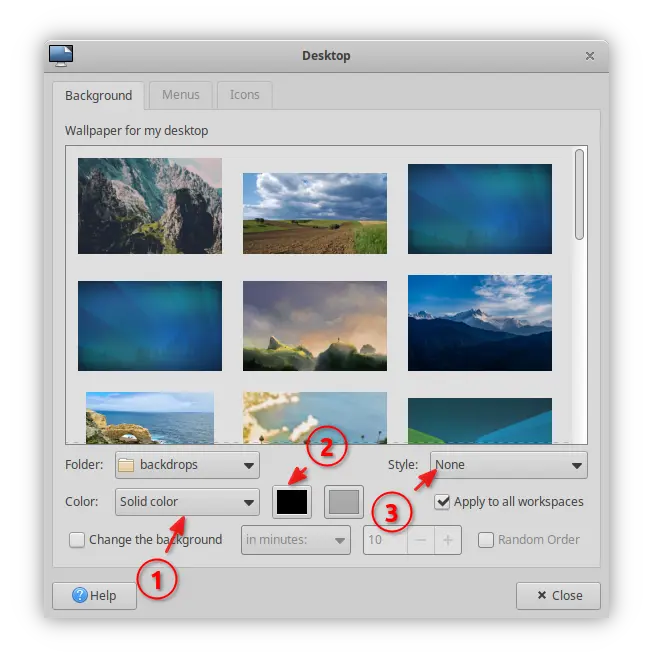
For XFCE, the default desktop in XUbuntu and many other Linux, right-click on desktop and select “Desktop Settings“.
In pop-up dialog, choose “Solid color” from Color select box, and pick a color right after it. Finally, set Style to “None” to make it work.
KDE Plasma (KUbuntu, Ubuntu Studio)
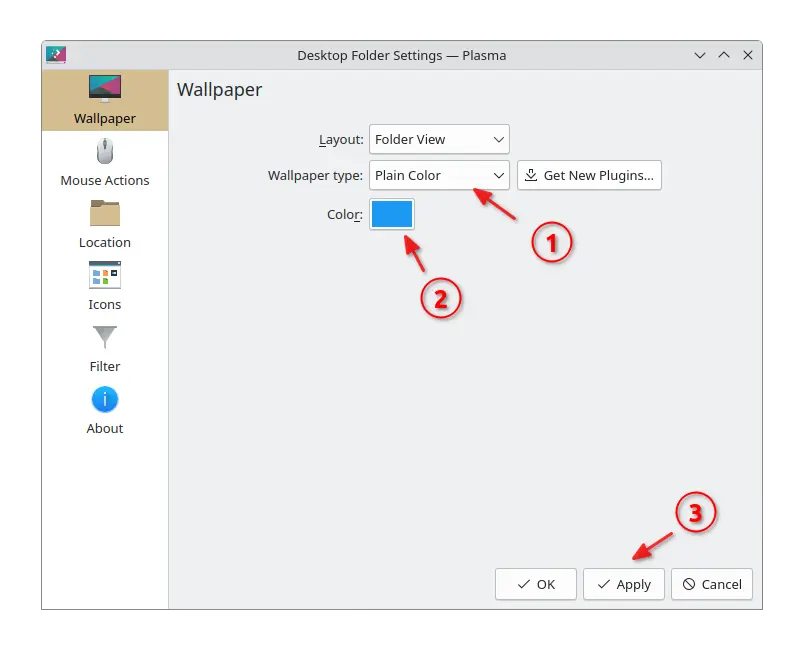
KDE user can right-click on desktop and select “Configure Desktop and Wallpaper” to launch the configure dialog.
Then, choose “Plain Color” as Wallpaper type, and set your favorite color, finally click “Apply”.
MATE (Ubuntu MATE)
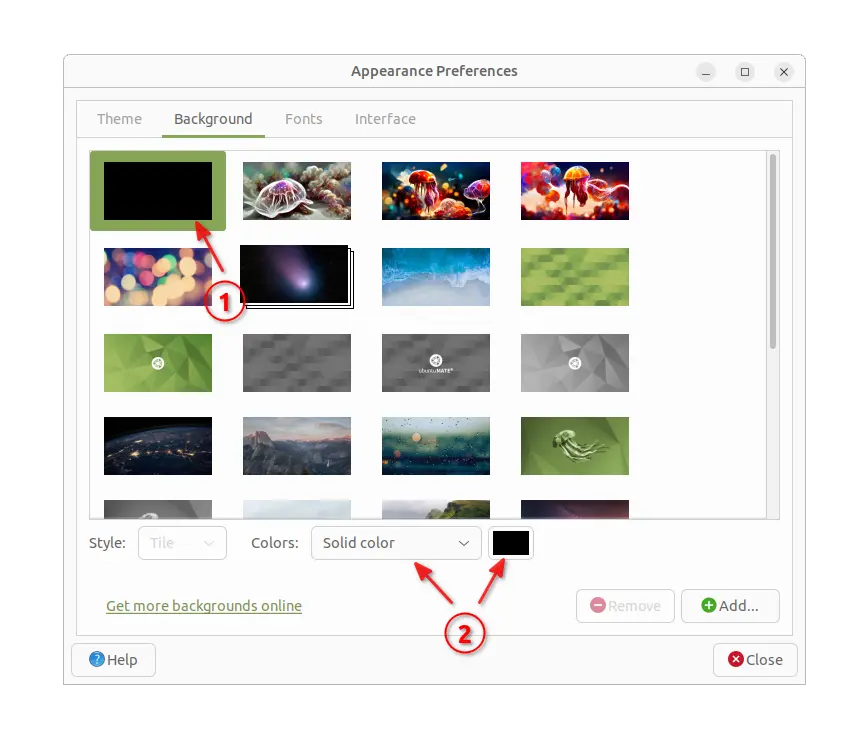
For MATE desktop, also right-click on desktop and select “Change Desktop Background” from pop-up menu.
Then, select the first image in top-left as background, and choose “Solid color” from Colors selection box, and click color picker to choose a color as you want.
Cinnamon (Ubuntu Cinnamon)
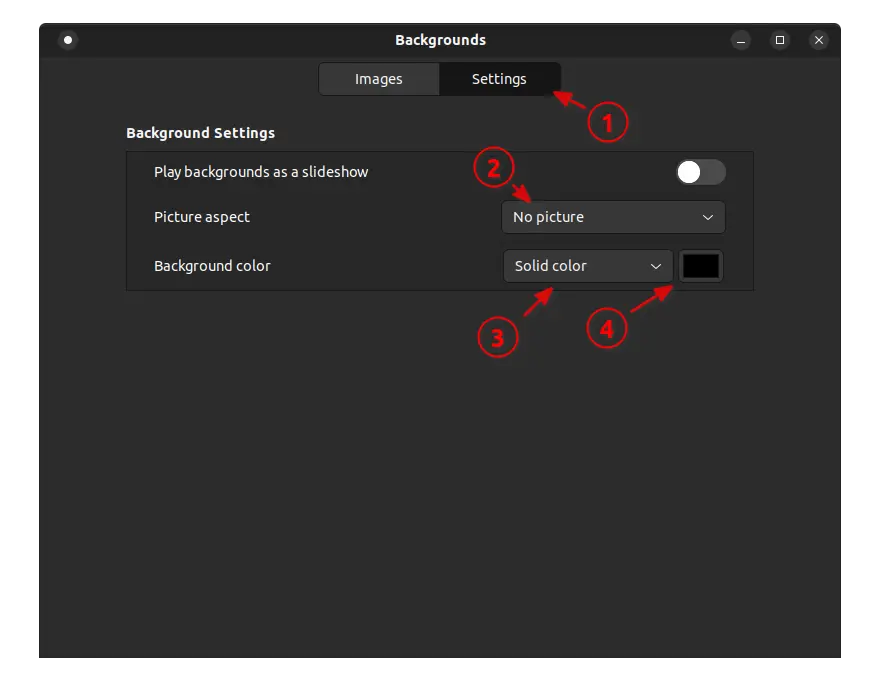
Also, right-click on desktop and select “Change Desktop Background”.
Then in pop-up dialog, navigate to “Settings” page, and do:
- Set “Picture aspect” to No picture.
- Change Background color to Solid color and choose a color.
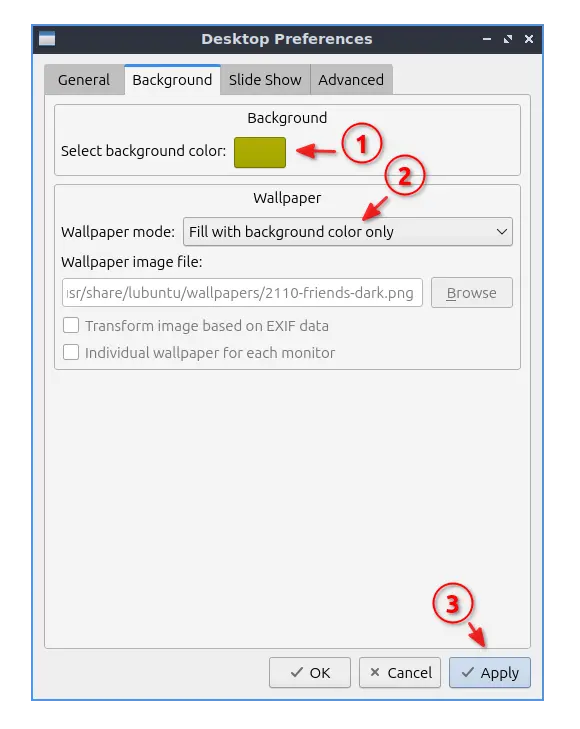
LXQt (LUbuntu)
For LXQt desktop, right-click on desktop and select “Desktop Preferences” from context menu.
In pop-up dialog, navigate to “Background” tab, then do:
- Choose color via the button under “Background”.
- Select “Fill with background color only” for Wallpaper mode.
- Finally, click Apply.