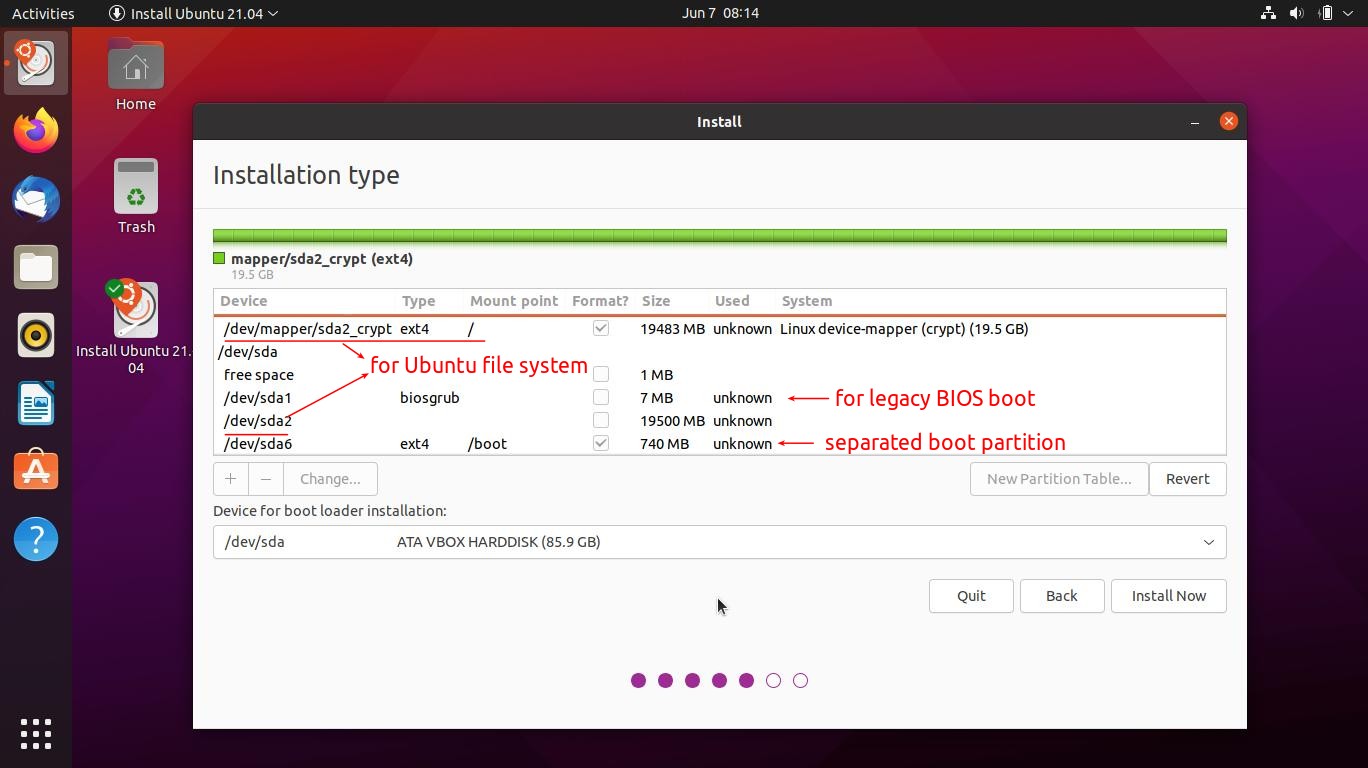
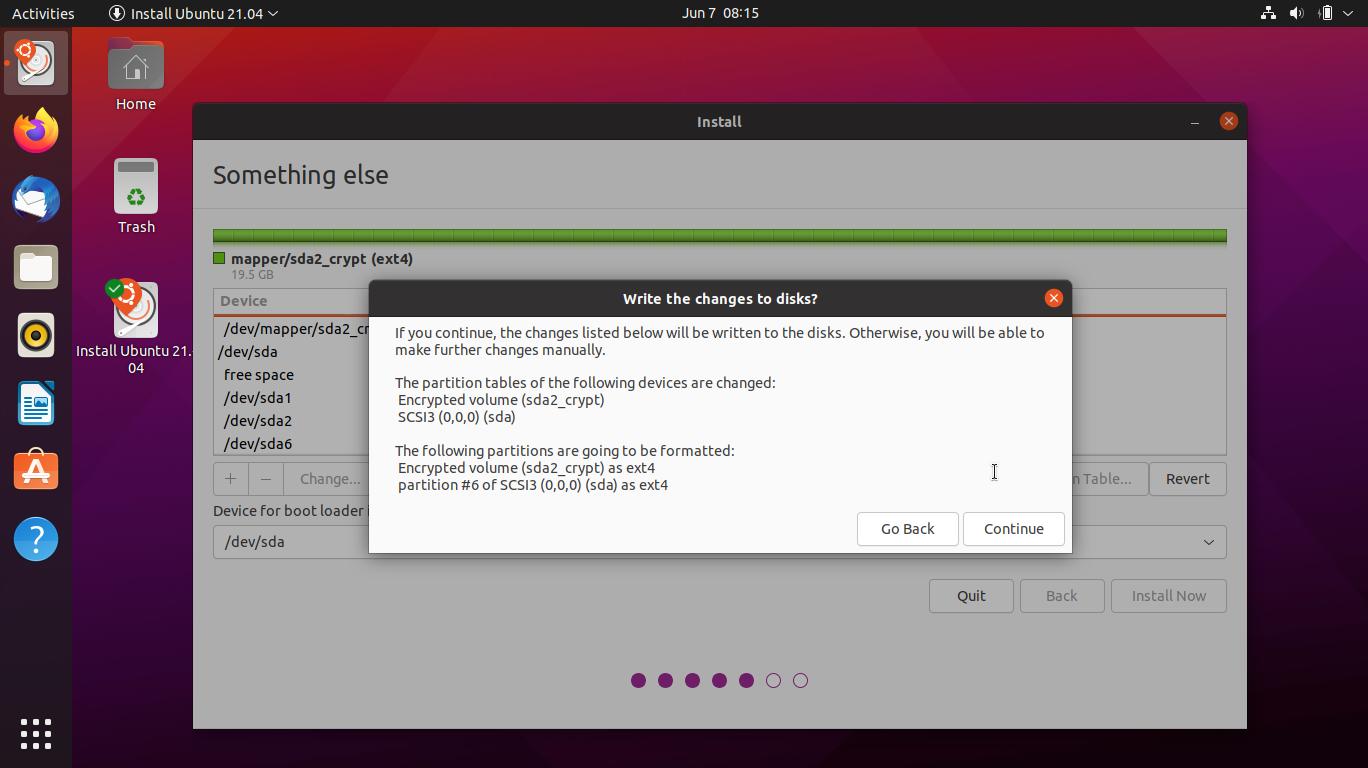
![]()
This simple tutorial shows how to enable & configure the multi-touch gestures in Ubuntu 22.04 using touchegg.
NOTE: This tutorial also works in Ubuntu 22.04, but only on Xorg session. In login screen, select username, and click bottom right gear button to make switch.
For those running Ubuntu on laptop or PC with external touchpad, multi-finger gestures enable users with more actions to control your system.
Since Ubuntu does not offer a utility to configure multi-touch functions, touchegg is a free open-source tool to enable this feature for you. And it supports for both global gestures or gestures for Firefox, Chromium, Google Chrome only.
Touchégg Enables Touchpad Gestures include:
- Swipe up, down, left, and right with 3 fingers and/or 4 fingers.
- Pinch in / out with 2, 3, and/or 4 fingers.
- Tap with 2, 3, 4, and/or 5 fingers.
Actions you can set for touchpad gesture:
- Minimize, Maximize, Restore, Close a window.
- Tile a window.
- Toggle full-screen.
- Switch desktop.
- Show desktop.
- Execute a command.
- Specify a keyboard shortcut, e.g., to open terminal, switch workspace, toggle activities overview.
Step 1: How to Install Touchégg Service in Ubuntu via PPA:
The software has an official PPA which so far supports for Ubuntu 20.04, Linux Mint 20, and higher.
1.) Firstly open terminal from system application launcher and run command to add the PPA:
sudo add-apt-repository ppa:touchegg/stable
Type user password, no asterisk feedback, when it asks and hit Enter to continue.

2.) Next run command to install the touchegg service via command:
sudo apt install touchegg
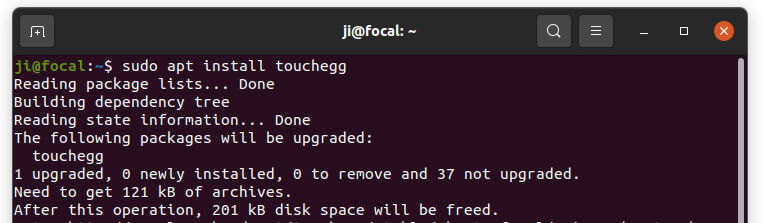
The service should run automatically once you installed it. To verify the status, run command:
systemctl status touchegg.service

It should show you ‘active (running)‘. If not, try to enable and start the service:
systemctl enable touchegg.service && systemctl start touchegg.service
Step 2: Install Graphical Configuration tool: Touché
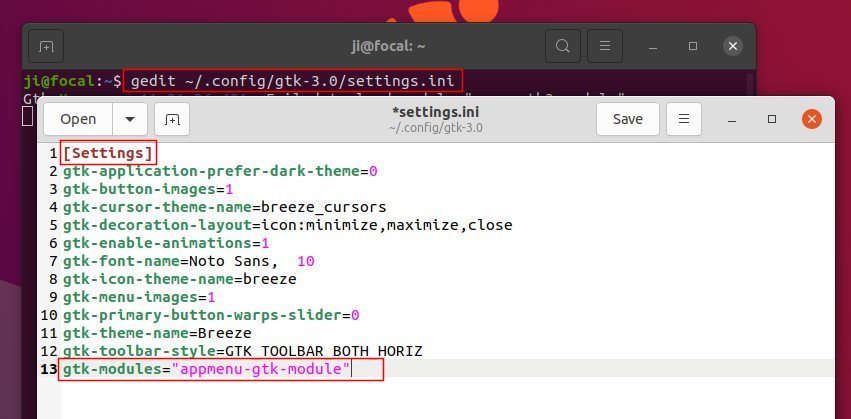
UPDATE (Nov 2021): It’s not a good idea in my own opinion, but they did it. The project does no longer provide native DEB package for the graphical configuration tool ‘Touché‘, though still maintains Ubuntu PPA with the package for the Touchégg system service. Some user do not like Flatpak since it requires hundreds of MB runtime libraries, while the app itself is only few dozen MB. For choice, you may use the GNOME Extension instead, see the link in bottom!
Now the project offers the graphical tool via universal Flatpak package runs in sandbox.
1.) Firstly, press Ctrl+Alt+T on keyboard to open terminal. When it opens, run command to install the flatpak daemon first:
sudo apt install flatpak

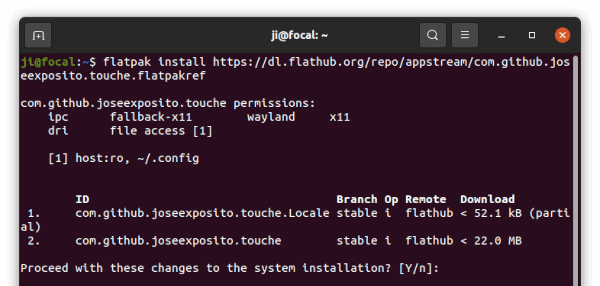
2.) Next, run command to install the configuration tool via Flatpak:
flatpak install https://dl.flathub.org/repo/appstream/com.github.joseexposito.touche.flatpakref
Finally restart your system is required to make multi-touch work!
Step 3: Enable/Configure Multi-Touch Gestures
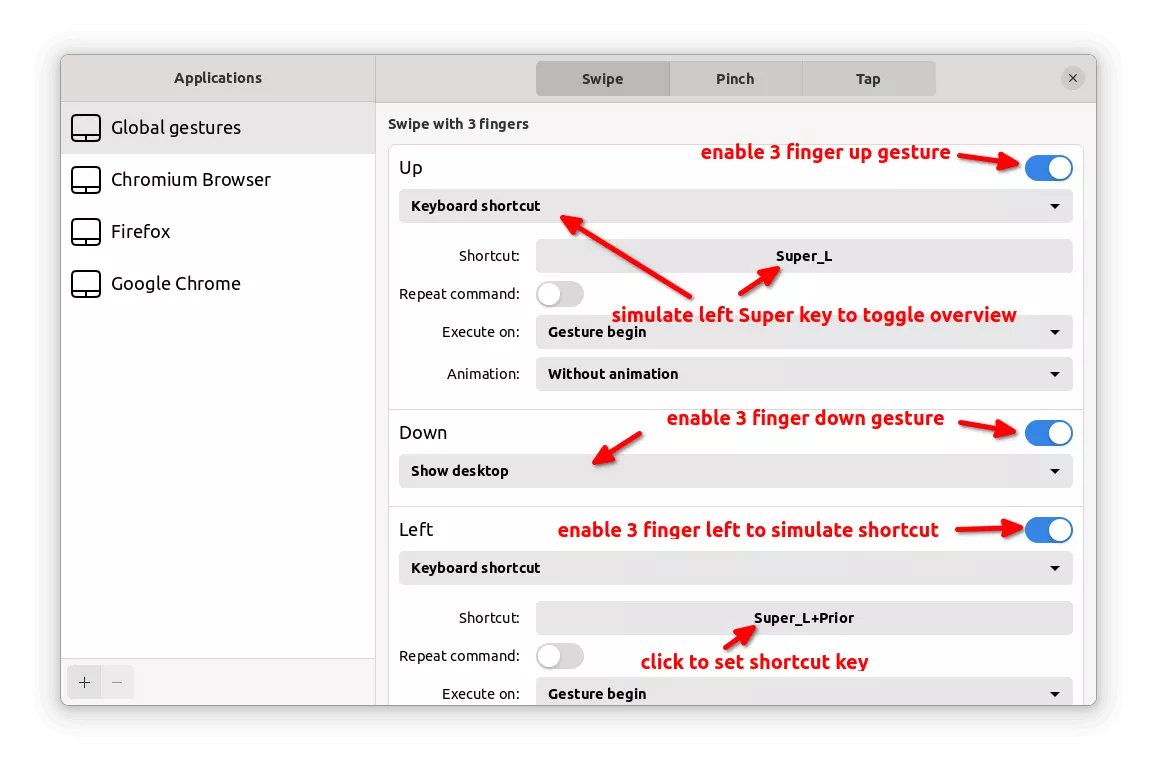
After restarted your system, search for and launch touché from Activities overview. When it opens, enable one or more finger gestures as you prefer. Then choose an action from the drop-down box.
Turn on the slider icons as you prefer, and select an action to do from the drop-down box. You may also simulate a keyboard shortcut, such as “Super” key to toggle overview and “Super+Pageup/Pagedn” to switch workspace.
The changes in touche apply immediately. And there’s also Gnome Extension to enable multi-touch gestures on X11. For more, see touchegg on github.
Step 4: Install Extension (for GNOME only)
For the default GNOME desktop with Xorg session, you also need to install an extension to make the multi-touch gestures work.
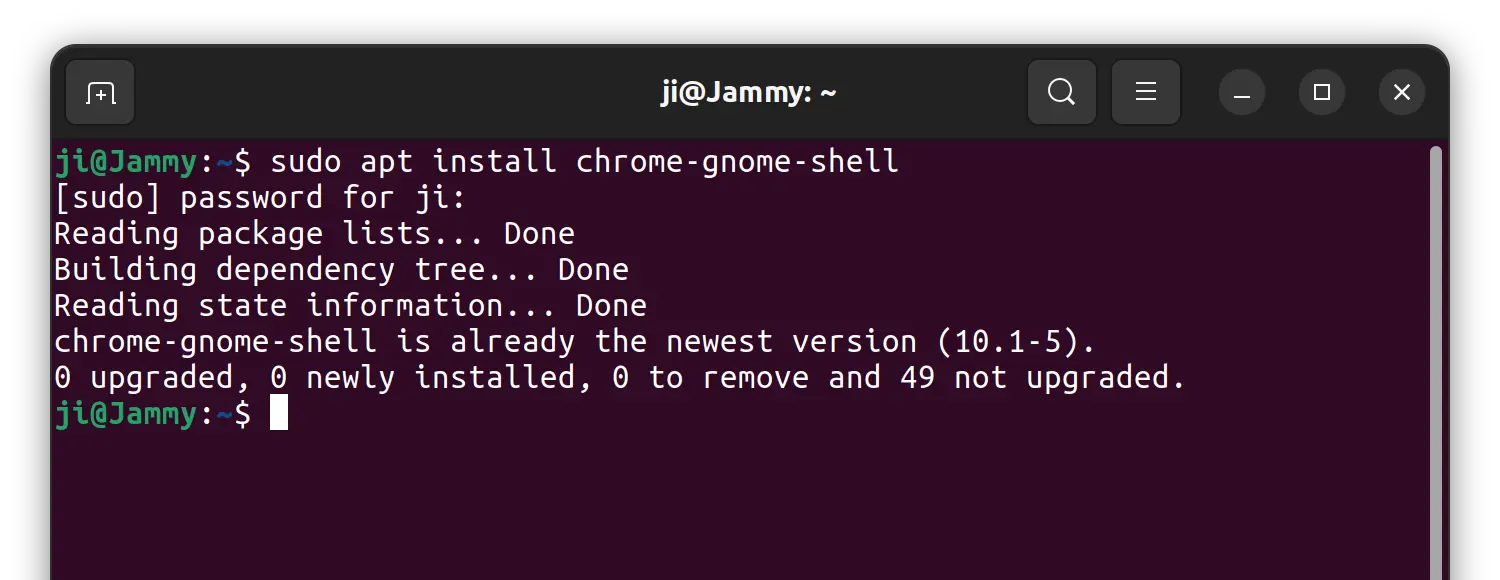
To do so, first open terminal (Ctrl+Alt+T) and run command to install the agent package:
sudo apt install chrome-gnome-shell
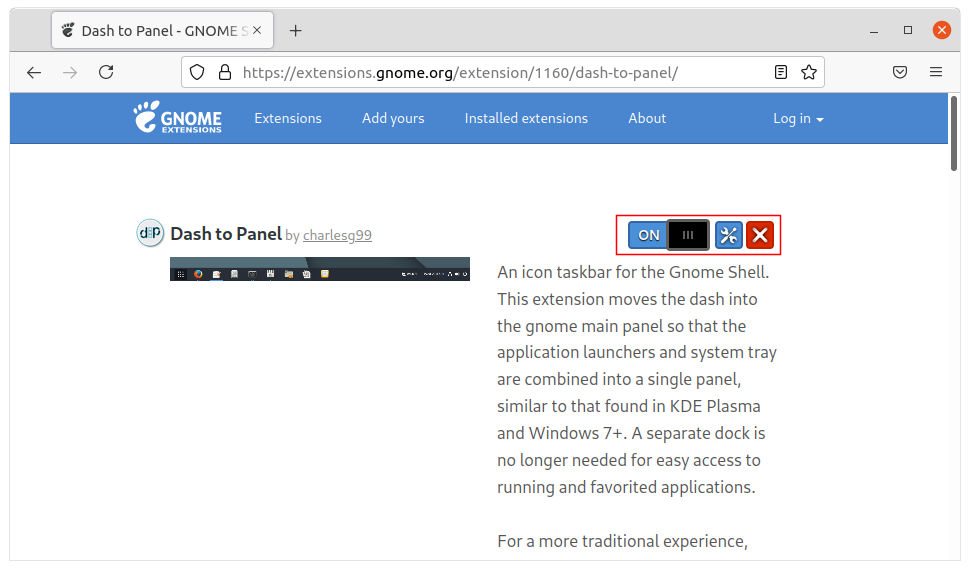
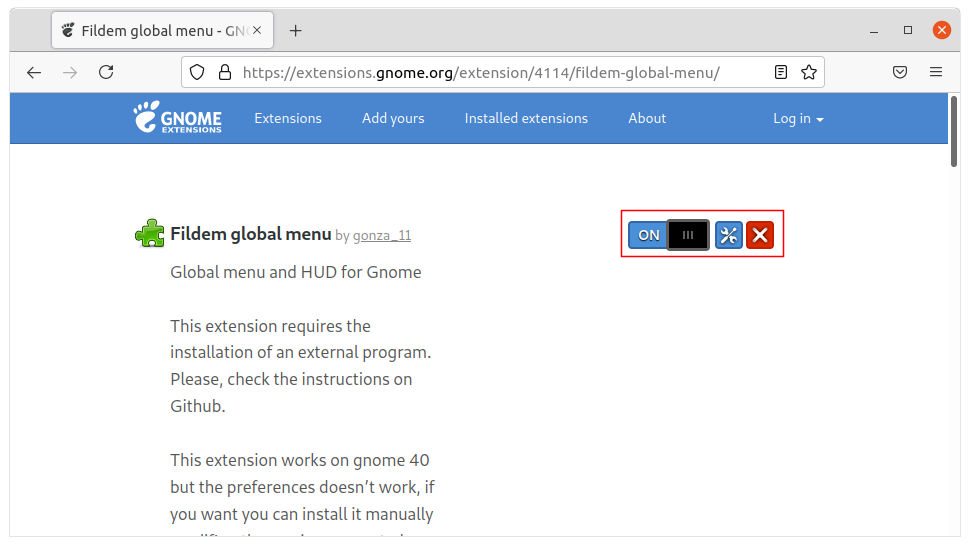
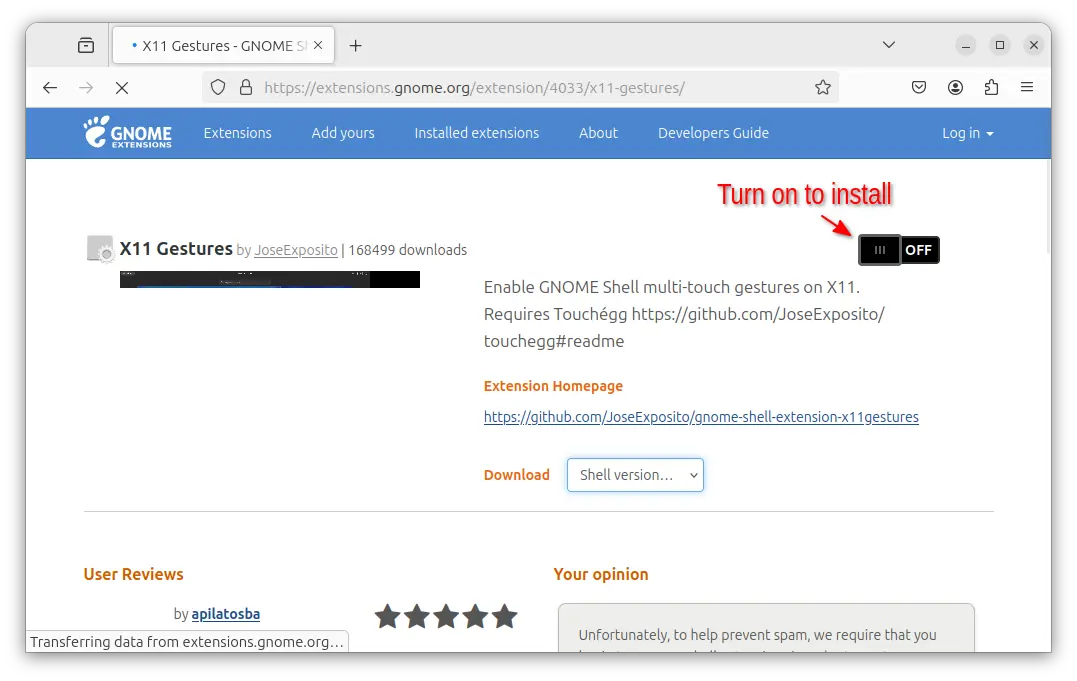
Then, go to the link page below, and use ON/OFF switch to install the extension for X11.
If you don’t see the toggle switch, install browser extension (it should prompt you via link in the page) and refresh.
Finally, log out and back in, or restart computer to apply change.
Uninstall Touchégg:
To remove the Touchégg service, open terminal and run command:
sudo apt remove --autoremove touchegg
And remove the Ubuntu PPA via command:
sudo add-apt-repository --remove ppa:touchegg/stable
For the graphical configuration tool Touché, remove it via command:
flatpak uninstall --delete-data com.github.joseexposito.touche
You may also run flatpak uninstall --unused to clean up disk space.