Want to automatically set the background & lock screen wallpaper once per day to Microsoft Bing image of the day? It’s easy to do this in Ubuntu via an Extension.
For Ubuntu 18.04, Ubuntu 20.04, Ubuntu 20.10, and all other Linux with Gnome Desktop, a lightweight Gnome Shell Extension “Bing Wallpaper” make it possible to set Microsoft Bing image as background and/or lock screen wallpaper.
The extension downloads Bing image and refreshes your wallpaper once per day. By providing system tray indicator menu, you can copy image to clipboard and change the extension preferences.


How to Install Bing Wallpaper Extension:
1.) Firstly open terminal (Ctrl+Alt+T) and run command to install the chrome-gnome-shell package, which will add Gnome Shell extensions integration for web browsers, if you don’t have it.
sudo apt install chrome-gnome-shell


2.) Then go to the extension web page, turn on the toggle icon to install it.
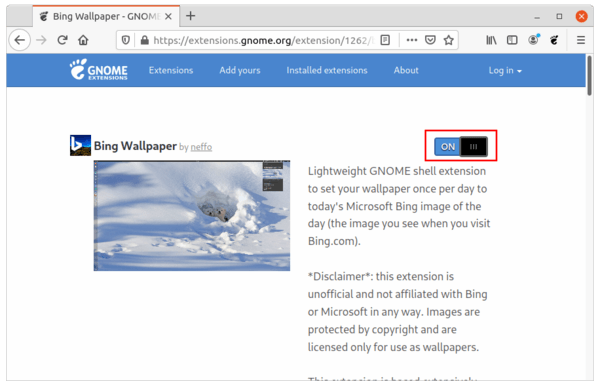

Don’t see the toggle icon? Follow the link to install the browser extension and refresh the web page.


Once installed the extension, an indicator applet should appear in the top-right corner. You can either click “Refresh Now” or wait till it refreshes wallpaper automatically.
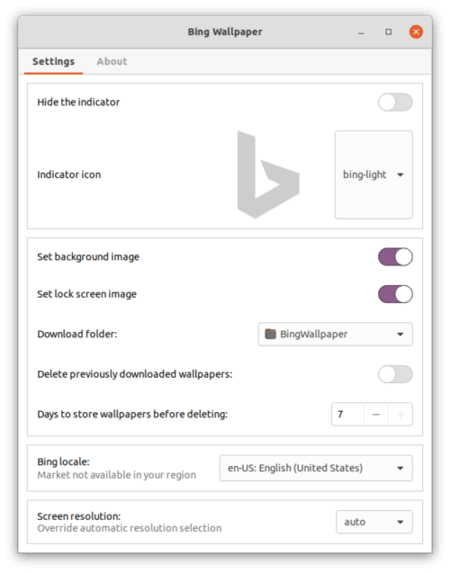
For Bing locale, download folder, screen resolution, and other settings, just go to indicator menu ‘Settings’ option.

Uninstall the Exension:
To remove the extension, either turn off the toggle icon in the previous link page, or use Extensions tool (install it via sudo apt install gnome-shell-extension-prefs command).