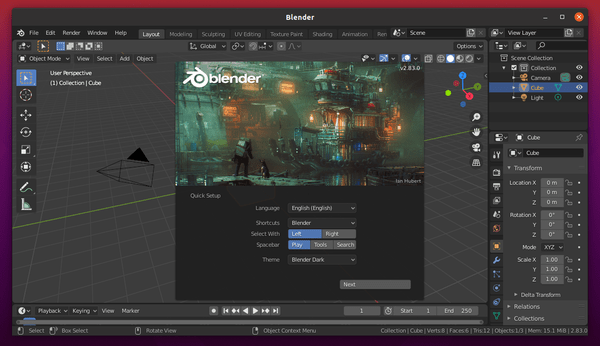
Archives For Howtos

gnome shell

Want to create desktop wallpaper slideshow in Ubuntu 20.04 so it changes background wallpaper automatically with your photo images and given time interval?

This quick tip is going to show you how to easily setup a custom desktop slideshow without installing anything, though there are a few applications can do the job (e.g., wallch which is available in software center).

1. First open the pre-installed shotwell photo manager from system application menu.

2. Then import your photo images via menu File > Import From Folder.

3. Then you can easily set a custom desktop slideshow via:

  • choose a selection of (Ctrl+click or Shift+click) or all photos (Ctrl+A).
  • go to menu File > Set as Desktop Slideshow

4. In next pop-up, set time interval, and click OK.

The desktop slideshow starts immediately and also automatically in next boot, until you change background wallpaper via System Settings > Background.

This quick tutorial shows how to install the latest Google Chrome web browser, and keep it up-to-date, in Ubuntu 20.04 via the official Google repository.

Note: if you hate Linux command line, you may download and install the .deb package from Google Chrome site via a web browser.

1. Open terminal either by pressing Ctrl+Alt+T on keyboard or by searching for ‘terminal’ from system application menu.

2. When terminal opens, run command to install the key:

wget -qO - https://dl.google.com/linux/linux_signing_key.pub | gpg --dearmor | sudo tee /etc/apt/keyrings/google-chrome.gpg

Type user password (no asterisk feedback) for sudo prompts and hit Enter. The terminal should output un-readable text, since the key file is dearmored.

Then add the source repository to your system via command:

sudo sh -c 'echo "deb [arch=amd64 signed-by=/etc/apt/keyrings/google-chrome.gpg] http://dl.google.com/linux/chrome/deb/ stable main" > /etc/apt/sources.list.d/google-chrome.list'

3. Refresh system package cache and install Google Chrome via commands:

sudo apt update

sudo apt install google-chrome-stable

If a new version is available, you’ll be able to update the browser via Software Updater (Update Manager):

Uninstall:

You can remove Google Chrome web browser for any reason by running command in terminal:

sudo apt remove google-chrome-stable

And remove the repository by going to Software & Updates -> Other Software tab.

Looking for a classic start menu in Ubuntu 20.04 or Ubuntu 22.04 Gnome Shell? Arc-menu is a traditional modern application menu for GNOME.

Arc-menu is a gnome shell extension replaces the top-left corner ‘Activities’ button and provides application menu that includes:

  • quick access to current user settings and user folders.
  • quick access to Software Center, System settings, Gnome Tweaks, terminal.
  • search functionality
  • Log out, lock, and power off buttons.

Install Classic Menu in Ubuntu 22.04

1.) Firstly, press Ctrl+Alt+T on keyboard to open terminal. When it opens, run command to install required library with ability to install Gnome Extension via web browser:

sudo apt install chrome-gnome-shell gnome-shell-extension-prefs

2.) Next, go to the extension web page in your browser via the link button below.

NOTE: The pre-installed Firefox is Snap that so far does not support installing Gnome Extensions. Use another browser, or install Firefox as Deb back.

Install the browser extension (if prompted) via the link in that page, and refresh the web-page. Finally turn on the slider icon to install Arc Menu.

If successfully installed, the menu should appear immediately on the upper-left corner. To configure the its icon and menu layout, just right-click on the button and choose an option to open settings.

Or, search for and open “Gnome Extensions” app from overview screen to manage and/or remove installed extensions.

App to Manage your extensions

Install the Classic Menu in Ubuntu 20.04:

1. To install Arc-menu Gnome Shell extension:

Simply open terminal by pressing Ctrl+Alt+T on keyboard. When it opens, run command:

sudo apt install gnome-shell-extension-arc-menu

Type user password when it prompts, no asterisk feedback, and hit Enter.

2. Enable / Disable Arc-menu:

Once installed the Gnome Shell extension, you can turn on / off the application menu easily via Gnome Extensions app.

If you don’t already have the tool, install it via command:

sudo apt install gnome-shell-extension-prefs

Then, search for and open ‘Gnome Extensions’ app in Activities overview screen. And turn on the toggle icon to enable the menu:

Don’t see ‘Arc Menu’ in settings? Restart Gnome by log out and back in (or press Alt+F2, type y and hit Enter).

3. Change Menu icon, appearance, etc.

Right click on the menu icon and select ‘Arc Menu Settings’. Then you change menu location, hotkey, menu icon, and more in popup settings dialog.

That’s it. Enjoy!

This simple tutorial shows how to install the latest Bluefish editor 2.2.11 in Ubuntu 16.04, Ubuntu 18.04, Ubuntu 19.10, and derivatives.

Bluefish editor 2.2.11 is a maintenance release that features Python 3 compatibility. Other changes include:

  • Improved double-click selection.
  • Fill a line with spaces up to a mouse click.
  • Search and replace ignores backup files by default.
  • Insert output from an external command
  • Search in files in the file-browser.
  • Select current identifier via shift+ctrl+i
  • Printing improvements, translation updates, and many bug-fixes.

While the new release package is already made into Ubuntu 20.04 universe repository, the PPA repository contains the latest packages for all current Ubuntu releases.

1. Open terminal either by pressing Ctrl+Alt+T on keyboard or by searching for ‘terminal’ from ‘Show Applications’ menu.

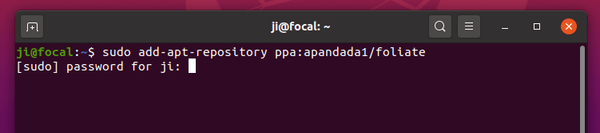
When terminal opens, run command to add the PPA:

sudo add-apt-repository ppa:klaus-vormweg/bluefish

Type user password when it prompts and hit Enter to continue.

2. Then run commands to check updates and install the programmers editor:

sudo apt update

sudo apt install bluefish

Or launch and update your old software package via Software Updater utility.

Uninstall:

You may remove the PPA repository either via Software & Updates utility under Other Software tab, or by running command in terminal:

sudo add-apt-repository --remove ppa:klaus-vormweg/bluefish

And remove Bluefish programmers editor if you want via command:

sudo apt remove --autoremove bluefish

The second bug-fix release for Audacious 4.0 was released a day ago. Here’s how to install it in all current Ubuntu releases.

While the first bug-fix release brings KDE Plasma 5.18 compatibility, Audacious audio player 4.0.2 includes mainly bug fixes and tweaks for the Qt interface:

  • Fixed a regression where the Enter key did not work in the playlist.
  • Fixed the seek bar changing width as the time counter increments.
  • Fixed the title bar getting stuck showing “Buffering”.
  • Added a workaround to ensure that the toolbar is not hidden on startup.
  • Fixed the Composer field not being saved when updating ID3v2 tags.

How to Install Audacious 4.0.2 in Ubuntu:

The unofficial PPA contains the latest packages for Ubuntu 16.04, Ubuntu 18.04, Ubuntu 19.10, and Ubuntu 20.04.

1. Open terminal by either pressing Ctrl+Alt+T on keyboard or searching for ‘terminal’ from application menu. When it opens, run command to add the PPA:

sudo add-apt-repository ppa:ubuntuhandbook1/apps

Type your password (no asterisk feedback) when it prompts and hit Enter to continue.

2. Then run commands one by one in terminal to install or upgrade the audio player:

sudo apt update

sudo apt install audacious audacious-plugins

Uninstall:

The PPA repository also contains some other applications. You may remove the PPA either by going to Software & Updates utility -> Other Software tab, or by running command in terminal:

sudo add-apt-repository --remove ppa:ubuntuhandbook1/apps

To remove audacious, either use your system package manager or run command:

sudo apt remove --autoremove audacious audacious-plugins

This simple tutorial shows how to add ‘Open as Administrator‘ option to file browser right-click menu in Ubuntu 20.04 LTS.

Need to open or edit files with Administrator (root) user privilege directly from file browser in Ubuntu desktop? There’s an extension nautilus-admin can do the job in the default Gnome desktop.

1. Open terminal by either pressing Ctrl+Alt+T on keyboard or searching for ‘terminal’ from application menu.

2. When terminal opens, run command to install the extension:

sudo apt install nautilus-admin

You may replace nautilus-admin with caja-admin or peony-admin if you’re running with MATE or UKUI desktop.

Once installed, run command nautilus -q or log out and back in to apply changes.

Note the extension only adds Administrator privilege to open folders or edit files. There’s no ‘Run as Administrator’ option to run program as super user privilege.

Dual-boot or multi-boot Ubuntu 20.04 with other operating systems? This tutorial will show beginners how to change the default OS entry in Ubuntu 20.04 desktop.

This is a graphical tool to configure the default Grub boot-loader in Ubuntu. It’s Grub Customizer, and available in Ubuntu universe repositories for Ubuntu 19.04 and higher.

1. Either install Grub Customizer via Ubuntu Software, or open terminal (Ctrl+Alt+T) and install the tool by running command:

sudo apt install grub-customizer

2. Then search for and launch the tool from application menu.

3. When Grub Customizer opens, do:

  • navigate to General settings tab.
  • Select an OS entry as default from the drop-down box after ‘predefined’
  • You may also change other settings: menu timeout, kernel parameters, font, background image, etc.
  • Finally click the Save button to apply changes.

That’s it. Enjoy!

Celluloid, a GTK+ frontend for mpv formerly called Gnome MPV, released version 0.19 a few days ago. Here’s how to install it in Ubuntu 18.04, Ubuntu 19.10, and Ubuntu 20.04.

Celluloid 0.19 release highlights include:

  • Retain window maximization state across sessions.
  • Retain loop state across sessions.
  • Implement playlist search.
  • Update the list of shortcuts in Keyboard Shortcuts dialog.
  • Deprecate --mpv-options.
  • Add support for configuring dead zone
  • Make window sizing work correctly with HiDPI displays.
  • Translation updates and other changes.

How to Install Celluloid in Ubuntu via PPA:

Celluloid media player is available to install via Flatpak package in Flathub repository.

For those prefer native Ubuntu .deb package, the formerly Gnome MPV PPA now maintains the Celluloid packages for Ubuntu 18.04, Ubuntu 19.10, and Ubuntu 20.04.

1.) Open terminal either by pressing Ctrl+Alt+T on keyboard or by searching for ‘terminal’ from application menu. When it opens, run command to add the PPA:

sudo add-apt-repository ppa:xuzhen666/gnome-mpv

Type user password (no asterisk feedback) when it prompts and hit Enter to continue.

2.) Then install the MPV frontend via command:

sudo apt install celluloid

For Ubuntu derivatives, you may need to run sudo apt update to refresh package cache first.

Uninstall Celluloid:

To remove the media player, open terminal and run command:

sudo apt remove celluloid

And remove the PPA repository via command:

sudo add-apt-repository --remove ppa:xuzhen666/gnome-mpv

Mozilla Firefox 75.0 was released today. Ubuntu security & updates repositories has published the packages for Ubuntu 16.04, Ubuntu 18.04, and Ubuntu 19.10.

Mozilla Firefox 75.0 comes with revamped address bar, which brings clean search experience. On Linux, the behavior when clicking on the Address Bar and the Search Bar changes: a single click selects all without primary selection, a double click selects a word, and a triple click selects all with primary selection.

The new release also brings official Flatpak support, improves HTTPS compatibility, and various security fixes. See release note for details.

Install Firefox 75 in Ubuntu:

For all current Ubuntu releases and derivatives, Firefox 75.0 has been made into the security & updates repositories.

Simply launch Software Updater (Update manager) and install available package updates.

For Ubuntu 20.04, Firefox 75.0 package now is available as pre-release updates for testing. It will go stable soon.

Ubuntu 20.04 introduces new dark mode in the Settings utility. It is however not full dark when you turn it on in Gnome Shell.

System tray menu, top-bar calendar, notification popups, and desktop context menu are not dark but always light when you switching between light, dark, and standard modes.

Enable Full Dark Theme in Ubuntu 20.04:

1.) First install user themes Gnome Shell extension.

It was able to install the extension simply via Ubuntu Software when I was in Ubuntu 18.04. Ubuntu 20.04 however shows me “No Application Found” when I searching for user themes in the new Ubuntu Software (Snap Store).

  • As a workaround, open Firefox web browser and go to https://extensions.gnome.org:

    Click the link text “click here to install browser extension” and follow the pop-ups to install the browser extension:

  • Then open terminal via Ctrl+Alt+T and run command:
    sudo apt install chrome-gnome-shell

  • Finally go to https://extensions.gnome.org/extension/19/user-themes/.

    Turn the switch on and then select install the Gnome Shell extension:

2.) Install Gnome Tweaks if you have it.

sudo apt install gnome-tweaks

3.) Finally launch Gnome Tweaks and navigate to Appearance in the left pane, choose Yaru-dark as the Shell theme and done!

And of course select Dark in System Settings -> Appearance to get dark applications if you don’t have it.