Kid3 audio tag editor 3.8.0 was released today. Here’s how to install it in Ubuntu 16.04, Ubuntu 18.04, Ubuntu 19.04, and derivatives.
According to the changelog, Kid3 3.8.0 features:
- kid3-cli: Support JSON output.
- Format codes %{modificationdate} and %{creationdate}.
- Support ID3v2 GRP1 frame introduced with iTunes 12.5.4.
- Import from Tags function which operates on selected files.
- Explicit frame names can be used by prepending a ‘!’ character.
- Adapt unified frame type mapping for better iTunes compatibility.
- Support multiple covers in M4A files.
- kid3-cli: Remove dependencies to GUI libraries.
- Android: Show info how to write to SD card.
- Android: Support Qt 5.12.
How to install Kid3 3.8.0 in Ubuntu 16.04/18.04:
The official Kid3 PPA has made the new release packages for Ubuntu 16.04, Ubuntu 18.04, Ubuntu 19.04, and derivatives.
Open terminal either via Ctrl+Alt+T keyboard shortcut or by searching for ‘terminal’ from application menu. When it opens, do following steps one by one.
1. Copy and paste following command in terminal and hit run to add the PPA:
sudo add-apt-repository ppa:ufleisch/kid3
Type user password (no asterisk feedback due to security reason) when it prompts and hit Enter to continue.


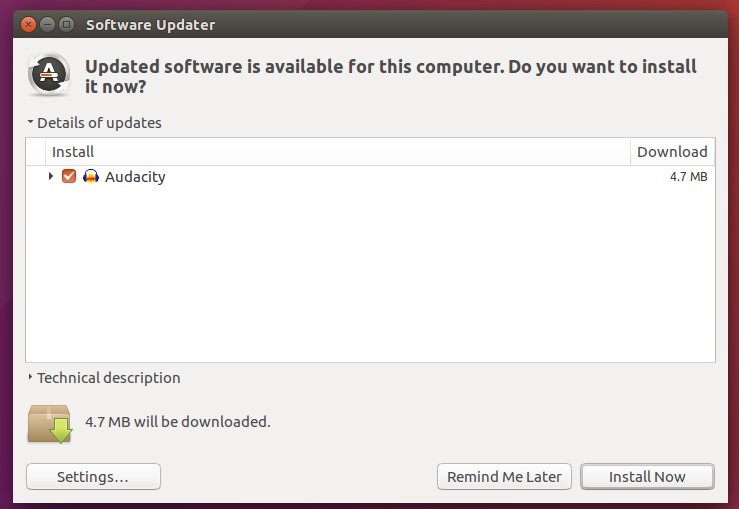
2. Then you can upgrade Kid3 from a previous version via Software Updater:


or run commands one by one in terminal to install or upgrade to the latest tag editor:
sudo apt update

sudo apt install kid3-qt
For KUbuntu user, replace kid3-qt with kid3 in the last command for KDE integration.
Uninstall
To remove the PPA repository, either open Software & Updates -> Other Software tab, or run command:
sudo add-apt-repository --remove ppa:ufleisch/kid3
To remove the audio tag editor, either use your system package manager or run command:
sudo apt remove --autoremove kid3 kid3-*