There are a variety of ways to improve your Firefox browser’s page load times. If you have a lot of RAM to spare in Ubuntu, moving Cache to RAM can speed up Firefox since computer can access data in RAM much faster than on a hard drive.
Firefox has a built-in feature that uses the browser cache in memory instead of disk. Below I’ll you how to enable it:
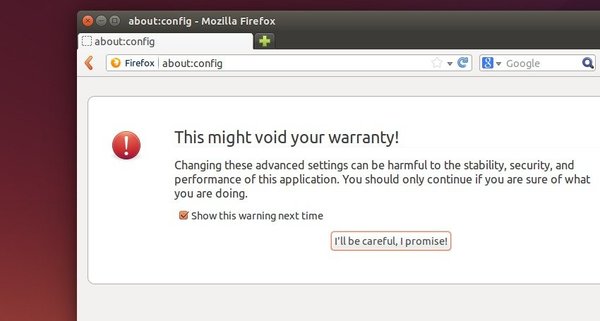
1. In address bar of Firefox, type in about:config and hit Enter. Click the button says “I’ll be careful, I promise!” to pass the warning page.
2. Stop Firefox from caching to disk.
In the filter bar, type in browser.cache.disk.enable. Double-click on the result line to set value to false.

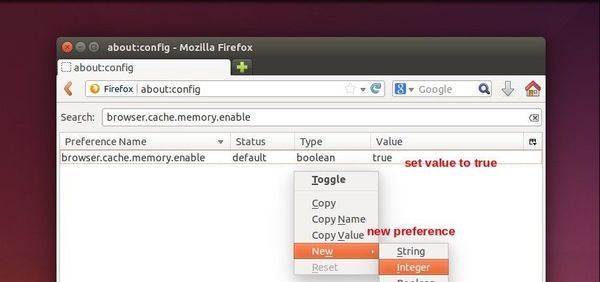
3. Enable cache to RAM and assign cache size.
To enable cache to RAM, type “browser.cache.memory.enable” in the filter bar and make sure the value of result preference is true!
To assign cache size, create a new preference:
- right click on blank area -> select “New” -> Integer
- type in name “browser.cache.memory.capacity” (without quotes)
- type in a value, number in KB (for example, 100000 means 100,000KB or 100MB). You can set the value to -1 to tell Firefox to dynamically determine the cache size.
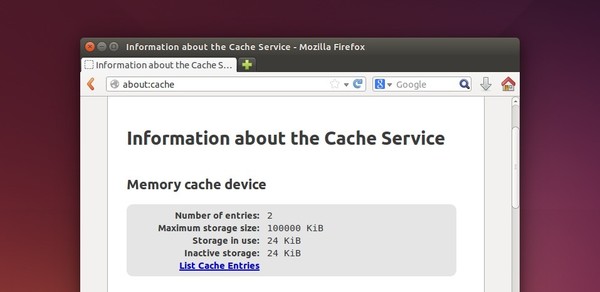
When everything’s done, restart Firefox and check out the cache information by going to the about:cache page.
That’s it. Enjoy!