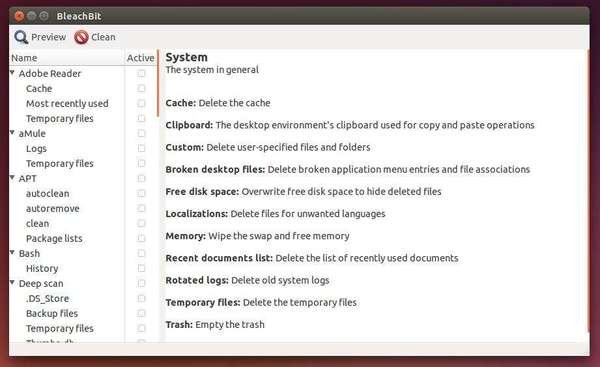
Archives For November 30, 1999

This quick tutorial is going to show you how to display or re-hide ‘hidden’ startup applications in Ubuntu 13.10 Saucy Salamander.

There’s a built-in utility in Ubuntu, which allows to add, remove, and edit additional startup applications. By default the system auto-start services are hidden, here’s how to show it in the box.

Before:

no apps startup applications utility in ubuntu 13.10

no apps in startup applications utility in ubuntu 13.10

After:

show hidden apps in startup applications

To get started, press Ctrl+Alt+T on your keyboard to open terminal. When it opens, run command below:

sudo sed -i 's/NoDisplay=true/NoDisplay=false/g' /etc/xdg/autostart/*.desktop

Then re-open the utility and you’ll see all ‘hidden’ apps.

If you just want to change some settings and then hide them again, run this command in terminal:

sudo sed -i 's/NoDisplay=false/NoDisplay=true/g' /etc/xdg/autostart/*.desktop

That’s it. Enjoy!

The latest Nvidia Driver for Linux 331.20 has been released today with lots of changes. Here are new features and how to install it in Ubuntu 13.10, Ubuntu 13.04, Ubuntu 12.04 and Linux Mint.

What’s New in Nvidia Linux 331.20:

This Long Lived Branch version 331.20 brings following changes:

  • Added support for NVIDIA OpenGL-based Framebuffer Capture (NvFBCOpenGL). This library provides a high performance, low latency interface to capture and optionally encode the composited framebuffer of an X screen. NvFBC and NvIFR are private APIs that are only available to approved partners for use in remote graphics scenarios.  Please contact NVIDIA at GRIDteam@nvidia.com for more information.
  • Fixed a bug that prevented configuration files containing application profiles from being loaded when directories were present in the application profile configuration search path.
  • Deferred initialization of libselinux in the NVIDIA OpenGL driver, in order to avoid a problem where libselinux might not be ready when the NVIDIA libGL shared library is first loaded.
  • Fixed a bug that could lead to memory exhaustion in OpenGL applications running on 32-bit systems.
  • Added nvidia-uvm.ko, the NVIDIA Unified Memory kernel module, to the NVIDIA Linux driver package. This kernel module provides support for the new Unified Memory feature in an upcoming CUDA release.
  • Fixed a bug that caused the X server to fail to initialize when DisplayPort 1.2 monitors were assigned to separate X screens on the same GPU.
  • Fixed a bug that could cause a deadlock when forking from OpenGL programs which use some malloc implementations, such as TCMalloc.
  • Fixed a bug that prevented Warp & Blend settings from being retained across display configuration changes.
  • Fixed a bug that prevented some settings changes made via the nvidia-settings command line interface from being reflected in the nvidia-settings graphical user interface.
  • Changed the clipping behavior of the NVIDIA X driver on Trapezoids and Triangles for some RENDER operations to match the behavior in newer versions of Pixman:
    http://lists.freedesktop.org/archives/pixman/2013-April/002755.html
  • Fixed a bug in MetaMode tracking that could cause spurious error messages to be printed when attempting to add or delete Metamodes via NV-CONTROL.
  • Fixed a bug that caused the NVIDIA X driver to attempt to load the X11 “shadow” module unconditionally, even in situations where the driver had no need to use the module. This could result in the printing of spurious error messages, on X servers where the module was not present.
  • Fixed a bug that prevented display configuration changes made with xvidtune(1) from working correctly.
  • Fixed a bug that occasionally caused display corruption in GLX applications while changing the display configuration.
  • Fixed a bug that prevented glReadPixels from working correctly when reading from Pixel Buffer Objects over indirect rendering, when the image width is not a multiple of 4.
  • Added a new NV-CONTROL attribute, NV_CTRL_BACKLIGHT_BRIGHTNESS, for controlling backlight brightness.
  • Fixed a bug that prevented nvidia-settings from creating display device configuration pages for newly connected DisplayPort 1.2 Multi Stream Transport downstream devices.
  • Added GPU utilization reporting to the nvidia-settings control panel.
  • Fixed a bug in the nvidia-settings control panel that prevented users from configuring stereo, when stereo was not already configured.
  • Added support for reporting the tachometer-measured fan speed on capable graphics boards via nvidia-settings and the NV-CONTROL API. The preexisting mechanism for reporting fan speed reports the speed of the fan as programmed by the driver.
    For example, `nvidia-settings –query=[fan:0]/GPUCurrentFanSpeedRPM`.
  • Fixed a regression that caused GPUs that do not support graphics to not appear in nvidia-settings.
  • Fixed a bug that caused DisplayPort 1.2 multi-stream devices to stop working if they were unplugged and plugged back in while they were active in the current MetaMode.
  • Added support for multiple NVIDIA kernel modules. This feature allows users to assign different GPUs in the system to different NVIDIA kernel modules, potentially reducing the software overhead of coordinating access to multiple GPUs.
  • Added support for the EGL API on 32-bit platforms.  Currently, the supported client APIs are OpenGL ES 1.1, 2.0 and 3.0, and the only supported window system backend is X11.
  • Add a new option, AllowEmptyInitialConfiguration, which allows the X server to start even if no connected display devices are detected at startup.  This option can be enabled by running “sudo nvidia-xconfig –allow-empty-initial-configuration”
    This option is useful in RandR 1.4 display offload configurations where no display devices are connected to the NVIDIA GPU when the X server is started, but might be connected later.
  • Updated nvidia-installer to provide a scrollable text area for displaying messages from the /usr/lib/nvidia/alternate-install-present and /usr/lib/nvidia/alternate-install-available distro hook files. This allows for longer messages to be provided in these files.
  • Updated nvidia-installer to avoid recursing into the per-kernel “build” and “source” directories when searching for conflicting kernel modules in /lib/modules.
  • Added a system memory cache to improve the performance of certain X rendering operations that use software rendering fallbacks.  The X configuration option “SoftwareRenderCacheSize” may be used to configure the size of the cache.
  • Removed the “DynamicTwinView” X configuration option: dynamic reconfiguration of displays is always possible, and can no longer be disabled.
  • Fixed a bug that caused nvidia-settings to display incorrect information in its display configuration page when all displays on an X screen were turned off.
  • Updated nvidia-installer to only install the libraries libvdpau and libvdpau_trace if an existing installation of libvdpau is not detected on the system. This behavior can be overridden with the –install-vdpau-wrapper and –no-install-vdpau-wrapper options.
    Future NVIDIA Linux installer packages will no longer include copies of libvdpau or libvdpau_trace: VDPAU users are recommended to install these libraries via other means, e.g. from packages provided by their distributors, or by building them from the sources available at: http://people.freedesktop.org/~aplattner/vdpau/
  •  

    Download & Install Nvidia 331.20:

    First download the drivers from the official links below:

    Nvidia 331.20 for 32 bit Linux

    Nvidia 331.20 for 64 bit Linux

    Nvidia 331.20 for 32 bit ARM Linux

    For FreeBSD, Solaris, go to Unix Drivers download page

    Once downloaded, press Ctrl+Alt+F1 on your keyboard to switch to command console and login with your username and password. Remove previous Nvidia’s proprietary drivers if any:

    sudo apt-get purge nvidia-current

    You required to run command below to stop / close graphic session before installing process:

  • For Ubuntu LightDM (default):
    sudo service lightdm stop
  • For Gnome GDM:
    sudo service gdm stop
  • For Linux Mint MDM:
    sudo service mdm stop
  • Give permission to execute the downloaded installer:

    chmod +x ~/Downloads/NVIDIA-Linux-*-331.20.run

    Finally start the installer and follow on screen prompts:

    sudo sh ~/Downloads/NVIDIA-Linux-*-331.20.run

    Don’t remove the installer after installation, because if for some reason this driver does not work properly, you can remove Nvidia 331.20 via command below in TTY console:

    sudo sh ~/Downloads/NVIDIA-Linux-*-331.20.run --uninstall

    BitTorrent Sync reached 1.2.67, which improved speed with large files for Desktop users and added Android 4.4 support. PPA for Ubuntu 13.10, Ubuntu 14.04, Ubuntu 13.04, Ubuntu 12.10, Ubuntu 12.04, Linux Mint is ready and here I’ll show you how to install it.

    What’s New in BitTorrent Sync 1.2.67:

    For Desktop:

    • Improved speed with large files (in 1Gb LAN and on low-end CPU devices)
    • Restore modified files in read-only folder
    • API and UI-less mode
    • Advanced features available through API :
      • new secrets with support of read-only encrypted peers
      • synchronize selected files only

    For Android:

    • Android 4.4 support
    • Speed improvements
    • Redesigned Help pages
    • Various bug fixes

    Install BitTorrent Sync:

    This peer-to-peer file synchronization tool is available in launchpad PPA. Press Ctrl+Alt+T on your keyboard to open terminal. When it opens, run commands below one by one to install it:

    sudo add-apt-repository -y ppa:tuxpoldo/btsync
    
    sudo apt-get update
    
    sudo apt-get install -y btsync btsync-user

    Once installed, you can start the indicator and/or web interface from Unity Dash shortcuts.

    Zim is a graphical text editor used to maintain a collection of wiki pages. Each page can contain links to other pages, simple formatting and images. Pages are stored in a folder structure, like in an outliner, and can have attachments. Creating a new page is as easy as linking to a nonexistent page. All data is stored in plain text files with wiki formatting. Various plugins provide additional functionality, like a task list manager, an equation editor, a tray icon, and support for version control.

    Zim can be used to:

    • Keep an archive of notes
    • Take notes during meetings or lectures
    • Organize task lists
    • Draft blog entries and emails
    • Do brainstorming

    Zim handles several types of markup, like headings, bullet lists and of course bold, italic and highlighted. This markup is saved as wiki text so you can easily edit it with other editors. Because of the autosave feature you can switch between pages and follow links while editing without worries.

    zim desktop wiki in Ubuntu

    Install Zim Desktop Wiki:

    We can easily download & install latest Zim Desktop Wiki in Ubuntu 13.10, Ubuntu 13.04, Ubuntu 12.04, Ubuntu 12.10 and Linux Mint from the links below:

    Zim Desktop Wiki DEB & Source Code

    So far, the latest is Zim 0.60 which is also available in Ubuntu Software Center for Ubuntu 13.10 and higher.

    Audacious 3.4.2 has been released with annoying bugs fixed. This tutorial shows how to install it via PPA in Ubuntu 13.10 Saucy, Ubuntu 13.04 Raring, Ubuntu 12.04 Precise, Ubuntu 12.10 Quantal, Linux Mint and Elementary OS.

    Audacious fixed following bugs:

    • Opening an Internet channel takes too long at the first time
    • SDL error: Failed to open audio stream: XAudio2: XAudio2Create() failed at open..
    • incorrect playtime length
    • NULL pointer segfault due to vfs async race
    • some opus file won’t play
    • Time label shows wrong time if slider is dragged beyond its upper limit

    To get started installing Audacious 3.4.2, press Ctrl+Alt+T on your keyboard to open terminal. When it opens, run command below to add the PPA:

    sudo add-apt-repository -y ppa:nilarimogard/webupd8

    Then you can install it from Ubuntu Software Center after checking for updates. Or run commands below instead:

    sudo apt-get update; sudo apt-get install -y audacious audacious-plugins

    audacious 3.4.2 in ubuntu 13.10

    Giada is a minimal, hardcore audio tool for DJs and live performers. Just pick your sample, drop it in any channel, and start the show by using this tiny piece of software as a loop machine, drum machine, sequencer, live sampler, or effect (VST) host. Giada aims to be a compact and portable virtual device for production use and live sets.

    Giada 0.8.0 brings initial MIDI input support. It also fixes many annoying bugs and introduces some minor improvements.

    Changelog:

    • initial MIDI input support
    • Fix freeze when recording audio inputs on a second channel
    • Fix ‘R’ button to show up even if the channel has no actions
    • Fix weird drawings of keypress actions in action editor
    • Free channel: delete ‘R’ button as well
    • Shift+key does not kill loop mode channels in a wait status
    • Fix issue with ‘R’ button and newly added actions
    • Remove “left”/”right” labels from main buttons

    Download & Install Giada:

    First check your OS type under System Settings -> Details. Choose to download the DEB from the official links below:

    Giada for Linux, DEB (32 bit)

    Giada for Linux, DEB (64 bit)

    Then uncompress the package and click to open the .deb file in result folder with Ubuntu Software Center.

    Finally click install button. Once installed, start Giada from Unity Dash.

    The latest Linux Kernel LTS 3.10.18 has been released today. Similar to Kernel 3.11.7, this kernel brings lots of updates and bugfixes for USB, wireless drivers, ARM, ipv6, tcp. See the changelog for details.

    This tutorial shows you how to install / upgrade Linux Kernel 3.10.18 in Ubuntu 13.10 Saucy, Ubuntu 13.04 Raring, Ubuntu 12.10 Quantal, Ubuntu 12.04 Precise, Linux Mint and Elementary OS.

    To get started, press Ctrl+Alt+T on your keyboard to open terminal. When it opens:

    1. Run commands below one by one to download the DEBs:

    For 32 bit system:

    wget http://kernel.ubuntu.com/~kernel-ppa/mainline/v3.10.18-saucy/linux-headers-3.10.18-031018-generic_3.10.18-031018.201311040835_i386.deb
    
    wget http://kernel.ubuntu.com/~kernel-ppa/mainline/v3.10.18-saucy/linux-headers-3.10.18-031018_3.10.18-031018.201311040835_all.deb
    
    wget http://kernel.ubuntu.com/~kernel-ppa/mainline/v3.10.18-saucy/linux-image-3.10.18-031018-generic_3.10.18-031018.201311040835_i386.deb

    For 64 bit system:

    wget http://kernel.ubuntu.com/~kernel-ppa/mainline/v3.10.18-saucy/linux-headers-3.10.18-031018-generic_3.10.18-031018.201311040835_amd64.deb
    
    wget http://kernel.ubuntu.com/~kernel-ppa/mainline/v3.10.18-saucy/linux-headers-3.10.18-031018_3.10.18-031018.201311040835_all.deb
    
    wget http://kernel.ubuntu.com/~kernel-ppa/mainline/v3.10.18-saucy/linux-image-3.10.18-031018-generic_3.10.18-031018.201311040835_amd64.deb

    2. Once downloaded, both 32 bit and 64 bit system can use commands below to install them:

    sudo dpkg -i linux-headers-3.10.18-*.deb linux-image-3.10.18-*.deb

    Restart your computer and done!

    If for some reason, ths kernel does not work properly on your system. Remove Linux Kernel 3.10.18 via:

    sudo apt-get purge linux-headers-3.10.18-* linux-image-3.10.18-*

    Linux Kernel 3.11 series has reached v3.11.7. It’s recommended to upgrade as soon as possible if you’re on Kernel 3.11.

    Linux Kernel 3.11.7 has lots of updates and bugfixes for USB, wireless drivers, ARM and ext3/4. See the changelog.

    This tutorial shows you how to install / upgrade this Kernel in Ubuntu 13.10 Saucy, Ubuntu 13.04 Raring, Ubuntu 12.04 Precise, Ubuntu 12.10 Quantal, Linux Mint and Elementary OS.

    To get started, press Ctrl+Alt+T on your keyboard to open terminal. When it opens:

    1. Run commands below one by one to download DEBs for Kernel 3.11.7:

    For 32 bit system:

    wget http://kernel.ubuntu.com/~kernel-ppa/mainline/v3.11.7-saucy/linux-headers-3.11.7-031107-generic_3.11.7-031107.201311040853_i386.deb
    
    wget http://kernel.ubuntu.com/~kernel-ppa/mainline/v3.11.7-saucy/linux-headers-3.11.7-031107_3.11.7-031107.201311040853_all.deb
    
    wget http://kernel.ubuntu.com/~kernel-ppa/mainline/v3.11.7-saucy/linux-image-3.11.7-031107-generic_3.11.7-031107.201311040853_i386.deb

    For 64 bit system:

    wget http://kernel.ubuntu.com/~kernel-ppa/mainline/v3.11.7-saucy/linux-headers-3.11.7-031107-generic_3.11.7-031107.201311040853_amd64.deb
    
    wget http://kernel.ubuntu.com/~kernel-ppa/mainline/v3.11.7-saucy/linux-headers-3.11.7-031107_3.11.7-031107.201311040853_all.deb
    
    wget http://kernel.ubuntu.com/~kernel-ppa/mainline/v3.11.7-saucy/linux-image-3.11.7-031107-generic_3.11.7-031107.201311040853_amd64.deb

    2. Both 32 bit & 64 bit install them via:

    sudo dpkg -i linux-headers-3.11.7-*.deb linux-image-3.11.7-*.deb

    Once done, restart your computer.

    If for some reason it does not work properly for you, remove Linux Kernel 3.11.7 via:

    sudo apt-get purge linux-headers-3.11.7-* linux-image-3.11.7-*

    GIMP (GNU Image Manipulation Program), the popular image editing tool is now at version 2.8.8 stable. This tutorial shows how to install GIMP 2.8.8 via PPA in Ubuntu 13.10, Ubuntu 13.04, Ubuntu 12.04, Ubuntu 12.10, Linux Mint.

    Changes from GIMP 2.8.6 to GIMP 2.8.8:

    Core:

    • Make sure indexed images always have a colormap
    • Fix language selection via preferences on Windows
    • Don’t crash on setting a large text size

    GUI:

    • Keep the same image active when switching between MWM and SWM
    • Make sure all dockables are properly resizable (particularly shrinkable)
    • Add links to jump directly to Save/Export from the Export/Save
    • file extension warning dialogs

    Libgimp:

    • Fix GimpPickButton on OSX

    Plug-ins:

    • Properly document plug-in-autocrop-layer’s PDB interface
    • Fix importing of indexed BMPs

    General:

    • Fix lots of places to use GIO to get proper file sizes and times on windows
    • Add an AppData file for GIMP
    • Backport lcms2 support from master, because lcms1 is not getting bug fixes any longer
    • Lots of bug fixes
    • Lots of translation updates

    Install GIMP 2.8.8

    The latest DEB packages for Ubuntu >= 12.04 and Linux Mint >= 13 are in the process of being built, and will be appear soon available in GIMP PPA.

    To add the PPA, press Ctrl+Alt+T on your keyboard to open terminal. When it opens, run commands below:

    sudo add-apt-repository ppa:otto-kesselgulasch/gimp

    After that, you can install latest gimp from Ubuntu Software Center after checking for updates. Or run commands below instead:

    sudo apt-get update; sudo apt-get install -y gimp

    Can’t wait? You can also build the gimp 2.8.8 source code by yourself.

    Linus Torvalds finally announced Linux Kernel 3.12. Here’re the new features and how to install / upgrade to Kernel 3.12 in Ubuntu 13.10, Ubuntu 12.04, Ubuntu 12.10 and Linux Mint.

    Linus Torvalds wrote on the mailing list (read the announcement):

    I was vacillating whether to do an rc8 or just cut the final 3.12, but
    since the biggest reason to *not* do a final release was not so much
    the state of the code, as simply the fact that I’ll be traveling with
    very bad internet connection next week, I didn’t really want to delay
    the release. Sure, we had a number of driver reverts, and there was an
    annoying auto-NUMA memory corruption fix series, but none of it was
    really worth delaying 3.12 for.

    But the fact that I’m going to be (effectively) off-line next week
    means that I’m *not* opening the merge window for 3.13 yet …

    What’s New in Linux Kernel 3.12:

  • The Radeon open-source kernel graphics driver has improved Dynamic Power Management, but it won’t be until Linux 3.13 where Radeon DPM is enabled by default along with HDMI audio.
  • A brand new DRM/KMS driver in the form of the Snapdragon MSM driver written by Rob Clark to go along with his reverse-engineered Freedreno driver for Qualcomm Snapdragon/Adreno graphics.
  • Run-time GPU power management so NVIDIA Optimus systems can dynamically power on/off the secondary GPU.
  • Experimental DRM render nodes support done by David Herrmann over the summer.
  • AMD Berlin APU support as the first APU built upon AMD’s Heterogeneous System Architecture (HSA).
  • The EXT4 file-system now supports aggressive extent caching and better recovery capabilities.
  • Random F2FS, XFS, and Btrfs file-system improvements. This kernel does deliver on disk improvements.
  • zRAM has been promoted out of the staging area of the kernel. ZRAM supports a compressed block device in RAM to avoid paging to disk and is mostly of benefit for systems with limited amounts of system memory.
  • Various staging driver updates and sound driver work and other glorious work.
  • Install / Upgrade Linux Kernel 3.12

    The DEBs for Linux Kernel 3.12 has been made into kernel-ppa. Press Ctrl+Alt+T on keyboard to open terminal and follow the steps below to download and install them.

    1. Download DEBs for this kernel:

    For 32-bit Ubuntu, Linux Mint and alternatives run commands below one by one:

    wget http://kernel.ubuntu.com/~kernel-ppa/mainline/v3.12-saucy/linux-headers-3.12.0-031200-generic_3.12.0-031200.201311031935_i386.deb
    
    wget http://kernel.ubuntu.com/~kernel-ppa/mainline/v3.12-saucy/linux-headers-3.12.0-031200_3.12.0-031200.201311031935_all.deb
    
    wget http://kernel.ubuntu.com/~kernel-ppa/mainline/v3.12-saucy/linux-image-3.12.0-031200-generic_3.12.0-031200.201311031935_i386.deb

    For 64-bit Ubuntu, Linux Mint and alternatives run commands below one by one:

    wget http://kernel.ubuntu.com/~kernel-ppa/mainline/v3.12-saucy/linux-headers-3.12.0-031200-generic_3.12.0-031200.201311031935_amd64.deb
    
    wget http://kernel.ubuntu.com/~kernel-ppa/mainline/v3.12-saucy/linux-headers-3.12.0-031200_3.12.0-031200.201311031935_all.deb
    
    wget http://kernel.ubuntu.com/~kernel-ppa/mainline/v3.12-saucy/linux-image-3.12.0-031200-generic_3.12.0-031200.201311031935_amd64.deb

    2. For both 32-bit & 64-bit install the Kernel via:

    sudo dpkg -i linux-headers-3.12.0-*.deb linux-image-3.12.0-*.deb

    Once installed, restart your computer and done.

    If for some reason the new kernel does not work properly, run command below to remove Linux Kernel 3.12:

    sudo apt-get purge linux-image-3.12.0-* linux-headers-3.12.0-*