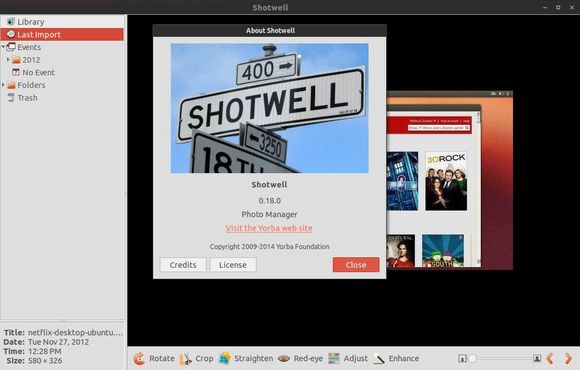
Archives For November 30, 1999

This simple tutorial will show you how to install the Spotify Client on Linux Mint 13, 14, 15 from the official repository.

Spotify is a digital music-streaming service that gives you on-demand access to millions of songs on all your devices. It works on Windows, Mac, Linux, Android, iOS, Windows Phone 7/8 (7 no longer updated), BlackBerry (GSM only), Symbian.

To install it from the official repository, press Ctrl+Alt+T to open terminal.

1.) Run below command to add the repository to Linux Mint:

sudo sh -c 'echo "deb http://repository.spotify.com stable non-free" >> /etc/apt/sources.list.d/spotify.list'

2.) Install the public key:

sudo apt-key adv --keyserver hkp://keyserver.ubuntu.com:80 --recv-keys D2C1988

3.) Finally update package lists and install spotify:

sudo apt-get update; sudo apt-get install spotify-client

Enjoy!

How to Install uTorrent on Linux Mint 15

Last updated: July 16, 2013

Here’s a beginner’s guide to install and setup uTorrent server on Linux Mint 15. There’s no command in tutorial, just a few clicks!

1.) First, download uTorrent server for Linux: www.utorrent.com/downloads/linux. You may check 32-bit or 64-bit by going to Start Menu -> System Tools -> System Settings -> System Info. Where “Distribution Linux Mint 15: olivia (i686)” means 32-bit. x86_64 means 64-bit system.

2.) Decompress the package in Downloads folder, then navigate to the extracted folder.

3.) Right-click on utserver and goto its Properties window. Make sure “Allow executing file as program” is checked.

4.) Before running the utserver, install ssl share libraries from Start Menu -> Software Manager.

5.) Now double-click on utserver file to start it. That’s right you see nothing happens because the server is running as a background program.

6.) Open your file browser and go to http://localhost:8080/gui/. Type:

username: admin
password: leave password empty

Done!

Install uTorrent on Ubuntu 13.10

Last updated: November 3, 2013

This tutorial shows you how to easily install uTorrent sever on Ubuntu and Linux Mint. There’s no command, just a few clicks!

First, download uTorrent server: http://www.utorrent.com/downloads/linux. Check 32-bit or 64-bit by top-right corner shutdown menu (gear icon) -> About This Computer.

After downloading, navigate to the package in Nautilus file browser. Then decompress it.

Go into the extracted folder, right-click on utserver and select Properties.

Make sure that the box before “Allow execute as a program” is checked.

Before starting this service, search for and install libssl0.9.8 (SSL shared libraries) from Ubuntu Software Center.

NOTE: If you’re on 64-bit Ubuntu, press Ctrl+Alt+T and install the libssl0.9.8 with command below in terminal to fix utserver not launching problem:

sudo apt-get install libssl0.9.8:i386

Then double click utserver to start uTorrent server (or run ~/Downloads/utorrent-server-v3_0/utserver command to start it). That’s right you see nothing happens because the server is running as a background program.

Launch your web browser and go to http://localhost:8080/gui/. Type:

username: admin
password: leave password empty

You’re done!

This brief tutorial will show you how to install the Rigs of Rods on Ubuntu 13.04 Raring and Linux Mint using the official repository.

Rigs of Rods (“RoR”) is an open source multi-simulation game which uses soft-body physics to simulate the motion and deformation of vehicles. The game was built using a specific soft-body physics engine called Beam, which simulates a network of interconnected nodes (forming the chassis and the wheels) and gives the ability to simulate deformable objects. With this engine, vehicles and their loads flex and deform as stresses are applied. Crashing into walls or terrain can permanently deform a vehicle.

The official ppa repository for Ubuntu 12.04 has been announced. So far it supports Ubuntu 13.04, 12.10, 12.04 and 11.10. Here’s how to install it:

Press Ctrl+Alt+T to open terminal, run command to add the ppa:

sudo add-apt-repository ppa:aapo-rantalainen/rigsofrods

Then update package lists and install the package:

sudo apt-get update; sudo apt-get install rigsofrods

Discuss: http://www.rigsofrods.com/threads/97932-Announcement-PPA-for-Ubuntu-12-04

Ubuntu desktop keeps going blank or dark when it is idled for a certain time. That’s not good if you’re watching movies on screen. Here’s the guide to stop your screen being turned off.

Open Brightness & Lock from Unity dash search results, or from System Settings

You’ll see the window as the below picture shown. Select “Never” in the drop-down box after where it says “Turn screen off when inactive for”.

That’s it! There also provides options to disable lock screen and dimming.

Enjoy!

How to Disable Screen Lock on Ubuntu 13.04

Last updated: July 15, 2013

When your computer is idled for a certain time, Ubuntu goes into screensaver and lock it self. You’re prompt to enter password to continue your session. Below steps will show you how to prevent your screen from locking on Ubuntu 13.04 Raring Ringtial.

To get started, open terminal from unity dash or by pressing Ctrl+Alt+T

Copy and paste below command and hit enter to run:

gsettings set org.gnome.desktop.screensaver lock-enabled false

That’s it! The unlock dialog has gone

Create Desktop Shortcuts on Ubuntu 13.04 Unity

Last updated: November 1, 2013

This brief tutorial is going to show you how to create application shortcuts on Unity Desktop in Ubuntu 13.04 Raring. You can just drag and drop icons to your desktop, but it won’t always work. Some of them have the permission issues which can be fixed by below steps:

UPDATES: For Ubuntu 13.10 Saucy, copy and paste the programs .desktop file from /usr/share/applications to user’s Desktop folder

1.) Search for applications from Unity Dash, drag and drop them onto desktop:

2.) After added all app icons to your desktop, press Ctrl+Alt+T to open a terminal.

Change the ownership of them. My username is handbook, in below command change it to yours.

sudo chown handbook ~/Desktop/*.desktop

Make sure all icons are executable:

sudo chmod +x ~/Desktop/*.desktop

You are done. Enjoy!

The latest stable kernel 3.10.1 has been released. All users of the 3.10 kernel series are urged to upgrade as soon as possible. Here is what’s new and how to install / upgrade kernel 3.10.1 on your system.

Linux kernel 3.10.1 is a small release that includes a few updated drivers, fixes for the HPFS and NFS file systems, as well as other small changes. See the announcement.

Below steps shows you how to install or upgrade this kernel:

1.) Press Ctrl+Alt+T to open terminal. Run below command to download the Deb packages

For 32-bit:

wget http://kernel.ubuntu.com/~kernel-ppa/mainline/v3.10.1-saucy/linux-headers-3.10.1-031001-generic_3.10.1-031001.201307131550_i386.deb http://kernel.ubuntu.com/~kernel-ppa/mainline/v3.10.1-saucy/linux-headers-3.10.1-031001_3.10.1-031001.201307131550_all.deb http://kernel.ubuntu.com/~kernel-ppa/mainline/v3.10.1-saucy/linux-image-3.10.1-031001-generic_3.10.1-031001.201307131550_i386.deb

For 64-bit:

wget http://kernel.ubuntu.com/~kernel-ppa/mainline/v3.10.1-saucy/linux-headers-3.10.1-031001-generic_3.10.1-031001.201307131550_amd64.deb http://kernel.ubuntu.com/~kernel-ppa/mainline/v3.10.1-saucy/linux-headers-3.10.1-031001_3.10.1-031001.201307131550_all.deb http://kernel.ubuntu.com/~kernel-ppa/mainline/v3.10.1-saucy/linux-image-3.10.1-031001-generic_3.10.1-031001.201307131550_amd64.deb

2) Install the Debs:

sudo dpkg linux-headers-3.10.1*.deb linux-image-3.10.1*.deb

After installation, update grub via:

sudo update-grub