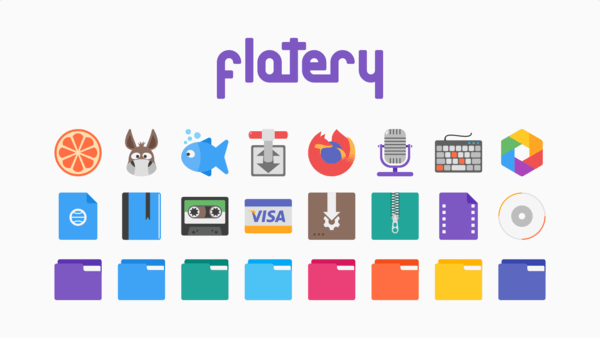
Looking for some different icons for your Ubuntu Desktop? Flatery is a flat style icon theme for Linux.
Flatery is a full desktop icons set licensed under the CC BY-NC-SA 3.0. It includes icons for app shortcuts, file folders, menu buttons, and in application icons.
The icon theme is also available in different colors (each contains light & dark mode), including Black, Blue, Gray, Green, Indigo, Mint, Orange, Pink, Sky, Teal, and Yellow.
Download & Install the Icon Theme:
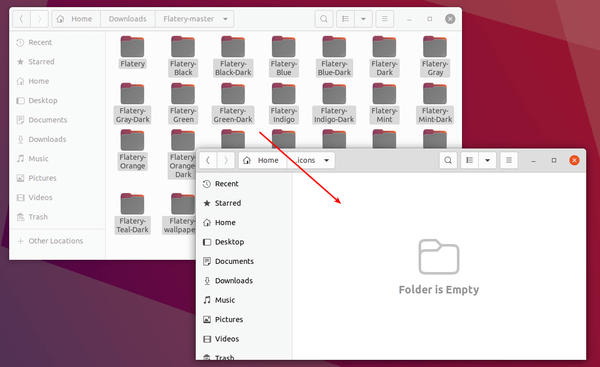
The theme is available to download at github project page.
You can simply click the link below to grab the zip archive:
Then extract the zip archive in your file browser. Install it by moving all sub-folders to:
.icons – For single use. In Home folder press Ctrl+H to show hidden file folders. And create .icons folder if it does not exit.
.local/share/icons – For KDE desktop.
/usr/share/icons – For global use. Gnome users can open the folder via nautilus /usr/share/icons command.
Finally apply the icon theme by Gnome Tweak Tool under Appearance tab:
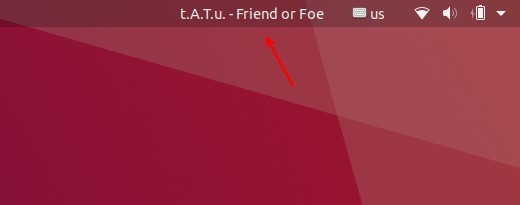
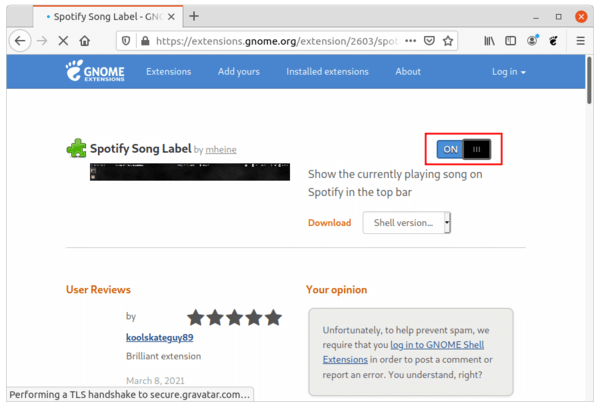
For Spotify users, you can add the currently playing song name displayed on the top panel in Ubuntu 20.04 via Gnome Extension.
There’s a Gnome Shell Extension called ‘Spotify Song Label’, which adds the current playing song as well as artist in the top bar.
It can be placed in the left, center, or right of the top panel, with options to change left / right padding. And it has ability to toggle between Spotify window and last focused app.
How to Install Spotify Song label Extension:
1.) Firstly make sure chrome-gnome-shell package is installed. And for the configuration tool (see the previous picture), install the gnome-shell-extension-prefs package:
Got a video playing upside down? Here’s an easy way to rotate it via a single command in Ubuntu.
There are a few video players, e.g., SMPlayer, support for rotating by 90 degrees clockwise or counter-clockwise during video playback.
If you want to make it permanent by exporting video rotated, besides using a heavy video editing tool, e.g., Pitivi and Openshot, the single command in this tutorial may help.
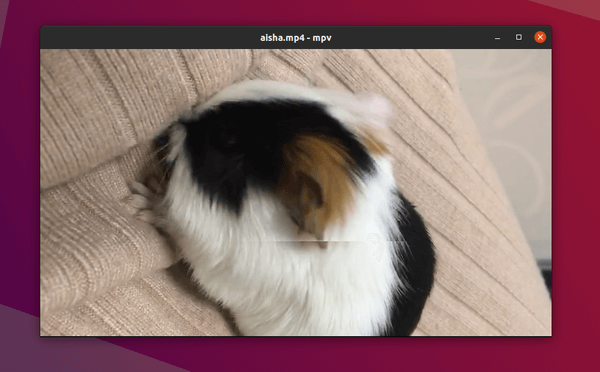
An upside down video
1. Install FFmpeg:
Firstly install FFmpeg if you don’t have it. FFmpeg is a large suite of libraries and programs for handling multi-media files and streams.
It is very popular and most likely already installed on your system, if you have any audio, video, and other multimedia relevant applications installed.
To make sure, open terminal (Ctrl+Alt+T) and run command:
2. Command to rotate video:
Now you can run the single command to rotate a video:
Before this command, you may first navigate to the video folder either via cd command (e.g., cd ~/Videos), or in file browser go to the folder and right-click blank area and select “Open in Terminal”.
In the command, the number in “transpose=1” can also be:
0 – means rotate by 90 degrees counterclockwise and flip
1 – means rotate by 90 degrees clockwise
2 – means rotate by 90 degrees counterclockwise
3 – means rotate by 90 degrees clockwise and flip
(Thanks to Roman Sheydvasser) Add -c copy (or -codec copy) will copy all the frames instead of doing decode -> filter -> encode process. It will speed up the command quite a lot!
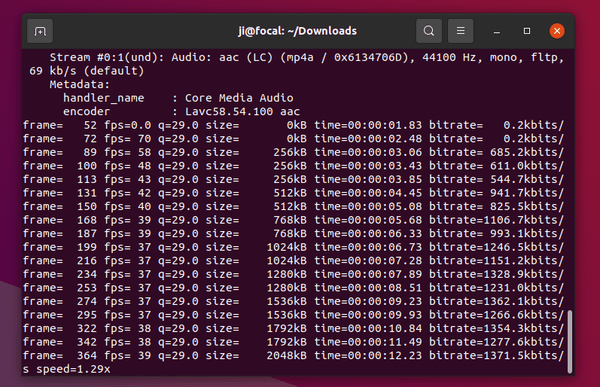
This command however will re-encode the video. Depends on the video size and your CPU, the process may take a few minutes.
Optional
The last command can take quite a few minutes since it needs to re-encode the video. As a workaround, user can use this command instead to do the rotation in the metadata.
Photoflare, simple but powerful image editor inspired by PhotoFiltre, released version 1.6.7 with translation updates and paint tool improvements.
Photoflare is an open-source cross-platform image editor written in C++ with Qt5 framework. It has a PhotoFiltre style user interface, and features basic image editing capabilities, paint brushes, image filters, colour adjustments and more advanced features such as Batch image processing.
The new 1.6.7 was released with new translations: Indonesian and Spanish. And it removed incorrect image extension check, instead it now shows the actual file type in the Image Properties dialog.
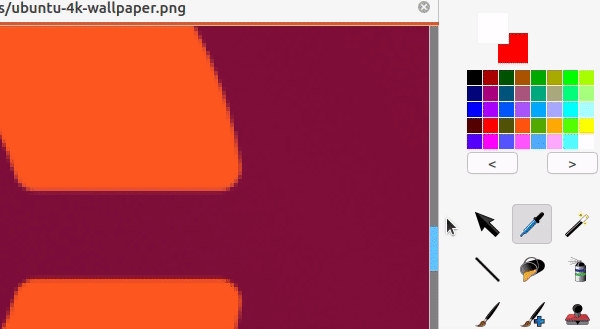
And the new version added offsets to the Paint Bucket tool and the Color picker tool. Previously, they select from the center of the cursor location.
Color Picker Before 1.6.7
Color Picker after
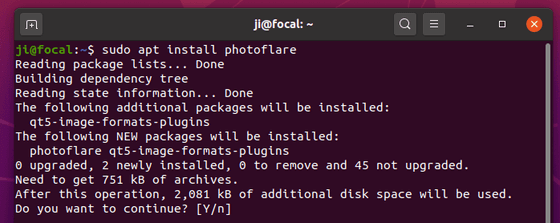
How to Install Photoflare in Ubuntu:
The official Ubuntu PPA has made the latest packages for Ubuntu 20.04, Ubuntu 20.10, and Linux Mint 19.x / 20.
1.) To add the PPA, open terminal from system application launcher and run command:
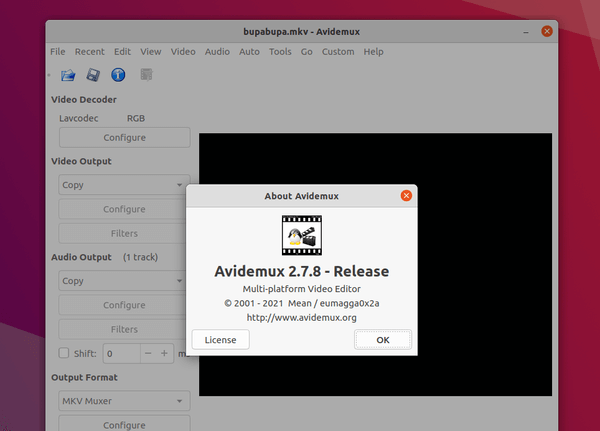
The free open-source Avidemux video editor 2.7.8 was released with many new features. Here’s how to install it in Ubuntu via PPA.
The new release features many new video filters. A dedicated MOV muxer is available to replace MOV muxing mode within the MP4 muxer; A subset of color info relevant for HDR support is retained in copy mode when both input and output video are stored in Matroska / WebM containers.
The indexer in the MPEG-TS demuxer now detects resolution changes in MPEG-2 and H.264 streams.
YUV varieties of the lossless Ut Video codec are supported via bundled FFmpeg library. Multi-threaded video decoding is now available for the bundled FFmpeg.
Other changes include:
Uncompressed 24-bit audio support.
Limited support for 7.1 channel layout.
Decode and stream copy support for XLL substream in DTS audio tracks.
Audio properties updated on resuming playback.
An option to keep the identity of markers A and B instead of swapping them automatically
Maximum resolution support increased to 8192×8192
FFmpeg bundle updated to 4.2.4
MP4 muxer accepts now MPEG-1 and MPEG-2
Extended Python interface, and more.
How to Install Avidemux 2.7.8 in Ubuntu:
The editor offers official non-install .appimage package, which is available to download at the link below
Grab the appimage, go to file Properties -> Permissions and make it executable, finally right-click and run the file to launch the Avidemux video editor.
For those prefer the classic apt method, I’ve uploaded the .deb packages into the unofficial PPA, available for Ubuntu 18.04, Ubuntu 20.04, and Ubuntu 20.10.
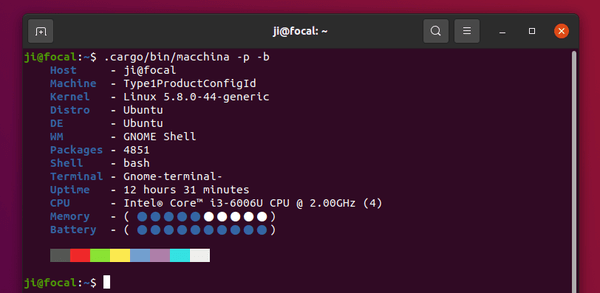
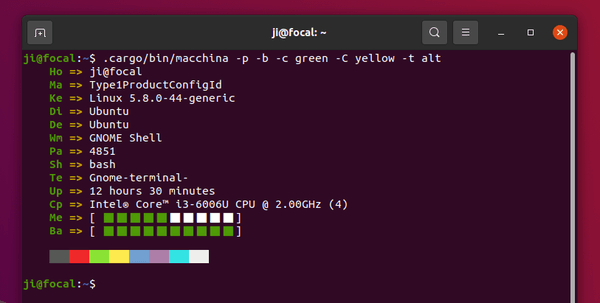
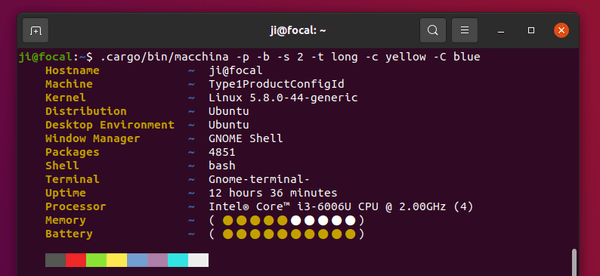
Macchina is another command line tool to fetch basic system information in Linux, similar to Neofetch, but focus on performance and minimalism.
The software is written in Rust, and it displays basic system information, including hostname, manufacturer, kernel version, uptime, desktop environment, processor, memory / battery status, and more. Macchina is pretty fast, it runs 8.53 ± 0.72 times faster than neofetch!
Macchina is a new project in active development. By adding --theme or -t flag, you can specify one of the supported themes. They are so far: default, alt, and long.
And you can specify the key color (--color / -c), the separator color (--separator-color / -C), let it show palette (-p) and display memory usage and battery percentage as bars (-b).
It also has options to change left padding and spacing.
How to Install Macchina in Ubuntu:
The software so far is available to install via crates.io.
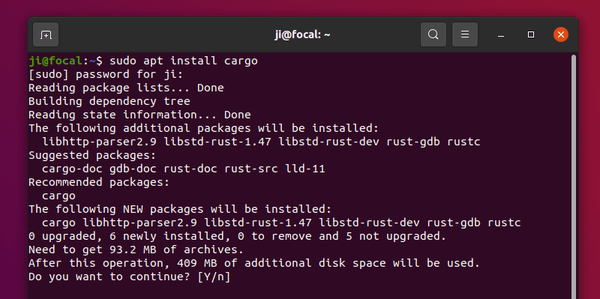
1. Firstly open terminal and run command to install cargo:
sudo apt install cargo
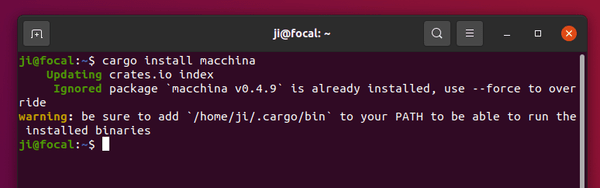
2. Then install the tool via command:
cargo install macchina
Once installed, you can run ~/.cargo/bin/macchina with your desired flags.
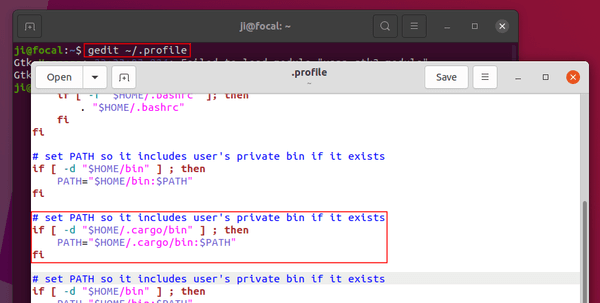
If you prefer to use command macchina instead, run command to edit user’s profile:
gedit ~/.profile
And add following lines to add “.cargo/bin” directory to your PATH:
# set PATH so it includes user's private bin if it exists
if [ -d "$HOME/.cargo/bin" ] ; then
    PATH="$HOME/.cargo/bin:$PATH"
fi
Log out and back in to apply the new PATH.
Uninstall Macchina:
To remove the software via cargo, run command:
cargo uninstall macchina
If you don’t use cargo, simply remove it via command:
The default size of files and folders in Nautilus file browser does not meet you need? It’s easy to change it in all current Ubuntu releases with Gnome.
Though you can’t find how to configure it either in the System Settings or Gnome Tweaks, Ubuntu do provide an option to set an even larger or smaller icon size, and here’s the quick tip shows you how.
Change File & Folder Size via Single Command:
If you’re familiar with Linux command, you can run a single command to change the size.
Since Nautilus displays files and folders in either icon view or list view, the command can be either:
1.) Change icon size in icon view:
gsettings set org.gnome.nautilus.icon-view default-zoom-level 'large'
Here value ‘large’ can be changed to: ‘small’, ‘standard’, ‘larger’, or ‘largest’.
2.) Change icon size in list view:
gsettings set org.gnome.nautilus.list-view default-zoom-level 'large'
Here value ‘large’ can be changed to: ‘small’, ‘standard’, or ‘larger’.
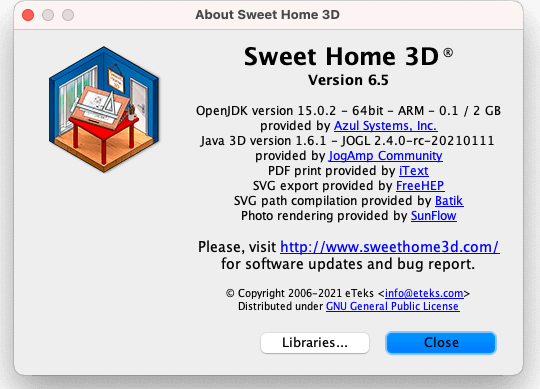
Free interior design software SweetHome3D 6.5 was released a few day ago. Here’s how to install it in Ubuntu 20.04, Ubuntu 20.10, Linux Mint 19.x, and 20.x.
According to the release note, SweetHome3D 6.5 features:
Azul OpenJDK 11.0.10 bundle for 64-bit Windows to get better HiDPI support.
Azul OpenJDK 15.0.2 bundle for Mac OS X ≥ 10.9, which supports notarization and the Apple new M1 processor.
JOGL library updated to 2.4 RC 20210111
Display Java runtime and Java 3D version in About dialog.
New options in Furniture and Textures Library Editors
Add a new example to the gallery, shows a house with pillars built on a small hill along a lake.
How to Install Sweet Home 3D 6.5 in Ubuntu:
First the software offers Linux portable as well as jar package in sourceforge page.
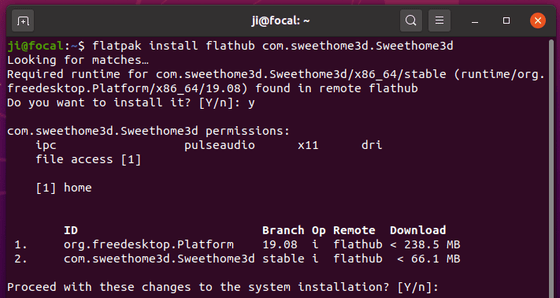
Sweet Home 3D is also available to install and keep updated via Flathub repository.
1. Setup Flatpak framework in Ubuntu:
First open terminal from system application launcher. When it opens, run command to install flatpak:
sudo apt install flatpak
Then add the flathub repository by running command:
The official LibreOffice Fresh PPA finally made the LibreOffice 7.1 packages for Ubuntu 20.04 and Ubuntu 20.10.
LibreOffice, Ubuntu’s default office suite, released version 7.1 almost a month ago. The new release features new Additions Dialog to better integrate extensions, new User Interface select dialog, new widget with styles preview in tabbed Notebookbar.
LibreOffice Math gets full support of HTML colors, and new examples in Element pane. The Writer application features faster find/replace, a new Style Inspector, and better detection of Unicode in documents. LibreOffice Impress gains new animation presets and adds “Pause/Resume” and “Exit” buttons.
How to Install LibreOffice 7.1 via Ubuntu PPA:
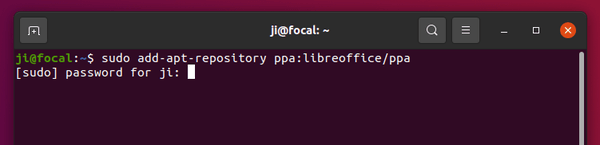
For Ubuntu 20.04, Ubuntu 20.10, Linux Mint 20, firstly open terminal and run command to add the PPA:
sudo add-apt-repository ppa:libreoffice/ppa
Type user password (no asterisk feedback) when it prompts and hit Enter to continue.
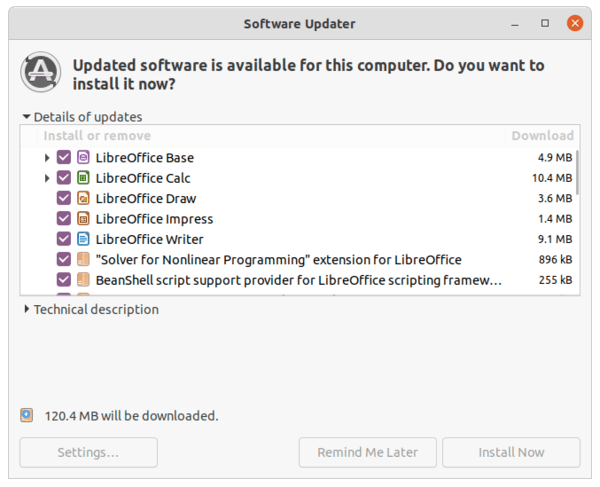
After that, open Software Updater and you’ll see the package updates for office suite after checking for updates.
Just install all the updates and done!
How to Restore:
For any reason, you can restore the office suite to the original pre-installed version, by running command in terminal to purge the PPA:
For those prefer installing apps via the classic apt method, you can now install Blender 2.92 via PPA in Ubuntu 20.04, Ubuntu 20.10, and also Ubuntu 16.04, Ubuntu 18.04.
The open-source 3D modeller software Blender 2.92 was released a few days ago. Features “a completely new workflow for editing meshes, new physics simulation methods, faster Cycles rendering, better compositing with Eevee, and so much more.”
Blender offers official Snap package, which runs in sandbox, and is available to install directly from Ubuntu Software. As well, a Linux portable package is available to download in its website. For those prefer the classic deb packages, Thomas Schiex’s PPA has made it for Ubuntu 20.04 and Ubuntu 20.10 uses.
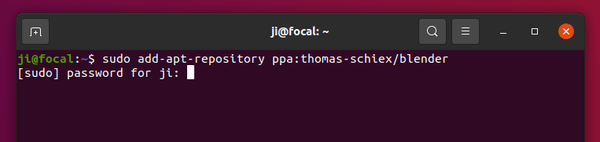
1. Add Blender PPA:
Firstly open terminal from system application launcher. When it opens, run command to add the PPA:
sudo add-apt-repository ppa:thomas-schiex/blender
Type user password, no asterisk feedback, when it asks and hit Enter to continue.
The PPA does not support for Ubuntu 16.04 and Ubuntu 18.04, but another PPA do! It however requires a few more PPA for updated libaries, see the PPA description for detail.
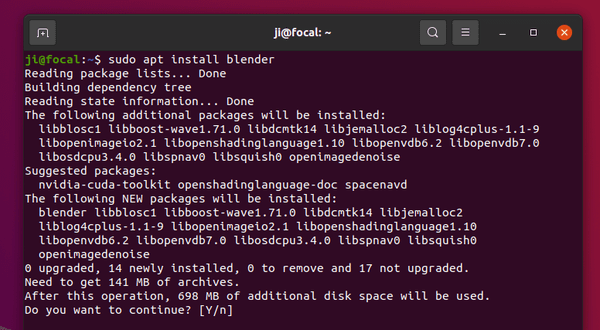
2. Install or update Blender:
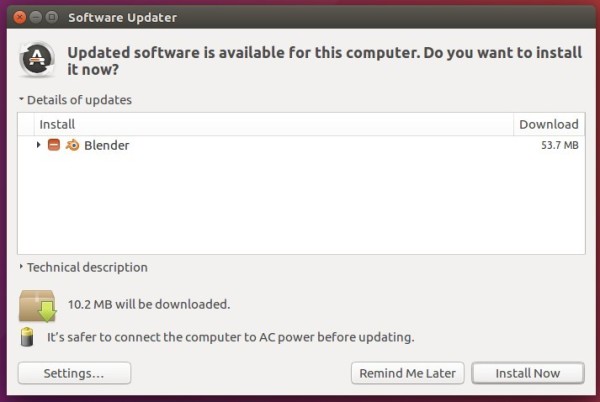
If you have an old version of Blender packages installed via apt method, open Software Updater (Update Manager) and update the software:
Or run commands in terminal to install / update the package:
sudo apt update

sudo apt install blender
3. Fix missing libLLVM-6.0.so.1 issue:
Blender 2.92 does not start in my Ubuntu 20.04, and it outputs an error when running from terminal:
/usr/lib/blender/blender: error while loading shared libraries: libLLVM-6.0.so.1: cannot open shared object file: No such file or directory
This can be easily fixed by running command:
sudo apt install libllvm6.0
Not sure if the problem exists in Ubuntu 20.10, but libllvm6.0 is not available in the Groovy repository.
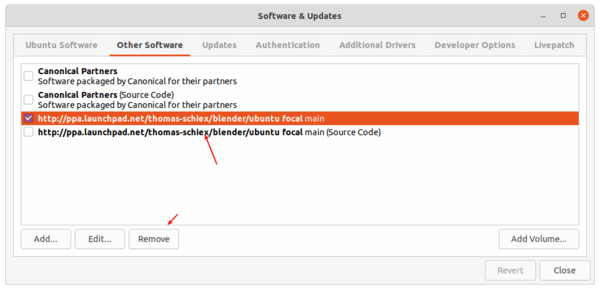
Uninstall:
To remove the Ubuntu PPA, open Software & Updates and go to Other Software tab, then remove the relevant line.
To remove Blender installed via apt, run command in terminal: