![]()

The default Gedit text editor in Ubuntu 18.04 always opens file in a new window, even though there’s already an existing instance. And there’s no easy option to change the behavior.
Thanks to fossfreedom, you can re-built Gedit pakages so to always open files in new tabs in the same gedit window.
1. Open terminal either via Ctrl+Alt+T shortcut key or by searching for ‘terminal’ from software launcher.
2. When terminal opens, paste the command below and hit run to install the building tools:
sudo apt-get install devscripts build-essential fakeroot


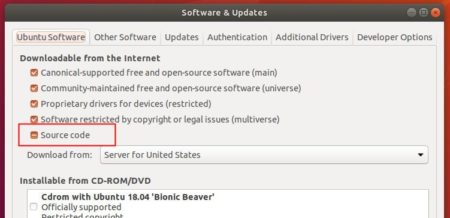
3. Launch Software & Updates, and click enable download Source code from Ubuntu repositories.

4. In user downloads, create a build folder and navigate to the directory.
cd ~/Downloads/ && mkdir build && cd build


5. Download the gedit source code via command:
sudo apt-get update; apt-get source gedit
Type your password (no asterisks feedback) when it prompts


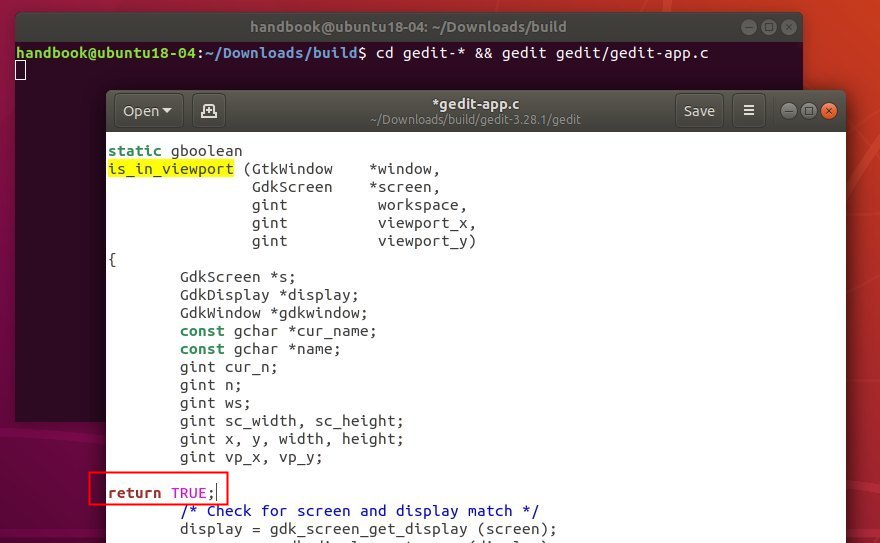
6. Next edit the source file gedit-app.c:
cd gedit-* && gedit gedit/gedit-app.c
When the file opens, add new line return TRUE; as the picture shows (line 320 for Ubuntu 18.04):
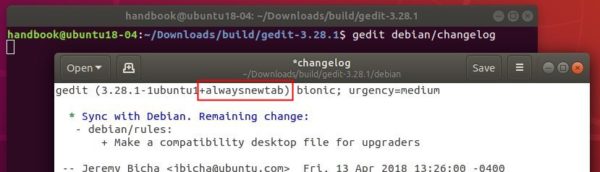
7. Give a unique package name by editing the debian/changelog file.
gedit debian/changelog

8. Finally rebuild the gedit via commands:
sudo apt-get build-dep gedit

debuild -i -us -uc -b
The commands will take a few minutes building the gedit text editor packages.
9. At last, install the new packages via command and enjoy!
cd ~/Downloads/build/ && sudo dpkg -i gedit*.deb


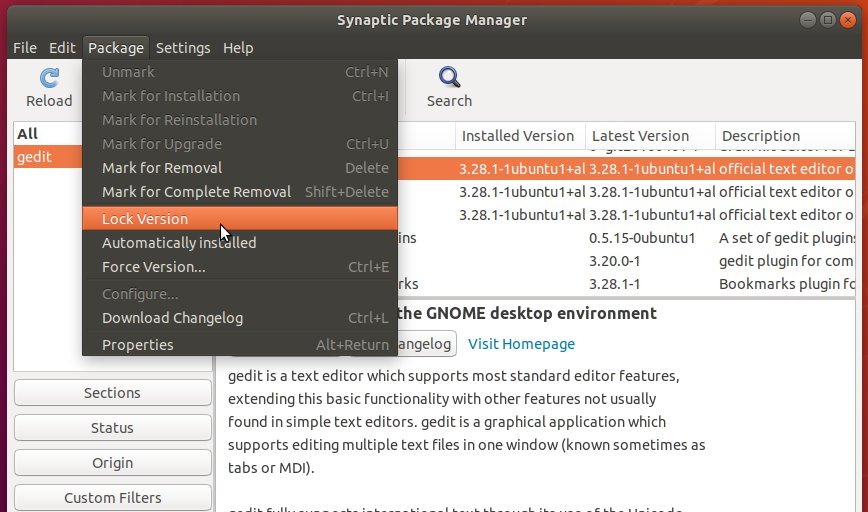
In addition, you may lock the changes so it won’t be overwritten after installing system updates.
And it can be done easily via Synaptic package manager (available in Ubuntu Software). Simply search for ‘gedit’ and choose lock version for gedit and gedit-common packages one by one.