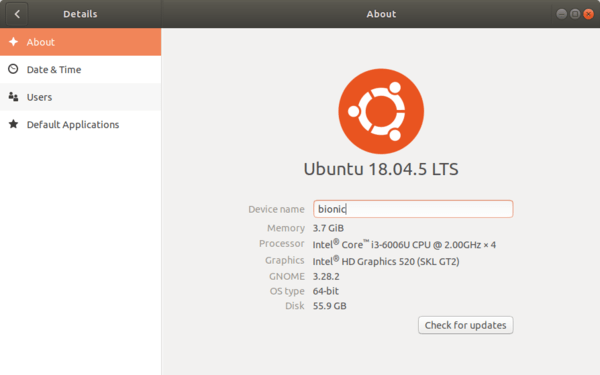
The Ubuntu team announced the release of Ubuntu 18.04.5 and Ubuntu 16.04.7 last night.
While Ubuntu 16.04.7 comes with only security package updates and other fixes, Ubuntu 18.04.5 includes an updated hardware enablement stack from Ubuntu 20.04.
With Linux Kernel 5.4, WiFi should work out-of-the-box in Ubuntu 18.04.5 with RTL8723DE (tests in my HP 246 G6 laptop).
Also users of Ubuntu 16.04 LTS will be offered an automatic upgrade to 18.04.5 via Update Manager.
Get Ubuntu 18.04.5 / Ubuntu 16.04.7
For Ubuntu 18.04.4 and previous, you’ll be automatically update to v18.04.5 after installing all system updates.
If you were updated from the original Ubuntu 18.04, and you never installed the hardware enablement stack, you may run command to get the latest kernel:
The third point release, Ubuntu 18.04.3 LTS, was released yesterday. Here’s how to upgrade from Ubuntu 18.04 to Ubuntu 18.04.3 and install Linux Kernel 5.0 and updated Xorg display server stack.
The Ubuntu team is pleased to announce the release of Ubuntu 18.04.3 LTS(Long-Term Support) for its Desktop, Server, and Cloud products, as well as other flavours of Ubuntu with long-term support.
Like previous LTS series, 18.04.3 includes hardware enablement stacks for use on newer hardware. This support is offered on all architectures and is installed by default when using one of the desktop images.
Ubuntu Server defaults to installing the GA kernel; however you may select the HWE kernel from the installer bootloader.
…
Ubuntu 18.04 users can easily upgrade to Ubuntu 18.04.3 by installing all available updates via Software Updater (Update Manager).
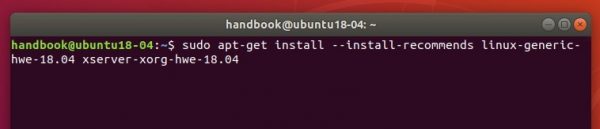
However, if you installed Ubuntu 18.04 LTS using the .iso images released in April 2018, you may kept back with Linux 4.18 and old Xorg display server.
To install the updated kernel 5.0, Xorg, and graphics drivers, you have to opt-in to “hardware enablement” (HWE). Simply open terminal (Ctrl+Alt+T) and run command:
If you want to revert back to previous Linux Kernel, simply reboot and in Grub boot-loader select boot-up “Advanced -> Linux 4.18.x”. And remove Linux 5.0 (if you want) via command in terminal:
Ubuntu 18.04.2 was released a day ago with new HWE stack (newer kernel and X packages backported from Ubuntu 18.10), here’s how to install (or remove) it in current Ubuntu 18.04 machines.
While regular system update does only upgrade to Ubuntu 18.04.2, you need to manually do following steps to install the new hardware enablement stacks.
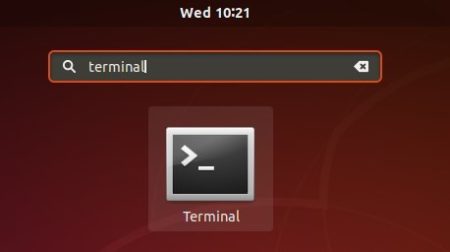
1. Open terminal either via Ctrl+Alt+T keyboard shortcut or by searching for ‘terminal’ from application menu:
2. When terminal opens, run command to install the new Hardware Enablement stacks, including Linux Kernel 4.18, and X stack back-ported from Ubuntu 18.10:
sudo apt install xserver-xorg-hwe-18.04
Type user password (no asterisk feedback) and hit Enter to continue.
Once installed, restart your computer and enjoy!
How to Remove New LTS Enablement Stack in Ubuntu 18.04:
For choice, you can easily remove the new X stack by running following command in terminal:
sudo apt remove xserver-xorg-*-hwe-18.04
Then you have to install back the old X packages via command:
This simply tutorial shows how to add a ‘Show Desktop‘ icon into the left dock panel in Ubuntu 21.10, Ubuntu 20.04, or Ubuntu 18.04 with default GNOME desktop.
The ‘Show Desktop‘ button was dropped since Ubuntu switched to Gnome 3 Desktop. For those using desktop app shortcuts, it’s useful to have a button to toggle display blank desktop quickly. And to add it back, you can manually create shortcut icon to do the trick and add it to panel (dock).
As you may know, the keyboard shortcuts Ctrl+Alt+d or Super+d do the function hide or show all opened app windows. And following steps will create a ‘show desktop’ shortcut icon simulates the keyboard press (Super+d) via the xdotool tool.
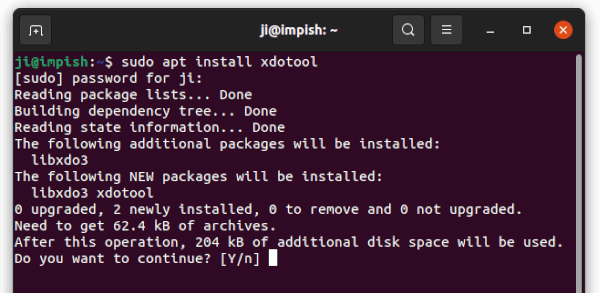
1. Install xdotool:
Xdotool is a command-line X11 automation tool, that allows to simulate keyboard input and mouse activity, move and resize windows, etc.
To install it, open terminal either by pressing Ctrl+Alt+T key combination on keyboard, or by searching from the activities overview screen. When terminal opens, paste the command below into it and hit run:
sudo apt-get install xdotool
Type your user password (no asterisk feedback) when it prompts and answer y to confirm.
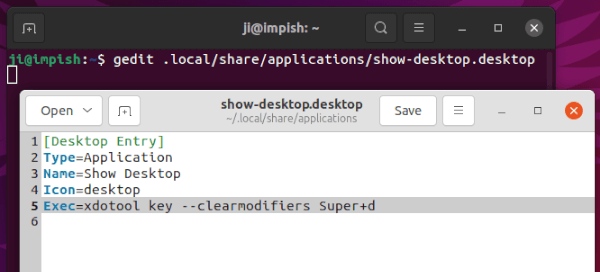
2. Create a shortcut icon for Show Desktop:
Most Linux distributions identify app shortcut icons via .desktop file under “/usr/share/applications” for global or ‘.local/share/applications’ for local user only.
To create an app shortcut in the case, run command in terminal:
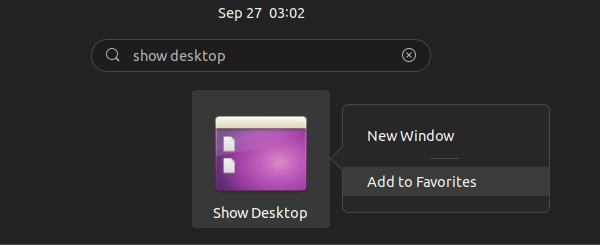
After created the shortcut, either press Windows (or Super) key on keyboard or click upper-left corner ‘Activities’ to bring up the overview screen.
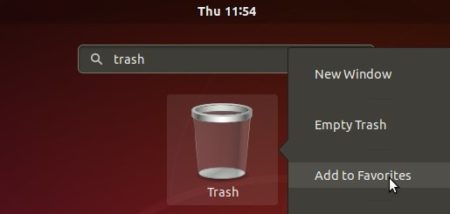
Then search for ‘Show Desktop’ (without quotes), right-click on the result icon and select ‘Add to Favorites’.
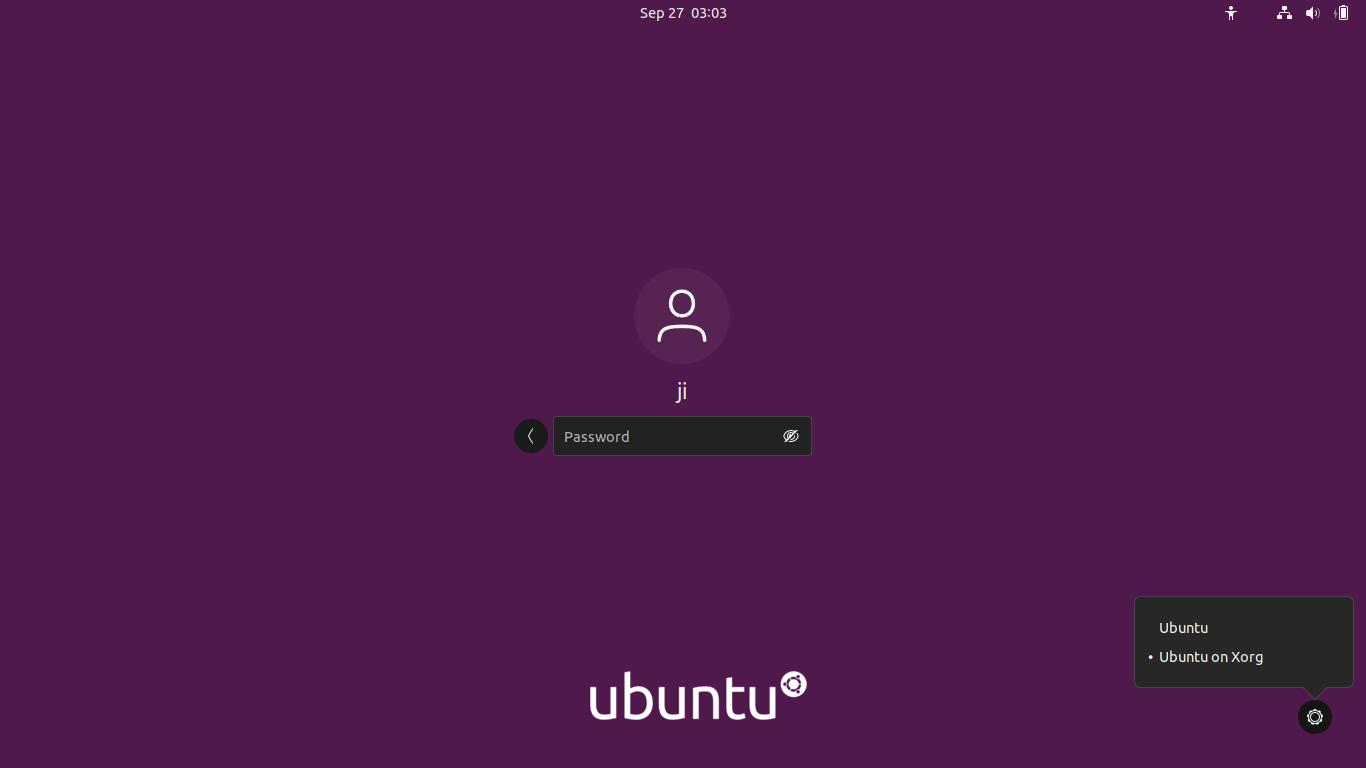
Finally, you’ll see the ‘Show Desktop’ icon on the dock panel. As mentioned, it works only on Xorg session. For Ubuntu 21.04 and higher, you may need to choose ‘Ubuntu on Xorg‘ from the login screen via the gear button.
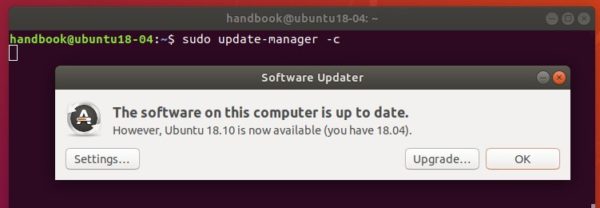
Ubuntu 18.10 Cosmic Cuttlefish was finally released today. Here’s how to upgrade from Ubuntu 18.04 to Ubuntu 18.10.
Ubuntu 18.10 is a short-term release with 9 months support. It features Linux 4.18 kernel, X.Org Server 1.20.1, Mesa 18.2.2, and new default desktop theme ‘Yaru’.
Preparation:
Before getting started, you need to do some preparations:
Backup your bookmarks, documents, and other important data.
It’s recommended to remove proprietary drivers and use the open-source drivers instead.
Purge or remove third-party PPA repositories (Software & Updates -> Other Software)
To upgrade to Ubuntu 18.10:
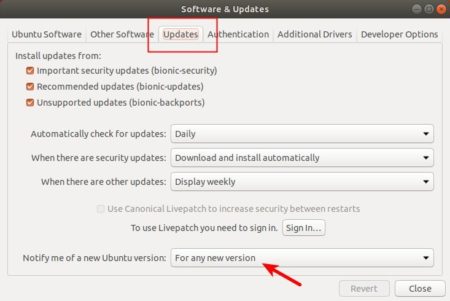
1. Open Software & Updates and navigate to Updates tab.
Then select “For any version” from the drop-down menu of ‘Notify me of a new Ubuntu version’
2. Install all available system updates by running commands in terminal (Ctrl+Alt+T):
sudo apt-get update && sudo apt-get dist-upgrade
Type your user password (no asterisks feedback) when it prompts and hit Enter to continue.
3. Start Update Manager and you’ll see Ubuntu 18.10 available for upgrade (Restart first if required):
sudo update-manager -c
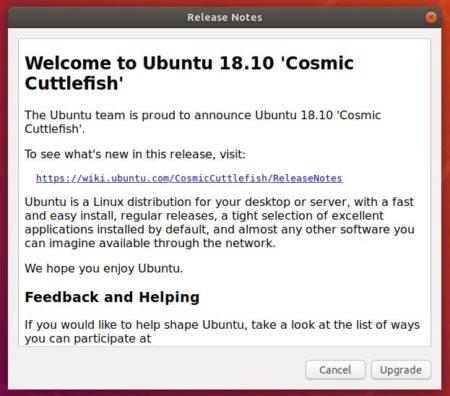
4. Click the Upgrade button and confirm in the next release note dialog:
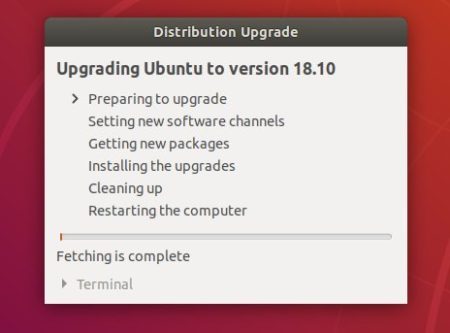
The upgrading process starts and it may take a few hours depends on your device and internet speed.
This quick tutorial is for those who want to pin application shortcut icons to the default Gnome Desktop in Ubuntu 18.04, while you can’t drag and drop icons from applications menu to the desktop.
1. First, open Gnome Tweaks (if not available, install it via Ubuntu Software) and navigate to Desktop tab and enable ‘Show icons’ on desktop.
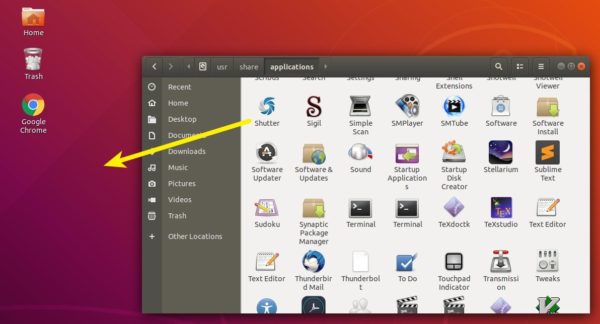
2. Open Files (Nautilus file browser) and navigate to Other Locations -> Computer -> usr -> share -> applications.
There drag and drop any application shortcut to the desktop.
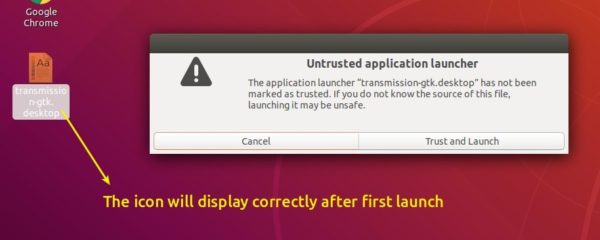
Click to run the desktop icon, and select ‘Trust and Launch’. The shortcut icon will display correctly once the application launches.
To remove a desktop shortcut, simply move the icon to trash. Only the shortcut will be removed, not the original item.
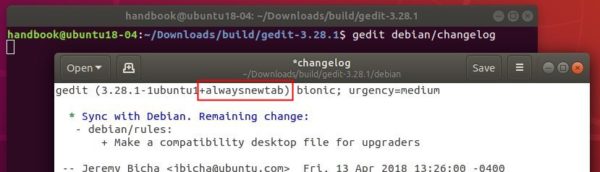
The default Gedit text editor in Ubuntu 18.04 always opens file in a new window, even though there’s already an existing instance. And there’s no easy option to change the behavior.
Thanks to fossfreedom, you can re-built Gedit pakages so to always open files in new tabs in the same gedit window.
1. Open terminal either via Ctrl+Alt+T shortcut key or by searching for ‘terminal’ from software launcher.
2. When terminal opens, paste the command below and hit run to install the building tools:
The commands will take a few minutes building the gedit text editor packages.
9. At last, install the new packages via command and enjoy!
cd ~/Downloads/build/ && sudo dpkg -i gedit*.deb
In addition, you may lock the changes so it won’t be overwritten after installing system updates.
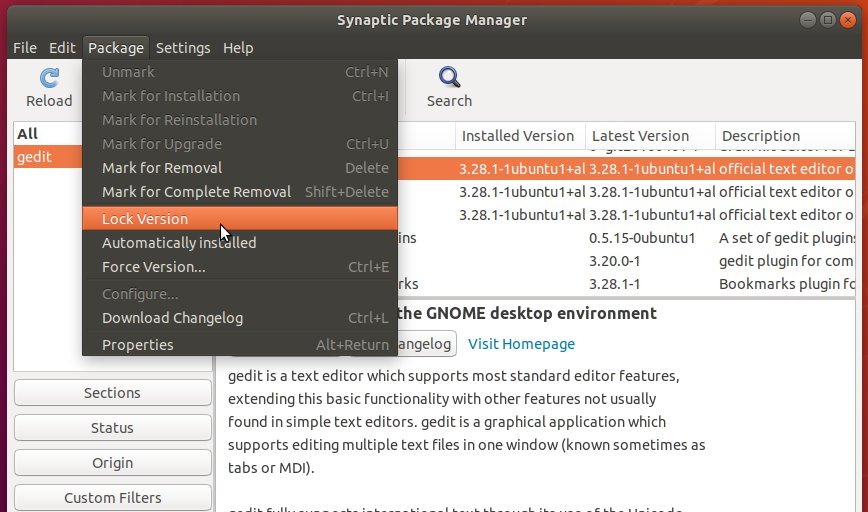
And it can be done easily via Synaptic package manager (available in Ubuntu Software). Simply search for ‘gedit’ and choose lock version for gedit and gedit-common packages one by one.
While the trash icon does not have ‘Add to Favorites‘ context menu option, here’s how to manually add a trash can icon to the left launcher in Ubuntu 18.04 Gnome Shell.
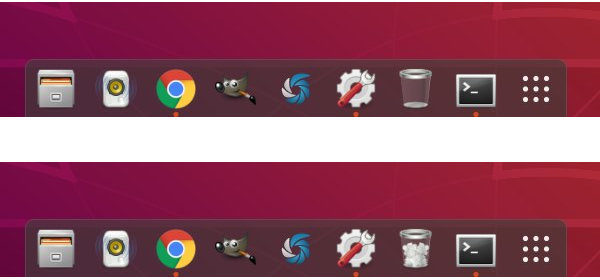
First see the result effect (in the picture, the left panel was replaced by Dash to Dock extension):
1. Open terminal either via Ctrl+Alt+T shortcut key, or by searching for ‘terminal’ from app launcher.
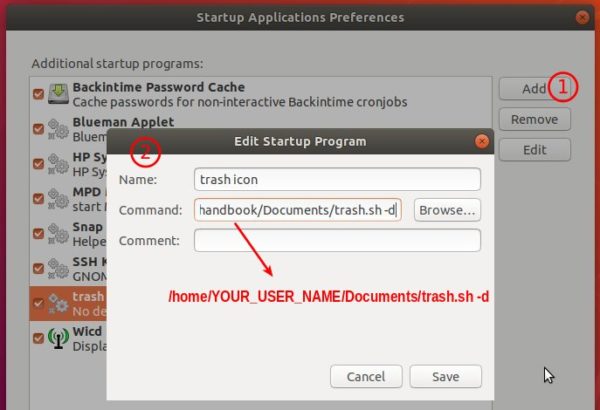
2. Run command to create and edit an empty file called trash.sh:
gedit ~/Documents/trash.sh
When the file opens, paste following lines and save it.
#!/bin/bash
icon=$HOME/.local/share/applications/trash.desktop

while getopts "red" opt; do
	case $opt in
    r)
	if [ "$(gio list trash://)" ]; then
		echo -e '[Desktop Entry]\nType=Application\nName=Trash\nComment=Trash\nIcon=user-trash-full\nExec=nautilus trash://\nCategories=Utility;\nActions=trash;\n\n[Desktop Action trash]\nName=Empty Trash\nExec='$HOME/Documents/trash.sh -e'\n' > $icon
	fi
	;;
    e)
	gio trash --empty && echo -e '[Desktop Entry]\nType=Application\nName=Trash\nComment=Trash\nIcon=user-trash\nExec=nautilus trash://\nCategories=Utility;\nActions=trash;\n\n[Desktop Action trash]\nName=Empty Trash\nExec='$HOME/Documents/trash.sh -e'\n' > $icon
	;;
    d)
	while sleep 5; do ($HOME/Documents/trash.sh -r &) ; done
	;;
  esac
done
3. Make the script file executable and run it via the 2 commands:
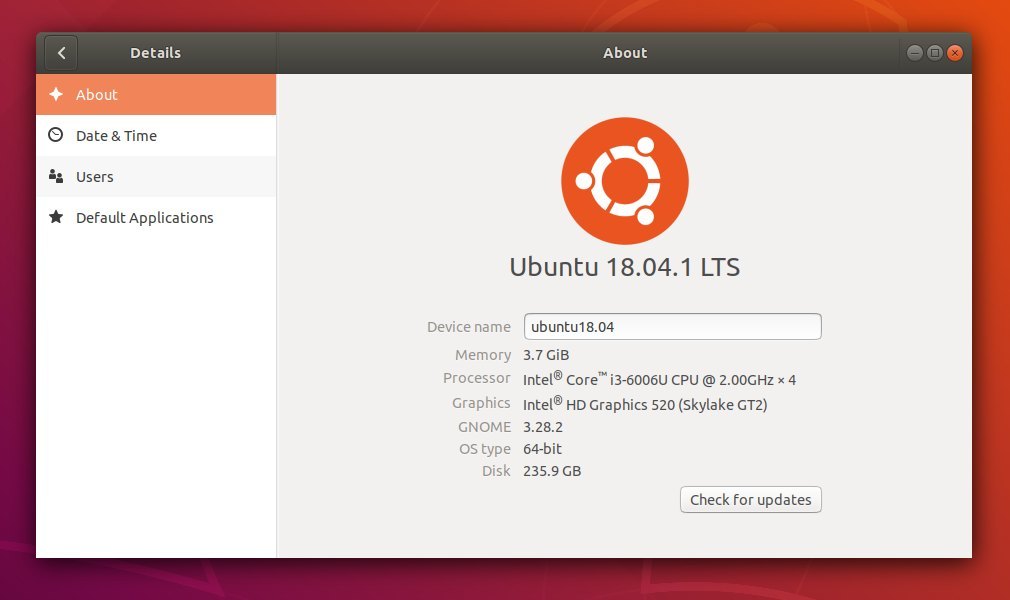
The first point release of Ubuntu 18.04 LTS was finally released.
Except for Ubuntu 18.04.1 Desktop, Server, and Cloud, Ubuntu Budgie 18.04.1 LTS, Kubuntu 18.04.1 LTS, Ubuntu MATE 18.04.1 LTS, Lubuntu 18.04.1 LTS, Ubuntu Kylin 18.04.1 LTS, and Xubuntu 18.04.1 LTS are also now available.
Ubuntu 18.04.1 come with updated Kernel and hardware support, many sever and cloud related fixes, installation and upgrade bug-fixes, and desktop fixes that include:
Make audio work on Lenovo machines with dual audio codecs
Upgrade Gnome Shell, GDM, and some other core apps to 3.28.2
Fix login fails (blank purple screen and mouse pointer only)
Ubuntu Software improvements for Snap packages.
New thunderbolt panel in System Settings (under Devices)
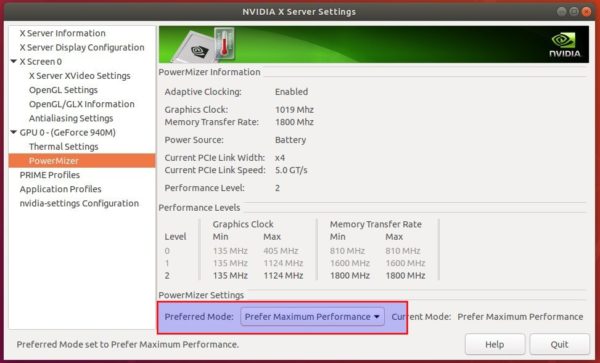
For Ubuntu 18.04 users plagued by screen tearing issue while using NVIDIA proprietary drivers, this quick tutorial may help you via enable PRIME Synchronization on Optimus.
Screen tearing usually happens on Ubuntu Linux laptop that uses Prime to switch between NVIDIA and Intel drivers.
1. Open terminal (either via Ctrl+Alt+T or by searching for ‘terminal’ from software launcher) and run command to create a new config file: