The latest SMPlayer 14.9 has been released recently with Youtube playback fixed. The official PPA is ready for Ubuntu 14.10, Ubuntu 14.04, and Ubuntu 14.04.
SMPlayer is a free and open-source GUI for MPlayer based on QT. It features audio and video filters & equalizer, multiple speed playback, configurable subtitles (Internet fetch), build-in Radio, TV, and Youtube browser support.
The new version 14.9 was released recently on September 7, 2014. According to the release note, the new release brings:
a new fix for Youtube playback
improved the option to search for subtitles
ability to shut down the computer after playback.
Install / Upgrade SMPlayer in Ubuntu:
The new release has been made into the PPA, available for Ubuntu 14.10, Ubuntu 14.04, Ubuntu 12.04 and derivatives.
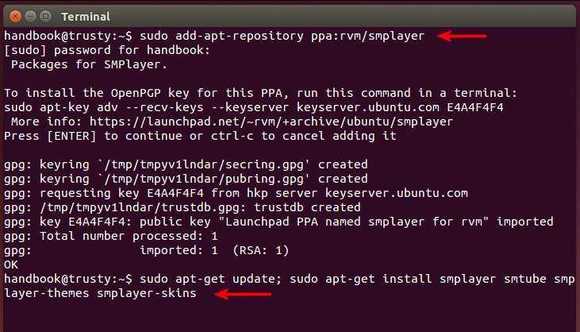
To add the PPA, press Ctrl+Alt+T on keyboard to open terminal. When it opens, run:
sudo add-apt-repository ppa:rvm/smplayer
After that, update the system package lists and install the player:
This quick tutorial shows you how to install UberWriter, a free word processor for markdown, via the official PPA in Ubuntu 14.04.
UberWriter is free and open source word processor, text editor for Ubuntu with markdown support. It provides a very clean interface with out of box spellcheck.
The UI now is based on GTK3 with client-side decorations support. If offers Focus, Fullscreen, Dark, and preview mode and allows to search and replace texts.
Through pandoc, it is possible to export to PDF, HTML, ODT and even more formats through the Advanced Export option.
Watch the video to see it in action:
Install UberWriter in Ubuntu:
UberWriter is available in Ubuntu Software Center, but it costs $5.
For the latest release and receiving future updates, the developer offers a launchpad PPA for Ubuntu 14.04. The PPA also provides old versions for Ubuntu 13.10, Ubuntu 12.04.
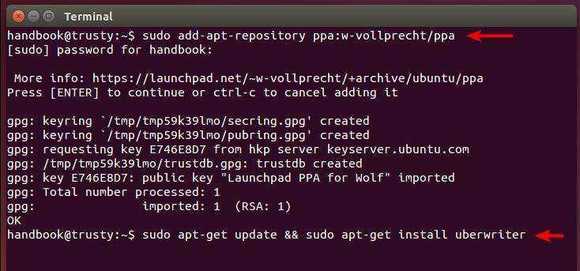
Press Ctrl+Alt+T to open the terminal. When it opens, paste the commands below and run one by one:
Above commands will add the developer’s PPA and install UberWriter in your system for free.
Note: UberWriter uses client-side decorations. The Unity integration is not entirely done yet. (Adwaita theme looks much better and inconsolata is missing in the dependencies.)
This quick tutorial shows you how to install the latest AVR Downloader/UploaDEr 6.1 in Ubuntu 14.04 while Software Center provides an old version.
AVRDUDE, stands for AVR Downloader/UploaDEr, is software for programming Atmel AVR Microcontrollers. It provides a command-line interface for all downloading and uploading features. Supports a wide range of programming hardware, from cheap ISP plugs that connect the AVR’s ISP interface directly to a computer’s parallel port or serial port. Supports Intel Hex, Motorola S-Record, and raw binary files for input and output.
The latest version 6.1 was released with below changes:
Atmel EDBG protocol support added (JTAGICE3, XplainedPro, Atmel-ICE)
Atmel DFU, using FLIP protocol version 1 (AT90USB and ATmega*U* devices), or version 2 (Xmega devices) support.
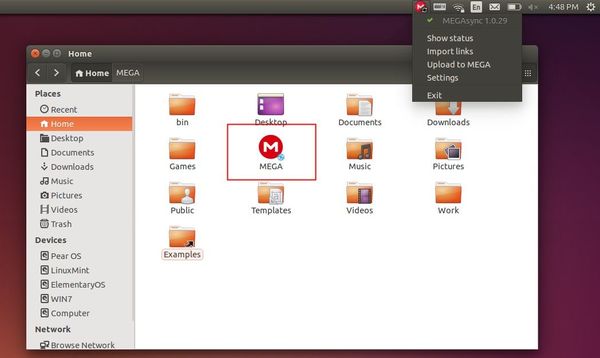
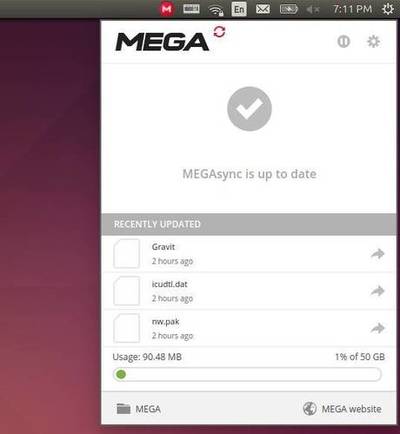
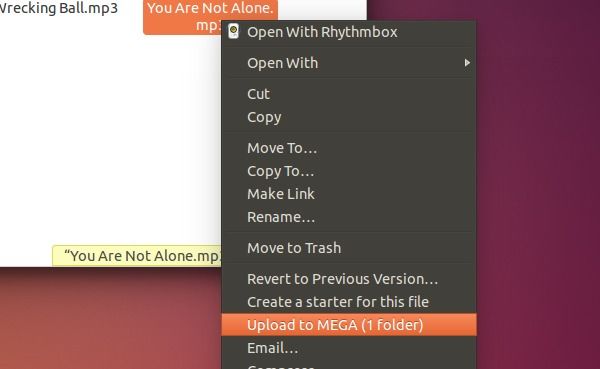
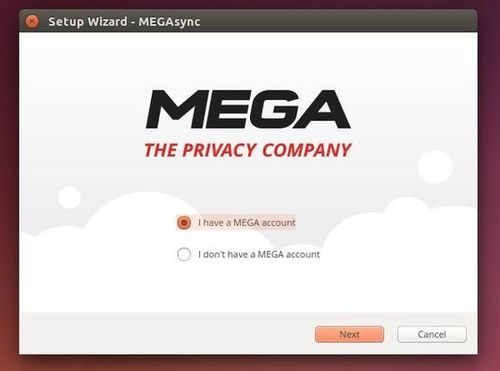
MEGA, a cloud storage and file hosting service, now provides an official sync client for Linux Desktop. So far, Ubuntu 14.04, Ubuntu 12.04, Ubuntu 13.10, Ubuntu 12.10 and Nautilus integration are supported.
MEGA features that all files are encrypted client-side using the AES algorithm before they are uploaded. Since Mega does not know the encryption keys to uploaded files, they cannot decrypt and view the content. It provides 50 GB of storage space are available for free and up to 4 TB for paid accounts.
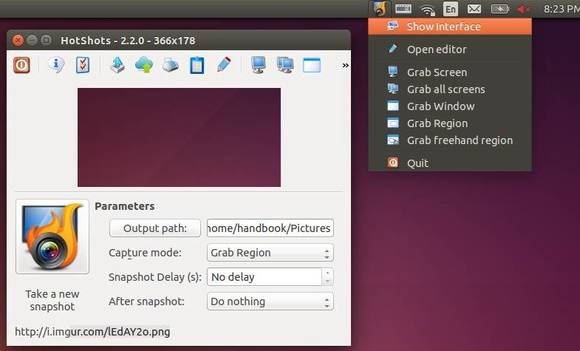
HotShots, a screenshot and annotation tool, now is at version 2.2.0. PPA has updated for Ubuntu 14.10, Ubuntu 14.04, Ubuntu 12.04 and derivatives.
Hotshots is a screenshot tool with some editing features. It is particularly suitable for writing documentation (as used in the following chapters) but you can use it to highlight some details on a map image or what ever you want.
Besides basic screen capturing and editing features, HotShots allows to send image directly to printer or to web services, such as FTP, imgur.com, imageshack.us, canardpc.com, freeimagehosting.net.
HotShots Main window and Unity indicator
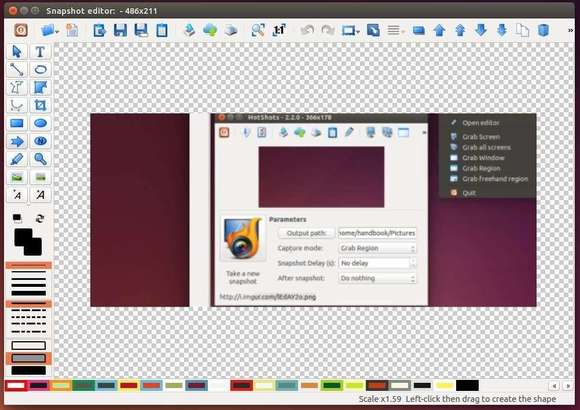
HotShots Editor
HotShots is a good and lightweight alternative to Shutter except:
Undo/Redo buttons are grayed out.
Does not support Dropbox.
Install HotShots 2.2.0:
Press Ctrl+Alt+T on keyboard to open the terminal. When it opens, paste the commands below and run one by one:
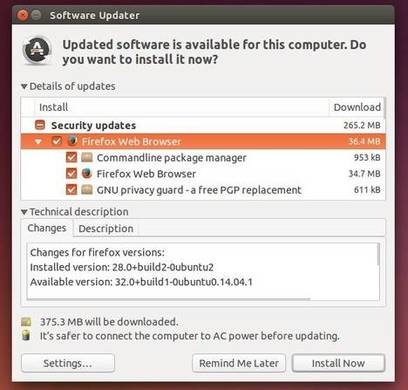
Mozilla Firefox has just released version 32.0 with improved performances and a few fixes. Canonical has made this release into the updates & security repositories for Ubuntu 14.04 and Ubuntu 12.04.
The latest Firefox 32 brings was released on September 2, with faster HTTP caching and public key pinning support enabled.
Hidden nodes displayed differently in the markup-view
New Web Audio Editor
Code completion and inline documentation added to Scratchpad
Mac OS X: fixed cmd-L does not open a new window when no window is available
Fixed text Rendering Issues on Windows 7 with Platform Update KB2670838 (MSIE 10 Prerequisite) or on Windows 8.1
Various security fixes
Upgrade to Firefox 32 in Ubuntu:
For Ubuntu, open Software Updater (or Update Manager for Ubuntu 12.04) from Unity dash. After checking for updates, you’ll see the latest Firefox available in the list.
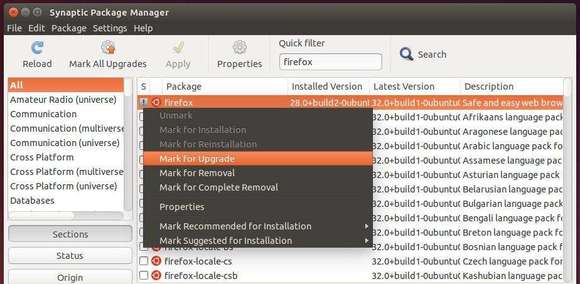
You can also upgrade Firefox in Ubuntu and its derivatives using Synaptic Package Manager (available in Software Center) after clicked the Reload button.
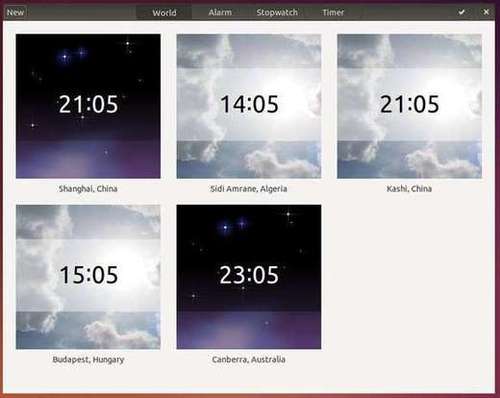
In Ubuntu 14.04 and Ubuntu 14.10, some Gnome applications use client-side decorations which don’t work properly in the default Unity Desktop.
The applications with client-side decorations look broken in Unity and they are unresizable. Here are some examples:
Gnome Clock in Ubuntu 14.04
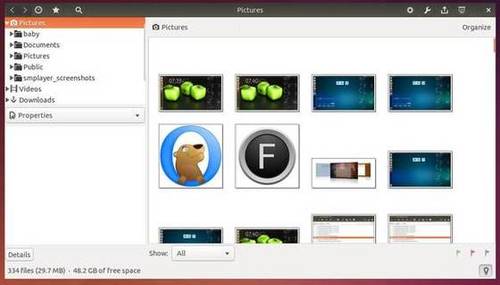
The Latest gthumb 3.3.2 (gthumb from Ubuntu repositories is old and does not use CSD)
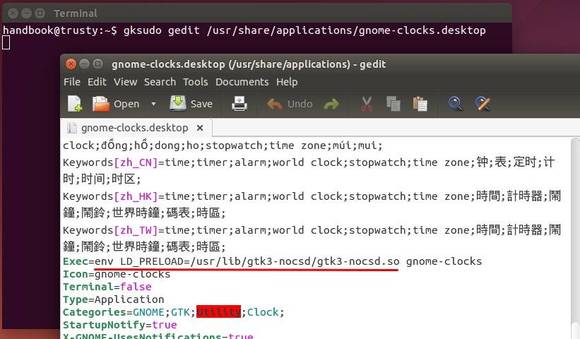
gtk3-nocsd, a hack by one of the LXDE founders, is a small module used to disable the client side decoration of gtk+ 3. It works on most, but not all CSD applications.
After disabled client side decoration, above applications will look like:
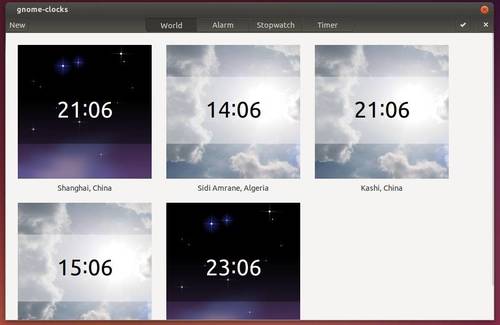
Gnome Clock with CSD disabled (Picture was taken in Gnome-Shell)
gthumb with CSD disabled
How to Install & Use gtk3-nocsd
This module has been made into Webupd8 PPA, available for Ubuntu 14.10 and Ubuntu 14.04.
Press Ctrl+Alt+T on keyboard to open the terminal. When it opens, paste the commands below and run one by one:
This short tutorial is going to show you how to disable / remove the login drumbeat sound in Ubuntu 14.04 LTS.
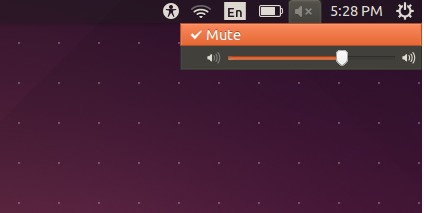
The easiest way to get rid of this annoying sound is mute the volume via the top-right indicator icon when you’re at the login screen. It won’t affect the system volume after you logged in.
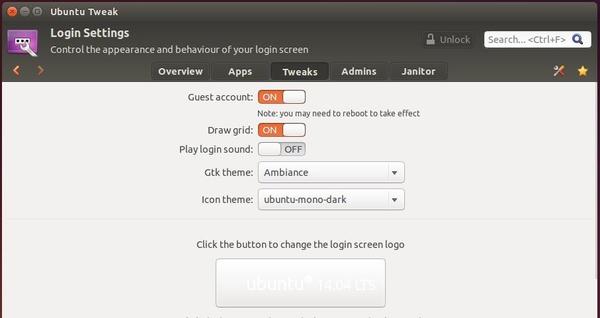
If don’t want to log out right away, you can toggle the login sound via a graphical tool called Ubuntu Tweak.
Download the Ubuntu Tweak (.deb package) from the link below and double-click to open it with Ubuntu Software Center and finally install it.
Once installed, open Ubuntu Tweak and go to Tweaks -> Login Settings. You’ll see the switch to turn on/off ‘Play login sound’. (click the Unlock button before doing any changes)
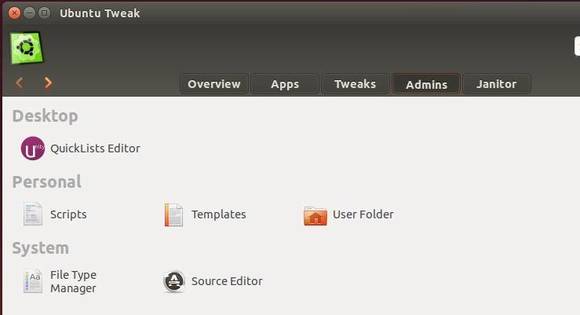
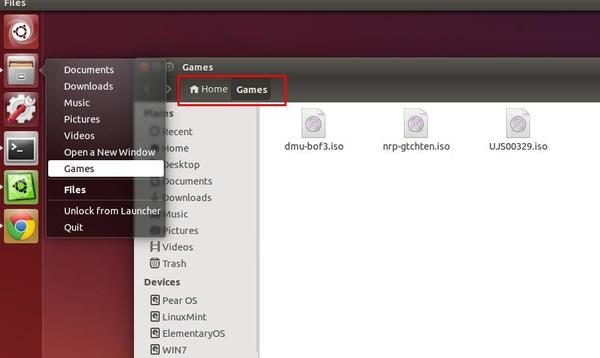
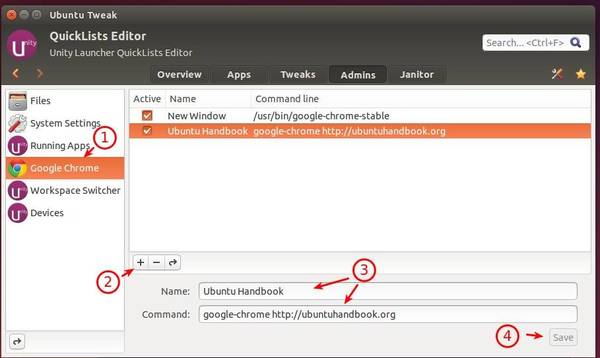
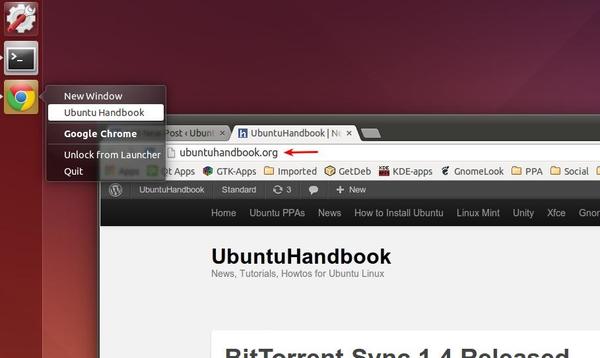
Quicklist, right-click context menu of application shortcuts in left panel of Ubuntu Unity, allows to quick access common tasks for those applications.
This tutorial will show you how to edit the quicklist in Ubuntu 14.04 with Ubuntu Tweak, a popular Ubuntu configuration tool.
There will be two simple examples: add your folder to Files’ (Home icon) context menu, add a bookmark to the righ-click menu of Google Chrome icon.
1. Install Ubuntu Tweak
Download the Deb package from the link below and click the package to open it with Ubuntu Software Center and finally click the install button to install Ubuntu Tweak in your system.
BitTorrent Sync, a p2p file syncing service, now has been updated to version 1.4 with new simplified UI and other new features.
BitTorrent Sync is a simple tool that applies p2p protocol for direct live folder sync with maximum security, network speed and storage capacity. It has native versions for Mac, Windows and Linux, as well as native NAS integration.
New in the latest 1.4:
New simplified UI
UI was fully revised and now looks similar on all platforms. Also, UI was simplified significantly to make Sync use faster, convenient, and easy to use.
HTTPS links support
HTTPS links are generated by Sync and shared with a remote peer to exchange Keys securely, using X.509 certificates
Proxy server support added
Direct connection between peers is possible as long as one of the two peers is not behind a proxy
Finder / Explorer integration added
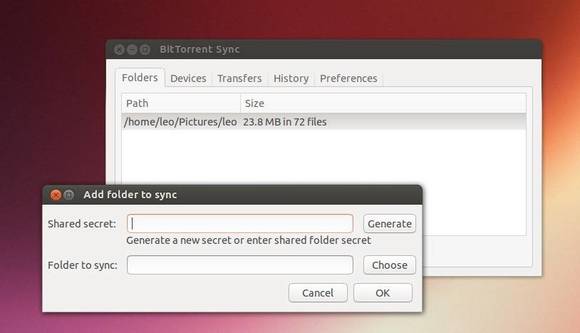
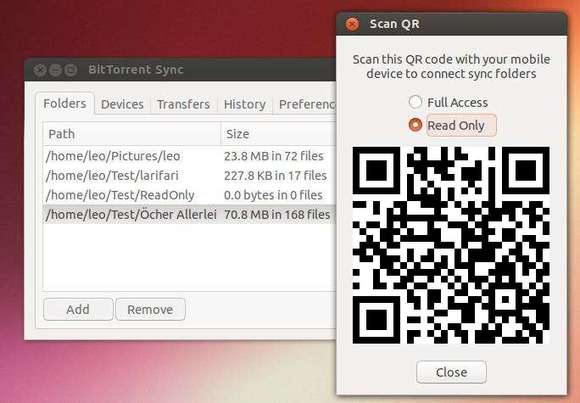
Right-clicking on the folder in Explorer / Finder exposes “Share with BitTorrent Sync” item, which ads the folder to Sync and automatically generates a Key (Secret).
Moved folder support
Sync tracks if synced folders move and automatically adjusts paths to keep the folder synced.
Sync performance optimization
Improves data transfer speed, CPU consumption, peer discovery.
Numerous bug fixes reported by users in 1.3
Install BitTorrent Sync in Ubuntu:
The official packages are available for download at the link below, check your OS type (32-bit or 64-bit), download the appropriate package under the Linux section, and finally run the executable from the extracted folder.
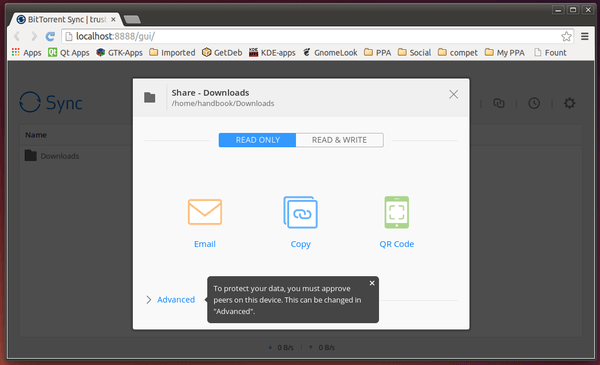
Finally, you can access the web client in your Web Browser by visiting “http://localhost:8888/gui/”
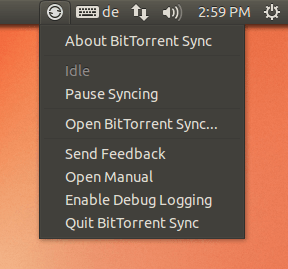
BitTorrent Sync Desktop App with Indicator Applet:
If you want an easy way to deploy BitTorrent Sync on Ubuntu, there’s a desktop GUI with Unity indicator created by community. At the moment of writing this tutorial, it is at version 1.3.1. The latest 1.4 should be available soon.
THE SOFTWARE AND THE PACKAGES BELOW ARE UNOFFICIAL AND NOT THE WORK OF BITTORRENT® INC.
To install this unofficial ready to use server and desktop packages, press Ctrl+Alt+T on keyboard to open the terminal, when it opens paste the commands below and run one by one: