Archives For November 30, 1999

wifi hotspot

The default network manager in Ubuntu 16.04 now supports to create WiFi hotspot for Android devices.

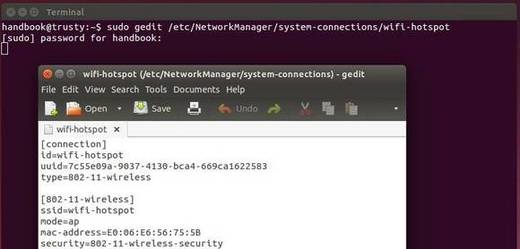
You can create a Wireless access point in Ubuntu 14.04 using Unity’s default network manager, but a little hack on the configuration file is required.

In Ubuntu 16.04, there’s a Hotspot mode in the WiFi connection editings page that works directly for Android devices. Here’s the step by step how to guide:

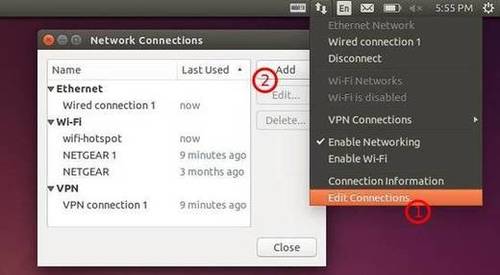
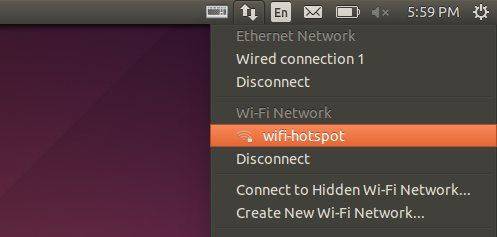
1. First disable WiFi and connect your laptop to a wired network, so your network menu looks like:

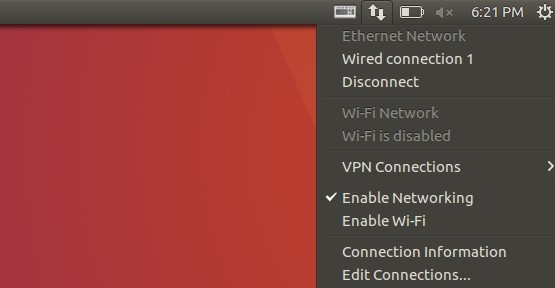
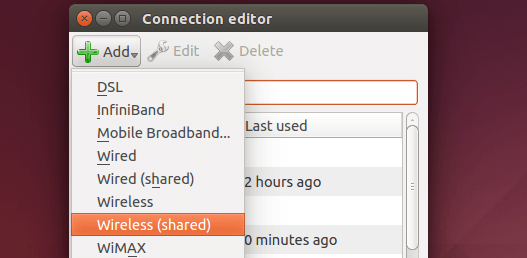
2. Click Edit Connections on the menu shown in above picture. Then click Add to add a new connection:

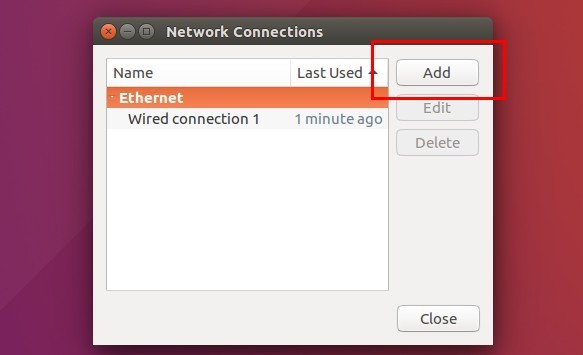
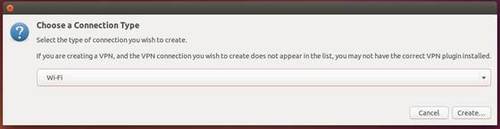
3. Choose WiFi from the drop-down box in the next window and click Create button.

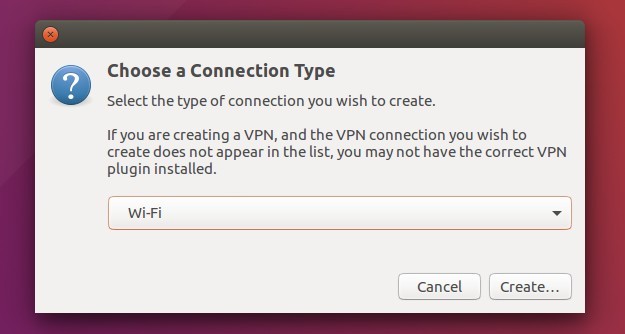
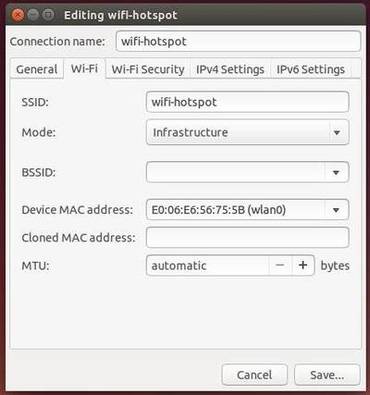
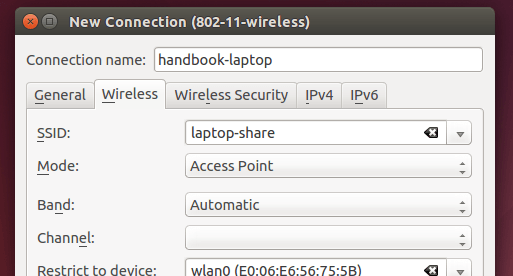
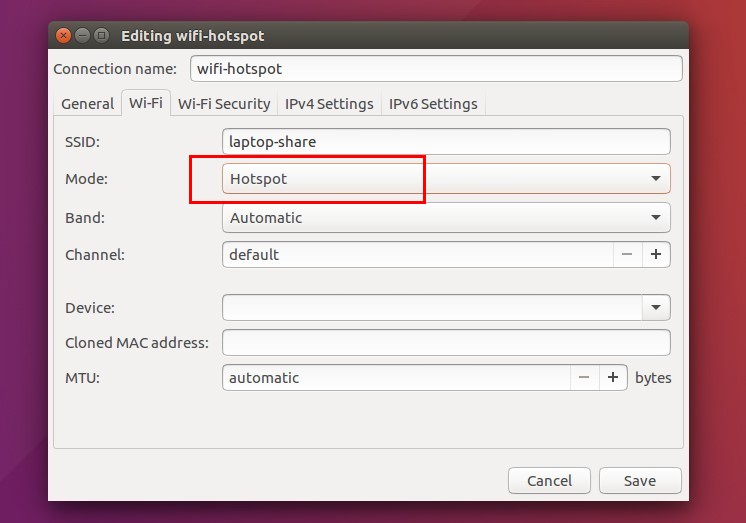
4. When the editing window popup, do:

  • Type in connection name, SSID, select Hotspot mode.
  • In Wifi Security tab, select WPA & WPA2 Personal and type in a password.
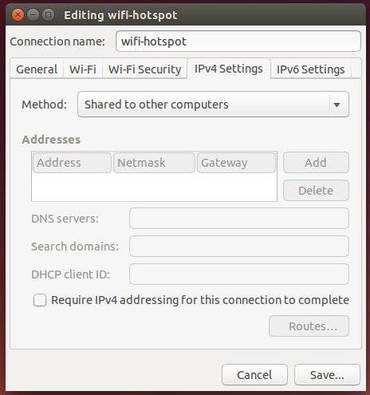
  • In IPv4 Settings tab, select mode “Share to other computers”

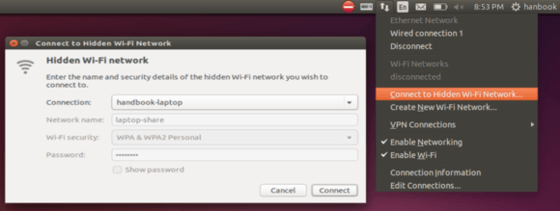
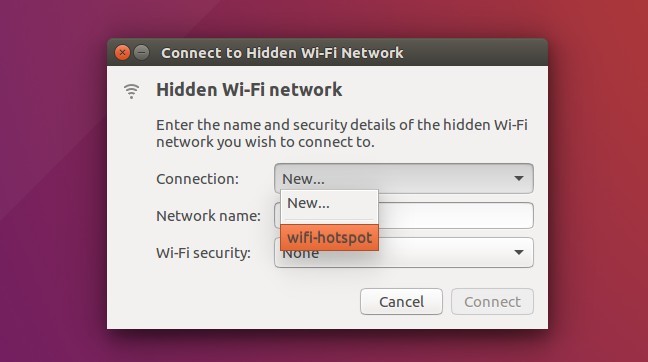
5. After clicked the save button, enable WiFi and click Connect to Hidden Wi-Fi network and select connect to the connection you just created.

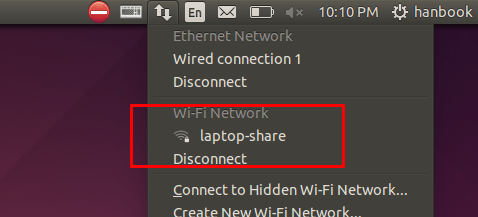
6. Your network menu now looks like:

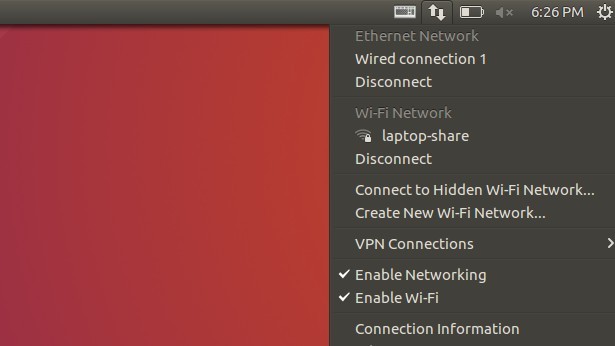
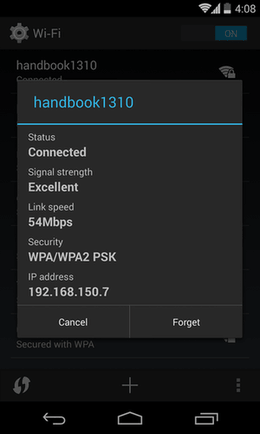
Finally connect to this hotspot from your Android device and enjoy!

Dear readers, I’ve found a new way to create wireless hotspot in Ubuntu, AP mode with Android devices support, using Unity’s Network Manager.

After this tutorial, I’ve found 3 ways to create wifi hotspot in ap mode:

  1. Using Ap-hotspot, an open-source app from github: see this post.
  2. Using KDE connection editor, see the post.
  3. Using Unity’s Default Network Manager with a little hack. See below

Below I will show you how to use Unity’s default network manager to create a wireless hotspot with Android devices support, tested in 64-bit Ubuntu 1404 with Nexus 4 and Sumsung Galaxy ace3.

1. Disable WIFI and plug in an internet cable to your laptop so that your Ubuntu is connect to a wired internet and wireless is disabled.

2. Go to Network Icon on top panel -> Edit Connections …, then click the Add button in the pop-up window.

3. Choose Wi-Fi from the drop-down menu when you’re asked to choose a connection type:

4. In next window, do:

  • Type in a connection name. The name will be used later.
  • Type in a SSID
  • Select mode: Infrastructure
  • Device MAC address: select your wireless card from drop-down menu.

5. Go to Wi-Fi Security tab, select security type WPA & WPA2 Personal and set a password.

6. Go to IPv4 Settings tab, from Method drop-down box select Shared to other computers.

When done, click the save button.

After above steps, a configuration file created under /etc/NetworkManager/system-connections directory. File name is same to the connection name you typed in step 4.

Now press Ctrl+Alt+T on keyboard to open terminal. When it opens, paste the commands below and hit enter to edit the configuration file:

gksu gedit /etc/NetworkManager/system-connections/wifi-hotspot

Replace wifi-hotspt with the connection name you typed in step 4.

When the file opens, find out the line mode=infrastructure and change it to mode=ap. Finally save the file.

When everything’s done, enable WIFI from Network Manager icon on the panel. It should automatically connect to the hotspot you created. If not, select “Connect to Hidden Wi-Fi Network …” and select it from the drop-down box.

Now you can search and connect the access point from your Android mobile and enjoy!

This quick tip is going to show you how to create wifi hotspot in Ubuntu 14.04 so that you can share a wired internet connection with Android devices through your wireless card.

I’ve written about this in another post using a third-party app called ap-hotspot, but some readers said that not work.

The pre-installed Network Manager in Ubuntu Unity does not support Access Point (AP) mode which is required for Android devices. Fortunately, KDE’s connection editor support this mode, below is how:

NOTE: To do below steps, your Wireless Card must support Access Point (AP) mode.

1. Click the link below to bring up Ubuntu Software Center and click install kde-nm-connection-editor:

2. Once installed, press Alt+F2 and run command to launch the app:

kde-nm-connection-editor

3. Click Add button and choose “Wireless (shared)” from the drop-down list.

4. Type in a name, ssid, and select Access Point mode. If want, set up a password under Wireless Security tab. Finally, click OK.

5. Already connected Wired internet? OK, click Network Manager applet on Unity panel and then choose “Connect to Hidden Wi-Fi network”, choose the connection you created in previous step and click Connect button.

6. Finally, your Network Manger menu should like this:

Turn on WLAN on your Android phone and you’ll see the access point in the list. Click connect and enjoy!

If you have a single wired Internet connection, you can easily setup an ad-hoc wireless network with Ubuntu and share the Internet connection among multiple devices. Unfortunately, some devices including Android & Windows Phones may not support ad-hoc wireless networks.

So this tutorial is going to show you how to turn your Ubuntu laptop into a wireless access point in another way with Android phones support.

To get started, press Ctrl+Alt+T on keyboard to open the terminal. When it opens, run the commands below one by one to install ap-hotspot.

Ap-hotspot is an open-source project that automatically creates an infrastructure (Access Point mode) wireless hotspot in Ubuntu that should work with Android and Windows Phone devices

sudo add-apt-repository ppa:nilarimogard/webupd8

sudo apt-get update

sudo apt-get install ap-hotspot

Supports for Ubuntu 13.10, Ubuntu 13.04, Ubuntu 12.10, Ubuntu 12.04 and Ubuntu 14.04. download & install the ap-hotspot deb for saucy at this page.

For Ubuntu 14.04, due to bug you need to downgrade hostapd to make ap-hotspot work.

  1. First uninstall the buggy hostapd in Ubuntu 14.04 via:
    sudo apt-get remove hostapd
  2. Copy and paste the command below into terminal that matches your OS type – check out via System Setting -> Details – and hit run to download, install, and hold the old version of hostapd.

    While running the commands below, type in your user password in terminal when prompt.

    For 64-bit system:

    cd /tmp && wget http://archive.ubuntu.com/ubuntu/pool/universe/w/wpa/hostapd_1.0-3ubuntu2.1_amd64.deb && sudo dpkg -i hostapd*.deb && sudo apt-mark hold hostapd

    For 32-bit system:

    cd /tmp && wget http://archive.ubuntu.com/ubuntu/pool/universe/w/wpa/hostapd_1.0-3ubuntu2.1_i386.deb && sudo dpkg -i hostapd*.deb && sudo apt-mark hold hostapd

Once installed, execute below command to configure your wifi hotspot:

sudo ap-hotspot configure

It will detect the wired & wireless interfaces and ask you to confirm that if they are correct (run ifconfig if you’re not sure). Then you’ll be asked to enter a wifi hotspot name and setup a password.

Finally start the wireless hotspot via:

sudo ap-hotspot start

Now you’re able to connect to wifi hotspot via your Android phone!

To stop the wireless hotspot, execute this command in Ubuntu terminal:

sudo ap-hotspot stop

UPDATE: Please report issues at: https://github.com/hotice/AP-Hotspot/.

Tip: For the error “Access Point Mode is not supported by this device”, you may take a look at this page.