HPLIP, an HP developed Linux drivers for HP inkjet and laser based printers, reached the 3.18.3 release with new devices and Linux distributions support.
HPLIP 3.18.3 added following new devices support:
HP DesignJet Z2600 PostScript
HP DesignJet Z5600 PostScript
HP PageWide XL 8000ps Printer
HP PageWide XL 8000 Blueprinter
HP PageWide XL 5000 Printer
HP PageWide XL 5000 MFP
HP PageWide XL 5000 Blueprinter
HP PageWide XL 4500 Printer
HP PageWide XL 4500 MFP
HP PageWide XL 4000 Printer
HP PageWide XL 4000 MFP
HP PageWide XL 5100ps
HP PageWide XL 5100ps MFP
HP PageWide XL 5100ps MFP Blueprinter
HP PageWide XL 6000ps
HP PageWide XL 6000ps MFP
The new release also added support for Manjaro 17.1.4 (64 bit), Fedora 27 (64 bit), and Linux Mint 18.3 (32 bit and 64 bit)
Download / Install HPLIP 3.18.3:
To install the software, download the package “hplip-3.18.3.run” from the link below:
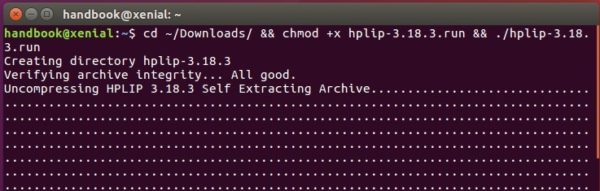
Then open terminal via Ctrl+Alt+T or search for “terminal” from app launcher. When it opens, run command:
cd ~/Downloads/ && chmod +x hplip-3.18.3.run && ./hplip-3.18.3.run
Input your password (no visual feedback while typing) when it prompts and hit Enter.
Then follow the terminal outputs, answer some questions to build and install HPLIP on your system. When everything is done, plug/re-plug your printers and enjoy!
LiVES, free and open-source video editor and VJ tool, reached the 2.8.8 release today. Here’s how to install it in Ubuntu 16.04, Ubuntu 17.10, Ubuntu 18.04.
Fix “undo render to same clip” after rendering to selection.
Add new libav_stream playback plugi
Set openGL playback plugin (if present) as the default for new installs.
(Multi monitor support) always show dialog windows on the gui monitor.
Re-enable audio recording from external sources (was inadvertantly disabled).
Fix possible problems with layout reloading (regression).
Reset to correct playback position when stop is pressed during / after pause (multitrack),
Increase size of playback area in multitrack mode.
Increase preview window size for video part open.
Add quick transcode menu option (beta).
Keep showing framebar when not playing (can be overriden in prefs).
Show audio source in framebar (overridden by pref).
Optimise redrawing of audio waveforms in clip editor.
Implement external audio trigger for recording.
Theme fixes for buttons.
Various optimisations.
Scale many widget sizes based on screen resolution.
Fix crash in multitrack parameter adjustment for effects with repeated channels.
Ctrl + mouse scroll can be used to zoom in / out in multitrack.
Disable ctrl-q (quit) accelerator during playback to prevent accidental triggering.
Updates for libav 3.5.
How to Install LiVES 2.8.8 in Ubuntu:
Other than building the software from source, you can install it from unofficial PPA in Ubuntu 18.04, Ubuntu 16.04, Ubuntu 17.10, Linux Mint 18.x and their derivatives by following steps:
1. Open terminal via Ctrl+Alt+T and run command to add the PPA:
sudo add-apt-repository ppa:ubuntuhandbook1/lives
Type in your password (no visual feedback while typing due to security reason) when it asks and hit Enter.
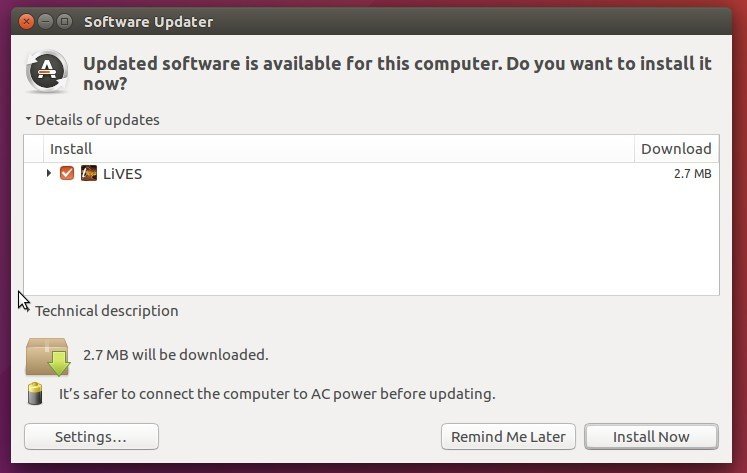
2. Then upgrade the software from an existing release via Software Updater:
or simply run commands in terminal to install or upgrade LiVES:
The first beta of Ubuntu 18.04 Bionic Beaver LTS (Long Term Support) was released last night.
Ubuntu 18.04 Beta 1 features images for Kubuntu, Ubuntu Budgie, Ubuntu Kylin, Ubuntu MATE, and Xubuntu.
NOTE the pre-releases of Ubuntu 18.04 are not recommended for anyone needing a stable system or anyone who is not comfortable running into occasional, even frequent breakage. They are, however, recommended for those who want to help in testing, reporting, and fixing bugs.
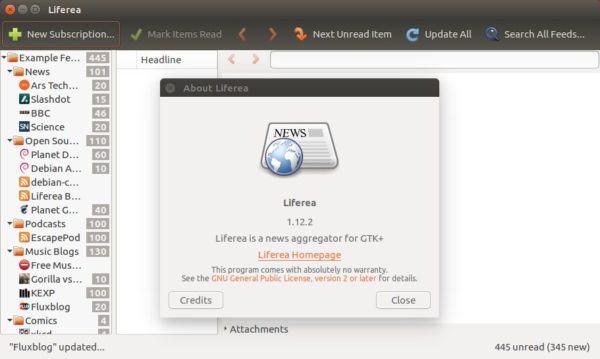
A new bug-fix release for Liferea 1.12 was released earlier today. A plugin installer plugin was introduced that allows easy discovery and installation of 3rd party plugins.
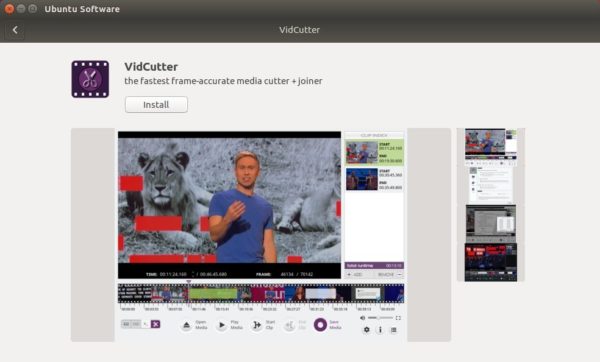
The snap package of VidCutter, a free and open-source video cutting and joining software, now is available.
Which means you can search for and install the software directly from Ubuntu Software app:
Snap package, the universal Linux app packaging format, runs in sandbox and comes with most required libraries bundled. It runs in all current Ubuntu releases.
For Ubuntu 16.04 and Ubuntu 14.04, you need to first install the snapd daemon by opening terminal via Ctrl+Alt+T and running command:
sudo apt install snapd snapd-xdg-open
Then you can install the snap in ALL current Ubuntu releases either via Ubuntu Software or by running command in terminal:
snap install vidcutter
Once installed, launch it from your application launcher and enjoy!
“Like previous LTS series’, 16.04.4 includes hardware enablement stacks for use on newer hardware. This support is offered on all architectures except for 32-bit powerpc, and is installed by default when using one of the desktop images. Ubuntu Server defaults to installing the GA kernel, however you may select the HWE kernel from the installer bootloader.
As usual, this point release includes many updates, and updated installation media has been provided so that fewer updates will need to be downloaded after installation. These include security updates and corrections for other high-impact bugs, with a focus on maintaining stability and compatibility with Ubuntu 16.04 LTS.“
To upgrade from a previous Ubuntu 16.04 release, either run Software Updater and install all available updates or run command in terminal (Ctrl+Alt):
sudo apt-get update && sudo apt-get upgrade
Then check result via command:
cat /etc/issue
How to Install HWE Stacks in previous Ubuntu 16.04:
The new point release ships with an updated kernel and X stack (HWE Stacks) by default for the desktop in its ISO images.
These HWE Stacks were released in the LTS point releases as a means to enable newer platforms and components.
For those upgrading from a previous release, you need to manually install the stacks via command:
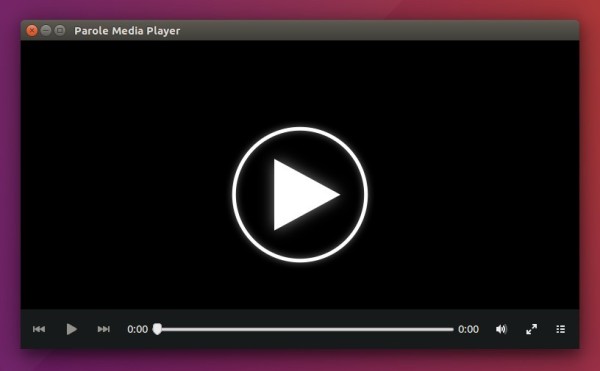
Xfce’s Parole media player reached the 1.0 stable series earlier today! Here’s how to install it in Ubuntu 17.10 and Ubuntu 18.04.
Xfce 1.0.0 brings a new feature and following bug-fixes:
Added “Automatic” video output option. This uses the autoimagesink to provide the best available video sink for the environment, eliminating the dreaded ‘Could not initialise Xv output’ error.
Fixed 32-bit crashes when using the MPRIS2 plugin
Fixed crash on “Clear History” button press
Fixed appdata validation
Fixed full debug builds and resolved implicit-fallthrough build warning
Replaced stock icon by freedesktop.org compliant option
How to Install Parole 1.0.0 in Ubuntu 18.04, 17.10:
Ubuntu 18.04 includes the new release package in its main repository archive, just search for and install ‘parole’ in Ubuntu Software.
For Ubuntu 17.10, you can install or upgrade to the new release via an unofficial PPA. No updates for Ubuntu 16.04, since Parole now requires GTK+ >=3.20.
1. Open terminal via Ctrl+Alt+T or by searching for “Terminal” from app launcher. When it opens, run command:
sudo add-apt-repository ppa:ubuntuhandbook1/apps
Type in your password (no visual feedback when typing due to security reason) when it prompts and hit Enter.
2. Then upgrade the media player via Software Updater utility:
or run following commands to install / upgrade it:
sudo apt-get update

sudo apt-get install parole
For those who don’t want to add PPA, grab the .deb package from HERE.
Uninstall:
Run following command to purge the PPA repository which also downgrade installed packages to the stock version in your Ubuntu:
Oracle VirtualBox 5.2.8 was released a day ago. For Linux guests, Kernel 4.15 now is supported and black screen issue when 3D enabled is fixed.
Changes in Virtualbox 5.2.8 include:
Added support for FSGSBASE, PCID, INVPCID CPU features for guests
fixed EMM386 issue with detecting suitable page frame base
Linux: prevent VM window from jumping and auto-resizing to tiny size after resizing it on HiDPI screen
Linux: fixed seamless regression caused by wm_class functionality
Front end: switched to https downloads
Fixed crash while opening New machine wizard
Added support for distinguishing recording sources in the PulseAudio mixer on the host when multiple VMs are running
Various fixes for the DirectSound backend
Added better file seeking support and fixed playback of recorded files with certain players (e.g. Firefox)
Various fixes for Windows guest surround setups and HDA emulation
Fixed an issue where the serial port parameters in the emulation and host serial port got out of sync
Fixed overwriting certain INQUIRY data for the DVD/CD drive attached to a AHCI controller
Fixed handling VMDK images created by Amazon EC2 VM export
Fixed PXE boot regression in e1000
Added a workaround for older guests which do not enable bus mastering for the virtio PCI device
3D: add environment variable to configure presenting 3D content on main thread
Windows hosts: fixed indiscriminate binding of NDIS5 bridged driver, that caused PPPOE malfunction
Windows guests: fixed incorrect function error when using shared folders in certain applications
Linux 4.15 support, fixed black screen when 3D enabled in Linux guests
Linux guests: suppress setuid and setgid in shared folders
How to Install Virtualbox 5.2.8 in Ubuntu:
1. If you’re still running with VirtualBox 5.1.x, open terminal via Ctrl+Alt+T or from application launcher. Remove old Virtualbox via command:
sudo apt-get remove virtualbox virtualbox-5.1
2. Download & install the latest Virtualbox package from the link below:
3. If you’ve added the Oracle VBox repository, you can directly install the 5.2 release from Synaptic Package Manager or via apt command, after removing the old version.
To add the repository, do:
Open terminal (Ctrl+Alt+T) and run command to add the repository:
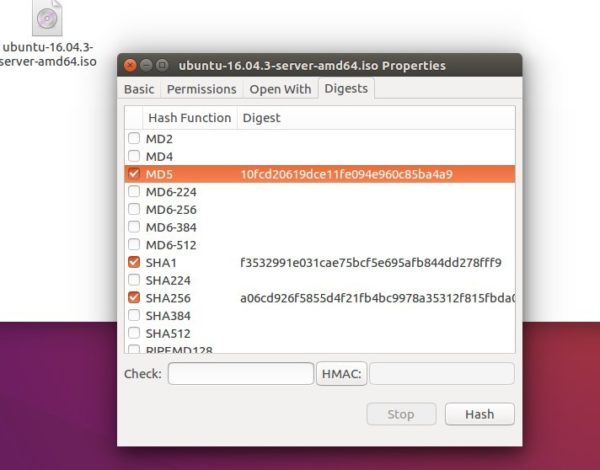
After receiving an installation file from the download server, we check its checksums to verify data integrity.
Other than running a Linux command or using a graphical tool, a Nautilus (the default file browser in Ubuntu Gnome) extension, nautilus-gtkhash, is available for computing checksums and showing them in file’s properties dialog box.
To install the extension, open terminal (Ctrl+Alt+T) and run command:
sudo apt-get install nautilus-gtkhash
Input your password (no visual feedback while typing) when it prompts and hit Enter
Once installed, restart Nautilus via command:
nautilus -q
Finally, right-click on your file and go to Properties dialog. Under Digests tab, click the Hash button to compute checksums and enjoy!