HandBrake, a free and open source video transcoder, finally gets an update by releasing 0.10 beta. It has been such a long time since the last v0.9.9.
Today we are releasing the first of several beta’s for the 0.10 release with the hope of releasing a final build sometime in the next couple of months.
The 0.10 release will give us the opportunity to push out many improvements, but allow us to continue working on the new API we have planned for the 1.0 release.
Changes in HandBrake 0.10:
Core:
- Intel QuickSync Video Encode / Decode support.(Windows only currently)
- DXVA Hardware Decode support (Experimental and Windows only)
- Choice of Scalers: Lanczos, Bicubic (OpenCL) (Experimental)
- hqdn3d filter now accepts individual settings for both chroma channels (Cr, Cb)
- New NlMeans? denoiser. This is very slow, but results are significantly better than hqdn3d.
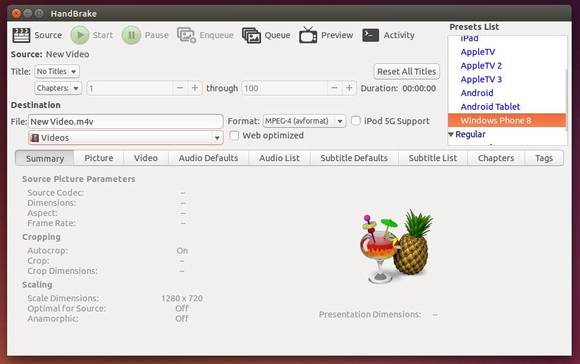
- Added Windows Phone 8 Preset
- Updated Libraries: x264 r2431-ac76440, Libav v10.1, libbluray 0.5.0
- Libavformat is now used for muxing instead of mp4v2 and libmkv
- The LibAV AAC encoder is now the default as FAAC has been removed.
- H.265 encoder (Experimental – available when compiled from source with –enable-x265)
- Added VP8 Encoder (using libvpx), available in MKV files only.
- Removed mcdeint deinterlace and decomb modes. This relied on the snow encoder in libav which has been was removed by upstream.
- Bug fixes and Misc Improvements
Linux:
- Automatic audio and subtitle track selection behaviours which can be stored per preset.
- Improvements to Auto-Naming feature.
- Batch Add to queue by list selection.
- Russian and Czech Translations
- Bug fixes and Misc Improvements
- Requires GTK3
Install HandBrake 0.10 beta in Ubuntu 14.04:
The new release is available in the snapshots PPA for Ubuntu 14.04 and its derivatives. To install it, press Ctrl+Alt+T on keyboard to open the terminal. When it opens, run the commands below one by one:
sudo add-apt-repository ppa:stebbins/handbrake-snapshots

sudo apt-get update

sudo apt-get install handbrake-gtk
Or you can grab the .deb package directly from the launchpad page.
via: handbrake.fr