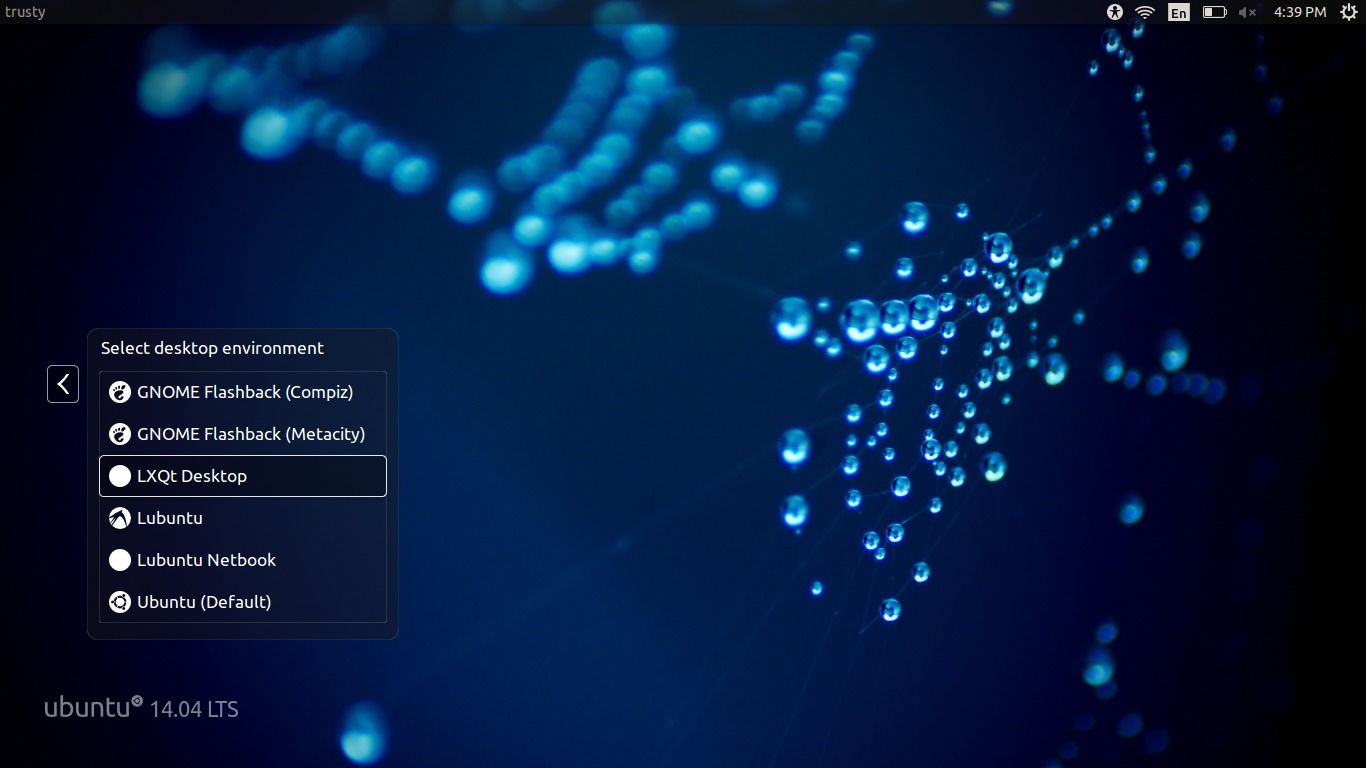
Archives For November 30, 1999

This simple tutorial shows you how to install the yEd Graph Editor in Ubuntu 12.04 Precise, 12.10 Quantal, 13.04 Raring, 13.10 Saucy and Linux Mint.

yEd graph editor

yEd is a powerful desktop application that can be used to quickly and effectively generate high-quality diagrams. Create diagrams manually, or import your external data for analysis. The automatic layout algorithms arrange even large data sets with just the press of a button.

Install yEd

The official website provides the yEd installer script for 32-bit /64-bit Linux systems, which includes a suitable JRE.

To download this script, press Ctrl+Alt+T on your keyboard to open terminal. When it opens, run below command (check 32-bit or 64-bit via System Settings -> Details):

For 32-bit system:

wget http://www.yworks.com/products/yed/demo/yEd-3.13_64-bit_setup.sh

For 64-bit system:

wget http://www.yworks.com/products/yed/demo/yEd-3.13_64-bit_setup.sh

Before running this script, run below command in previous terminal to give its executable permission.

chmod +x yEd-3.13_*-bit_setup.sh

Finally run the script to bring up setup wizard:

./yEd-3.13_*-bit_setup.sh

Follow the setup wizard. When done, you’ll be able to open yEd Graph Editor in Unity Dash.

How to Install Jupiter in Linux Mint 15

Last updated: July 29, 2013

This simple and brief tutorial is going to show you how to install Jupiter from JoliCloud PPA in Linux Mint 15 Olivia.

As you may know, Jupiter is a powerful and lightweight power and hardware control applet. It has been retired and last supported release is up to Linux Mint 14 Nadia. However, Jupiter is available for Olivia from JoliCloud Desktop Environment PPA.

The webupd8team add the packages to the ppa and it’ll be used as a background program for JoliCloud session. I’ve installed it on my laptop and it’s working well.

Install Jupiter on Linux Mint 15:

Press Ctrl+Alt+T on your keyboard to open terminal. When it opens, run below command to add the PPA repository:

sudo add-apt-repository ppa:jolicloud-team/ppa

Then update package lists and install:

sudo apt-get update; sudo apt-get install jupiter

To install Jupiter support package for Eee PCs:

sudo apt-get install jupiter-support-eee

The latest stable Linux Kernel 3.10.4 has been released. This simple tutorial will show you how to install / upgrade this kernel in Ubuntu 13.04 Raring, 12.10 Quantal and 12.04 Precise.

Linux kernel 3.10.4 is an important release, which brings many improvements to IPv4 and IPv6 protocols, as well as many updated drivers and ARM fixes. All users of the 3.10 kernel series are urged to upgrade as soon as possible. See official announcement.

To get started, press Ctrl+Alt+T to open a terminal window, copy and paste below command into terminal and run to download the kernel:

for 32-bit system:

wget http://kernel.ubuntu.com/~kernel-ppa/mainline/v3.10.4-saucy/linux-headers-3.10.4-031004-generic_3.10.4-031004.201307282043_i386.deb http://kernel.ubuntu.com/~kernel-ppa/mainline/v3.10.4-saucy/linux-headers-3.10.4-031004_3.10.4-031004.201307282043_all.deb http://kernel.ubuntu.com/~kernel-ppa/mainline/v3.10.4-saucy/linux-image-3.10.4-031004-generic_3.10.4-031004.201307282043_i386.deb

for 64-bit system:

wget http://kernel.ubuntu.com/~kernel-ppa/mainline/v3.10.4-saucy/linux-headers-3.10.4-031004-generic_3.10.4-031004.201307282043_amd64.deb http://kernel.ubuntu.com/~kernel-ppa/mainline/v3.10.4-saucy/linux-headers-3.10.4-031004_3.10.4-031004.201307282043_all.deb http://kernel.ubuntu.com/~kernel-ppa/mainline/v3.10.4-saucy/linux-image-3.10.4-031004-generic_3.10.4-031004.201307282043_amd64.deb

After that, both 32-bit and 64-bit run below command to install the kernel

sudo dpkg -i linux-headers-3.10.4-*.deb linux-image-3.10.4*.deb

Finally apply changes to grub boot loader:

sudo update-grub

You can remove the downloaded packages after the kernel is properly installed.

This simple tutorial will show you how to convert your photos to cartoon or sketch images in Ubuntu Linux using a simple tool XnSketch.

XnSketch is a very small tool that allows you to turn your photos into cartoon or sketch images. It works on Windows, Linux, Mac OS, Apple and Android devices.

Features:

  • 18 different effects (black strokes, white strokes, pastel, pencil sketch, colored sketch, …)
  • Edge strength, and opacity adjustement
  • Contrast, brightness, saturation adjustement
  • Save or share the result to Flickr, Picasa, Facebook, Imgur, Thmblr, ImageShack, Yfrog, GlowFoto, TwitPic, and Email.

Install XnSketch

First download the package:

XnSketch for Windows 32-bit | Windows 64-bit

XnSketch for Ubuntu Linux

For Ubuntu users, decompress the package and copy and paste the result folder into /opt/ folder once downloaded. To do so, press Alt+F2 on your keyboard and type in gksudo nautilus to open file browser with root privilege.

Then drag and drop the extract folder from your ~/Downloads folder to /opt/:

Finally follow below steps to create a launcher for this tool:

1.) Press Ctrl+Alt+T on your keyboard to open terminal. When it opens, run below commands to install required package:

sudo apt-get install gnome-panel --no-install-recommends

2.) Run command to bring up Create Launcher dialog.

sudo gnome-desktop-item-edit /usr/share/applications/ --create-new

In next window type following:

name = XnSketch
command = /opt/XnSketch/xnsketch.sh
select an icon from /opt/XnSketch/xnsketch.png

Once done, click Ok and you’ll see the XnSketch from the Unity Dash home.

NitroShare is a network file-sharing application that makes sending a file to another machine on the local network as easy as dragging-and-dropping.

NitroShare is designed to be hassle-free in every aspect. Just install the application on any machine running Ubuntu or Windows and you’re all set. Each machine should discover all of the other machines on the local network. The application integrates with the operating system, using application indicators on Ubuntu and the system tray on Windows.

Install NitroShare:

NitroShare PPA contains the latest packages for Ubuntu 13.10 Saucy, 13.04 Raring, 12.10 Quantal, 12.04 Precise.

To add the ppa, press Ctrl+Alt+T on your keyboard to open terminal. When it opens, run below commands:

sudo add-apt-repository ppa:george-edison55/nitroshare

Then you can click ‘Reload’ on Synaptic Package Manager and then install this home network sharing software. Or you can do it via below command:

sudo apt-get update; sudo apt-get install nitroshare

For Ubuntu 14.04 and higher, download “nitroshare_0.2_amd64.deb” for 32-bit OS or “nitroshare_0.2_i386.deb” for 64-bit OS from Launchpad.net and install it via Software Center.

Once installed, open it from Unity Dash home.

For the first time launching this application, you’ll need to follow on the setup wizard. When you’re done, you’ll see the panel indicator and the icons on bottom-right corner of your desktop.

Use indicator menu or drag and drop file onto the desktop icon to start transfering. Target machine will receive a confirm dialog.

How to Install Areca Backup in Ubuntu Linux

Last updated: July 28, 2013

This simple and brief tutorial shows you how to download and install Areca Backup utility in Ubuntu Linux Unity Desktop.

As you may know, Areca Backup is an Open Source personal backup solution which is released under the General Public License (GPL) v2. It basically allows you to select a set of files / directories to back-up, choose where and how (as a simple file copy, as a zip archive, …) they will be stored, and configure post-backup actions (like sending backup reports by email or launching custom shell scripts).

Download & Install Areca Backup

The acrca backup depends on Java, so first install OpenJDK from Ubuntu Software Center or Oracle Java from ppa.

The last stable version can be downloaded from below link:

download areca backup

Choose to download the areca-*-linux-gtk.tar.gz. You may check 32-bit or 64-bit by opening Details from Unity Dash.

Once downloading process finished, decompress the package and put the result folder to /opt/ directory. To do so, press Alt+F2 and type in gksudo nautilus to open file browser with root privilege.

Then move the extracted folder to computer -> /opt/ folder.

Now you’re able to open this backup utility via command: /opt/areca/areca.sh

To create a launcher for Areca Backup

Press Ctrl+Alt+T on your keyboard to open terminal. When it opens, run below command to install required package:

sudo apt-get install gnome-panel --no-install-recommends

After that, run below commands to create the .desktop launcher file:

sudo gnome-desktop-item-edit /usr/share/applications/ --create-new

It brings up a dialog, where you can set the icon, name, and command of new launcher.

Once done, you’ll see areca backup in Unity Dash.

Install Gyachi in Ubuntu 13.04 Raring via PPA

Last updated: July 28, 2013

This simple and brief tutorial is going to show you how to install Gyachi Yahoo! client in Ubuntu 13.04 Raring Ringtail via the ppa repository.

GyachE Improved (GyachI) is a fork from Gyach Enhanced Yahoo! client for Linux operating systems. This Yahoo! client supports almost all of the features you would expect to find on the official Windows Yahoo! client: Voice chat, webcams, faders, ‘nicknames’, audibles, avatars, display images, and more. Yet, it remains very light-weight and memory-friendly.

NOTE: The latest version of Gyachi was released on 2011-09-03, so it may or may not work. Use it at your own risk!

Install Gyachi:

There’s a PPA repository contains the latest Gyachi packages for Ubuntu 10.04 Lucid and higher.

To add the ppa, press Ctrl+Alt+T to open terminal. When it opens, run below commands:

sudo add-apt-repository ppa:adilson/experimental

Then you can update your system package lists and install it via:

sudo apt-get update; sudo apt-get install gyachi

Run gyachi command to launch it first time, then click its icon and choose “lock to launcher”.

gyachi

This simple tutorial shows you how to add ‘File Compare’ option on Nautilus’ context menu in Ubuntu 13.04 Raring Ringtail.

There are a few tools in Ubuntu allow to compare files or folders, such as Meld Diff Viewer, Kdiff3. Nautilus-compare is a simple plugin that integrates them with Nautilus file browser.

Press Ctrl+Alt+T on your keyboard to open temrinal. When it opens, run below command to install this plugin:

sudo apt-get install nautilus-compare

Once installed, open “Nautilus Compare Extension Preferences” from Unity Dash and choose your diff veiwer:

Finally, restart Nautilus by below command to apply changes:

nautilus -q

For Ubuntu 13.04, due to bugs you need to run below command to get it work:

for 32-bit:

sudo ln -s /usr/lib/i386-linux-gnu/libpython2.7.so.1 /usr/lib/libpython.2.7.so

for 64-bit:

sudo ln -s /usr/lib/x86_64-linux-gnu/libpython2.7.so.1 /usr/lib/libpython.2.7.so

There are quiet a few bittorrent programs for Ubuntu Linux. Lince is one which aims to be lightweight and efficient.

Lince is a light and full featured Bittorrent client coded in C++. The graphic interface has been designed to resemble the old Azureus, simple but powerful. Giving the user all the information in an easy and intuitive way. Another strong point of Lince is its capacity to allow the user to configure it according to his/her wishes.

Lince also has efficiency as top goal. It meets user requirements using as few resources as necessary. Give it a try you will be surprised by its speed and low memory consumption!

Here is non exhaustive list of features that you will find in Lince:

  • A nice User Interface inspired by the old Azureus.
  • UPnP / NAT-PMP port forwarding support.
  • Encryption support (compatible with Vuze / Azureus).
  • Advanced user, tracker and file management.
  • Advanced torrent queue management.
  • Bandwidth scheduler.
  • DHT (trackerless) support.
  • uTorrent Peer eXchange support (PeX).
  • Support for Magnet links.
  • Internationalization support(translators needed).
  • Unicode support.
  • Connection though a proxy.
  • Search engine included.
  • IP Filtering similar to the one in eMule.

Install Lince via PPA:

The GetDeb repository contains latest Lince (1.3) for Ubuntu 13.04 Raring, 12.10 Quantal, 12.04 Precise and Linux Mint 13 Maya, 14 Nadia, 15 Olivia users.

For Ubuntu users, download and install below deb to add the getdeb repository:

Download getdeb

For Linux Mint users, enable the repository from Start menu -> Software Sources -> Additional Repositories

After that, install the client via your package manager. Or run below command in terminal (press Ctrl+Alt+T to open it):

sudo apt-get update; sudo apt-get install lince

Install Shutter 0.90 in Ubuntu 13.04 via PPA

Last updated: March 11, 2015

This simple tutorial shows you how to install the latest Shutter 0.90 on Ubuntu 13.04 Raring Ringtail using its PPA repository.

This release fixes bugs and removes some error prone (or unused) features. Some of the error prone features has been removed in order to keep Shutter’s codebase easier to maintain.

Due to licensing issues it was necessary to remove three plugins (3Dreflection, 3Drotate, bordereffects). The plugins are based on scripts written by Fred Weinhaus and he asked to remove them from Shutter.

Shutter 0.90 indicator adds a new option to show the main window, it’s convenient for Unity users.

This release removes the following dependency: libgnome2-gconf-perl (Gnome2::GConf)

Install Shutter from PPA:

The Shutter PPA is ready for Ubuntu 13.04, 12.10, 12.04 and 10.04 users. Press Ctrl+Alt+T on your keyboard to open terminal. When it opens, run below command to add the ppa:

sudo add-apt-repository ppa:shutter/ppa

Then you can install it via below command:

sudo apt-get update; sudo apt-get install shutter