The fourth point release Ubuntu 18.04.4 LTS was released. Here’s how to install the new Linux Kernel 5.3 and Xorg in your current Ubuntu 18.04 machine.
Ubuntu 18.04.4 comes with an updated “hardware enablement stack” (HWE) from Ubuntu 19.10, including Kernel 5.3 that enables the latest hardware and peripherals available from IBM, Intel, and others.
It was announced last night:
The Ubuntu team is pleased to announce the release of Ubuntu 18.04.4 LTS (Long-Term Support) for its Desktop, Server, and Cloud products, as well as other flavours of Ubuntu with long-term support.
Like previous LTS series, 18.04.4 includes hardware enablement stacks for use on newer hardware. This support is offered on all architectures and is installed by default when using one of the desktop images.
Ubuntu Server defaults to installing the GA kernel; however you may select the HWE kernel from the installer bootloader.
…
How to Upgrade to Ubuntu 18.04.4:
Besides downloading the ISO image, installing all available updates via Software Updater will bring you to the latest point release in the current Ubuntu 18.04 machine.
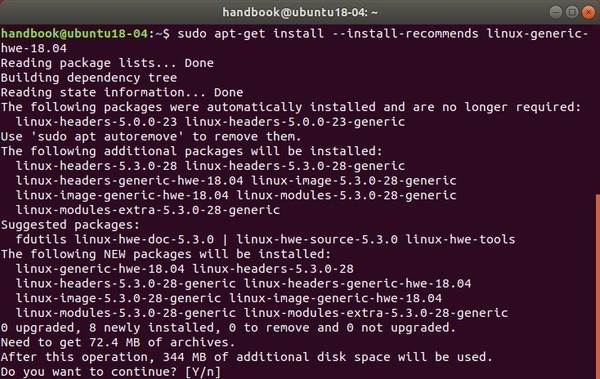
If you never installed the “hardware enablement stack” in your Ubuntu 18.04 machine, you may also do:
To install the 5.3 Kernel, you may need to run following command in terminal:
sudo apt-get install --install-recommends linux-generic-hwe-18.04
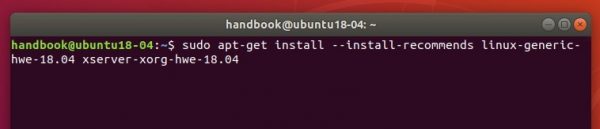
Or run command to install both new kernel and Xorg Server stack:
sudo apt-get install --install-recommends linux-generic-hwe-18.04 xserver-xorg-hwe-18.04
Once installed, restart and enjoy!
How to remove the new hardware enablement stack:
To remove the new v5.3 kernel, first reboot and choose previous kernel from Grub boot-loader > Advanced options. Then run command:
sudo apt remove linux-image-unsigned-5.3*generic linux-image-5.3*generic
To remove the new Xorg packges, run command:
sudo apt remove xserver-xorg-*-hwe-18.04
And you DO HAVE to install back the old xorg packages via command:
sudo apt install xorg