This is a step by step beginner’s guide shows how to manually download & install the new Gnome Adwaita Sans and Adwaita Mono fonts in all current Ubuntu releases. GNOME introduced new interface font in version 48, named Adwaita Sans and Adwaita Mono. While, Ubuntu does not ship Adwaita fonts in system repository, user can install it manually by following steps.
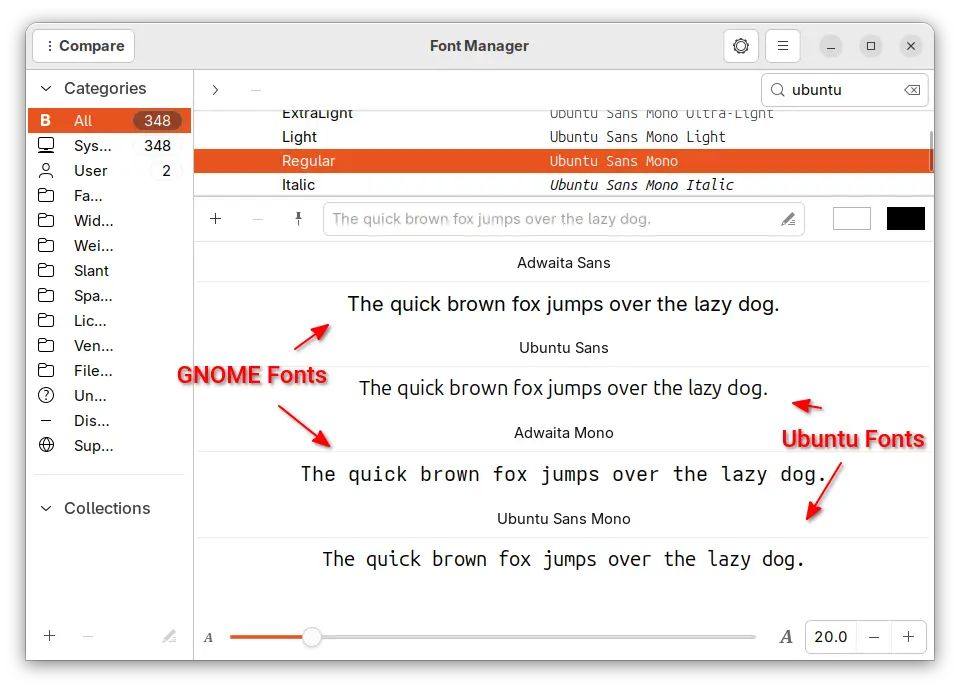
GNOME & Ubuntu Fonts compare in Font Manager
NOT only for Ubuntu, this tutorial should work for most other Linux. And, you may follow this tutorial for manually installing any other fonts.
Step 1: Download Adwaita Fonts
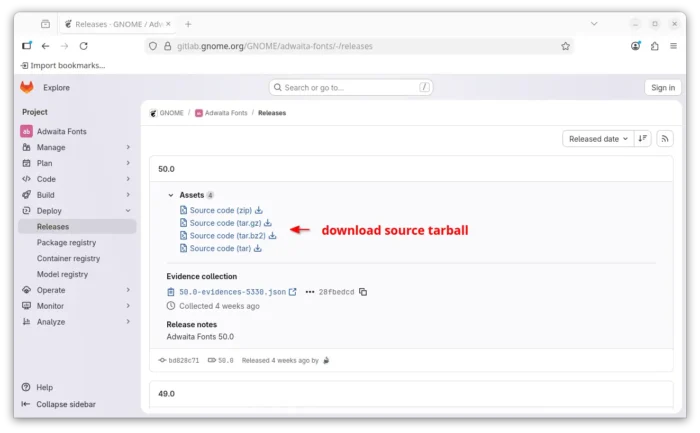
First, download the source code of GNOME Adwaita Fonts from its project page via the link below:
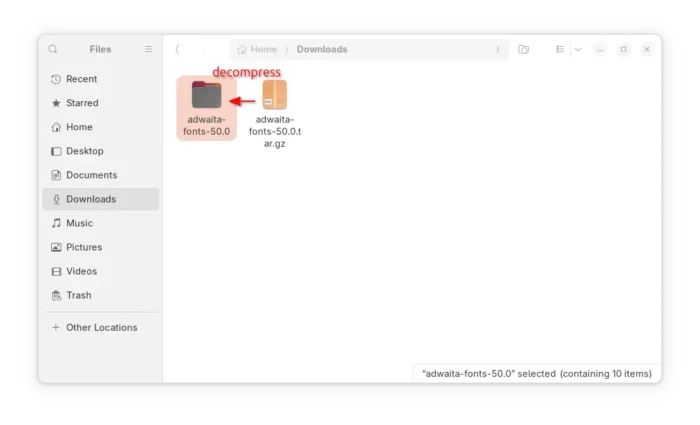
Then, open your Downloads folder and decompress the source tarball. In the extracted folder, you’ll see the font files (.ttf files) under mono and sans sub-folders.
Step 2: Install the Font files
To install manually downloaded fonts in Ubuntu and most other Linux, simply put the .ttf files into one of the following locations:
/usr/share/fonts for fonts that work system-wide (meaning for all users).
/usr/local/share/fonts – an alternative system-wide font directory.
.local/share/fonts or .fonts– for fonts that work for current user only.
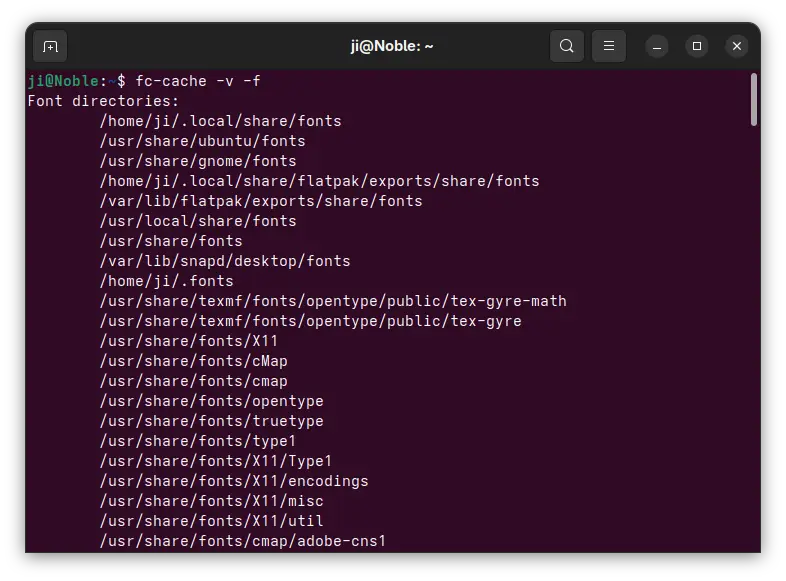
There are as well other locations, such as Ubuntu, GNOME, Flatpak, and Snap specific directories for storing font files. Run command fc-cache -v in terminal to list them all.
Option 1: Install Adwaita Fonts for current user only
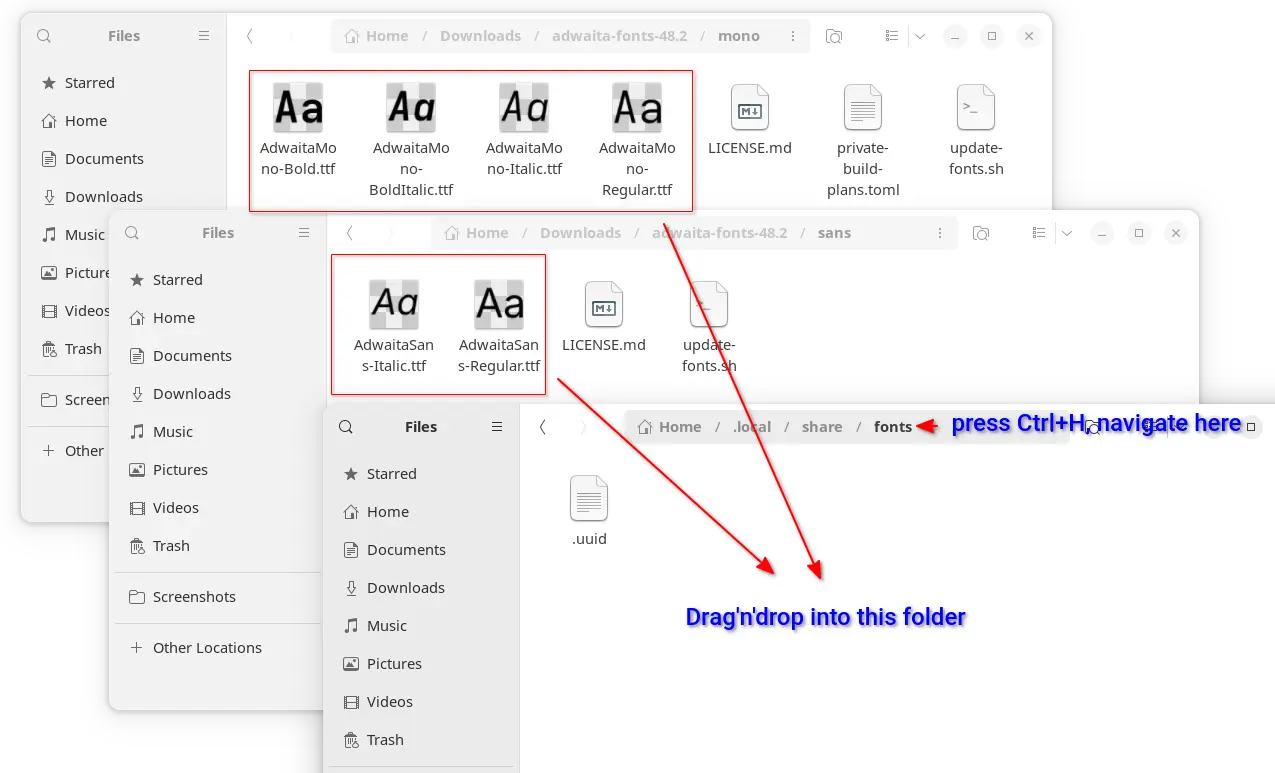
For current user only, open another file manager window, press Ctrl+H to show hidden files/folders, then navigate to .local -> share -> fonts (create if not exist). Then, drag and drop the .tff font files from the extracted adwaita-fonts folder (mono and sans sub-folders) into that directory. Finally, press Ctrl+Alt+T to open up a terminal window, and run command to re-generate font cache:
fc-cache -f -v
Option 2: Install Adwaita Fonts for all users
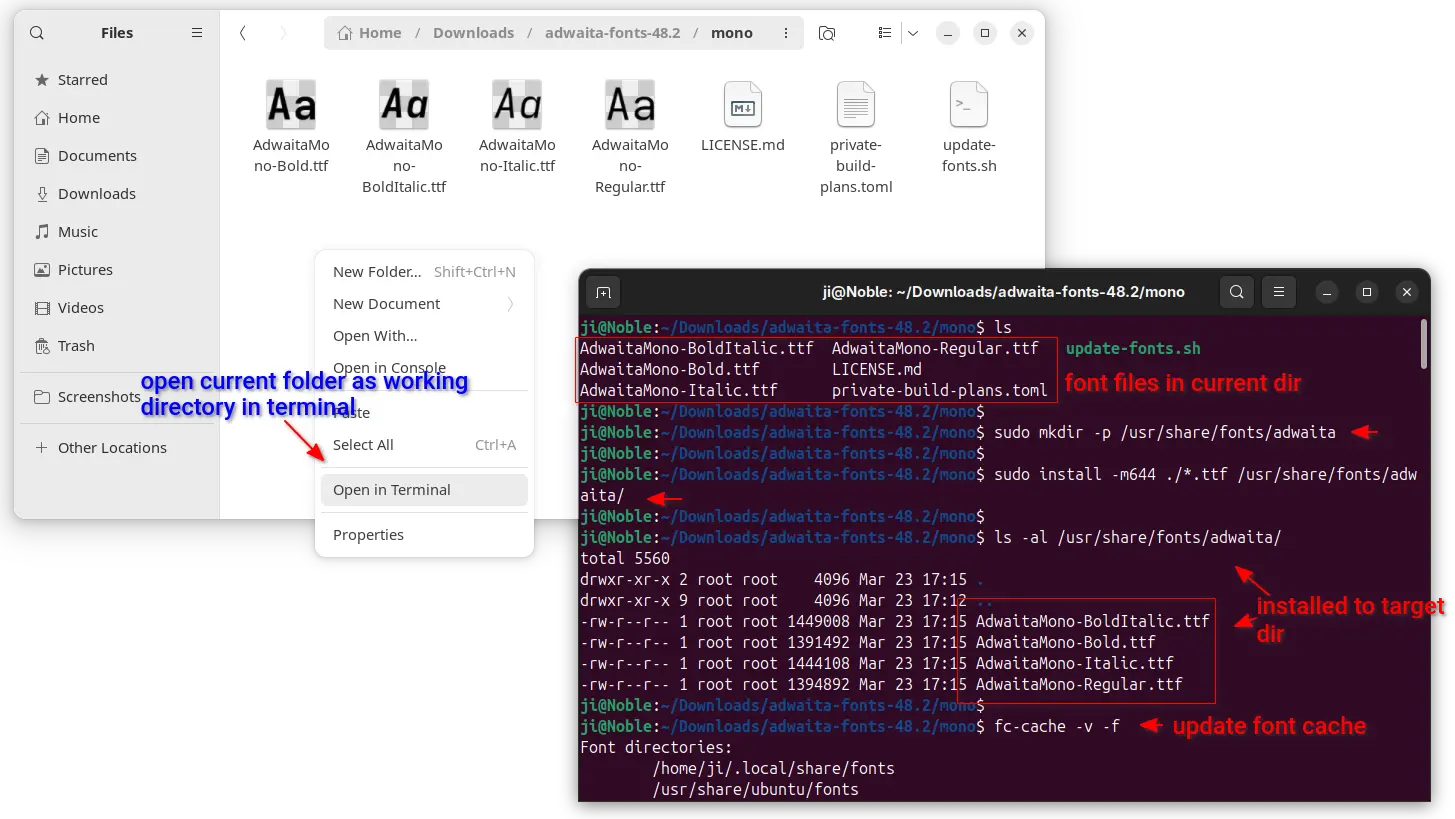
For system wide use, just move the .ttf files into /usr/share/fonts directory (or sub-directory) instead, though you need root permission to do the job. First, open file manager and navigate to the folder that contains the .ttf font files.
Right-click on blank area and select “Open in Terminal” to open terminal window with that folder as working directory.
When terminal opens, first run command to create a sub-folder, adwaita in the case, under target directory:
sudo mkdir -p /usr/share/fonts/adwaita
Then, run command to install (move and change permission to 644) all .ttf files from current to the location you just created:
As the .ttf font files are separated into 2 folders (mono and sans sub-folders), you need to open another folder in terminal and re-do the steps above. When done, also run fc-cache -f -v to apply changes.
Step 3: Apply the New Fonts
After installed font files into target location and updated cache, you may use following tools to apply/change font.
Option 1: Use GNOME Tweaks
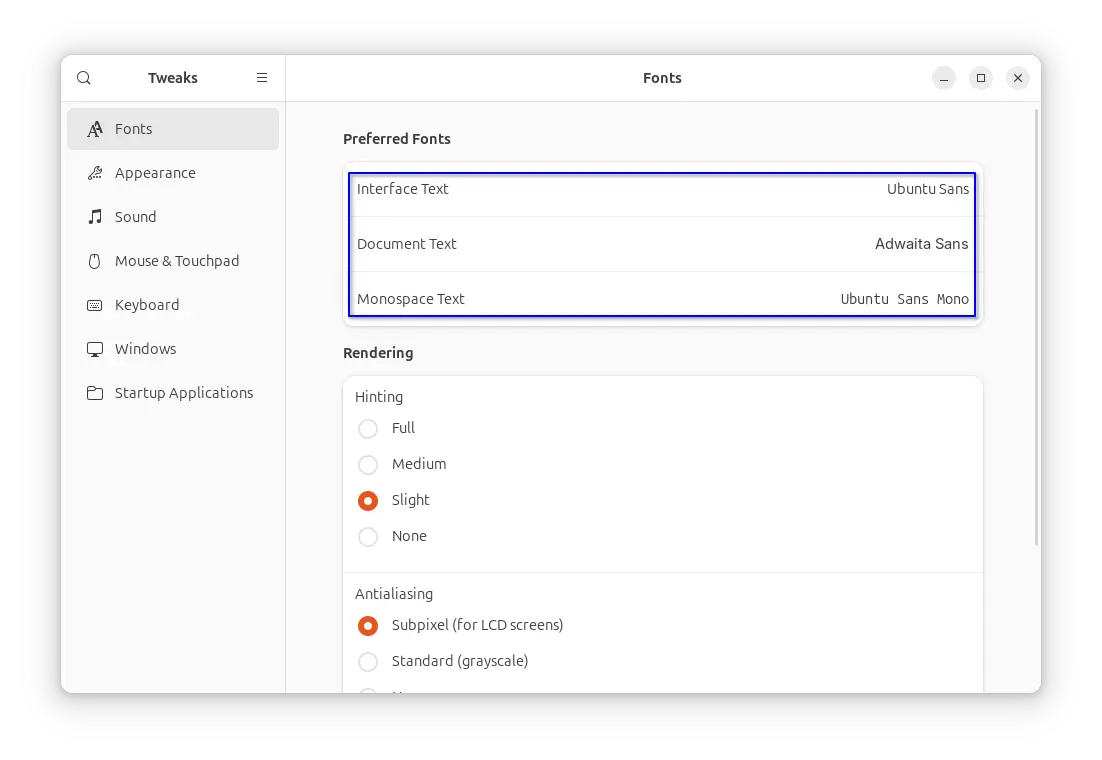
For the default GNOME Desktop, GNOME Tweaks (available to install in Ubuntu Software / App Center) tool offers options to do the job in first tab. NOTE: GNOME Tweaks v46 has bug changing fonts in Ubuntu 24.04, please try other ways instead.Tips: As you see in the screenshot, there are 3 font options:
Interface Text – the text font in panels, menus, buttons, Settings, app window titles, etc.
Monospace Text – font for fixed-width characters in, e.g., terminal, coding, and text editors.
Document Text – font for displaying document text in an application (GNOME Text editor now use “Monospace Text” font instead).
Option 2: Use Font Manager
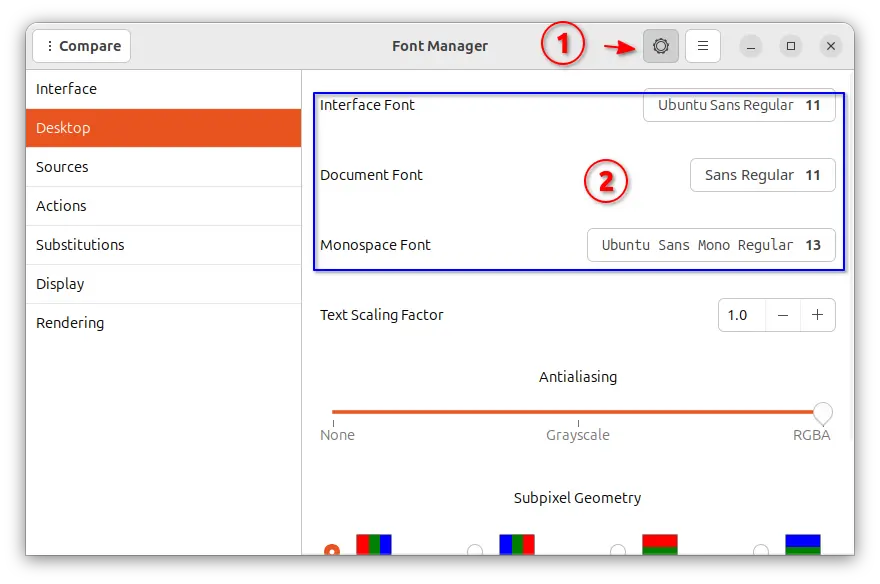
For non-GNOME desktop users who can’t find out the desktop specific font setting options, “Font Manager” also offers the options the change the fonts. Simply search for and install the app from Ubuntu Software or App Center, then launch it, and click the setting gear icon in header, finally navigate to “Desktop” in left pane to get the options.
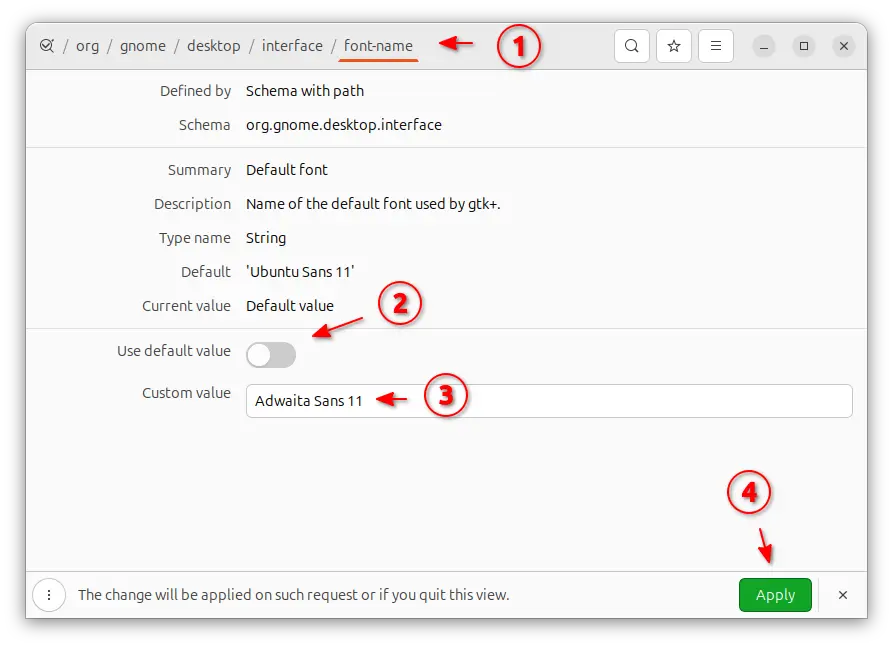
Option 3: Use Dconf Editor
Also for GNOME, the advanced dconf editor tool also provides the options to change fonts. While it also has options to easily reset fonts to default. First, install Dconf Editor either from AppCenter (or Ubuntu Software) or by running command in terminal (Ctrl+Alt+T):
sudo apt install dconf-editor
Then, launch Dconf Editor and navigate to org/gnome/desktop/interface. Finally, find out and change the following key values:
document-font-name – for Document Text.
font-name – for Interface Text.
monospace-font-name – for Monospace Text.
For each key, click turn off “Use default value”, then input a custom value Adwaita Sans 11 or Adwaita Mono 11 in the case, finally click the bottom right Apply button.
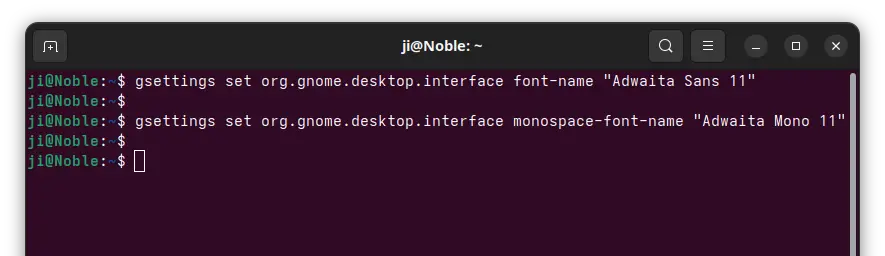
Option 4: Change fonts from command line (GNOME Only)
For the default GNOME desktop users who are OK with Linux command line, simply press Ctrl+Alt+T to open up a terminal window. When terminal opens, run the commands below one by one to set Adwaita Fonts:
gsettings set org.gnome.desktop.interface font-name "Adwaita Sans 11"
gsettings set org.gnome.desktop.interface monospace-font-name "Adwaita Mono 11"
gsettings set org.gnome.desktop.interface document-font-name "Adwaita Sans 11"
For choice, you may replace number ’11’ in the command to increase or decrease fonts sizes.
Restore Default Fonts (GNOME Only)
As mentioned above, “Dconf Editor” offer options to reset fonts to default. Just install & launch the tool, then navigate to org/gnome/desktop/interface, finally click edit each key and turn on “Use default value” option to revert back to default font. For choice, you may open terminal and run the commands below one by one to restore the fonts:
GNOME Desktop 48 was officially released on Wednesday! The developer team announced it in GNOME website:
The GNOME project is excited to introduce GNOME 48, a fresh release shaped by six months of hard work from our amazing community. We’re incredibly grateful to everyone who contributed to making this happen!
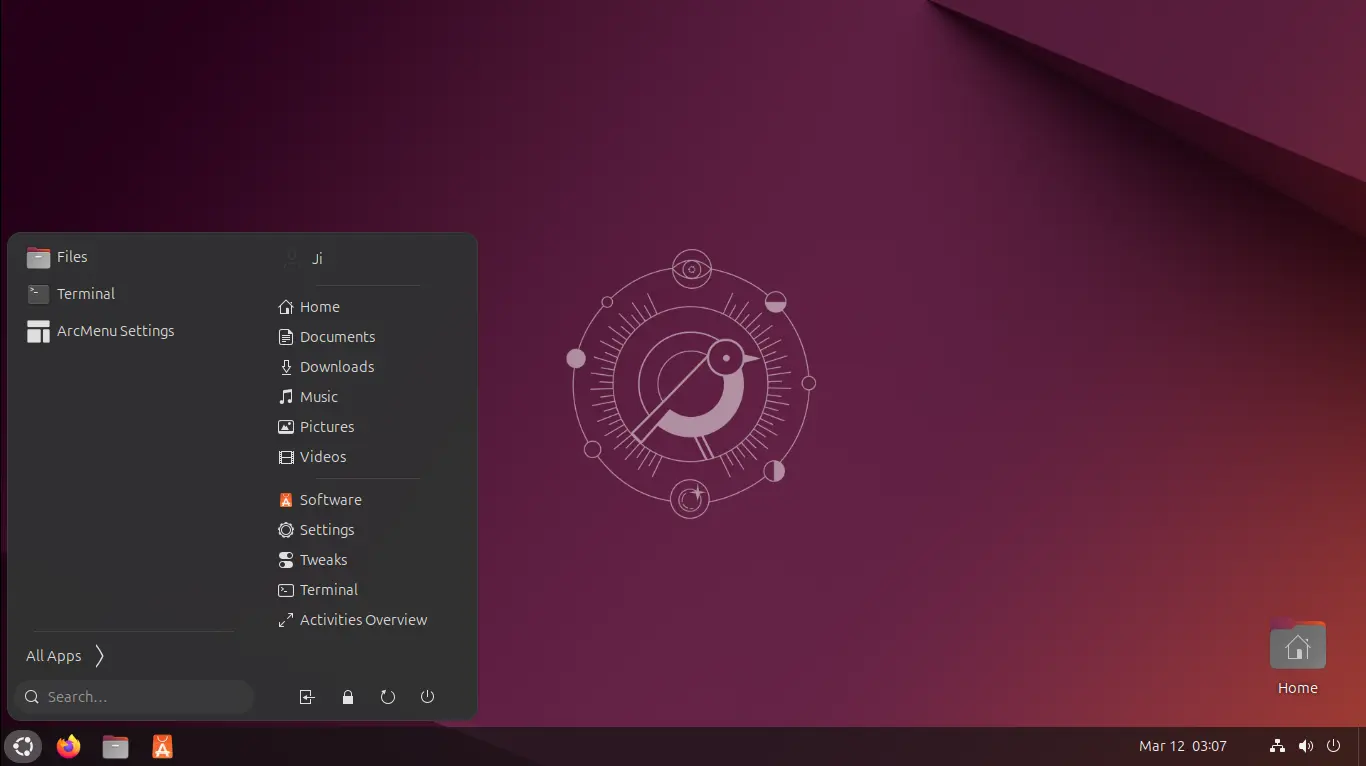
Dock to panel, the popular GNOME extension that merge the top-bar and bottom dock (aka the dash) into single classic Windows style panel, got big updates a few days ago.
The new release added GNOME 48 support, meaning it now works in Ubuntu 25.04 and Fedora 42 Workstation, though both are still in development at the moment of writing.
Dash to panel along with ArcMenu in Ubuntu 25.04 Daily Build
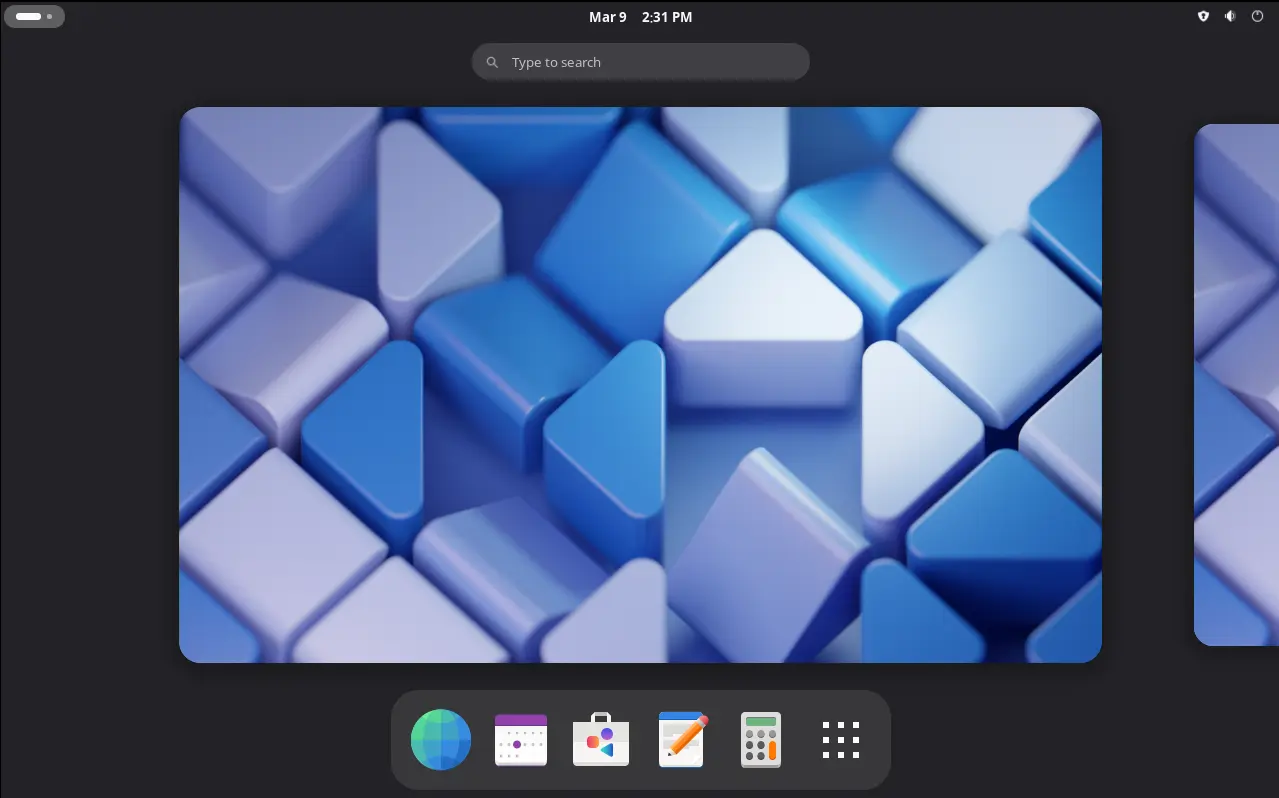
GNOME 48, the default desktop environment for Ubuntu 25.04 and Fedora 42 Workstation, is now in RC testing stage. While, the final stable release is planned for 2025-03-19.
The new release candidate enhanced the new features that were introduced in last Beta and Alpha releases, fixed numerous bugs, as well introduced some new features.
GNOME 48, the Linux desktop environment that will be default for Ubuntu 25.04 & Fedora 42 Workstation, now is in Beta stage.
The release team announced it just a few hours ago in GNOME Discourse, along with an installer image for testing and porting extensions.
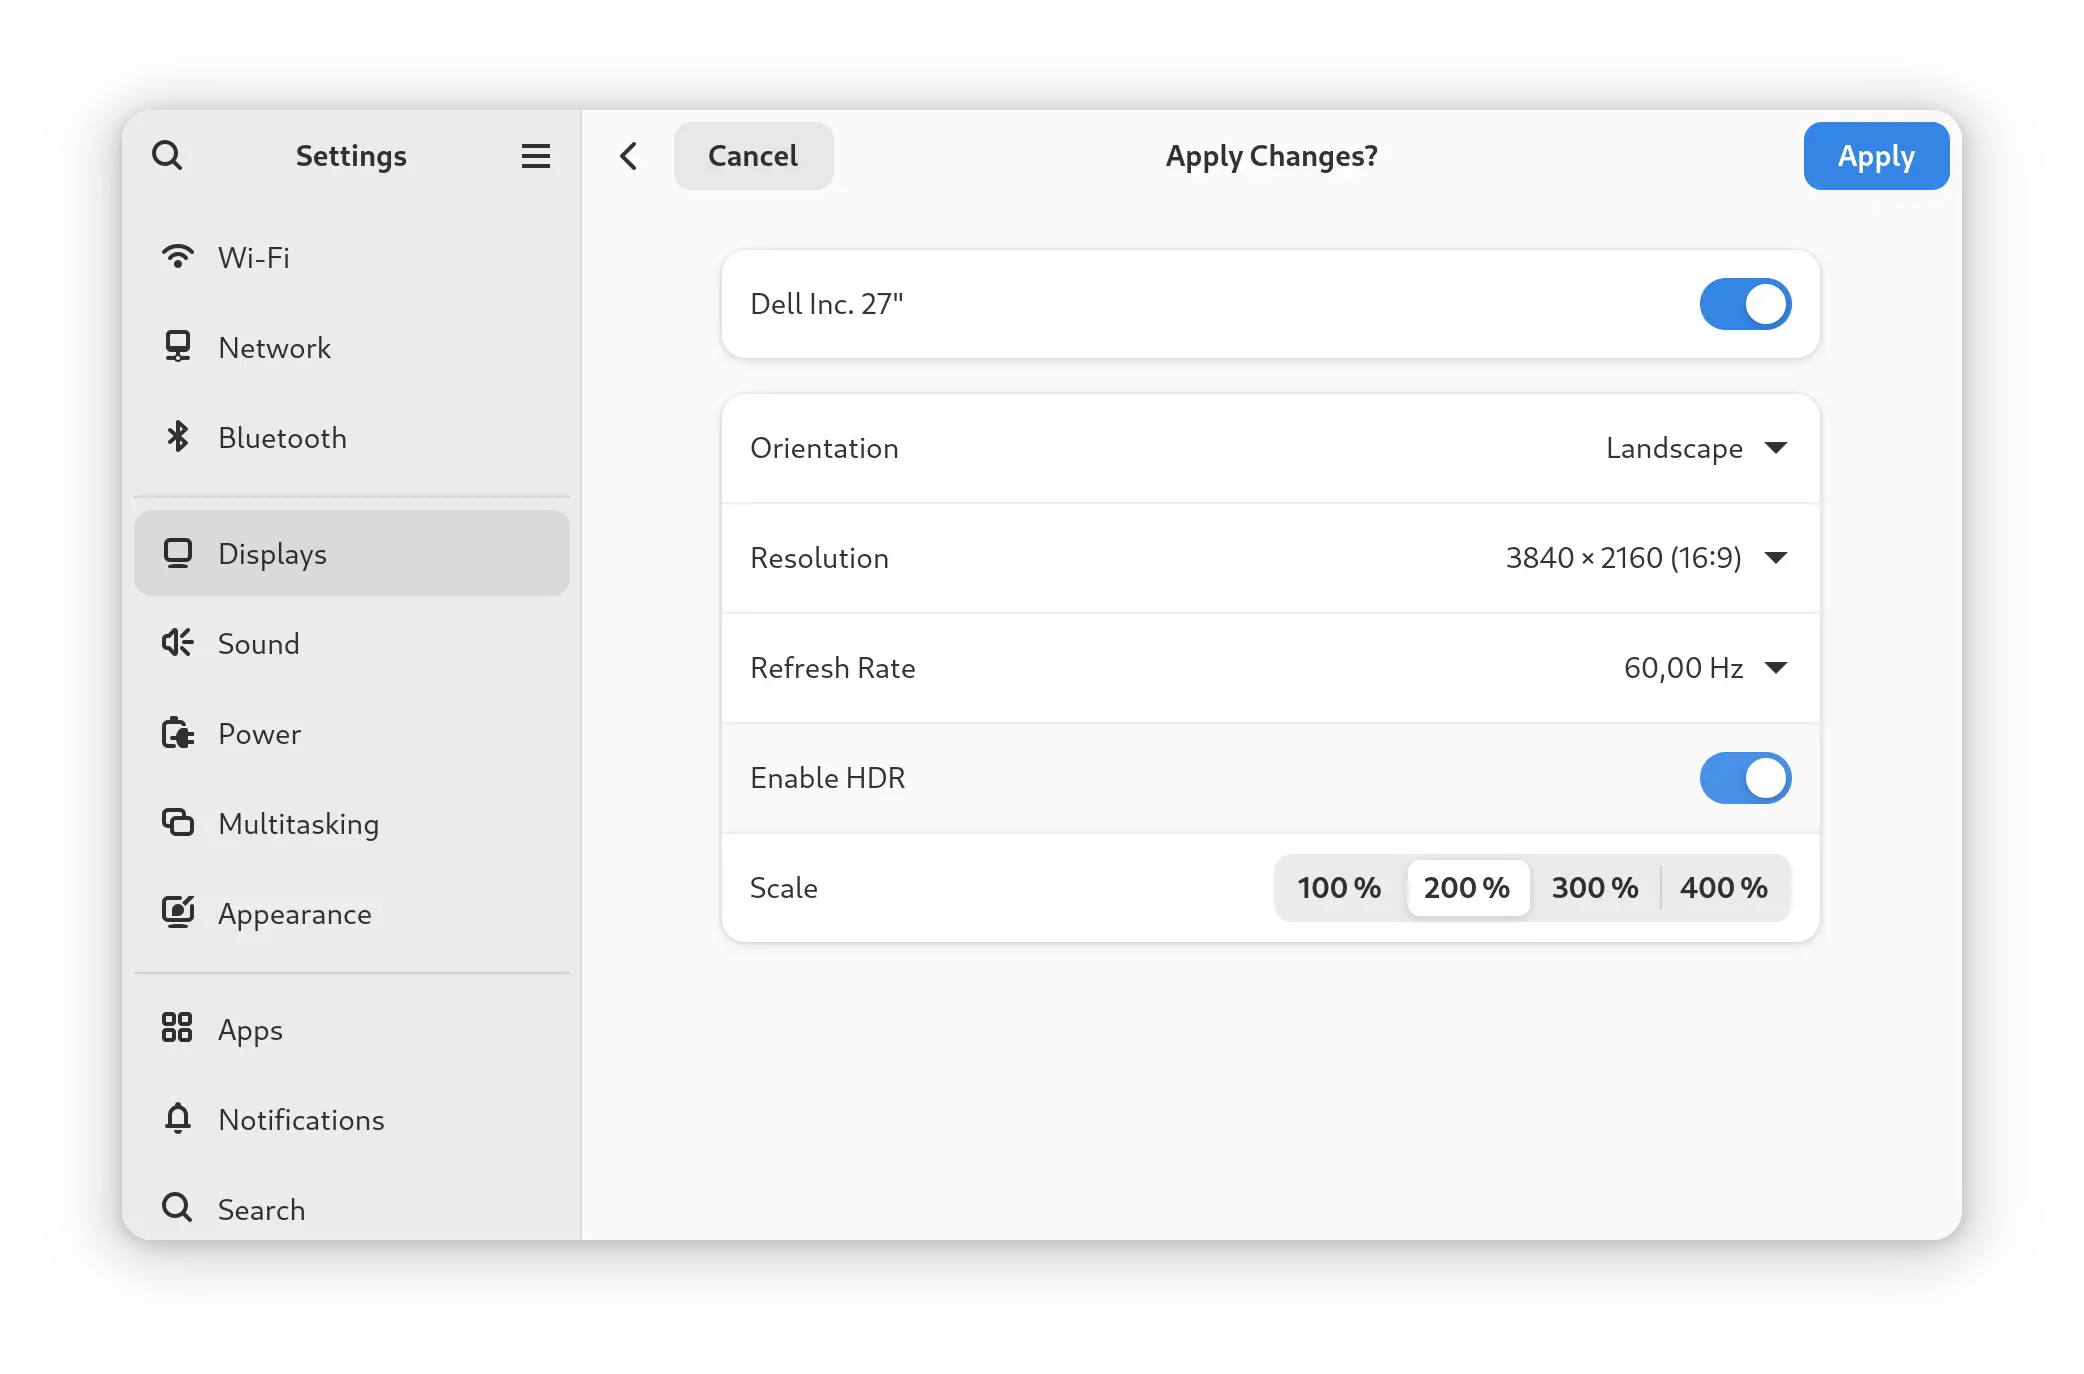
GNOME added experimental HDR support since version 44. It’s a technology allowing to transmit high dynamic range videos and images to compatible displays. In GNOME 48, GCC (GNOME Control Center) finally has a toggle option in the Display setting page to turn on/off this feature.
As you may know, GNOME is moving to GTK4 + LibAdwaita in recent years. Core apps are either ported to the new frameworks or replaced with new ones.
GNOMOE Text Editor, GNOME Camera, GNOME Console, and Loupe replaced Gedit, Cheese, GNOME Terminal, and Eyes of GNOME as default text editor, camera app, terminal, and image viewer. And, it introduced Decibels as new core app for playing audio files.
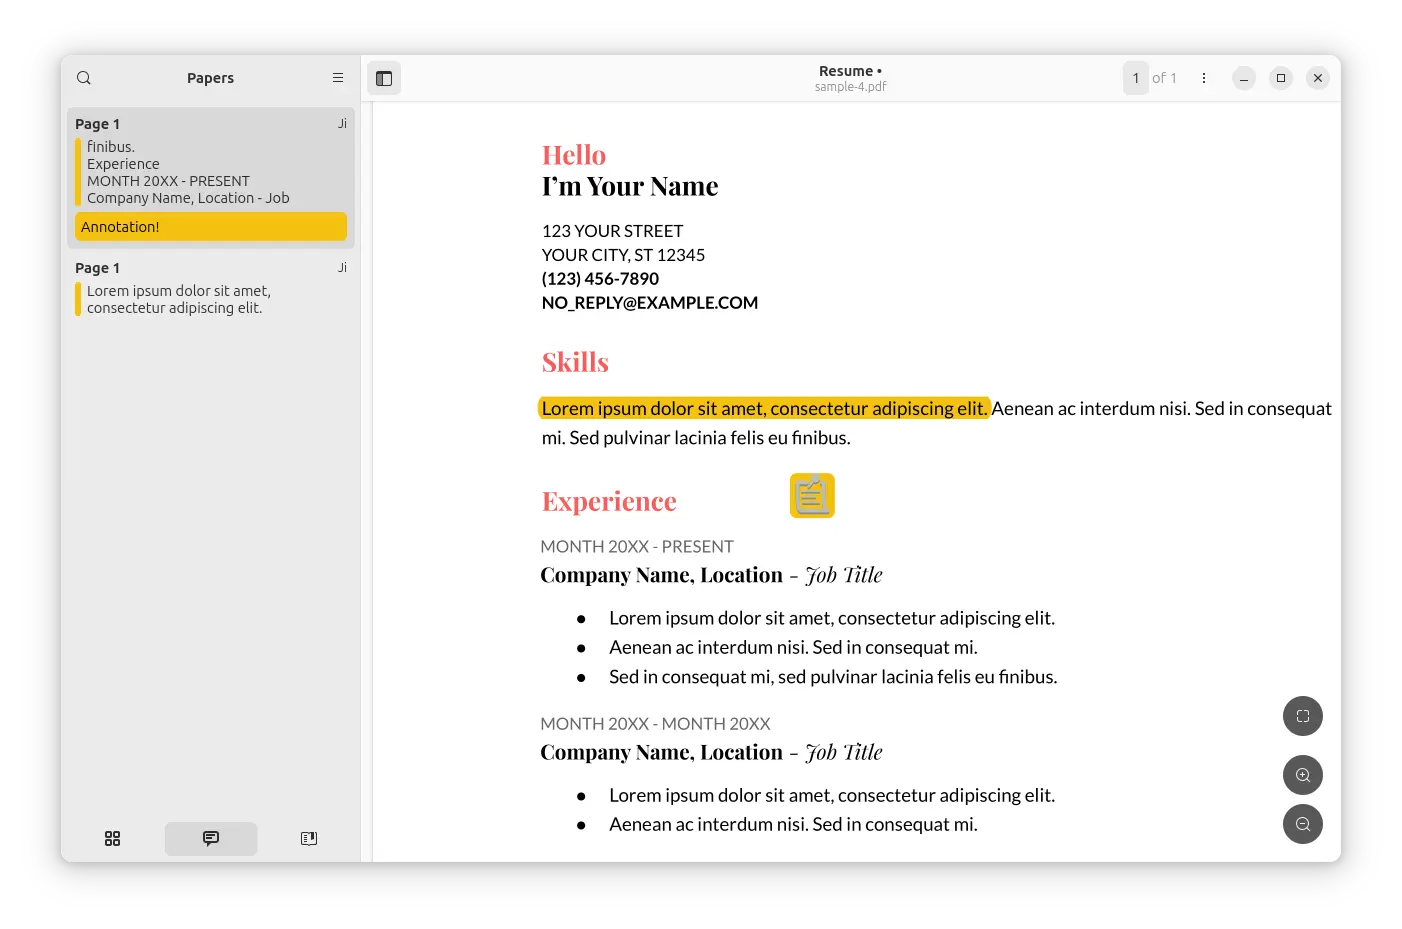
Papers entered GNOME Incubator about a year ago, expects to replace Evince as default PDF and Document viewer. Now it’s made into Debian (Unstable) and Ubuntu (25.04) repository for choice, and it’s expected to be default perhaps later this year according to this thread.
The first alpha release of GNOME 48 is out today! See what’s new in the desktop environment that will be default in next Ubuntu 25.04 and Fedora Workstation 42.
First, GNOME 48 introduced new core app called Decibels. It’s a simple audio player that features playback speed adjustment, easy seek controls, and shows the waveform of the track.
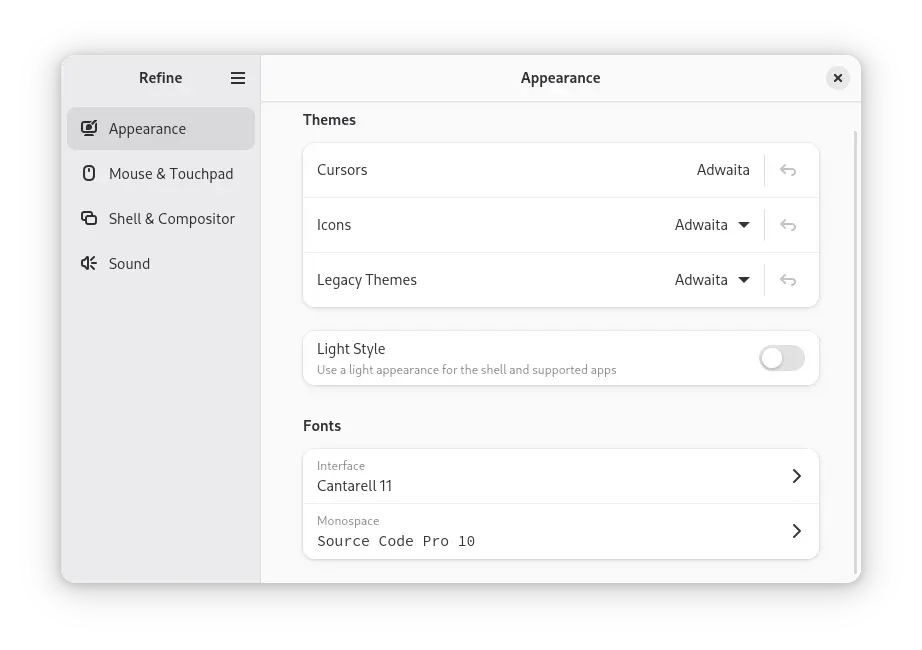
For Linux with GNOME, there’s now new configuration tool to tweak advanced settings in this desktop environment.
It’s Refine, a free open-source tool that uses GTK4 + LibAdwaita for a modern UI to tweak desktop settings in Fedora Workstation, Arch, Manjaro Linux, etc with vanilla GNOME Desktop.
NOTE: Ubuntu is marked as “Unsupported Environment”. Some settings MAY not work as intended. User needs to confirm “Accept the Risk and Continue” for using the app in Ubuntu. See this bug report for details.