This is a beginner’s guide shows you how to rotate your images using either a Linux command or built-in apps such as file manager and image viewer.
Option 1: Rotate an image using built-in image viewer
If you want to change the orientation for only a few photo images, then the built-in image view is always the best choice.
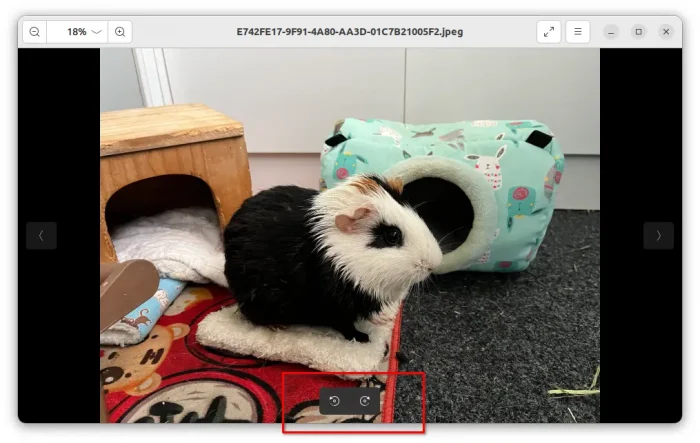
Simply click open your image file through the image viewer. Move mouse cursor over the app window, then you’ll see the buttons to rotate to the left and rotate to the right in bottom.
The image viewer app varies depends on your desktop environment, the rotate options may be available other-where such as in app menu.
After rotated your image, either click Save (Ctrl+S) to override the original image file, or choose Save as (Ctrl+Shift+S) to save the rotated image as another file.
Option 2: Rotate image/images using File Manager
For the default GNOME desktop, there’s a plugin for the built-in Nautilus file manager to resize and rotate selected images.
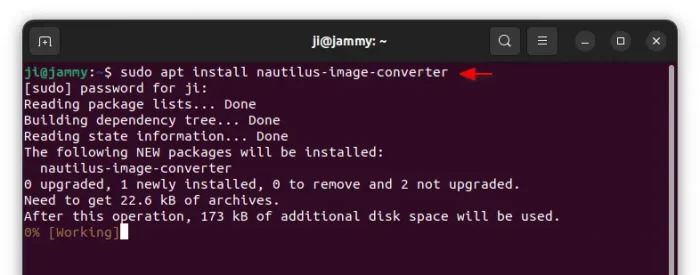
1. First, press Ctrl+Alt+T on keyboard to open terminal. When it opens, run command to install the plugin:
sudo apt install nautilus-image-converter
Type user password for sudo authentication, though there’s no asterisk feedback.
2. After that, run command to restart Nautilus and apply the new plugin:
nautilus -q
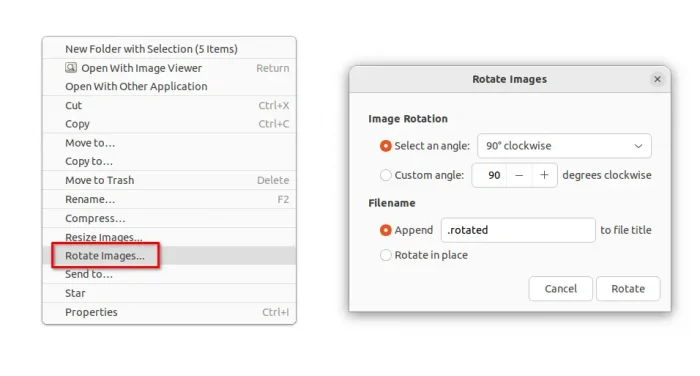
3. Now, re-open file manager and choose an image. Or, choose multiple images using either Ctrl + click to select one by one, or Shift + click to choose from one to another. Finally, right-click and select “Rotate Images …” menu option.
In pop-up dialog, either choose an angle or input custom angle, set “Rotate in place” to override original images or use default append option to save as another files, and finally click “Rotate” button.
Option 3: Linux command to rotate images
If you don’t have a graphical desktop environment, or previous methods do not work for you, then try convert command.
1. First open terminal (Ctrl+Alt+T) or get into command console, then run command to install the powerful imagemagick library:
sudo apt install imagemagick
2. Then, use the convert command to rotate an image:
convert myimage.png -rotate 90 myimage-rotated.png
This command will rotate the “myimage.png” image file 90 degrees to the right, and save it to another “myimage-rotated.png” file. In the command, you may:
- Replace
myimage.pngwith any other image file (Imagemagick supports over 100 major file formats), though you may first navigate to the folder that contains your photo images. For example, usecd ~/Picturesto navigate to user Pictures folder, or right-click on picture folder and select “Open in Terminal”. - Set another rotate degree (from 0 to 360) in clockwise direction.
- For choice, set the output image name (
myimage-rotated.pngin last command) to same to the input image (myimage.png), so it will override the original one.
For batch image rotating, for example rotate all .png images (in current folder) 90 degrees to the right, and append -rotated in output filenames, run command:
for img in *.png; do convert $img -rotate 90 ${img%.png}-rotated.png; done
In Addition
In addition to the options above, there’s also Shotwell photo manager (pre-installed in full installation mode), gThumb image organizer can do similar jobs. For more powerful image converting tool, but hate Linux commands, then converseen is a good choice.


