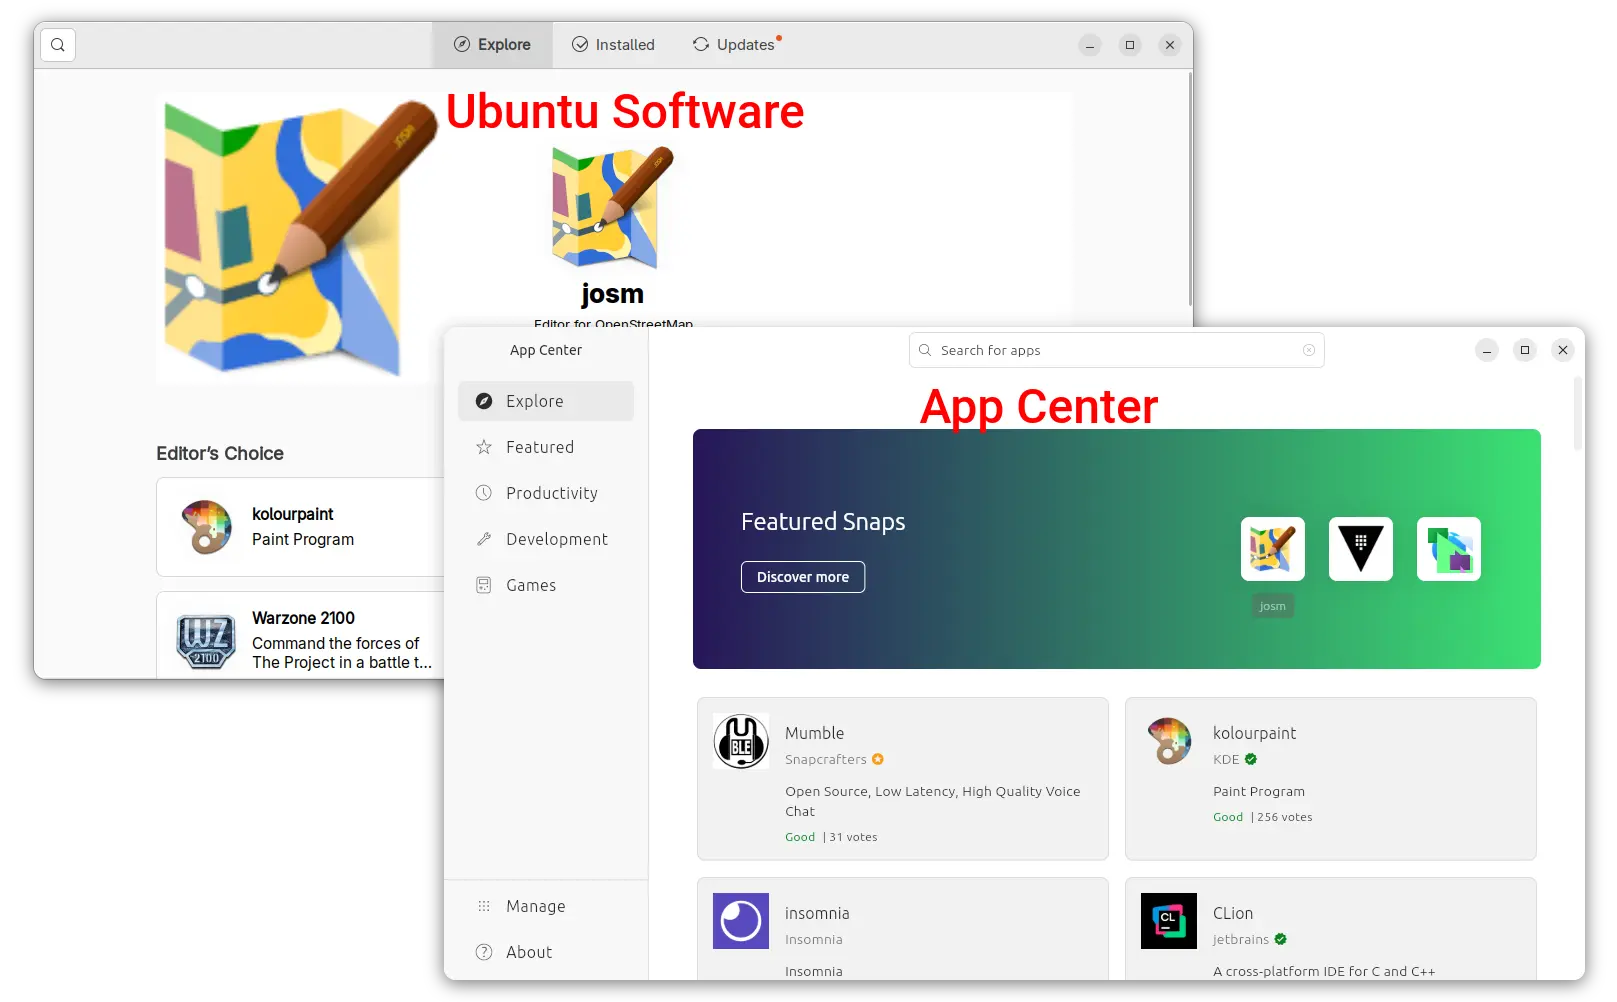
Archives For Howtos

Got a Logitech or SteelSeries headset? This app may help to adjust sidetone, get battery state, toggle LED, and set inactive time in Ubuntu Linux.

It’s HeadsetControl, a free and open-source application that supports:

  • Logitech G430, G432, G433, G533, G535, G633, G635, G733, G930, G933, G935, G Pro.
  • Logitech Zone Wired/Zone 750
  • SteelSeries Arctis 1, Arctis 1 for XBox, Arctis (7 and Pro), Arctis 7+, Arctis Nova 7, Arctis 9, Arctis Pro wireless.
  • HyperX Cloud Flight Wireless
  • Corsair Void (Every void-version*, regardless whether Elite, Pro, HS70 Wireless)
  • Roccat Elo 7.1 Air

The application is a command line tool, though it has a graphical interface for GNOME 42+ (Ubuntu 22.04 / Fedora 35 and higher).

Image borrowed from extension web page, as I don’t have a headset at hand

How to Install the HeadsetControl app

The app so far does not have binary package for Ubuntu Linux, though it’s not hard to build it from source. The following steps is tested and works in my case in Ubuntu 22.04 LTS.

1. First, press Ctrl+Alt+T on keyboard to open a terminal window. When it opens, run command to install build dependencies:

sudo apt install build-essential git cmake libhidapi-dev

2. Then, clone the source by running the git command in terminal, and then navigate to the source folder:

git clone https://github.com/Sapd/HeadsetControl && cd HeadsetControl

3. Create ‘build’ sub-folder, navigate to that sub-folder and start building it:

mkdir build && cd build && cmake ../

4. Finally, run make and then make install to build and install the tool:

make -j4
sudo make install

Once successfully installed, it will output that ‘/usr/local/bin/headsetcontrol‘ and ‘/usr/local/lib/udev/rules.d/70-headsets.rules‘ installed.

How to Install the Extension for graphical UI

For Ubuntu 22.04 and higher, first search for and install “Extension Manager” from Ubuntu Software.

Install Extension Manager in Ubuntu 22.04+

Then, use “Extension Manager” to search and install the ‘HeadsetControl’ extension under ‘Browse’ tab.

Once installed, it should show the indicator applet in system tray area immediately with menu options to control your headset! Other Linux can go to this page to use ON/OFF switch to install the extension.

Uninstall:

To remove the extension, either go to the link page above and use ON/OFF switch, or use “Extension Manager” or Gnome Extensions tool.

To remove the command line application, open terminal and run command:

sudo rm /usr/local/bin/headsetcontrol /usr/local/lib/udev/rules.d/70-headsets.rules

This simple tutorial is going to show beginners how to install the latest stable Battle for Wesnoth (so far 1.16.8) via PPA in Ubuntu 22.04, Ubuntu 20.04, Linux Mint 20/21.

The Battle for Wesnoth is an open source, turn-based strategy game features both single player and online multiplayer combat.

Ubuntu includes the game package in its system repository but always old. User can choose to install the official Flatpak package, by running 2 commands one by one in a terminal window.

sudo apt install flatpak
flatpak install https://dl.flathub.org/repo/appstream/org.wesnoth.Wesnoth.flatpakref

Though, it’s universal Linux package format that runs in sandbox.

For users who prefer the classic .deb package format, The Debian/Ubuntu Games Team maintains an Ubuntu PPA with the latest stable/devel release (1.16.x stable at the moment) of the game packages. Which, so far supports Ubuntu 20.04, Ubuntu 22.04, Ubuntu 22.10, and their derivatives.

1. First, either search for and open a terminal from start menu or press Ctrl+Alt+T on keyboard to open terminal.

2. When terminal opens, paste the command below and hit Enter to add the PPA repository.

sudo add-apt-repository ppa:pkg-games/wesnoth-devel

Type user password (no asterisk feedback) when it asks for sudo authentication, and hit Enter to continue.

3. If a previous 1.16.x version of the game package was installed on your system, launch “Software Updater” (or Update Manager) to upgrade the game:

Or, run command in terminal to install/upgrade the game package:

sudo apt instatll wesnoth-1.16

NOTE: Linux Mint user may first run sudo apt update to refresh package index.

Once installed, search for and launch the game either from start menu or ‘Activities’ overview depends on your DE and enjoy!

Uninstall:

To download the game to the stock version available in system repository, open terminal (Ctrl+Alt+T) and run command:

sudo apt install ppa-purge && sudo ppa-purge ppa:pkg-games/wesnoth-devel

This command will install ppa-purge tool and purge the PPA, which also downgrade installed packages.

To simply uninstall the game package, use command:

sudo apt remove --autoremove wesnoth-1.16

Also remove the PPA, either via “Software & Updates” under Other Software tab in Ubuntu, or use “Software Sources” tool in Linux Mint, or run command:

sudo add-apt-repository --remove ppa:pkg-games/wesnoth-devel

That’s all. Enjoy!

For sports fans who want to keep a watchful eye on live scores for favorite teams, here’s an indicator applet for Ubuntu, Fedora, and other Linux with GNOME.

It’s colosseum, which displays an indicator in top-panel system tray area. By clicking on it will show the menu with live scores for your favorite sports teams.

So far, it supports 12 sports leagues:

  • Bundesliga
  • 2. Bundesliga
  • English Premier League
  • La Liga
  • Ligue 1
  • Major League Baseball
  • National Basketball Association
  • National Football League
  • National Hockey League
  • Serie A
  • UEFA Champions League
  • Women’s National Basketball Association

There are also 5 supported tournaments, including

  • CONCACAF Gold Cup
  • Copa America
  • FIFA World Cup
  • UEFA Champions League
  • UEFA European Championship

How to Install this live scores indicator

This indicator is available as an extension, which so far supports GNOME v40, 41, 42 and 43. Meaning, you can install and use it in Ubuntu 22.04+, Fedora 35+, Arch, Manjaro, Rocky Linux, etc with GNOME desktop.

1. For Ubuntu 22.04 and higher, first search for and install “Extension Manager” from Ubuntu Software.

Install Extension Manager in Ubuntu 22.04+

2. Then open the extension manager tool, navigate to “Browse” tab. Finally, search and install “colosseum” extension.

3. Once installed, switch back to “Installed” tab, and click on gear icon for that extension to open the configuration page.

There, set the refresh time interval, turn on the toggle buttons for your favorite sports leagues and/or tournaments. New configuration tabs will appear, where you can follow your favorite teams.

TIP: If the indicator applet does not appear in panel, try to turn off and then turn on again the extension, or just log out and log back to restart Gnome Shell.

For other Linux, go to this page and use ON/OFF switch to install the extension. And, install and use “Gnome Extensions” app to manager extensions’ configurations.

RetroArch emulator released version 1.15.0 a few days ago. Here’s how to install it in Ubuntu 22.10, Ubuntu 22.04, Ubuntu 20.04 and Ubuntu 18.04 via PPA.

The new 1.15.0 release feature steam support for macOS user, though macOS 10.13 or later is required. Also, it supports Apple’s native Gamepad protocol MFi, includes Vulkan video driver that is HDR capable for macOS users.

The new release also features Append Preset and Prepend Preset, allows to stack shader presets now on top of each other. Meaning user can mix various shader presets and then save it as a new preset.

Another big change is the alternative system to runahead – preemptive frames. Which, works by rerunning core logic to “rewrite history” before the current frame. Frames are only rerun when the controller state changes. Runahead is still available, and user can choose which one to use.


Other changes include:

  • Add support for system subdirs per core/database.
  • Restore cached video driver always on quit
  • Add keyboard recording support to BSV
  • Add checkpointing feature for replay recordings
  • PS3/PSL1GHT: Add RSX video driver
  • Add “Switch Icons” option
  • Add Run-Ahead data to on-screen statistics
  • See the release note for more details.

How to Install RetroArch 1.15.0 in Ubuntu / Linux Mint

RetroArch download page offers the downloads for all supported platforms.

For Ubuntu, Linux Mint based systems, the official PPA is a good choice, which so far support for Ubuntu 18.04, Ubuntu 20.04, Ubuntu 22.04, Ubuntu 22.10, and upcoming Ubuntu 23.04.

1. First, press Ctrl+Alt+T on keyboard to open terminal. When it opens, run command to add the PPA:

sudo add-apt-repository ppa:libretro/stable

Type user password (no asterisk feedback) when it asks and hit Enter to continue.

2. For the old Ubuntu 18.04 and Linux Mint, user may need to manually refresh package cache by running command:

sudo apt update

3. Finally, either run command in terminal to install the emulator:

sudo apt install retroarch libretro-*

Or if an old version was installed, use Software Updater to update to v1.15.0.

After installing the software, search for and launch it from start menu or ‘Activities’ overview.

Then, use “Online Updater” menu option to update core libraries, assets, profiles, database, etc. And, use ‘Content Downloader’ option to grab free contents for selected core.

How to Remove RetroArch

To remove the software package, open terminal (Ctrl+Alt+T) and run command:

sudo apt remove --autoremove retroarch libretro-*

Also remove the PPA repository, either by running the command below:

sudo add-apt-repository --remove ppa:libretro/stable

Or use “Software & Updates” utility by removing the source line under “Other Software” tab.

Ksnip, the popular free open-source screenshot and annotation tool, released 1.10.1 version yesterday.

Ksnip is a Qt based screenshot tool with editing features, that works in Windows, macOS, and Linux on both Wayland and Xorg. It’s one of my top favorite applications for adding annotations in screenshot.

The app just released version 1.10.1 one day ago as the first point release for the 1.10 release series. It’s a small release with a new feature: KDE support for scale factor. Meaning it’s now working better in KDE desktop (such as KUbuntu, Ubuntu Studio) with different scaling factor.

Other changes include:

  • Fix drag and drop issue for Ksnip installed as Snap.
  • Fix sticker resizing issue when bounding rect flipped.
  • Show tab tooltips on initial tabs.
  • Fix for unnecessary scrollbars when a screenshot has a smaller size than the previous one
  • Fix that loading image from stdin single instance client runner side doesn’t work

How to Install KSnip 1.10.1 in Ubuntu / Linux Mint

Option 1: Snap package

The easiest way to install the tool in Ubuntu is using the official Snap packages. Simply open Ubuntu Software, then you can search for and install it via few clicks.

Install Ksnip via Ubuntu Software

Option 2: AppImage / Deb

The software project page also provides AppImage and Deb packages, as well as Windows and Mac OS packages for download under ‘Assets’ section:

For most Linux, you may download the non-install AppImage package, make it executable via right-click menu “Properties” dialog -> “Permissions” tab, and finally click run the package to launch it.

For Debian and Ubuntu based system, download the .deb package and install it by running command in terminal (press Ctrl+Alt+T to open terminal):

sudo apt install ~/Downloads/ksnip-*.deb

NOTE for Ubuntu 22.04, double-click installing this local deb via “Software Install” option may not work properly. It refers to the Snap package, rather than installing the local package.

Option 3: Ubuntu PPA (unofficial)

For those prefer Ubuntu PPA, here’s an unofficial repository with Ubuntu 20.04, Ubuntu 22.04, Ubuntu 22.10 and Ubuntu 23.04 support.

Simply press Ctrl+Alt+T on keyboard to open terminal, and run the commands below one by one will add the PPA and install the screenshot tool from it.

sudo add-apt-repository ppa:ubuntuhandbook1/ksnip
sudo apt update
sudo apt install ksnip libkimageannotator0 libkcolorpicker0

Install the OCR plugin:

The OCR plugin is available to install as a separate package. It’s available to download at the link below:

Click to expand the ‘Assets‘ section, download & install the .deb package for Debian and Ubuntu based system.

Uninstall Ksnip

For the snap package, simply click ‘uninstall’ button in Ubuntu Software.

For deb package, press Ctrl+Alt+T on keyboard and run the command below to remove it:

sudo apt remove --autoremove ksnip libkimageannotator0

And, remove the Ubuntu PPA (if added) by running command:

sudo add-apt-repository --remove ppa:ubuntuhandbook1/ksnip