Archives For News

Ubuntu 21.10 Impish Indri Final Beta Released

Last updated: September 24, 2021 — Leave a comment

The Ubuntu team announced the release of Ubuntu 21.10 Beta, code name ‘Impish Indri’. The release features Linux Kernel 5.13 and GNOME 40 desktop.

Ubuntu 21.10, codenamed “Impish Indri”, continues Ubuntu’s proud tradition of integrating the latest and greatest open source technologies into a high-quality, easy-to-use Linux distribution. The team has been hard at work through this cycle, introducing new features and fixing bugs.

Ubuntu 21.10 final will be released on October 14, with support for 9 months until July 2022. It is powered by Linux Kernel 5.13 with most recent hardware support. The Desktop edition include GNOME 40 features a new and improved Activities Overview design.

Workspaces are now arranged horizontally, and the overview and app grid are accessed vertically. And it supports three-finger touchpad gestures to toggle overview and switch workspaces.

The “standard” app layout, dark header-bar along with light window color, has been removed. Now Ubuntu 21.10 includes only “light” and “dark” mode to choose from the ‘Appearance’ settings page.

GNOME 40 by default logs into the overview screen. Gladly, Ubuntu decides to disable this design and revert to blank desktop just as before. However, Firefox web browser in Ubuntu 21.10 defaults a Snap app runs in sandbox.

Though the classic Firefox deb is still available out-of-the-box, clicking the default browser icon on left dock will open the Snap app. For users don’t like Snap may remove the icon from dock and add the native one as favorite.

Ubuntu 21.10 has TWO Firefox packages and defaults to SNAP

Download Ubuntu 21.10

This Beta release includes disc images from Ubuntu Desktop, Server, Cloud products, as well as official Ubuntu flavors including Kubuntu, Lubuntu, Ubuntu Budgie, UbuntuKylin, Ubuntu MATE, Ubuntu Studio, and Xubuntu.

To download Ubuntu 21.10 desktop and server iso images, go to the link button below:

For Ubuntu flavors and other downloads go to cdimage.ubuntu.com. And the full release notes for Ubuntu 21.10 Beta can be found at HERE.

After half a year of development, the GNOME project announced version 41 of its popular Linux desktop environment.

GNOME 41 comes with some exciting new features. The upper right corner system tray menu now includes option to make it easy to switch Power Mode between “Balanced” and “Power Saver”. It’s said that “Performance mode” is only visible on hardware that supports this feature, though I don’t understand which hardware required, may be a dedicated graphics card.

The GNOME Settings panel introduced two new items in the left pane: Multitasking and Mobile Network.

The “Multitasking” pane offers options to toggle top-left hot-corner to open Activities overview, app window auto-resizing function when dragging against screen edges; set dynamic or fixed number of workspaces; show workspace on primary only or all displays; super + tab switching for apps on all workspaces or current workspace only.

The “Mobile Network” pane is only visible when a supported modem is present, e.g., 2G, 3G, 4G, and GSM/LTE. It allows to set the network type, whether to use mobile data and data roaming. And it supports multiple SIMs and modems, allows to easy switching network modes.

Other changes in Gnome 41 include:

  • New “Connections” remote desktop app with VNC and RDP support.
  • Overhaul Gnome Software.
  • Redesigned Gnome Music.
  • Faster response to keyboard & pointer input on Wayland.
  • New default GL renderer for GTK4.
  • Create encrypted .zip archives in Files.
  • Import events to Calendar from .ics files.
  • Code cleanup in Mutter, and more.

How to Get Gnome 41:

Usually, the newest GNOME desktop will be first made into Fedora and Arch Linux. Users are recommended to wait your Linux distribution to include the desktop environment.

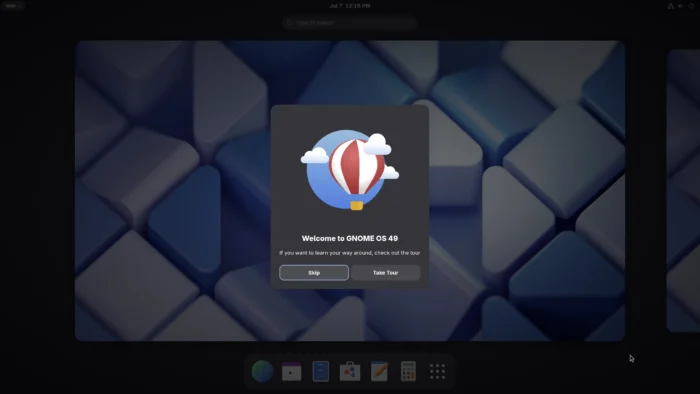
For testing and development purpose, you can try the GNOME OS either in virtual machine or real computer. Or download the iso image from the link button below:

gThumb image viewer and organizer announced version 3.12.0 as the new stable release series!

gThumb 3.12.0 is the new stable series since the last 3.10.x, while the 3.11.x is the development release.

What’s New in gThumb 3.12.0:

The new release includes many new features compare to the previous stable 3.10.x. They are all introduced in the 3.11 development releases, so you may already enjoy using them for a period of time.

With libheif library, gThumb now opens AVIF, HEIF (include Apple’s HEIC) images, and allows to save images as AVIF. And it supports JPEG XL images using the jpeg-xl library. A template editor is available to edit text values with special codes, for use in script commands, rename templates, print header and footer, etc.

Besides that, it improved file navigation for directory contains thousands of images. The file list now starts more thumbnailers in parallel, status bar has button to show the progress dialog. And the color picker tool shows colors in two more formats: rgb in % and hsl. Others include:

  • Allow to set shortcuts to activate filters.
  • Allow to mount unmounted volumes.
  • Add file actions to the viewer context menu.
  • Read color profiles from png files as well.
  • Option to show/hide the status bar.

For those already running gThumb 3.11.4, there are only bug-fixes and translation updates.

How to Install gThumb 3.12.0 in Ubuntu:

The software does not provide official binary package. Besides building from the source tarball, you may install it via the unofficial Ubuntu PPA.

1. Add the Ubuntu PPA.

The PPA so far provides packages for Ubuntu 20.04, Ubuntu 21.04, Ubuntu 21.10, and Linux Mint 20. It contains package for Ubuntu 18.04 but lacks JPEG XL support.

Firstly open terminal either from start menu or by pressing Ctrl+Alt+T on keyboard. When it opens, paste the command below into terminal and hit run:

sudo add-apt-repository ppa:ubuntuhandbook1/apps

2. Update system package cache.

Adding PPA will automatically refresh the package cache in Ubuntu 20.04 and higher. However old versions and some Ubuntu based systems does not. To do it manually, simply run command in terminal:

sudo apt update

3. Install / Upgrade gThumb.

Finally, either run the apt install command in a terminal window to install the image viewer:

sudo apt install gthumb

Or use the Software Updater (Update Manager) utility to receive package updates. Un-check other packages from the PPA if you don’t want them.

Uninstall / Restore gThumb:

You can restore to the stock version of the image viewer and organizer by purging the PPA repository. To do so, simply run command:

sudo apt install ppa-purge && sudo ppa-purge ppa:ubuntuhandbook1/apps

You may also keep the gThumb package but remove the Ubuntu PPA, since it contains many other software packages that you don’t prefer. To do so, either run command in terminal:

sudo add-apt-repository --remove ppa:ubuntuhandbook1/apps

Or remove the repository line under ‘Other Software’ tab via Software & Updates utility.

The Ubuntu team announced the six point release for Ubuntu 18.04 today for the Desktop and Server.

Ubuntu 18.04.6 refreshed the disc images for the amd64 and arm64 architecture, re-enabling the usage on Secure Boot enabled systems due to the key revocation related to the BootHole vulnerability.

In August 2020, a set of security vulnerabilities in GRUB2 (the GRand Unified Bootloader version 2) collectively known as BootHole were disclosed. Today, another set of vulnerabilities in GRUB2 were disclosed, with similar implications.

See more in this blog post.

The release also includes many other security updates for additional high-impact bug fixes, with a focus on maintaining stability and compatibility with Ubuntu 18.04 LTS.

Download Ubuntu 18.04.6:

Ubuntu 18.04 has 5 year standard security support, and additional 5 year Extended Security Maintenance (esm) free for personal use.

To download Ubuntu 18.04.6, go the the link below:

For Ubuntu 16.04 LTS, it’s able to upgrade to Ubuntu 18.04.6 using the Update Manger. See the documentation for more.

The free open-source Lightroom alternative, Darktable release version 3.6.1. Here’s what’s new and how to install it in Ubuntu.

Darktable 3.6.1 comes with stability improvements and bug-fixes. No new features, but has new camera support, including base support for Leica C-Lux (3:2), Sony ILCE-7RM3A, Sony ILCE-7RM4A, Nikon D6 (12bit and 14bit), and Nikon Z fc (12bit- and 14bit-compressed). The release also adds noise profile for Ricoh GR III.

And here are the bug-fixes according to the release note:

  • Fix module expand on quick access panel when enabling/disabling module.
  • Fix a possible crash in color calibration module.
  • Fix an inconsistency between the CPU & GPU path in color calibration module.
  • Fix possible issue in OpenCL Bradford non-linear code in color calibration which leads to wrong color rendering.
  • Fix Windows paths handling and encoding.
  • Fix possible issue in exiv2 when trying to write empty strings.
  • Fix by-scale button in export module.
  • Fix crash when renaming a drawn mask.
  • Minor UI fix in duplicate module.
  • Fix possible wrong rendering of the color picker tooltip.
  • Fix filename variable used when importing new pictures.
  • Fix noise profile for RICOH GR III.
  • Fix some memory leaks.

How to Install Darktable 3.6.1 in Ubuntu:

The raw development tool has official Linux repository with native packages for Debian, Ubuntu, Fedora, openSUSE. Darktable is also available to install via the universal Flatpak package.

For choice, I’ve uploaded the package into the unofficial PPA with Ubuntu 20.04, Ubuntu 21.04, and Ubuntu 21.10 support. And 32-bit Ubuntu 18.04 is also supported.

1.) Add the PPA.

Press Ctrl+Alt+T on keyboard to open terminal for running commands. When it opens, paste the command below into it and hit Enter.

sudo add-apt-repository ppa:ubuntuhandbook1/darktable

Type user password (no visual feedback) when it asks and hit Enter to continue.

2.) Install / upgrade Darktable

Next either run command in terminal to install the photography software:

sudo apt install darktable

Or upgrade the package using Software Updater (Update Manager) utility.

Uninstall Darktable:

To remove the software package, you may simply run apt command with remove flag in terminal:

sudo apt remove darktable --autoremove

And remove the PPA via command:

sudo add-apt-repository --remove ppa:ubuntuhandbook1/darktable

The Software & Updates also provides option to manage PPAs. Open it and navigate to “Other Software” tab, select the repository and click remove it.