


![]()
OpenJDK announced the latest JDK 26 on March 17, 2026. This is the beginner’s guide shows how to install it as well as the last 25 LTS in all current Ubuntu and Linux Mint releases.
OpenJDK 25 is the Long Term Support release with 5-years support until 2030. Ubuntu has made JDK 25 into system repository for current releases, while user may also choose the official tarball for choice.

image from oracle.com
Difference between OpenJDK and Oracle JDK
OpenJDK and Oracle JDK are “same thing”, but with different licence.
Oracle JDK is built from the OpenJDK JDK source, but non-opensource licence. While both OpenJDK source and the OpenJDK builds binaries are distributed under the same GPL2+CPE licence.
Both are free! Though, Oracle also offers a subscription for the Oracle JDK builds that user can buy for support! And, I’ve written about how to install Oracle Java 21/25 in Ubuntu.
Option 1: Install Open JDK 25 from System Repository
Ubuntu supports the long term support (LTS) OpenJDK releases. Like JDK 8, JDK 17, and JDK 21, the last OpenJDK 25 has been made into system repositories for Ubuntu 22.04, Ubuntu 24.04, Ubuntu 25.04/25.10, and next Ubuntu 26.04.
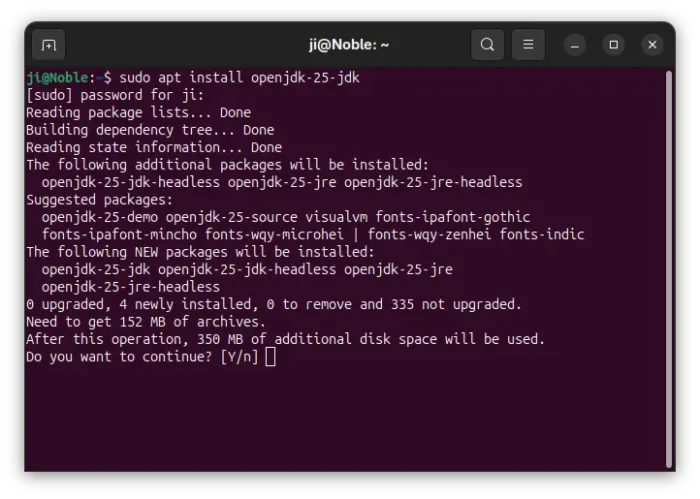
To install it, press Ctrl+Alt+T on keyboard to open terminal and run command:
sudo apt install openjdk-25-jdk
Run sudo apt update to refresh cache if failed. And you may replace openjdk-25-jdk with openjdk-25-jre for just run-time environment.
If you have multiple versions of Java installed, and JDK 25 is not set as default after installation, then you may run the command below and choose one to be default:
sudo update-alternatives --config java
Also replace java with javac or jar to set the defaults for other executables.
Option 2: Install OpenJDK JDK 26 from official tarball
NOTE: The steps below will override Oracle JDK 26 if it’s also installed via tarball.
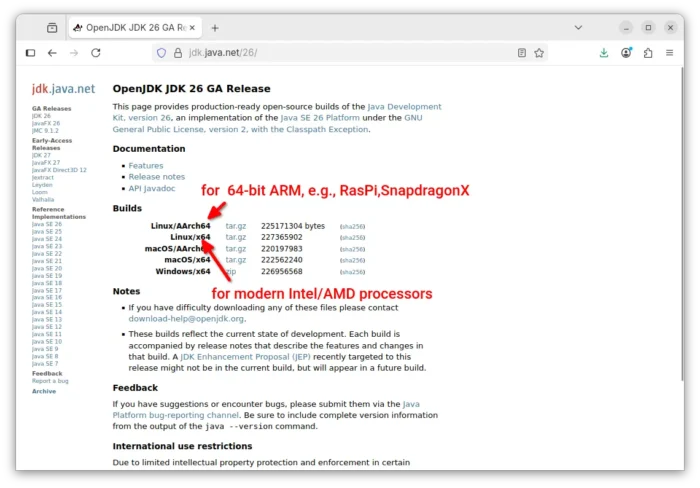
1. To install the new OpenJDK JDK 26, first go to java website via the link below:
Then select download the “Linux / x64” build for AMD/Intel platform, or “Linux / AArch64” for ARM devices (e.g., Raspberry Pi or Snapdragon X).
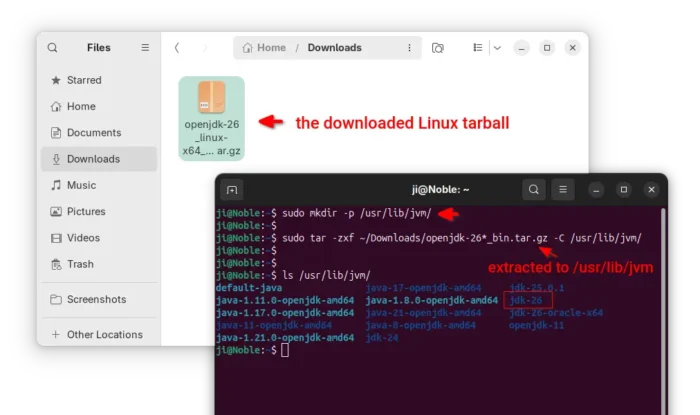
2. After downloaded the Linux tarball, press Ctrl+Alt+T to open up a terminal window, and run commands below to extract to /usr/lib/jvm directory.
- First, create the target directory in case this is the first time you install Java on the system.
sudo mkdir -p /usr/lib/jvm
- Then, run command to extract OpenJDK 26 tarball into that directory:
sudo tar -zxf ~/Downloads/openjdk-26*_bin.tar.gz -C /usr/lib/jvm/
Here assume you saved the tarball in user Downloads folder.
After that, run ls /usr/lib/jvm/ to list directory content. It should include a new jdk-25 (or jdk-25.0.1, jdk-25.0.2, etc) sub-folder.
3. Set OpenJDK JDK 26 as default.
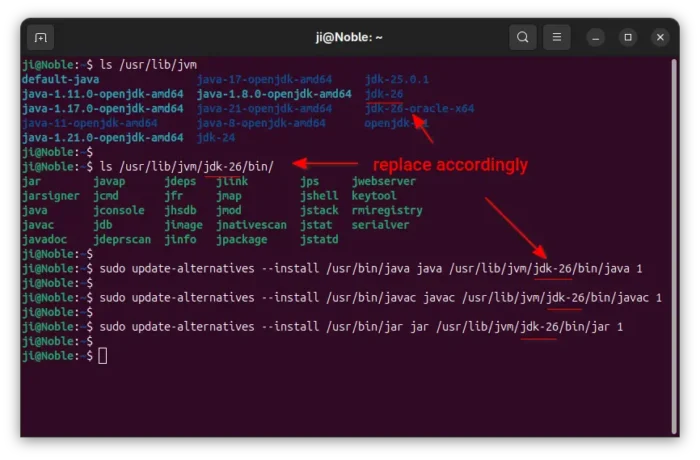
To set it as default, first run commands below one by one to link executable files as alternatives:
sudo update-alternatives --install /usr/bin/java java /usr/lib/jvm/jdk-26/bin/java 1
sudo update-alternatives --install /usr/bin/javac javac /usr/lib/jvm/jdk-26/bin/javac 1
sudo update-alternatives --install /usr/bin/jar jar /usr/lib/jvm/jdk-26/bin/jar 1
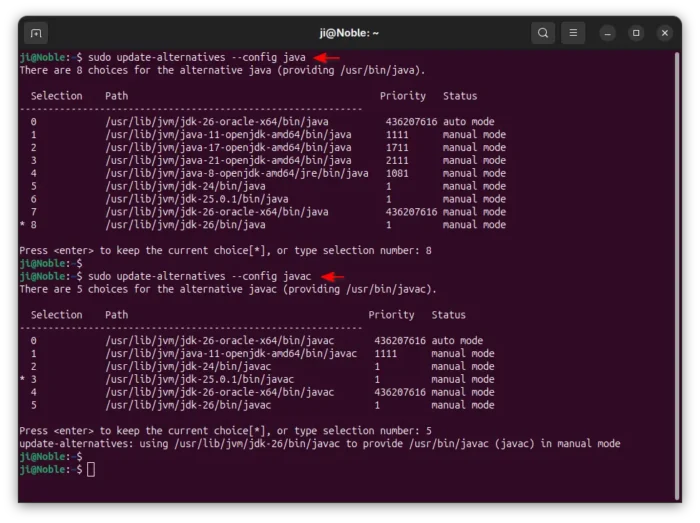
As you see in the screenshot below, there are many other executable files under /usr/lib/jvm/jdk-26/bin (e.g., javap, jdb, jfr, and more). You may run similar commands above for them one by one as you need.
NOTE: As time goes on, OpenJDK may release updates for JDK 26. In the case, you’ll need to replace “jdk-26” in command with “jdk-26.0.1” or “jdk-26.0.2” according to the Java root folder name under “/usr/lib/jvm”.
After that, run the commands below one by one to choose default Java:
sudo update-alternatives --config java
sudo update-alternatives --config javac
sudo update-alternatives --config jar
Also run similar command above for other executable files if you created links for them.
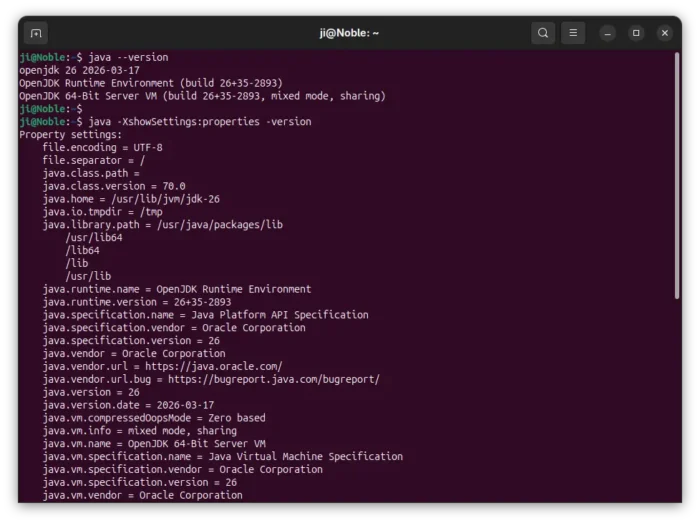
4. Finally, run command to check the default Java edition:
java --version
javac --version
And, use java -XshowSettings:properties -version to print more the properties.
Uninstall OpenJDK JDK 25 or 26
If you installed OpenJDK 25 from Ubuntu system repository, simply run the command below in terminal (Ctrl+Alt+T) to uninstall:
sudo apt remove --autoremove openjdk-25-jdk* openjdk-25-jre*
To uninstall OpenJDK JDK 26 installed via the Linux tarball, run command to remove the Java folder under /usr/lib/jvm:
sudo rm -R /usr/lib/jvm/jdk-26
Then, remove the alternative links:
sudo update-alternatives --remove java /usr/lib/jvm/jdk-26/bin/java
sudo update-alternatives --remove javac /usr/lib/jvm/jdk-26/bin/javac
sudo update-alternatives --remove jar /usr/lib/jvm/jdk-26/bin/jar
Also run similar command above for other executable files if added. And, replace jdk-26 with jdk-26.0.1 etc. for point releases.


Thanks!
Excellent instructions.
Thank you very much!
Many thanks
These instructions were great