


![]()
Mission Center, the popular free open-source system monitoring and task managing app for Linux Desktop, release new 1.0.0 version few days ago.
Like Resources, it’s a modern GTK4 tool to monitor CPU, GPU, Memory, Storage and Network devices, while being able to manage running apps, processes, as well as background services.
The new release has completely rewritten the the Gatherer backend, and renamed it to “Magpie”. Now, it can be running as a standalone set of libraries and executable, and using by other system monitoring applications.
For SATA and NVMe storage devices, the new Mission Center 1.0 added a circled information symbol 🛈 in the disk monitoring page.
By clicking on it, you may view the SMART data, including available spare, total data read/write, power circles, media errors, etc information. Though, I prefer to use QDiskinfo, a CrystalDiskInfo look-like app, to do the job.
Besides that, it added eject symbol (⏏) in the page of removable storage devices, allowing to click eject devices, such as optional disk and USB stick.
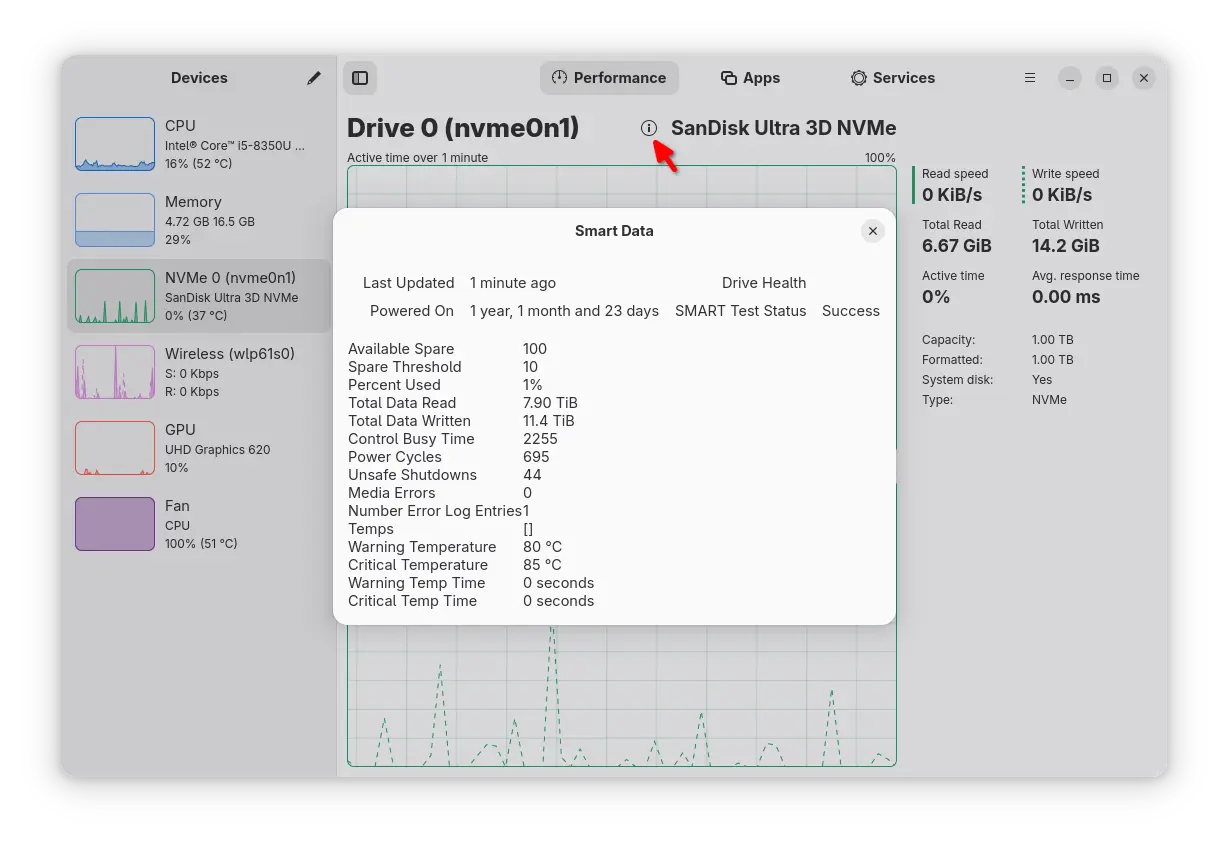
Mission Center SMART Data
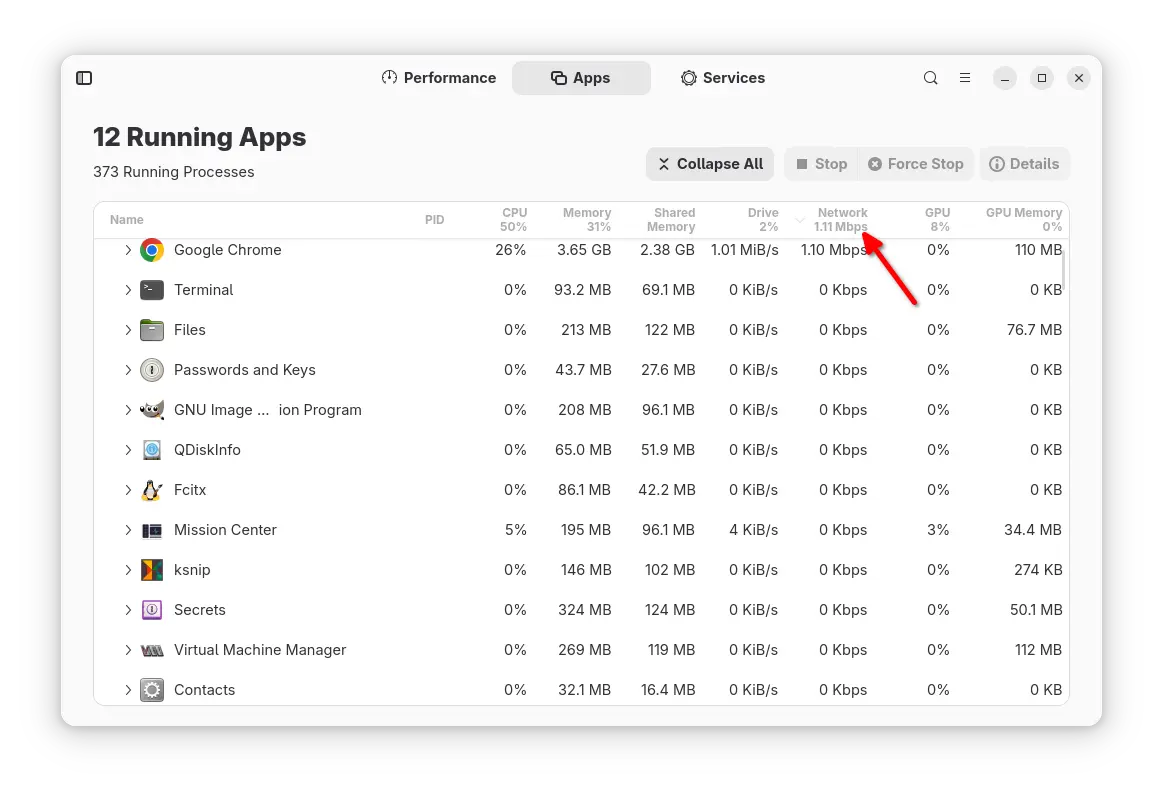
By installing nethugs (Linux “net top” tool), the app finally added support monitoring network usage on per-app basis. Though, you need to make nethogs runnable without root.
Mission Center 1.0 also updated to the latest NVTOP, enabled all its supported GPUs including RaspberryPi.
Other changes include:
- Update “Apps” page with more information about each app and process.
- Add keyboard shortcuts to search, switch tab, device, and toggle sidebar.
- New unit options: Base-2 or Base-10, Bits or Bytes
- New option to draw graphs as smooth line instead of jagged line.
- Lower CPU and memory usage.
- Improved overall app responsiveness.
- And, fixes various bugs. See HERE for details.
How to Install Mission Center
The app is available to install as Flatpak package that runs in sandbox environment and works in most Linux.
Linux Mint 21/22 and Fedora Workstation (with 3rd party repository enabled) can search for and install the app either from Software Manager or GNOME Software.
While Debian, Ubuntu, and other Linux may follow the steps below to install the package:
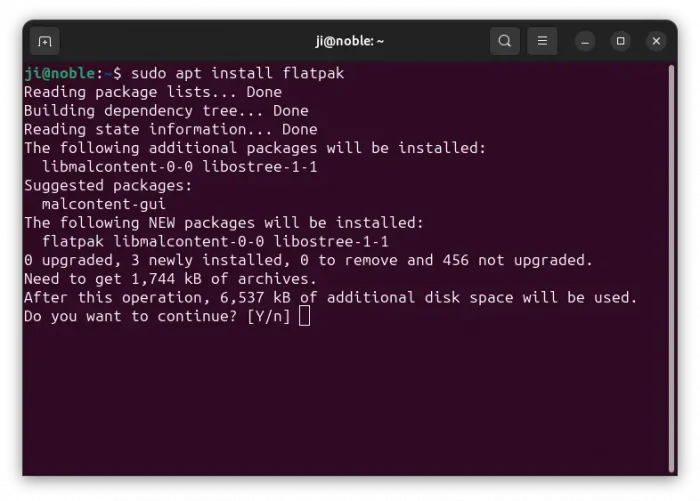
- First, press Ctrl+Alt+T to open terminal and run command to install the Flatpak daemon:
sudo apt install flatpak
For other Linux, follow the official setup guide to enable Flatpak support.
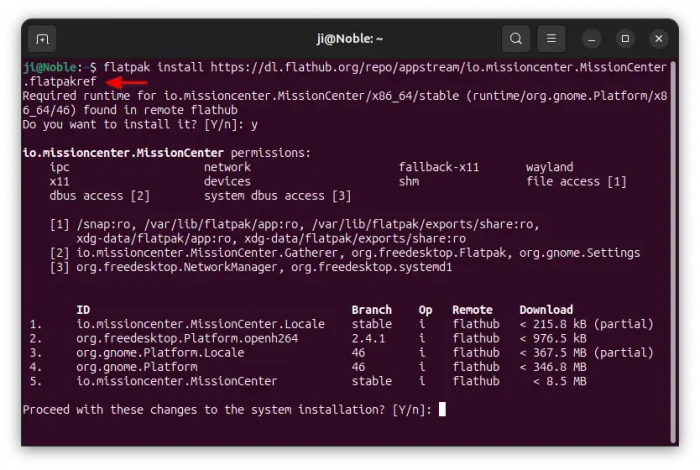
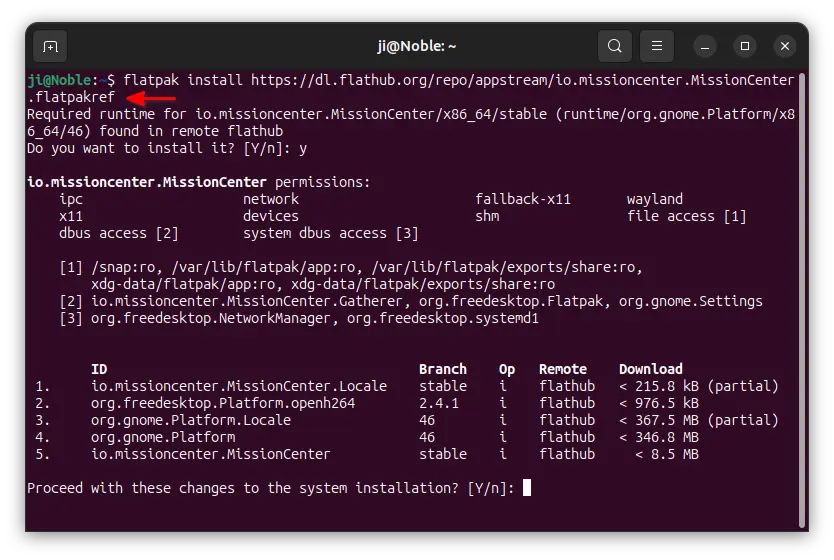
- Next, run the command below to install the Flatpak app package:
flatpak install https://dl.flathub.org/repo/appstream/io.missioncenter.MissionCenter.flatpakref
NOTE: there may be lots of downloads as it also need to install GNOME run-time in sandbox environment.

After installed the app, launch either from app launcher (e.g., GNOME App Grid) or by running the command below in terminal:
flatpak run io.missioncenter.MissionCenter
To check updates, use command:
flatpak update io.missioncenter.MissionCenter
To enable per-app network monitoring, Debian/Ubuntu users may run the command below to install nethogs:
sudo apt install nethogs
Then, use the command to allow it running as non-root user:
sudo setcap "cap_net_admin,cap_net_raw,cap_dac_read_search,cap_sys_ptrace+pe" /usr/sbin/nethogs
Finally, launch or re-launch Mission Center and navigate to “Apps” page to identify.
Uninstall Mission Center
To uninstall the system monitor, use command:
flatpak uninstall --delete-data io.missioncenter.MissionCenter
Optionally run flatpak uninstall --unused to remove useless runtime libraries.


