


![]()
Darktable, the popular free open-source photography app and raw developer, released new 5.2.0 version few days ago!
The new release introduced side-by-side view (aka split view) to preview the different between snapshot and current images. And, it can be enabled by clicking on the “X|Y” icon next to “take snapshot” button.
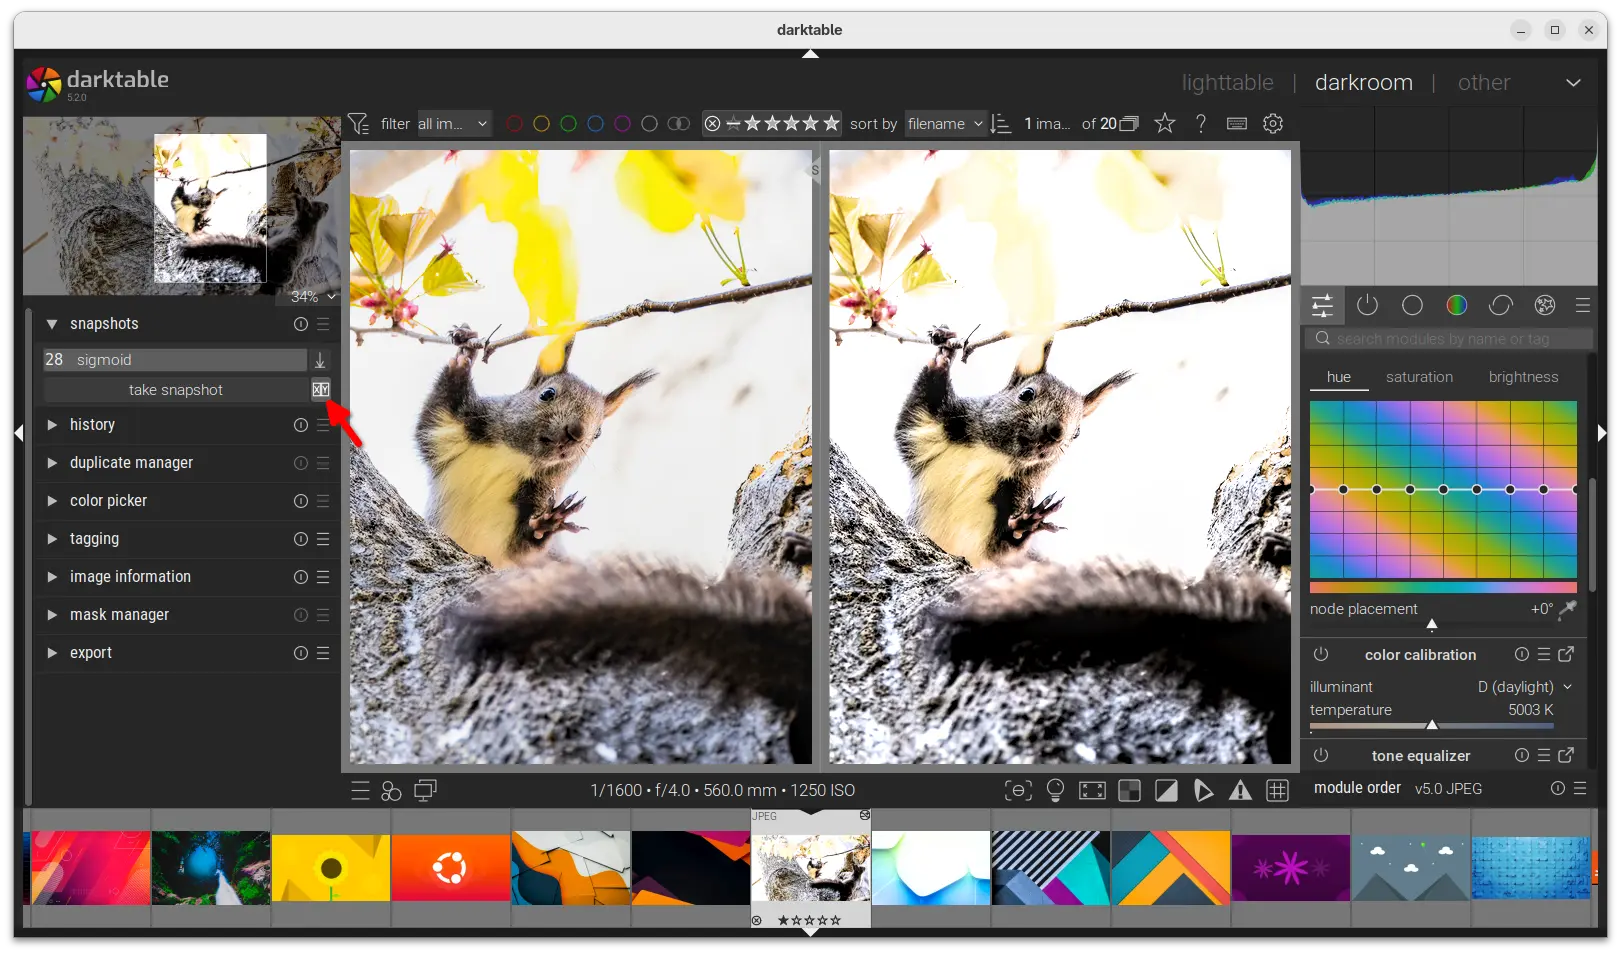
In this view, images are placed side by side either vertically or horizontally. You may click on image to switch between them, and zoom or hold “a” + drag to pan synchronously.
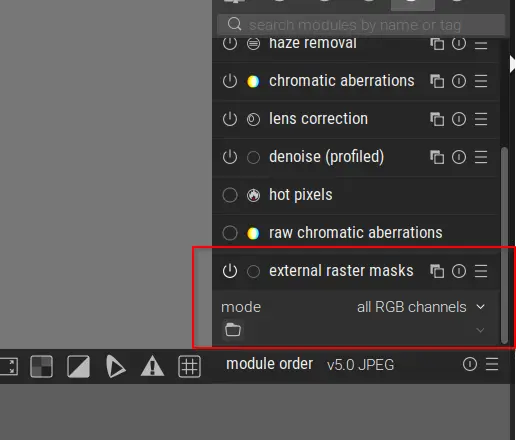
The release also added new raster mask import module. After setting a root folder for raster mask files under Preferences -> processing, a .pfm file can be selected to be used as a raster mask. And, it allows to choose which RGB components of that file to be used.
Besides that, export module now has new multi-preset export section, allowing to export selected images with multiple presets in one single export run.
Other changes include:
- Metadata module is fully configurable and allows to add & maintain any tags supported by exiv2.
- Sigmoid module is now the default tone-mapper selected for new installation.
- Replaced zoom range widget with a spin button.
- ctrl+click to pick the actual color in Color Balance RGB 4 ways tab.
- Removed the levels and contrast brightness saturation modules.
- Reading support of Cineon (.cin) and DPX (.dpx) file formats.
- Disable the workaround for old broken AMD OpenCL drivers
- Add 45×35 aspect ratio to the crop module
- Add auto login to the piwigo export module.
- Update Luna API to 9.5.0, and add
apply_sidecartodt_lua_image_t.
Darktable 5.2.0 also added based support for the following cameras:
- Canon EOS R5 C
- Fujifilm GFX100RF
- Fujifilm GFX100S II
- Nikon COOLPIX P1100
- Nikon Z5_2
- OM System OM-3
- Olympus SP510UZ
- Panasonic DC-G97, DC-G9M2, DC-GH6, DC-S1RM2, DC-S5M2, DC-S5M2X, DC-S9, DC-TZ99, DC-ZS99 (4:3)
- Phase One IQ150
- Phase One P40+
- Sigma BF (DNG)
- Sony DSC-RX100M7A
- Sony ILCE-6100A, ILCE-6400A, ILME-FX3A
- Sony ZV-1A, ZV-E10M2
There are as well white balance presets and noise profiles support for new cameras, suspended support for some cameras as no samples are available on raw.pixls.us, bug-fixes, translation updates. For more, see the official release note.
How to Install Darktable 5.2.0
NOTE: Please backup old database (if any) before upgrading!
The official packages for Linux, Windows, macOS, as well as the source tarball are available to download in Darktable website via the link below:
Linux user may choose using the AppImage to launch software directly without installation, Flatpak that runs in sandbox, or OBS repository contains native DEB and RPM packages for Debian, Ubuntu, Fedora, and openSUSE.
While, I’ve also made the new release package into this unofficial PPA for Ubuntu 22.04, 24.04, 24.10 and 25.04.
Just open terminal (Ctrl+Alt+T) and run the commands below one by one to add PPA and install:
sudo add-apt-repository ppa:ubuntuhandbook1/darktable
sudo apt update
sudo apt install darktable
NOTE for Ubuntu 22.04, ‘libheif’ (use exiv2 for HEIF) is disabled to avoid dependency issue! Please leave comment if you do need the feature.
Uninstall PPA & Darktable
To uninstall the PPA, use command:
sudo add-apt-repository --remove ppa:ubuntuhandbook1/darktable
And, remove darktable installed from the PPA via:
sudo apt remove --autoremove darktable

