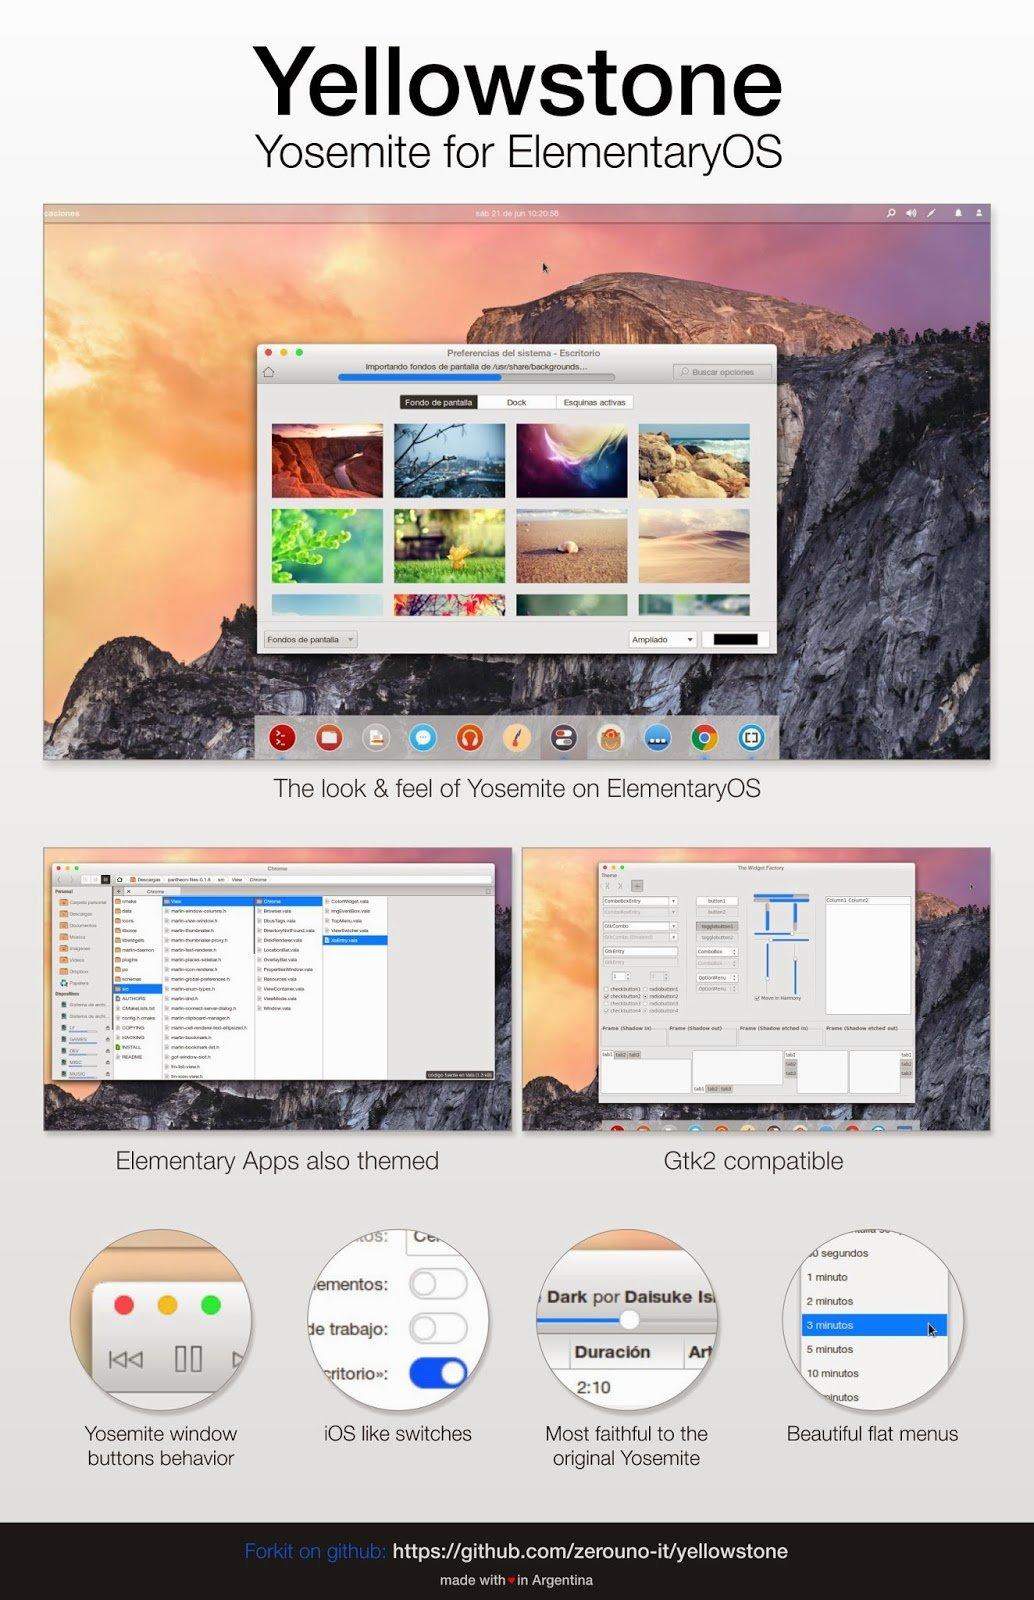
For Elementary OS users now there’s an OS X Yosemite like GTK theme for the 0.2 Luna desktop.
Some guys have created a new project called yellowstone, which is an OS X Yosemite like ElementaryOS Luna theme based on the excellent Elementary default theme.
Screenshots:
To install the theme:
1. Downloads Yellowstone theme at the link below:
2. Open file browser and press Ctrl+H on keyboard to view hidden file folders. Create a new folder called .themes folder if not exist.
3. Open the downloaded package via Archive Manager and select extract to the .themes folder.
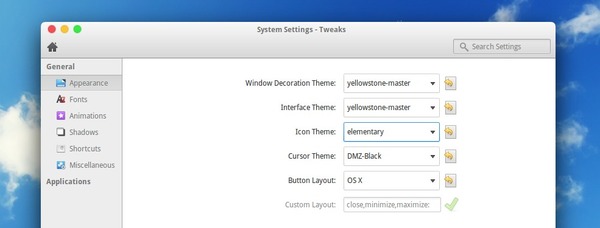
To apply the theme:
1. Install Elementary Tweaks by pressing Ctrl+Alt+T to open terminal and then running below commands one by one:
Want to remotely access your Ubuntu Server with a graphical interface? Well, here’s a simple guide shows you how to do it with X2Go, an implementation of NX remote desktop protocol.
All you need to do is install X2Go Server package as well as the Desktop Environment in remote server side and install X2Go client in the client side.
On Ubuntu Server Side:
The latest X2Go server is available in Ubuntu 14.04 LTS, Ubuntu 12.04 LTS, and Ubuntu 10.04 LTS via PPA. Just connect to your Ubuntu server and run below commands to add the PPA and install the server packages:
Before adding the PPA, you have to install add-apt-repository:
For Ubuntu 12.04, Ubuntu 10.04, Ubuntu 14.04, and Ubuntu 14.10 you can get the latest client from PPA by running below commands one by one in a terminal window (or you can install an old version directly from Ubuntu Software Center):
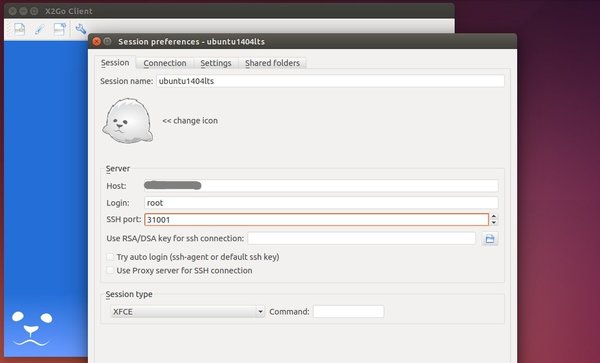
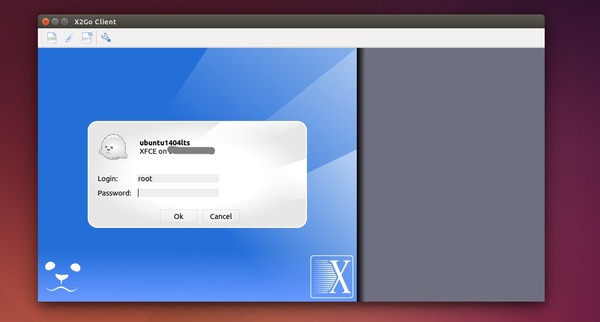
The first time you start the client, it prompts you to create a session with:
a session name of your choice
an icon of your choice
remote server ip
the login name
ssh port (default is 22)
select session type (XFCE in the case)
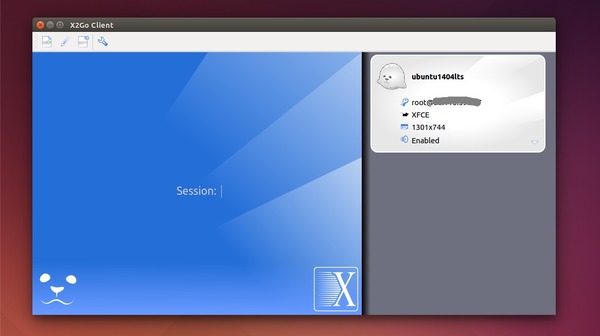
After that, you can see the session available in the right pane of the client window. Go to menu session -> new session if you have more that one remote server to connect.
Click a session from the right pane and type in remote user password to connect:
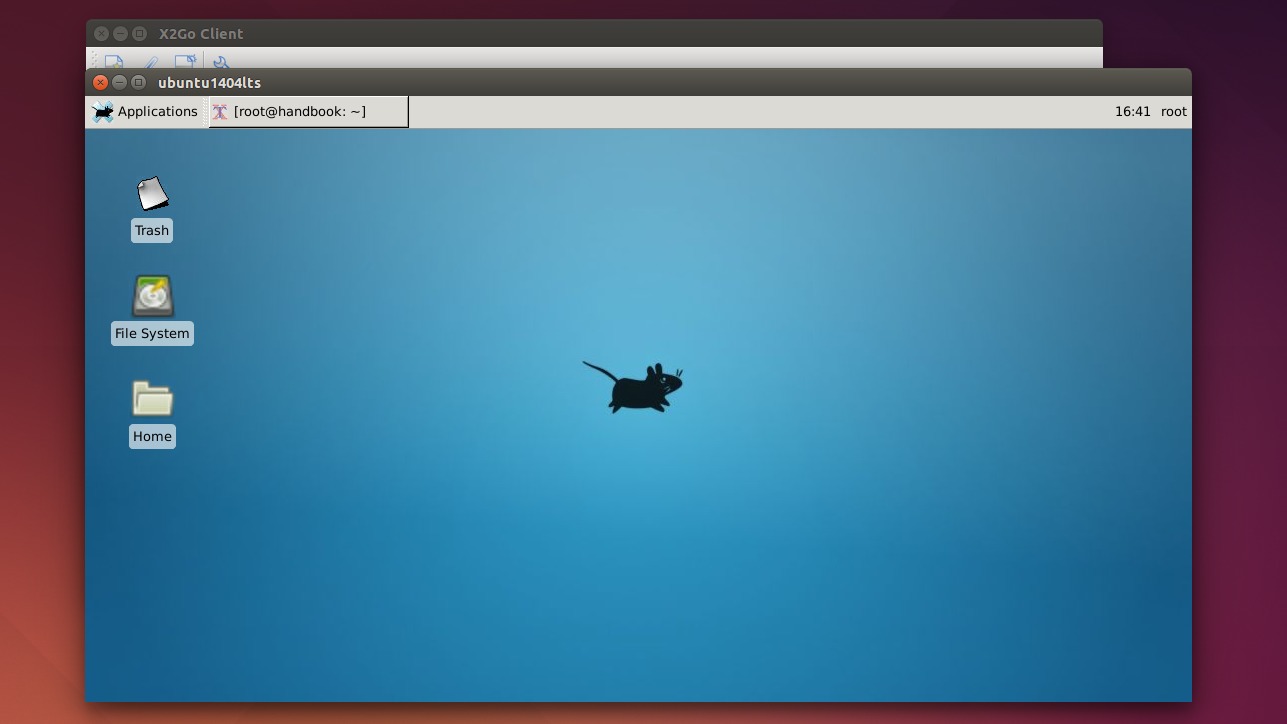
Once connected, you can operate on the remote desktop in a new window:
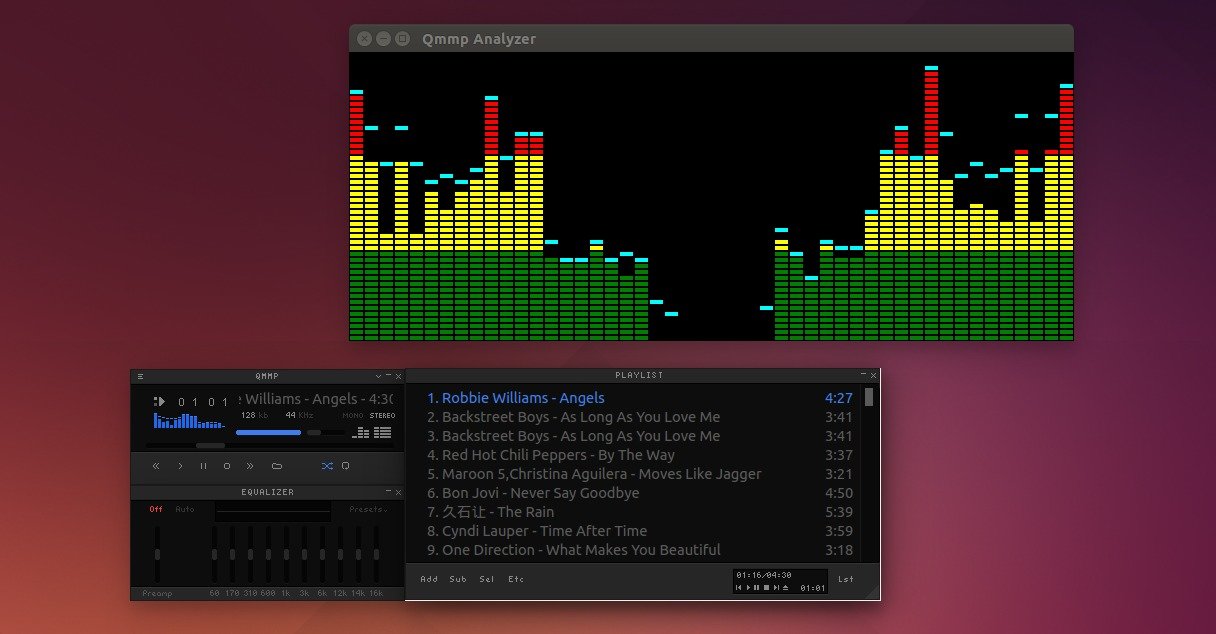
Qmmp audio player has reached the 0.8.3 release a few hours ago with fixes for skin, equalizer, auto-play, and crash issues.
Qmmp is a free and open-source audio player written in C++ and Qt. It started 7 years ago in 2007 and officially supports the operating systems Linux, FreeBSD and Microsoft Windows. It is the only audio player not featuring a database that uses the Qt library.
It features:
A simple, intuitive user interface. XMMS and Winamp 2.x skins support
Ogg Vorbis, FLAC and MP3 music playback support
Automatic album-cover fetching
Support for embedded ID3v2 album images
ReplayGain support
Support for multiple artist and performer tags per song
A system tray icon
Plugin support
Translations into many languages
The 0.8.3 release brings below changes:
Reduced time of the ‘Randomize List’ and “Remove Duplicates” operations
Fixed ffmpeg 2.5 support
Fixed 24/32 bit modes in the equalizer
Fixed skin parsing
Fixed autoplay when playlist was opened from command line
updated Portuguese translation
updated Czech translation
Install / Upgrade to Qmmp 0.8.3:
Ubuntu 14.10, Ubuntu 14.04, Ubuntu 12.04 and derivatives users can install or upgrade this player from PPA. Just open terminal from the Dash or by pressing Ctrl+Alt+T on keyboard, then run below commands one by one:
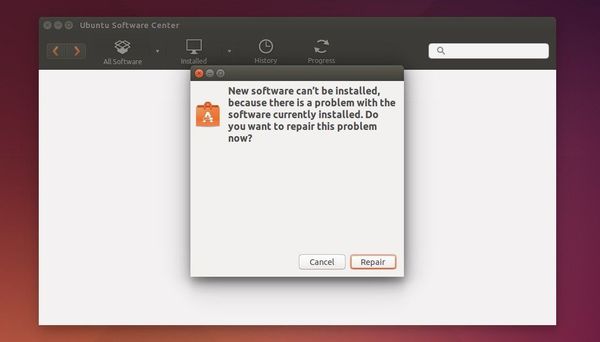
If a package installation fails in Ubuntu, it can cause a package manager to freeze or become locked. When you start Ubuntu Software Center, it asks you to press button to repair broken packages in your system, but it does not always work.
Here are a few tips show you how to fix broken packages in command line. To get started, open terminal from the Dash or by pressing Ctrl+Alt+T on keyboard:
1. If a package installation fails due to dependencies issue, run below command in terminal:
sudo apt-get -f install && sudo dpkg --configure -a
The command either solves the dependencies, or removes the package (if dependencies unavailable) automatically.
2. If a problem occurs with MergeList, appearing as a missing “Package: header” error:
E: Encountered a section with no Package: header
E: Problem with MergeList…
E: The package lists or status file could not be parsed or opened.
Plank, the simplest OS X-style dock launcher, has reached the 0.8.0 release recently with new feature and bug fixes.
“May” is our new feature and bug-fix release on the way to 1.0.
Yet again bunch of more or less subtile bug-fixes and design adjustments. The major feature addition is the integrated settings dialog which is suppose to ease configuring plank and obsolete the need for 3rd party settings tools. Besides that some HiDPI fixes and possible crasher fixes.
Go-For-It is a new and open-source to-do list application available for both Windows and Ubuntu Linux. It features a simple and stylish UI with built-in productivity timer.
To-do lists are stored in the Todo.txt format. This simplifies synchronization with mobile devices and makes it possible to edit tasks using other front-ends.
The developer has created a Youtube video that describes the workflow of this application:
How to Install ‘Go For It’:
The developer, mank319, has built this app into PPA, available for Ubuntu 14.04, Ubuntu 14.10, Ubuntu 15.04 and derivatives.
To add the PPA and install the app, open terminal from the Dash or by pressing Ctrl+Alt+T. When it opens, run the commands below one by one:
Or you can simply download & click install the .deb package via Software Center (i386 for 32-bit, amd64 for 64-bit) the matches your OS edition at the PPA packages page.
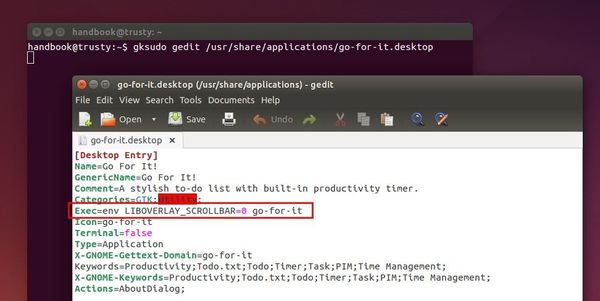
NOTE: Due to the bug related to Unity Overlay Scrollbars, the background sometimes looks like broken. As a workaround, run command below to edit the app’s shortcut file:
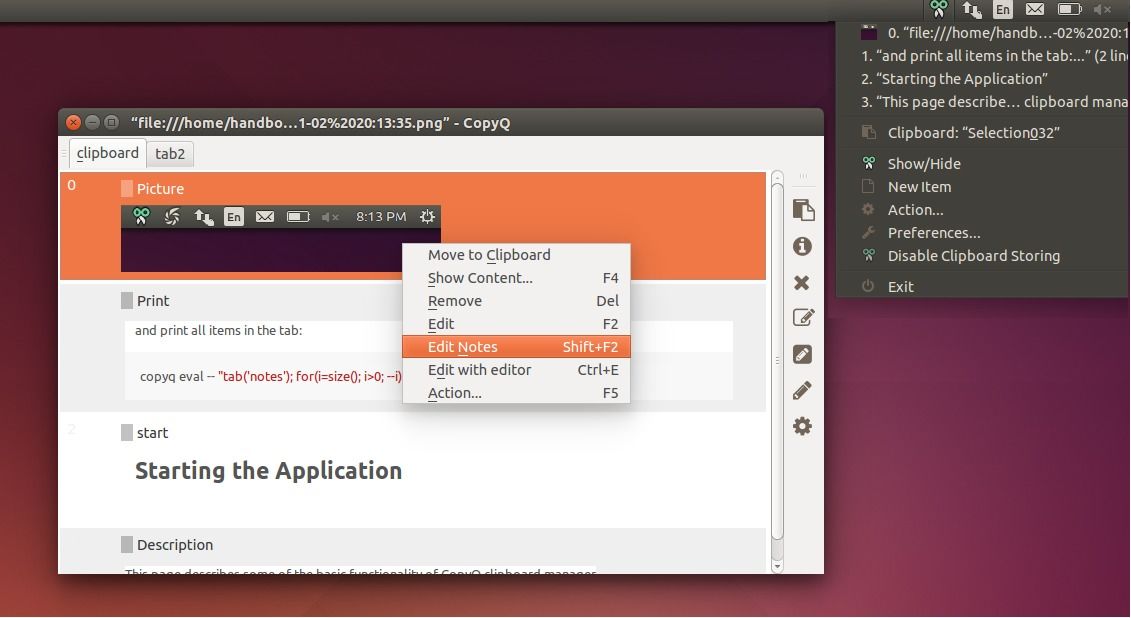
CopyQ is an advanced clipboard manager available for both Windows and Linux. It allows you to browse, search, and edit clipboard history in text, HTML, images and any other custom format.
The software provides a customizable system tray menu, supports a variety of system-wide shortcuts (e.g. show main window or tray, edit clipboard, copy next/previous, paste as plain text), sorts items in tabs or tree, and provides advanced command-line interface and scripting.
The latest 2.4.3 release brings new plugins and a few fixes:
Plugin for tagging items
Plugins can provide script functions and commands
Improved automatic commands execution
Fixed gradients, transparency and other style improvements
Fixed decryption with newer version of GnuPG
Fixes for Qt 5 version
How to Install CopyQ:
Source tarball and installers for Windows, Debian, Ubuntu, OpenSUSE, and Fedora are available for download at the github release page:
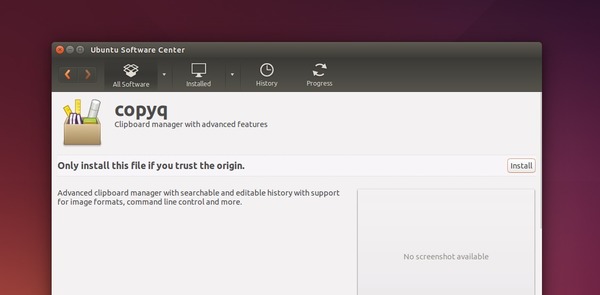
For Ubuntu user, select download the i386.deb for 32-bit system or amd64.deb for 64-bit system. Finally click to open the package with Ubuntu Software Center and install the software:
The final release of Deepin 2014.2, an Ubuntu 14.04 based Linux Distro, is out today!
Deepin is a Chinese Linux Distro that officially supports over 20 languages, it uses its own Deepin Desktop Environment developed based on HTML5 technology, with Deepin Music, Deepin Movie, Deepin Store and other Deepin system software. In addition, deepin comes with media codecs, Adobe Flash Player, Google Chrome, and other software pre-installed under license by the relevant manufacturers.
A great new feature in this release is that a deepin special version of CrossOver is pre-installed, allows to run Windows applications with CrossOver for free.
For Chinese users, the 2014.2 release brings QQ6.7, 360 security guard for Linux, and the latest versions of WPS, Google Chrome, and more.
System Requirements:
minimum system requirements: Intel Pentium IV 2.0GHz CPU, 1GB RAM, 10GB Hard Drive.
Using Faenza icons on your Ubuntu desktop? If you’re a perfectionist, you may already have found that this icon theme set lacks the wireless mouse icon and the tiny calendar icon under time & date menu in Ubuntu 14.04.
Faenza icons is one of the most popular icon theme sets for Gnome. It’s created by Matthieu James and last updated two years ago in 2012. A guy from Ubuntu forum has recently added fixes to the source so that below icons work in Ubuntu 14.04 & higher:
the wireless mouse icon
the tiny calendar icon under time & date menu
Fix to Faenza icons
No screenshot for the wireless mouse icon because I don’t have one, sorry…
I’ve repack the Faenza Icon 1.3.1 with the fixes into PPA and the .deb package available for download at the link below:
Just click download the package and then double-click to open it with Ubuntu Software Center and finally click install.
Finally apply the theme in Unity Tweak Tool -> Icons and done.
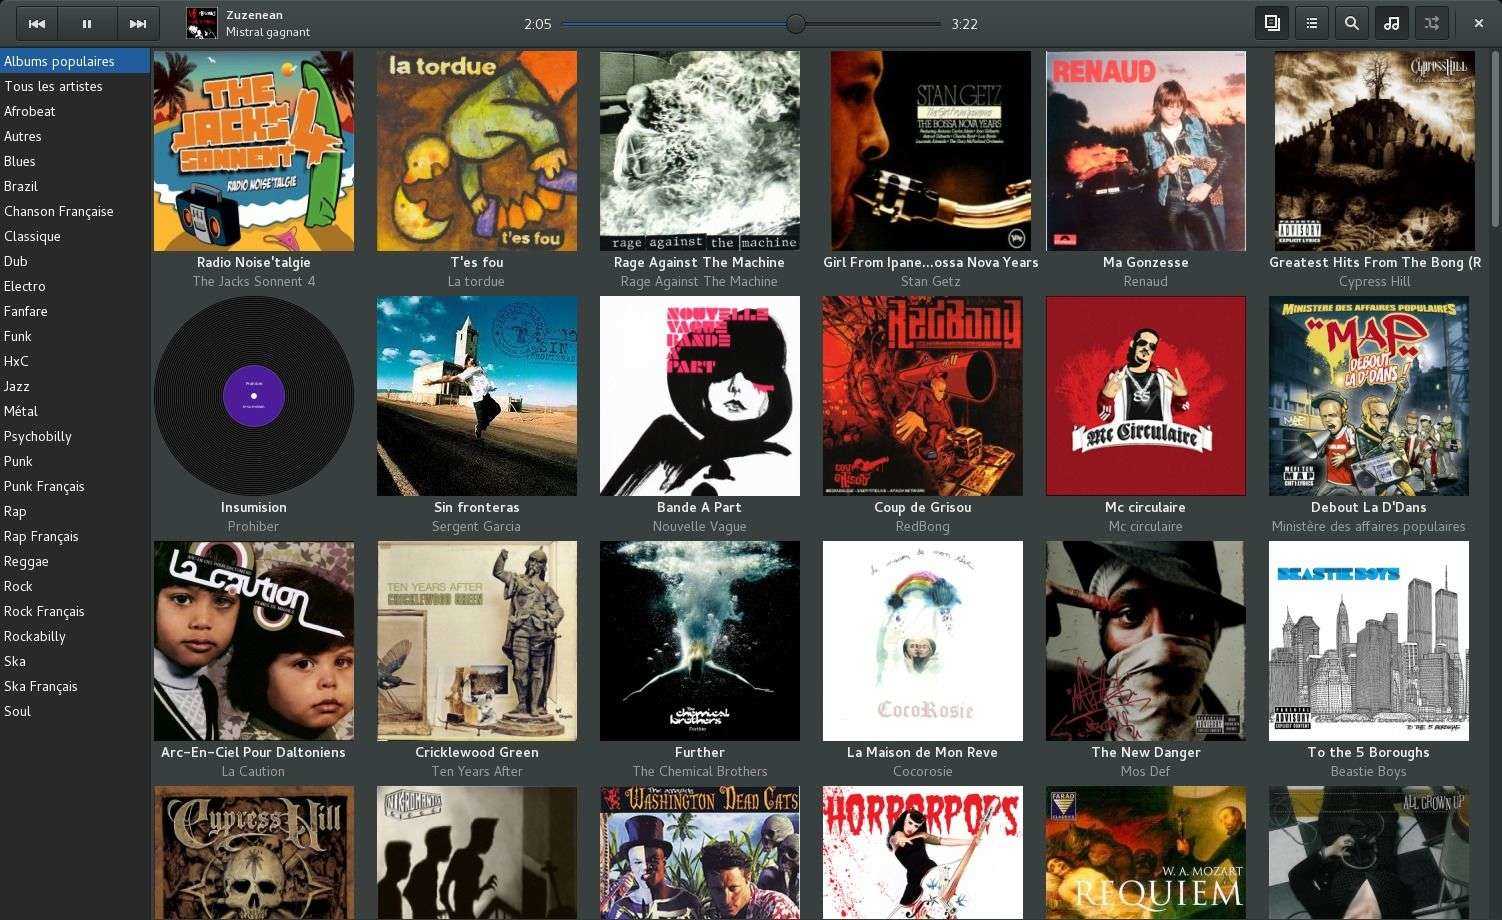
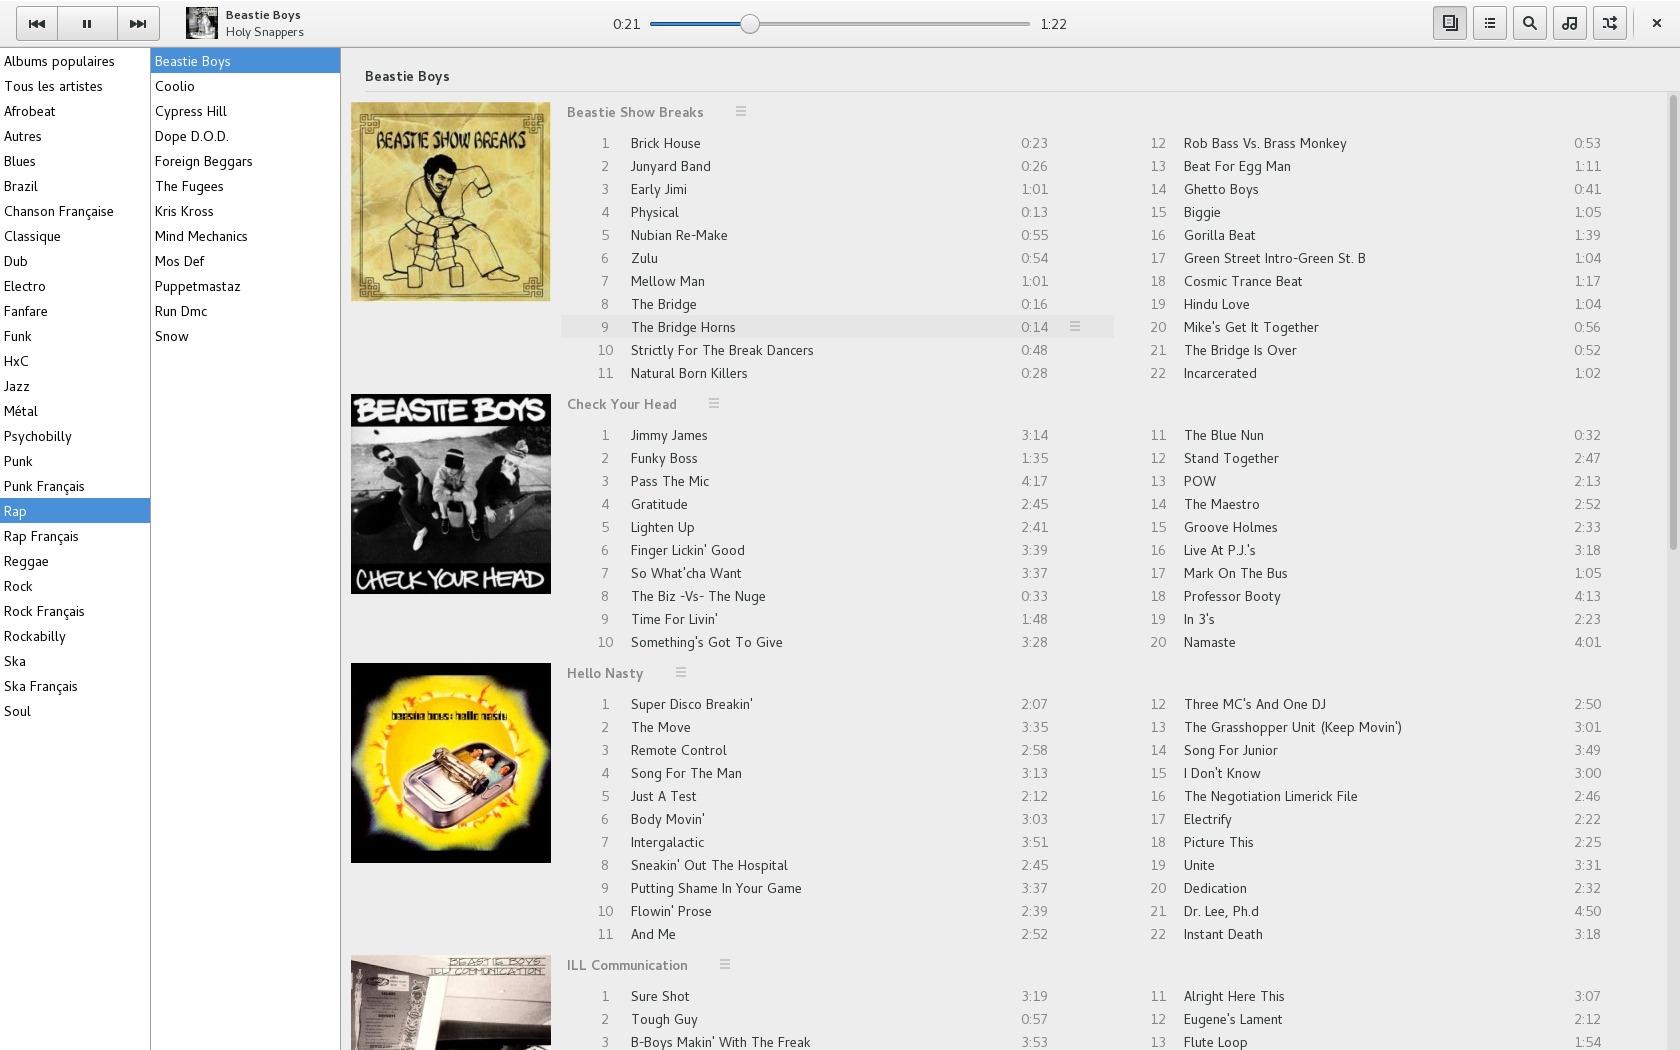
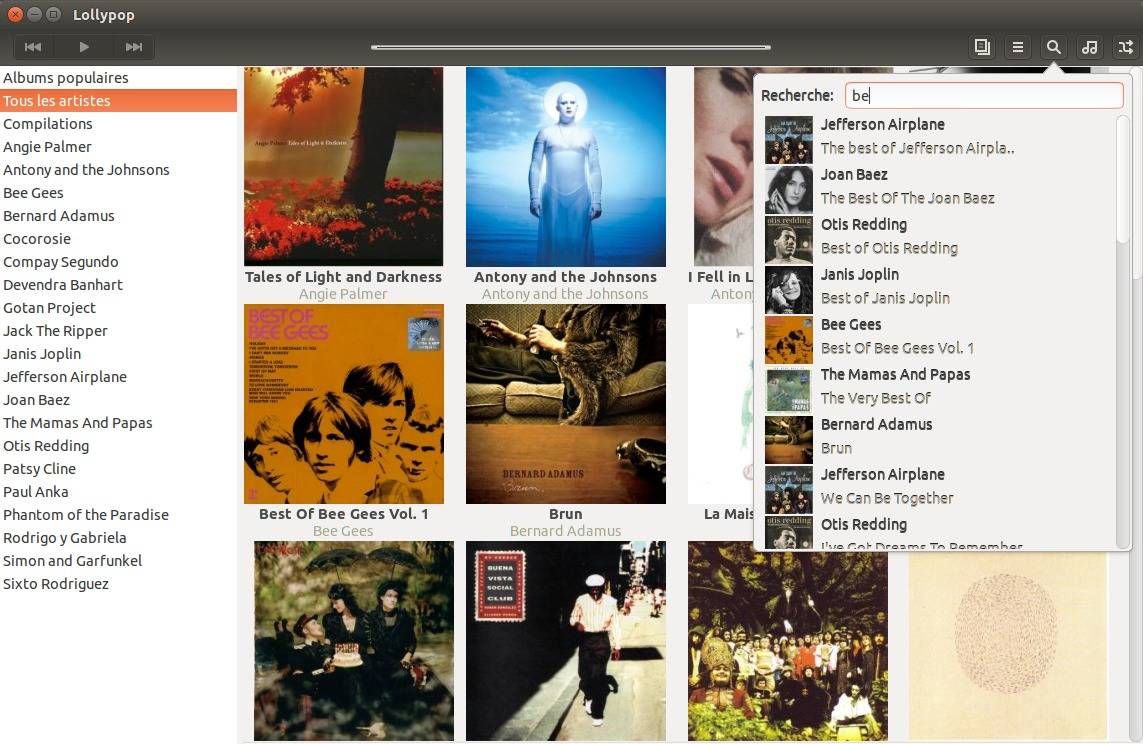
Lollypop is a new Gnome music playing application written in Python and Gtk3. It’s a free and open-source project hosted on github.
The music player features:
mp3/4, ogg and flac.
Genre/Cover browsing
Genre/Artist/Cover browsing
Search
Main playlist (called queue in other apps)
Party mode
Replay gain
Cover art downloader
Context artist view
The screenshots:
How to Install Lollypop Music Player in Ubuntu:
The developer has built the latest packages into his PPA, available for Ubuntu 14.04 (tested in Ubuntu 14.04 but it doesn’t work), Ubuntu 14.10, Ubuntu 15.04 and derivatives.
1. To add the PPA, open terminal from the Dash or by pressing Ctrl+Alt+T on keyboard. When it opens, run the command below:
sudo add-apt-repository ppa:gnumdk/lollypop
Type in your user password when it asks and hit Enter to continue.
2. After added the PPA, run command to reload system package cache:
sudo apt-get update
3. Finally install the player from Synaptic Package Manager, or by running below command:
sudo apt-get install lollypop
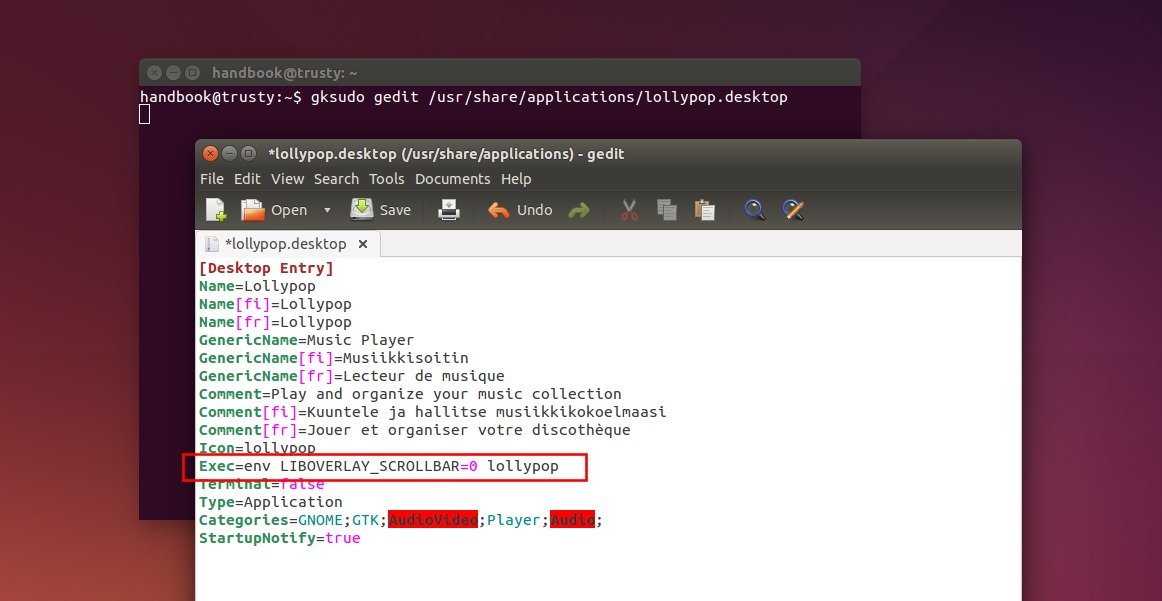
4. [Fixed in Ubuntu 15.10 and higher] Due to an Ubuntu related bug, you have to disable the overlay scrollbars for better experience.
To do this for this single application, run command to edit the .desktop file: