The latest version of Firefox is usually available as a security update in all supported releases of Ubuntu within a few hours of Mozilla’s announcement.
This time, Canonical announced the updated to Firefox 27 in its supported Ubuntu releases six days later since it was released on February 4, 2014. See what’s new in Firefox 27
How to Upgrade:
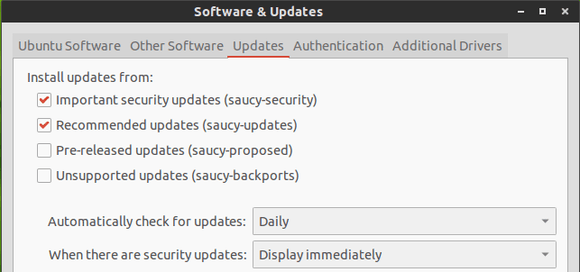
Firefox 27 is available in recommended repository for Ubuntu 13.10, Ubuntu 12.10 and Ubuntu 12.04.
To get started, make sure the recommended updates repository is enabled.
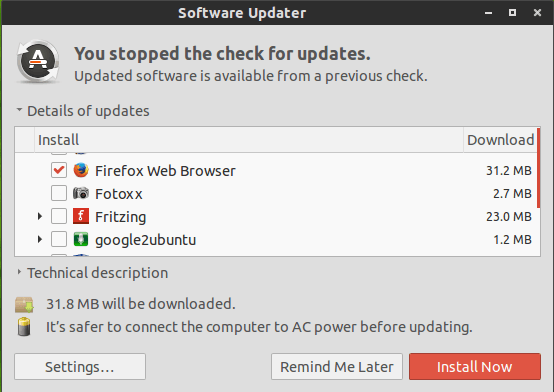
Then you can install the Firefox updates via Software Updates:
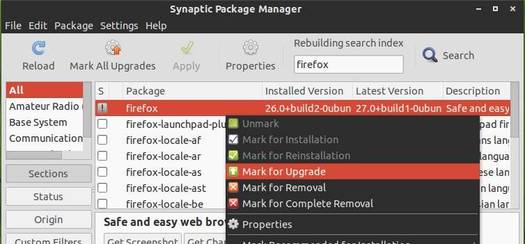
You can also use Synaptic Package Manager (available in Ubuntu Software Center) to upgrade your firefox:
Bored with the default Grub bootloader? You may give Burg a try. Burg is a Grub based boot loader which works in both text and graphic mode. There are quite a few themes so that you can always make your boot menu beautiful.
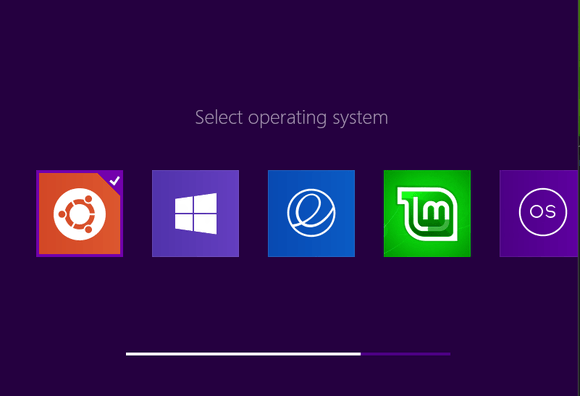
Below is the burg boot menu with Metro theme.
Install Burg:
Press Ctrl+Alt+T on your keyboard to open the terminal. When it opens, run the commands below one by one to install Burg from PPA:
UPDATE: Ubuntu 14.04, Ubuntu 14.10, and derivatives are added support!
So far, the PPA supports Ubuntu 13.10, Ubuntu 13.04, Ubuntu 12.10, Ubuntu 12.04, Ubuntu 11.10, Ubuntu 11.04 and their derivatives.
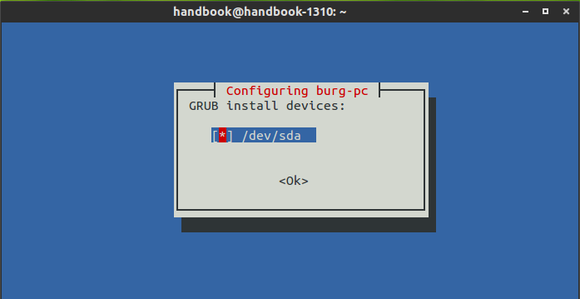
While the installing process, click OK to answer all questions. In the below screen, you need to press the Space key first to select your disk name and Tab key to select OK.
Install Theme for burg:
There are 16 themes available by default. You can download more themes at deviantart.com and install them via following steps:
2. Extract the theme package and put the result folder into /boot/burg/themes/ directory. Run below command in the terminal to open file browser with root, then do the copy and paste things.
sudo nautilus
3. The theme misses Linux Mint logo. Download the below icons and put them into /boot/burg/themes/Metro/icons/ if need.
hover_linuxmint
normal_linuxmint
Then edit the icons file in the same folder and added the line below to make the icons work:
In testing mode, press F2 to switch the themes. You can also press F3 to change resolution in the real burg boot menu.
Tips: You can edit the “menuentry” sections in “/boot/burg/burg.cfg” to remove unwanted menu entries.
Also uncomment “GRUB_DISABLE_LINUX_RECOVERY=”true”” in “/etc/defaut/burg” will hide the recovery mode.
Restore Grub:
To revert back to original grub boot loader, run the command below in terminal:
sudo grub-install /dev/sda
/dev/sda is the disk name (Run sudo fdisk -l to check it out).
Bluefish, a powerful editor targeted towards programmers and webdevelopers has reached version 2.2.5. Here’s how to install it in Ubuntu 13.10, Ubuntu 12.04, Ubuntu 12.10, Linux Mint and their derivatives.
According to the changelog:
Bluefish 2.2.5 is a minor bug fix release but has also quite some new features. The syntax scanning engine is faster after small changes to the text. The filebrowser is also much faster with less memory usage, with various fixes and new features. Projects now store the active document and active line numbers. Indenting is improved in auto-completion and the smart indenting. Bookmarks and paste special also have been improved. On OSX there are many improvements, such as Mavericks support, Retina display support, working system hotkeys, native input methods (Japanese, Chinese, etc.), opening files from the finder and Widget bindings on MacOSX are moved to Cmd+C|V|X|A and working. Furthermore almost all syntax highlighting has been improved, most notable jquery in javascript, HTML5, and HTML5 in PHP files. There are also many bug fixes, such as in wrap text on right margin, in the replace engine, the jsmin licence, the split lines feature, the auto-recovery and many obscure bugs. Last bluefish now has an appdata file.
Install Bluefish:
Press Ctrl+Alt+T on your keyboard to open the terminal. When it opens, run the commands below one by one to install Bluefish from PPA:
This simple tutorial shows you how to install the latest FileZilla Client in all versions of Ubuntu currently supported on the desktop. So far, they are Ubuntu 14.04, Ubuntu 13.10, Ubuntu 12.10, and Ubuntu 12.04.
The current FileZilla release is version 3.7.4. It comes with below new features and bug fixes:
Added SOCKS4 support
Added Corsican and Kabyle translations
SFTP now supports the hmac-sha2-256 algorithm
Additional bugfix for site-specific bookmarks
Improve compatibility with servers sending directory listings in Polish language or in EBCDIC encoding
Handle set user id bit when populating permissions dialog.
MSW: Show local timestamps for old files using the correct daylight saving time (DST) offset.
Fix loading of transfer queue if starting FileZilla while another instance is in the process of shutting down
Fix interaction between site-specific bookmarks and multiple tabs
Don’t resume uploads when there’s zero octets left to transfer
Improve symbolic link detection when using MLSD
If processing a queue with files queued on multiple servers and not storing passwords, the password was not always asked prior to switching servers
Use the correct name element when importing sites
MSW: Show actual Windows version in about dialog regardless of app-compat settings
Install FileZilla:
If you don’t like PPAs, you can always follow the steps below to install the latest FileZilla Client in Ubuntu.
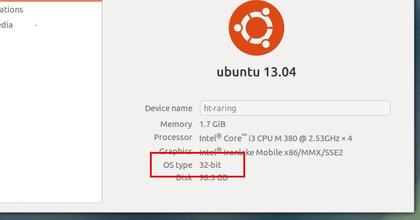
1. First go to System Settings -> Details and check out your OS type: 32 bit or 64 bit
Copy and paste below lines into the file and save it.
[Desktop Entry]
Name=FileZilla
GenericName=FTP client
GenericName[de]=FTP-Client
GenericName[fr]=Client FTP
Comment=Download and upload files via FTP, FTPS and SFTP
Comment[de]=Dateien über FTP, FTPS und SFTP übertragen
Comment[fr]=Transférer des fichiers via FTP, FTPS et SFTP
Exec=/opt/FileZilla3/bin/filezilla
Terminal=false
Icon=filezilla
Type=Application
Categories=Network;FileTransfer;
Version=1.0
Change the FileZilla3 to the exact folder name and done.
The instant messaging program Pidgin 2.10.9 has been released recently. It mainly fixed problems logging into some servers including jabber.org and chat.facebook.com.
The default Pidgin versions in Ubuntu universe repositories are quite old (See Pidgin changelog history). The Pidgin Developers PPA provides the most recent version of Pidgin for Ubuntu 14.04, Ubuntu 13.10, Ubuntu 12.10, and Ubuntu 12.04. Here’s how to add the PPA and install / upgrade your Pidgin from it.
To get started, press Ctrl+Alt+T on your keyboard to open the terminal. When it opens, run the command below to add Pidgin PPA to your system:
After that, update your system package lists and then you’re able to install packages from the PPA:
sudo apt-get update
Now install the Pidgin:
sudo apt-get install pidgin
That’s it. Enjoy!
For the Off-the-Record (OTR) plug-in, which is designed for use with Pidgin ensures authenticated and secure communications between Pidgin users, just search for and install pidgin-otr from Ubuntu Software Center. Finally enable the plugin from Pidgin menu Tools -> Plugins.
The popular VLC media player has reached version 2.1.x with some fantastic new features, bug fixes and performance improvements. However, the official PPA for Ubuntu 13.10 and earlier is stuck at version 2.0.8.
There’s now a third-party PPA that provides the most recent build of VLC (it’s 2.1.2 so far) to Ubuntu 12.04, Ubuntu 12.10, Ubuntu 13.04, and Ubuntu 13.10 users. The PPA is maintained by djcj
The PPA is not officially endorsed, supported or otherwise backed by the Videolan team. Use it at your own risk!
Press Ctrl+Alt+T on your keyboard to open the terminal. When it opens, run the commands below to add the PPA and install VLC.
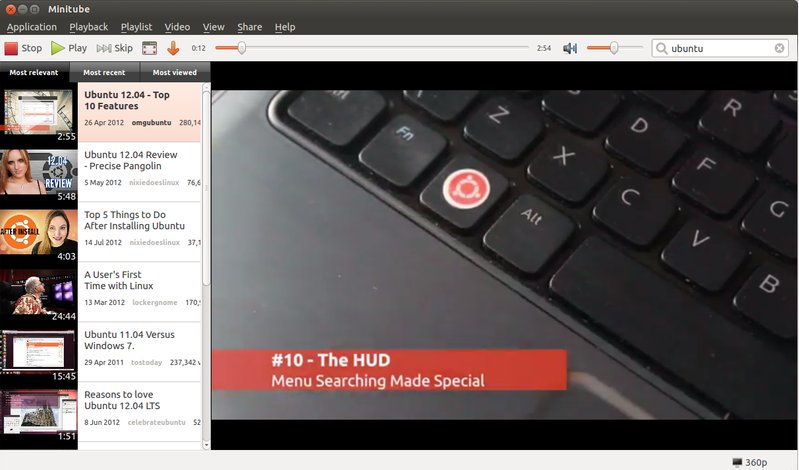
Minitube, the YouTube desktop application has just released version 2.1.6 with a fix for the playback of some YouTube videos. A minor change in Minitube’s Browse tab removes some so-called standard feeds like Most Shared, etc.
This simple tutorial will show you how to install or upgrade to the latest build of Minitube in Ubuntu 14.04, Ubuntu 13.10, Ubuntu 12.10, Ubuntu 12.04, Linux Mint and their derivatives via the PPA repository.
What is Minitube:
Minitube is a lightweight and stylish YouTube application. With it you can watch YouTube videos in a new way: you type a keyword, Minitube gives you an endless video stream.
By automatically playing videos one after another, Minitube aims to create a TV-like experience. Stop fiddling, just sit back and enjoy.
Minitube is designed to be very easy to use. This simplicity is great for kids and grandparents. Consider getting Minitube as a gift for the whole family.
Minitube consumes less CPU, preserves battery life and keeps your laptop cool. That’s because Minitube does not use the Flash Player. Minitube plays HD videos up to 1080p. Go full-screen and watch them play smoothly.
With Minitube you can search by keyword, search YouTube channels or just paste a YouTube link. Related videos are always a click away. You can also browse top videos for your favorite category and country. You can subscribe to YouTube channels and be notified of new videos.
Minitube is translated in more than 30 languages including German, French, Italian, Russian, Danish, Spanish, Portuguese, Arabic, Hebrew and Chinese.
Install Minitube:
Press Ctrl+Alt+T on your keyboard to open the terminal. When it opens, run the commands below one by one:
The Ubuntu team is pleased to announce the release of Ubuntu 12.04.4 LTS (Long-Term Support) for its Desktop, Server, Cloud, and Core products, as well as other flavours of Ubuntu with long-term support.
As with 12.04.3, 12.04.4 contains an updated kernel and X stack for new installations on x86 architectures.
As usual, this point release includes many updates, and updated installation media has been provided so that fewer updates will need to be downloaded after installation. These include security updates and corrections for other high-impact bugs, with a focus on maintaining stability and compatibility with Ubuntu 12.04 LTS.
How to upgrade to Ubuntu 12.04.4:(Thanks to h1repp from askubuntu)
The normal software updates will bring your system up to 12.04.4, but the Hardware Enablement Stack (HWE; the *-lts-saucy packages) is not part of those updates (by policy).
You can install the HWE packages manually, but there are some caveats.
To upgrade use this command line only (press Ctrl+Alt+T to open the terminal):
The –install-recommends is important. It makes sure that the xserver will install completely. Without it, xserver will only install partly, and apt will remove most of your system.
When you upgrade like this you may notice that there are configurations left over, among others those of the original xserver-xorg. You can purge them (I always do), but beware: this will remove the symlink /etc/X11/X that is used to start the XServer, so on next boot it won’t start. To prevent this, after purging left over configurations, do the following before the next boot:
sudo dpkg-reconfigure xserver-xorg-lts-saucy
This will recreate the necessary symlink and everything is fine again.
You can also download Ubuntu 12.04.4 iso with the new Saucy HWE stack at:
Today, Greg Kroah-Hartman has announced the Linux Kernel 3.12.10, Kernel 3.13.2, Kernel 3.10.29 LTS and Kernel 3.4.79 LTS. All users of each kernel series are urged to upgrade as soon as possible.
I’ve written about how to install or upgrade to Kernel 3.13.2 & Kernel 3.12.10. This tutorial is going to talk about Kernel 3.10.29 LTS.
Linux kernel 3.10.29 LTS brings updated architectures, including ARM, s390, PowerPC, and x86, numerous updates drivers (wireless, rtc, scsi, tty, usb, etc.), some filesystem improvements (mainly Btrfs and EXT4), a couple of networking fixes for IPv4 and IPv6, and some sound improvements. See the announcement.
Install / upgrade to Kernel 3.10.29:
The Ubuntu Kernel Team has build the deb packages which are available in this page.
If you’re comfortable with command line, you can also follow the steps below to download & install this kernel:
If you’re using a proprietary video driver, you may need to re-build or re-install to get it work with the new kernel.
If for some reason this kernel release doesn’t work properly for you, reboot into previous kernel (Grub -> Advanced -> select previous kernel) and run this command to remove Linux Kernel 3.10.29: