


![]()
This is a step by step beginner’s guide shows how to install and use TeamViewer in Ubuntu 24.04 Desktop.
TeamViewer is a popular German remote desktop access and remote control software that works in Linux, Windows, MacOS, Android, and iOS/iPadOS.
It’s a proprietary software that provides paid versions, as well as free license for personal use. For Linux, TeamViewer provides support for x86/x64, and arm64/armhf devices support. It’s a good choice for users who don’t know how to setup remote desktop sharing.
Remote Control Ubuntu 24.04 Desktop via TeamViewer
Step 1: Download & Install TeamViewer
To download the package for Linux, just go to its website via the link button below:
Please comment if the link above is outdated. And, Non-English users can scroll down and use “Change Region” option in bottom left to choose another language.
For Debian, Ubuntu, and their based systems, click one of “x86-32bit”, “x86-64bit”, “arm64-64bit”, “armv7-32-bit” buttons to download the .deb package. In case you don’t know your OS type, press Ctrl+Alt+T to open terminal and run uname -m command (or dpkg --print-architecture) to tell.

After downloaded the .deb package, press Ctrl+Alt+T on keyboard to open terminal. Then run command to install it:
sudo apt install ~/Downloads/teamviewer*.deb
Here I assume you saved the package into user Downloads folder. Instead of typing path to file (~/Downloads/teamviewer*.deb), you may also drag’n’drop file into terminal to insert.

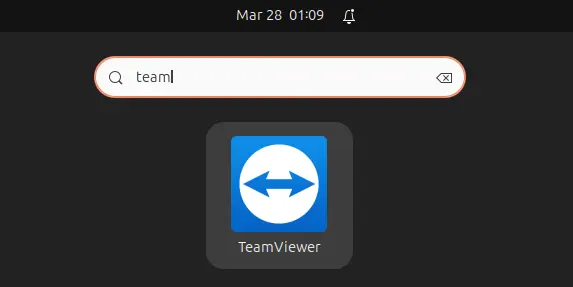
Once installed, search for and launch the software from either start menu or Show Apps menu depends on your desktop environment.
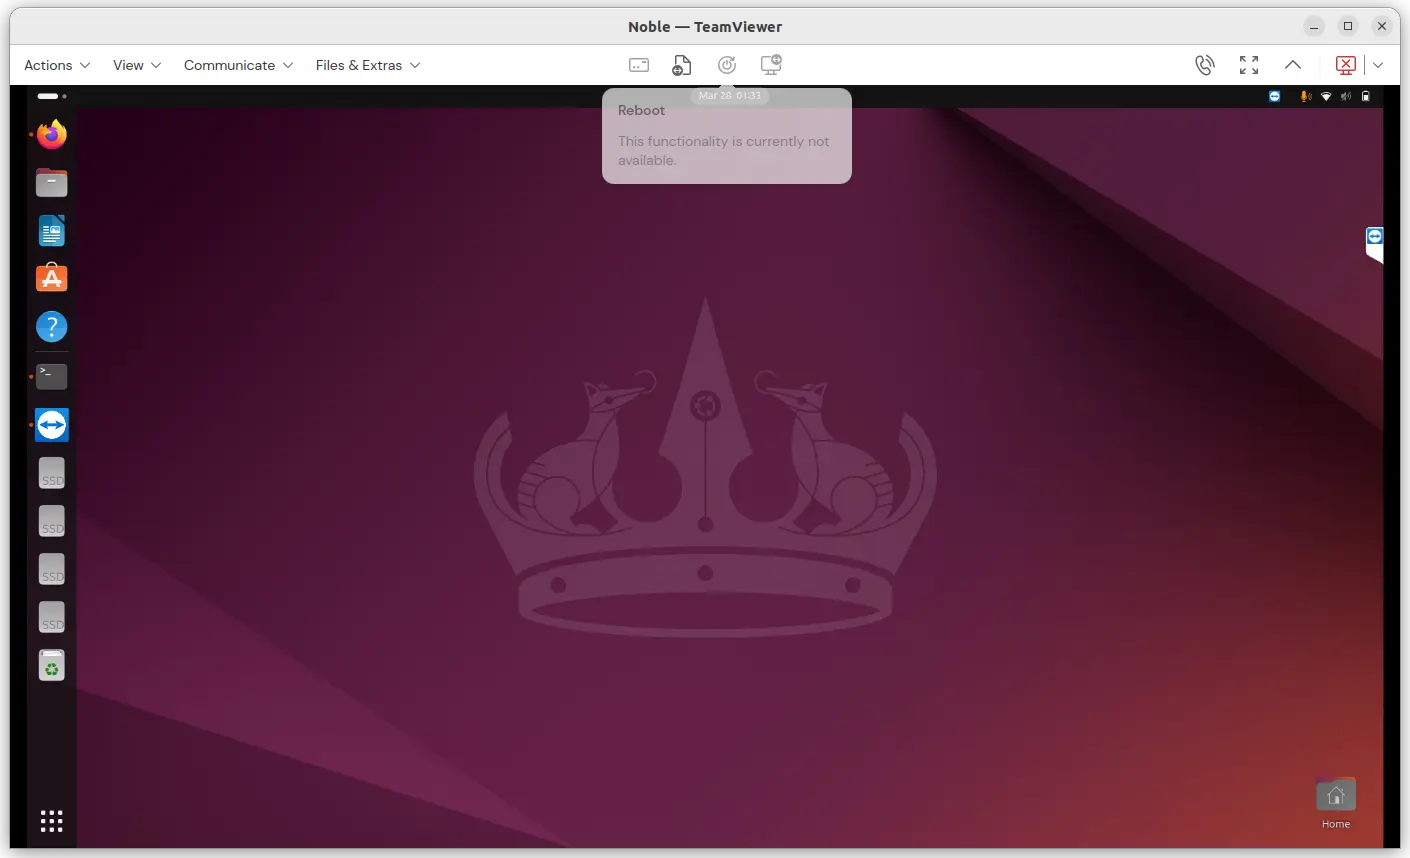
Step 2: Use TeamViewer to Remote Access to Another PC, or Access Current PC from Remote
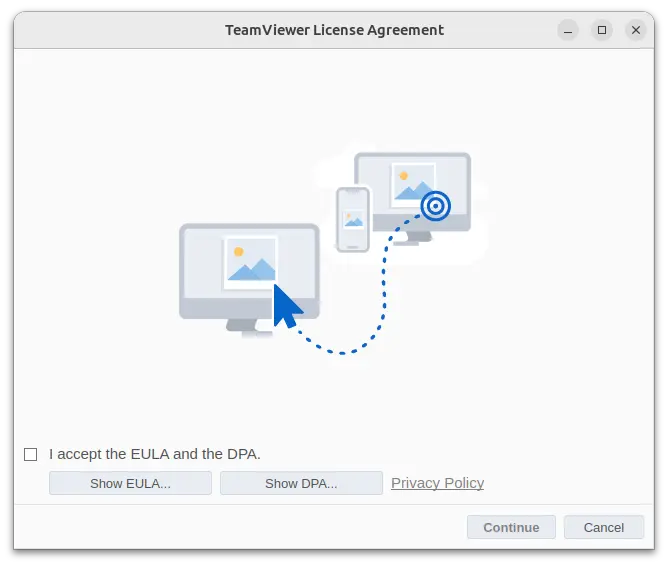
After installation, launch the software and accept the license for being able to use the tool.
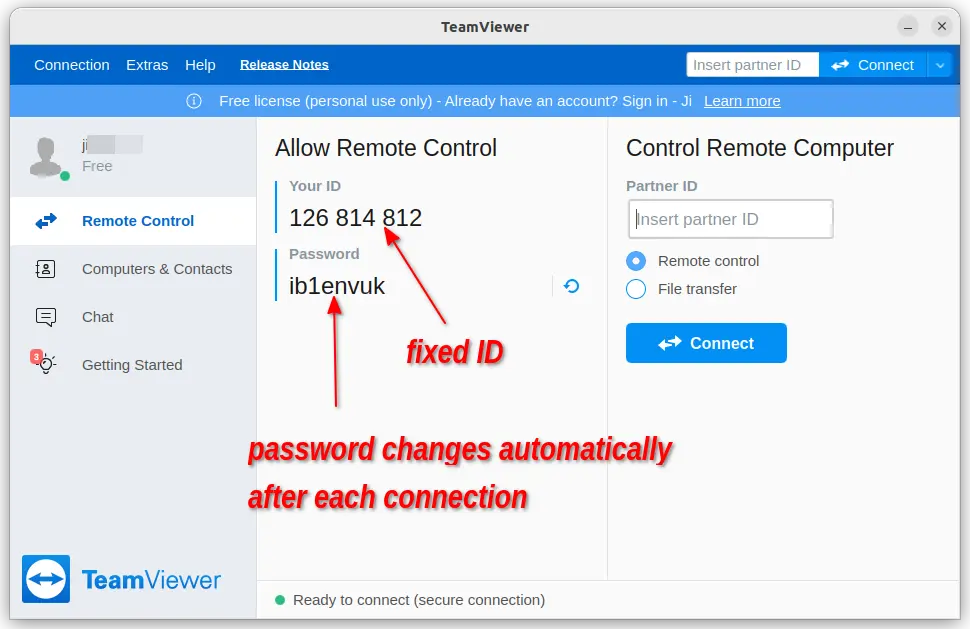
1. Connect to current PC from remote machine
When the app window starts, you’ll see your ID and Password in window center. The ID is fixed, but Password changes automatically after every incoming connection.
If you always sit in front of this computer, waiting for incoming TeamViewer connections, then:
- Just tell the ID and the Password to your friends (time by time) and done.
- No user account, No log in (sign in) required.
Remote PC or Mobile with TeamViewer app, needs a validated account, log-in, then type your ID into ‘Partner ID’ box and click ‘Connect’, finally use the password to authenticate in pop-up dialog to connect to your PC.
If you want to allow incoming connections, when leaving away this computer, then are 2 choices.
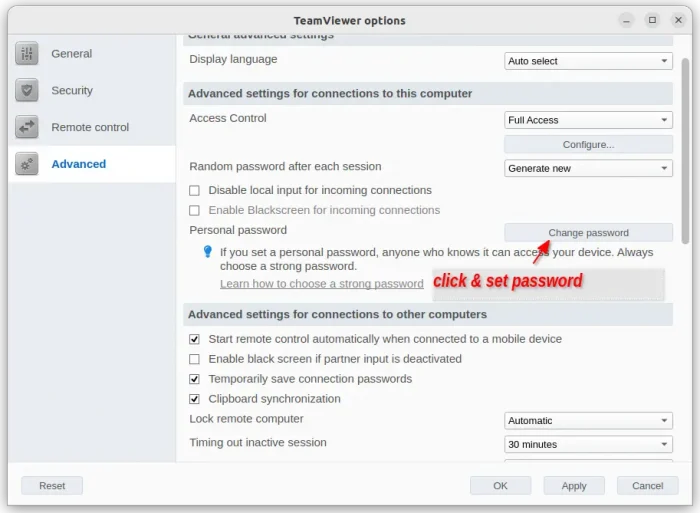
- Option 1: Set Personal password – So anyone with your ID and this personal password can connect, unless blocked. The upside is that you don’t need to log-in TeamViewer for this computer. To do so, go to menu Extras -> Options. Then, set a Personal password by clicking “Change password” button under “Advanced” tab.
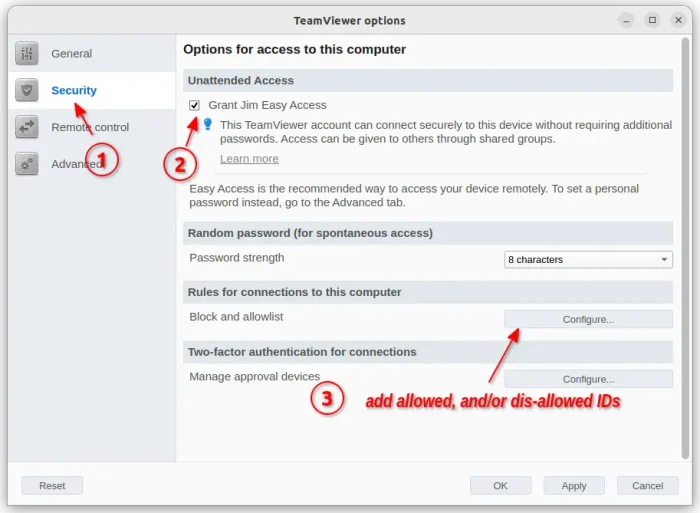
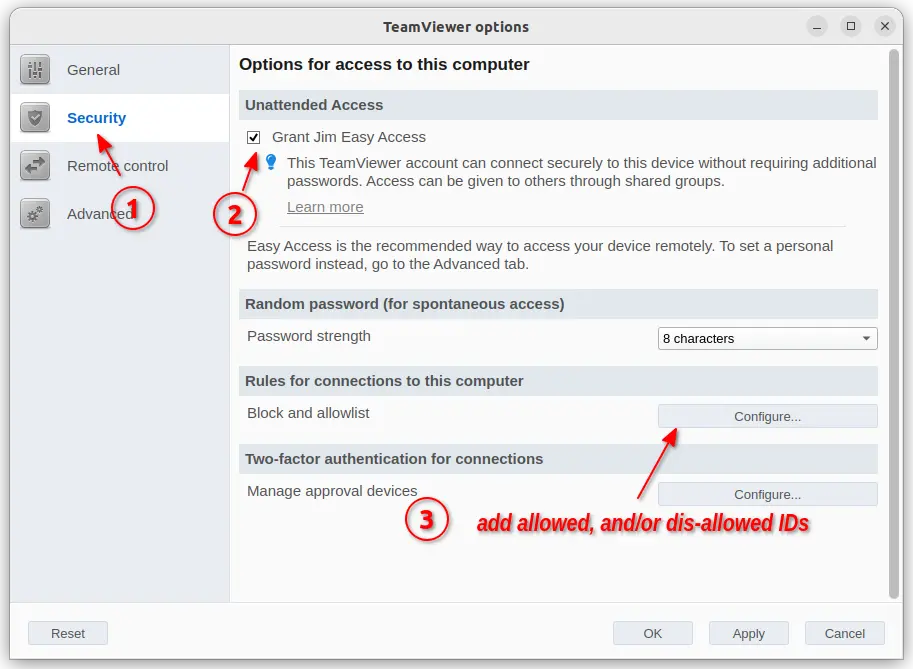
- Option 2: Log-in TeamViewer in multiple machines with SAME account. By signing up with an email account, activate with an email, and validate with Phone number. You can log-in to teamviewer with same account in multiple machines. Then, you can go to “Extras -> Options“, and turn on “Grant user Easy Access” option under Security tab. Finally, remote connect to this computer without password authentication. For choice, you can add blacklist and whitelist IDs, 2-factor authentication in this tab for more secure connections.

Tips: by enabling “Start TeamViewer with System option” in Extras -> Options -> General can start the software automatically on startup.
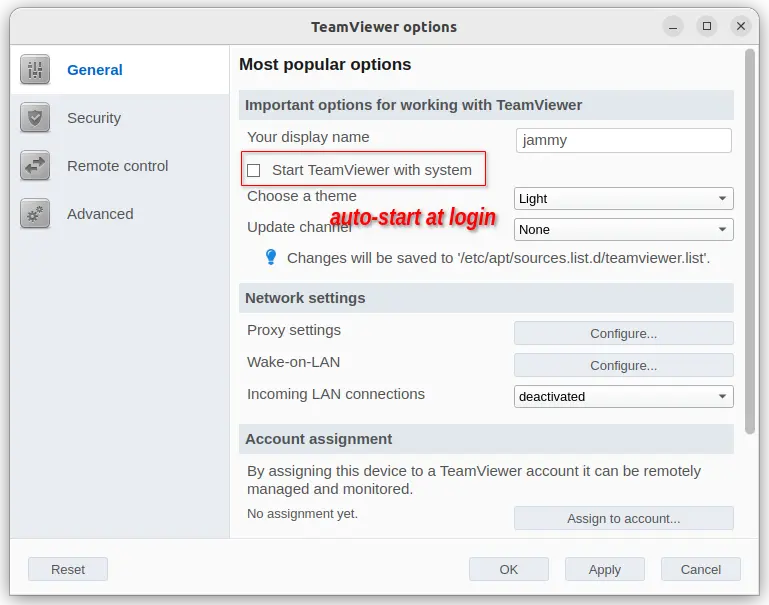
AutoStart TeamViewer
2. Connect to Remote Machine with TeamViewer
To use TeamViewer to remote control other computers, you have to first sign up an account using an email account, activate by clicking the registration email. And, first outcoming connection will ask you to validate using a Phone number.
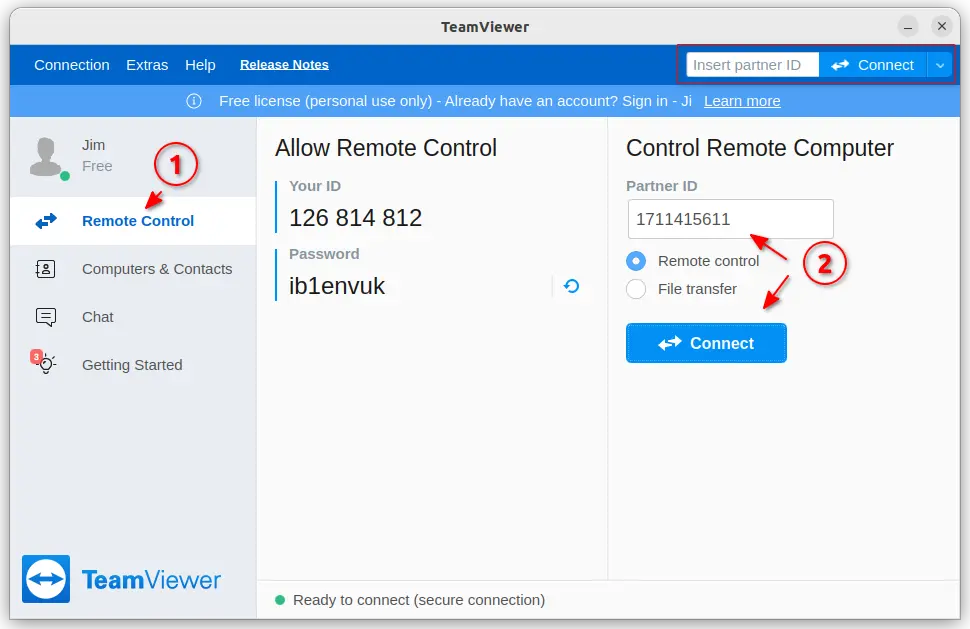
Once you met all the requirements, either type remote ID using header input-box, or go to Remote Control -> Control Remote Computer, and type remote ID to start a connection.
For choice, you may go to “Computers & Contacts” tab, to quickly access recent connections, and/or add remote IDs into contacts.
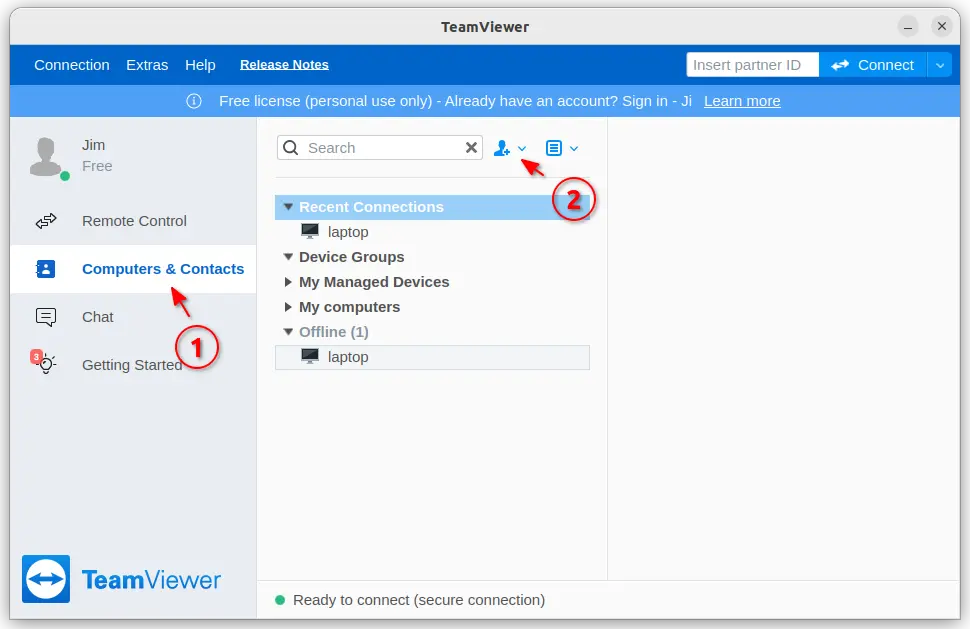
TeamViewer Add Contacts
For more about using TeamViewer, either see “Getting Started” tab or go menu “Help”!
