


![]()
This simple tutorial shows how to install the tiny sound recording app “Audio Recorder” in Ubuntu 22.04 and Ubuntu 24.04 LTS.
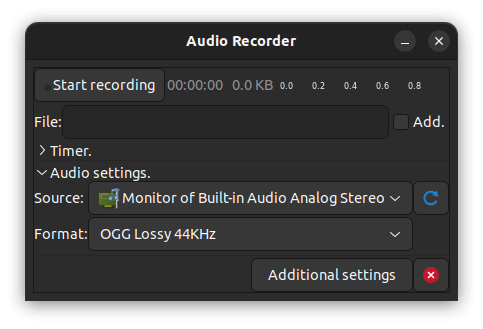
“Audio Recorder” is a little open-source app that can record audio from your system’s sound card, microphone, browsers, webcams and any sound that your PC plays out.
The tool has a built-in timer that automates audio recording on given clock time or after time period, auto stop when the recorded file size exceeds a limit. And, it can be controlled via Rhythmbox, VLC, Audacious and other MPRIS2 compatible players. For Skype users, it can automatically record all your Skype calls without any user interaction.
Sounds can be saved as OGG audio, Flac, MP3, WAV, M4A, and OPUS. And, it has command line options to control app interface as well as recording actions.
UPDATE: THIS APP IS NO LONGER IN ACTIVE DEVELOPMENT! It does NOT work in Ubuntu 24.10 and later.
Install Audio Recorder in Ubuntu 22.04 | 24.04:
The PPA also contains old version packages for Ubuntu 16.04, Ubuntu 18.04, and Ubuntu 20.04
The app has been more than 10 years old! The developer team maintains an official PPA with all Ubuntu releases and their derivatives (e.g., Linux Mint) support. Somehow, it does not available in Ubuntu’s universe repository.
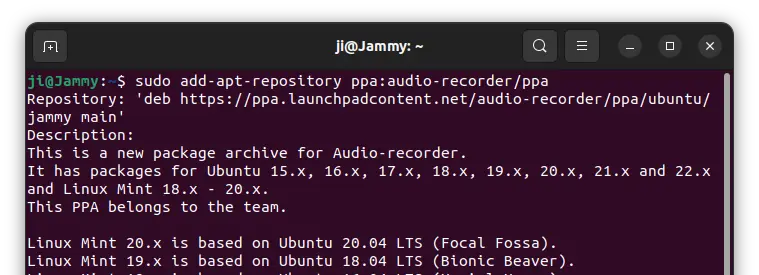
1. Add the PPA
First press Ctrl+Alt+T on keyboard to open terminal. When it opens, paste the command below and hit Enter:
sudo add-apt-repository ppa:audio-recorder/ppa
Type user password (no asterisk feedback) for sudo authentication and hit enter to continue.
NOTE: For Ubuntu 24.04 and 23.10, the run command below to add this PPA instead.
sudo add-apt-repository ppa:ubuntuhandbook1/audio-recorder
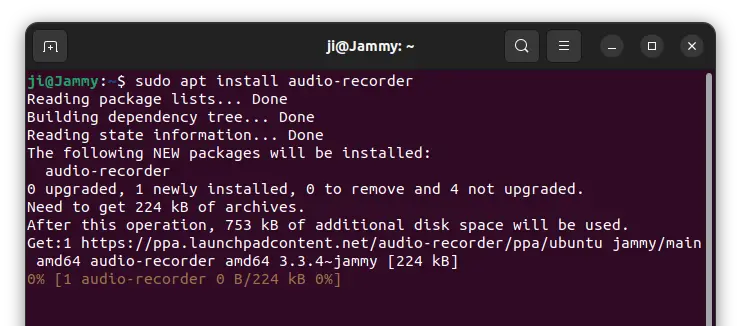
2. Install Audio Recorder package
After adding the PPA and updating the package cache (which is done automatically), just run the apt command below to install the tool:
sudo apt install audio-recorder
Some Ubuntu based systems need to run sudo apt update to manually refresh package cache after adding PPA. While it’s done automatically in Ubuntu.
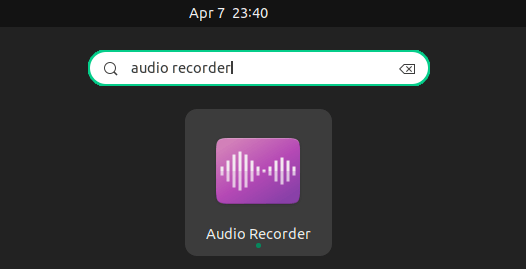
Once installed, search for and open the tool from ‘Activities’ overview screen and enjoy!
How to Remove Audio Recorder:
To remove the Ubuntu PPA, either launch “Software & Updates” utility and remove the source from Other Software tab, or run the command below in terminal:
sudo add-apt-repository --remove ppa:audio-recorder/ppa
And to remove the sound recording app, simply use command:
sudo apt remove --autoremove audio-recorder
That’s all. Enjoy!


Thank you! This is the best audio recorder of all and for some reason I cannot install it in Xubuntu 23.04.
I cannot install audio recorder as you did. Here is what I get:
~$ sudo add-apt-repository ppa:audio-recorder/ppa
[sudo] password for Hank:
Repository: ‘deb https://ppa.launchpadcontent.net/audio-recorder/ppa/ubuntu/ lunar main’
Description:
This is a new package archive for Audio-recorder.
It has packages for Ubuntu 15.x, 16.x, 17.x, 18.x, 19.x, 20.x, 21.x and 22.x and Linux Mint 18.x – 20.x.
This PPA belongs to the team.
Linux Mint 20.x is based on Ubuntu 20.04 LTS (Focal Fossa).
Linux Mint 19.x is based on Ubuntu 18.04 LTS (Bionic Beaver).
Linux Mint 18.x is based on Ubuntu 16.04 LTS (Xenial Xerus).
Installation:
0) Remove the OLD, PRIVATE PPA that belonged to the developer. Run:
sudo add-apt-repository –remove ppa:osmoma/audio-recorder
1) Add new PPA.
Then update your package list and Install the latest version of audio-recorder. Run:
sudo add-apt-repository ppa:audio-recorder/ppa
sudo apt-get -y update
sudo apt-get install –reinstall audio-recorder
——-
Older packages for Ubuntu 14.10, 14.04 and earlier, see
https://launchpad.net/~osmoma/+archive/audio-recorder
This includes audio-recorder for Linux-Mint 13, 17 and 17.x.
Source code:
https://launchpad.net/~audio-recorder
Bem-vindo,
You are welcome !
More info: https://launchpad.net/~audio-recorder/+archive/ubuntu/ppa
Adding repository.
Press [ENTER] to continue or Ctrl-c to cancel.
Adding deb entry to /etc/apt/sources.list.d/audio-recorder-ubuntu-ppa-lunar.list
Adding disabled deb-src entry to /etc/apt/sources.list.d/audio-recorder-ubuntu-ppa-lunar.list
Adding key to /etc/apt/trusted.gpg.d/audio-recorder-ubuntu-ppa.gpg with fingerprint 42EF41ED9813B713D4F1F06D5CF12638ACF9669F
Hit:1 http://us.archive.ubuntu.com/ubuntu lunar InRelease
Hit:2 https://brave-browser-apt-release.s3.brave.com stable InRelease
Get:3 http://us.archive.ubuntu.com/ubuntu lunar-updates InRelease [109 kB]
Get:4 http://security.ubuntu.com/ubuntu lunar-security InRelease [109 kB]
Ign:5 https://repo.vivaldi.com/stable/deb stable InRelease
Get:6 https://repo.vivaldi.com/stable/deb stable Release [3,840 B]
Get:7 https://repo.vivaldi.com/stable/deb stable Release.gpg [833 B]
Get:8 http://us.archive.ubuntu.com/ubuntu lunar-backports InRelease [99.8 kB]
Ign:9 https://ppa.launchpadcontent.net/alexlarsson/flatpak/ubuntu lunar InRelease
Get:10 https://repo.vivaldi.com/stable/deb stable/main amd64 Packages [1,964 B]
Get:11 http://us.archive.ubuntu.com/ubuntu lunar-updates/main amd64 Packages [358 kB]
Get:12 http://us.archive.ubuntu.com/ubuntu lunar-updates/main i386 Packages [199 kB]
Ign:13 https://ppa.launchpadcontent.net/audio-recorder/ppa/ubuntu lunar InRelease
Get:14 http://us.archive.ubuntu.com/ubuntu lunar-updates/main Translation-en [89.5 kB]
Get:15 http://us.archive.ubuntu.com/ubuntu lunar-updates/main amd64 DEP-11 Metadata [81.2 kB]
Get:16 http://us.archive.ubuntu.com/ubuntu lunar-updates/main amd64 c-n-f Metadata [6,816 B]
Get:17 http://us.archive.ubuntu.com/ubuntu lunar-updates/restricted amd64 Packages [282 kB]
Get:18 http://security.ubuntu.com/ubuntu lunar-security/main i386 Packages [140 kB]
Get:19 http://us.archive.ubuntu.com/ubuntu lunar-updates/restricted Translation-en [45.6 kB]
Get:20 http://us.archive.ubuntu.com/ubuntu lunar-updates/universe amd64 Packages [752 kB]
Get:21 http://security.ubuntu.com/ubuntu lunar-security/main amd64 Packages [269 kB]
Get:22 http://us.archive.ubuntu.com/ubuntu lunar-updates/universe i386 Packages [655 kB]
Get:23 http://security.ubuntu.com/ubuntu lunar-security/main Translation-en [63.4 kB]
Get:24 http://security.ubuntu.com/ubuntu lunar-security/main amd64 DEP-11 Metadata [7,404 B]
Get:25 http://security.ubuntu.com/ubuntu lunar-security/main amd64 c-n-f Metadata [4,904 B]
Get:26 http://security.ubuntu.com/ubuntu lunar-security/restricted amd64 Packages [282 kB]
Err:27 https://ppa.launchpadcontent.net/alexlarsson/flatpak/ubuntu lunar Release
404 Not Found [IP: 2620:2d:4000:1::3e 443]
Get:28 http://security.ubuntu.com/ubuntu lunar-security/restricted Translation-en [45.6 kB]
Get:29 http://security.ubuntu.com/ubuntu lunar-security/universe amd64 DEP-11 Metadata [6,580 B]
Get:30 http://us.archive.ubuntu.com/ubuntu lunar-updates/universe Translation-en [79.8 kB]
Get:31 http://us.archive.ubuntu.com/ubuntu lunar-updates/universe amd64 DEP-11 Metadata [52.8 kB]
Get:32 http://us.archive.ubuntu.com/ubuntu lunar-updates/universe amd64 c-n-f Metadata [12.5 kB]
Get:33 http://us.archive.ubuntu.com/ubuntu lunar-backports/universe amd64 DEP-11 Metadata [13.2 kB]
Err:34 https://ppa.launchpadcontent.net/audio-recorder/ppa/ubuntu lunar Release
404 Not Found [IP: 2620:2d:4000:1::3e 443]
Reading package lists… Done
N: Skipping acquire of configured file ‘main/binary-i386/Packages’ as repository ‘https://brave-browser-apt-release.s3.brave.com stable InRelease’ doesn’t support architecture ‘i386’
E: The repository ‘https://ppa.launchpadcontent.net/alexlarsson/flatpak/ubuntu lunar Release’ does not have a Release file.
N: Updating from such a repository can’t be done securely, and is therefore disabled by default.
N: See apt-secure(8) manpage for repository creation and user configuration details.
E: The repository ‘https://ppa.launchpadcontent.net/audio-recorder/ppa/ubuntu lunar Release’ does not have a Release file.
N: Updating from such a repository can’t be done securely, and is therefore disabled by default.
N: See apt-secure(8) manpage for repository creation and user configuration details.
Hank@dev2:~$ sudo apt install audio-recorder
Reading package lists… Done
Building dependency tree… Done
Reading state information… Done
E: Unable to locate package audio-recorder
Sadly, the PPA so far does not support Ubuntu 23.04 Lunar.
Thank You so much – this is a really nice little APP. Easy install, too. Keep up the good work!
Followed instructions. Got:
Unable to locate package audio-recorder
After last command
Seemed like an easy install and it seems to be recording, but I cannot figure out how to save and play back the audio I’ve recorded.
I just installed it and recorded a short “testing 123” file but I have no idea how to find and play it back.
It should automatically create a ‘Audio’ folder in user home, and save all recorded files there.
Using Ubuntu MATE 24.04, I followed your instructions and it worked perfectly.
I tried recording a song that was playing in YouTube and the indicator was responding to the audio on YouTube but when I played it back I was surprised to only hear all the sounds at my desk… the fan blowing and others speaking. I then discovered I had to select the “Built-in Audio Analog Stereo” with the little picture of a computer screen on it, NOT the other one with the picture of a microphone on it.
It was strange that the recording loudness indicator was showing the audio from YouTube but actually recording from the computer’s mic.
Now I’m looking for a “Simple Audio Player.” Even Rhythmbox player is far more than I need.
Thank you for a great little program.
I did the automatic update to the new 24LTS and it got rid of so much software WTF? And this method won’t work now.
Got a new computer, put Mint 22 on it but had a hell of a time finding you. Then a hell of a time getting AR installed! Would you believe I actually had to read all the instructions! But we are now up and running and the world is back in balance! I’ve used your Audio-recorder for years and couldn’t imagine life without it. It’s one if the best programs for Linux, period!