Audacious, the popular lightweight audio player, released new 4.4 version this Wednesday!
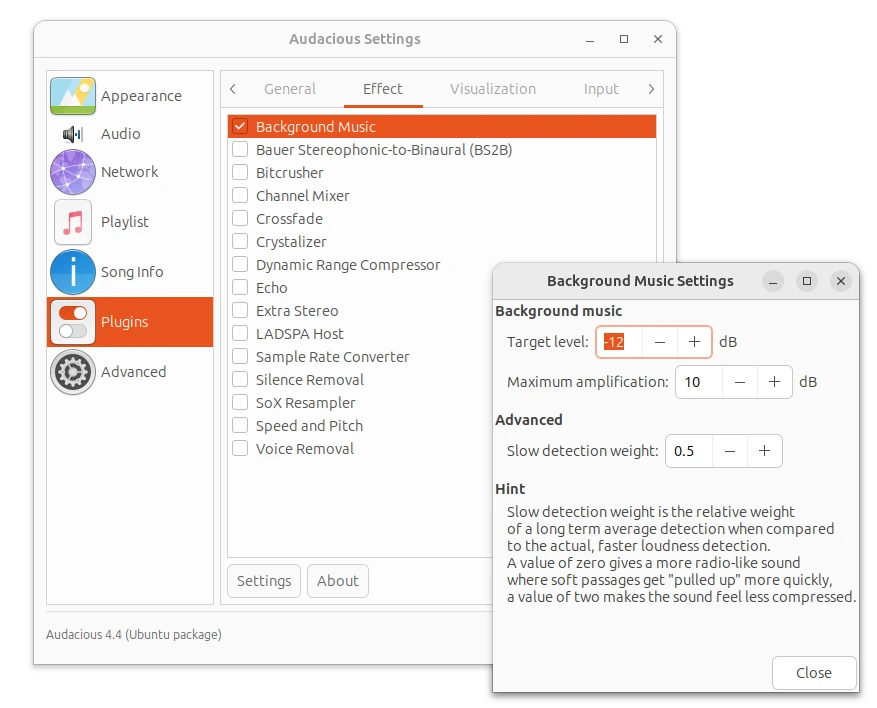
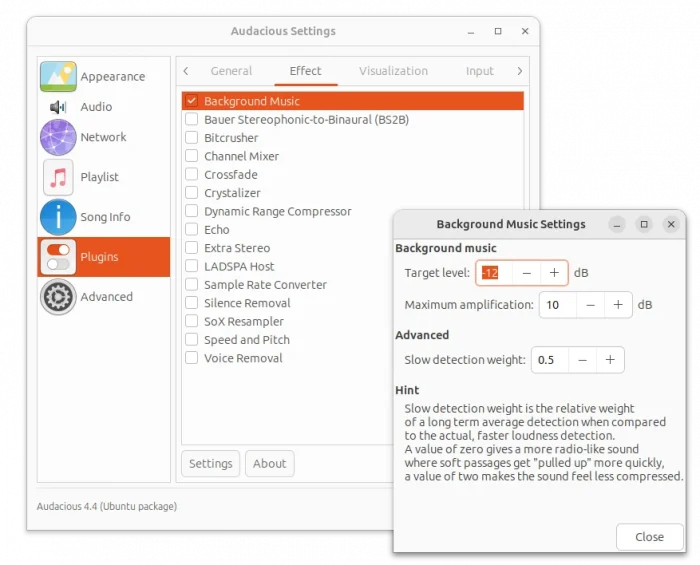
The new release of this free open-source music player restores Lyrics plugin for GTK interface, and adds new provider chartlyrics.com. Thanks to Michel Fleur, there’s now “Background Music” plugin, under “Effect” tab in the Plugin page, allows to make the sound equally loud within and between tracks.
The Scrobbler (Last.fm) plugin now also works on macOS and Windows. And, the Song Change plugin now allows to run custom command when a song is stopped.
Audacious 4.4 now defaults to GTK3 + Qt6, though Qt5 and GTK2 are still supported. It improved Wayland support for GTK interface, but the classic Winamp interface does NOT work properly on Wayland, thus users are recommended to run Audacious via XWayland (default behavior if available) therefore.
Other changes in Audacious 4.4 include:
- Add Disc Number support
- Read ReplayGain values in Opus files from R128 tags
- Allow to disable column header sorting
- Middle-click on volume button to mute/un-mute.
- Add Shift+Enter shortcut to Jump-to-Song dialog
- Improve PipeWire support.
- HTTPS support and X86_64 build for Windows
- Various bug-fixes, see release note for details.

How to Install Audacious 4.4 in Ubuntu
The software website provides official .exe files for Microsoft Windows users:
For Ubuntu users, it’s available to install via Ubuntu PPA (native .deb package), Snap package, or Flatpak package (runs in sandbox environment).
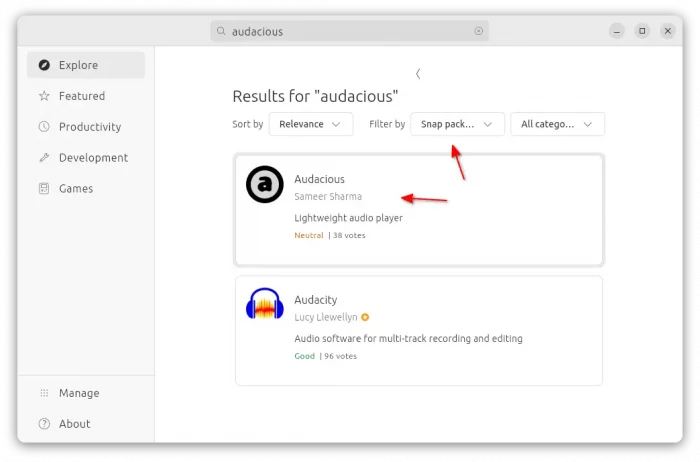
Method 1: Audacious Snap package
If you’re OK running the audio player in sandbox environment, then Audacious is easy to install through Ubuntu Software (or App Center) as Snap package.
Method 2. Install Audacious via Flatpak
Most Linux can install the audio player as Flatpak package, that runs in sandbox. So far, it supports amd64 and arm64 platforms.
All current Ubuntu user can press Ctrl+Alt+T on keyboard to open terminal and run the 2 commands below one by one to get it.
After installation, search for and launch it from start menu or Gnome overview. Log out and back in if app icon not visible.
Method 3. Install Audacious from Ubuntu PPA
For Ubuntu 18.04, Ubuntu 20.04, Ubuntu 22.04, Ubuntu 23.10, and Ubuntu 24.04 users, I’ve uploaded the new release package into PPA for amd64 and arm64/armhf machines.
Changes in the PPA package:
- Packages for Ubuntu 18.04 and Ubuntu 20.04 are built with Qt5 + GTK3, since Qt6 is NOT available.
- Qt6 + GTK3 for Ubuntu 22.04 and higher.
- The dependency library name changes that follow upstream policy in Ubuntu 24.04:
- libaudcore5 -> libaudcore5t64
- libaudgui5 -> libaudgui5t64
- libaudqt2 -> libaudqt2t64
- libaudtag3 -> libaudtag3t64
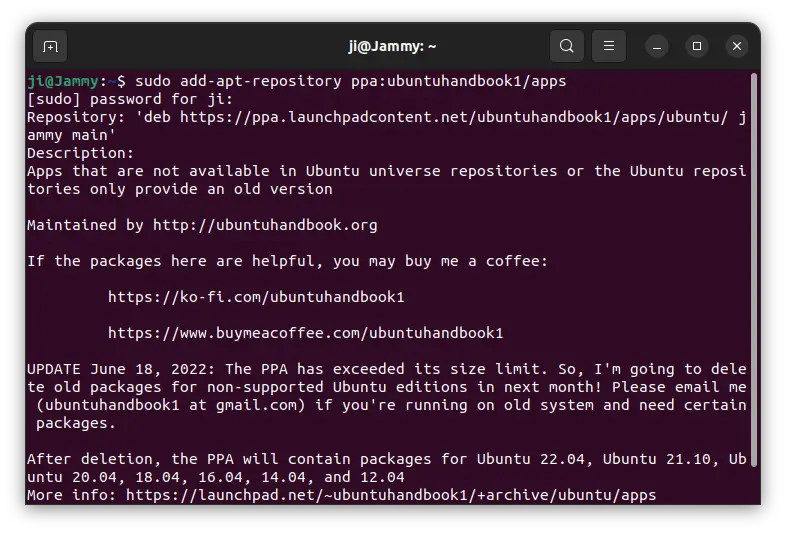
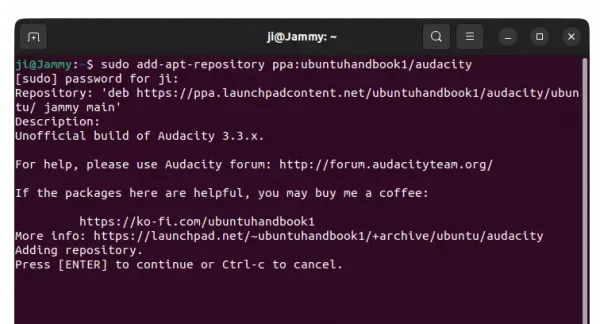
1. First, press Ctrl+Alt+T on keyboard to open terminal. When it opens, run command to add the PPA:
sudo add-apt-repository ppa:ubuntuhandbook1/apps
Type user password (no visual feedback, just type in mind) when it asks and hit Enter to continue.

2. Then, update system package cache:
sudo apt update
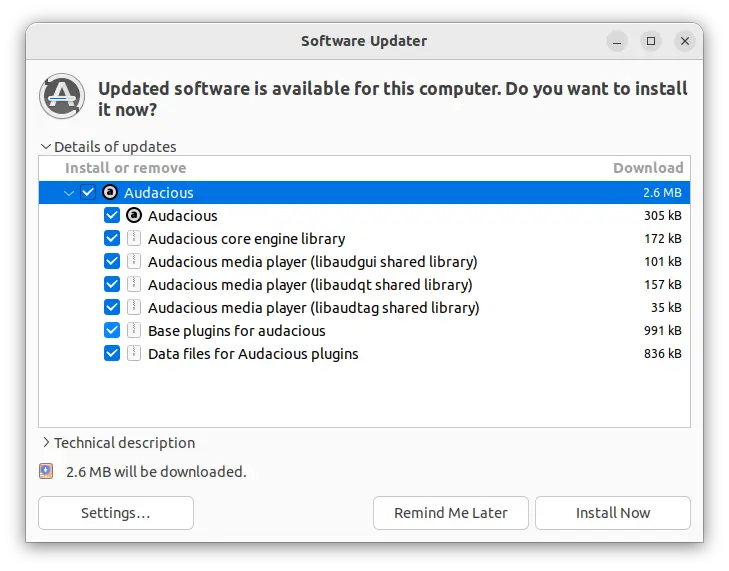
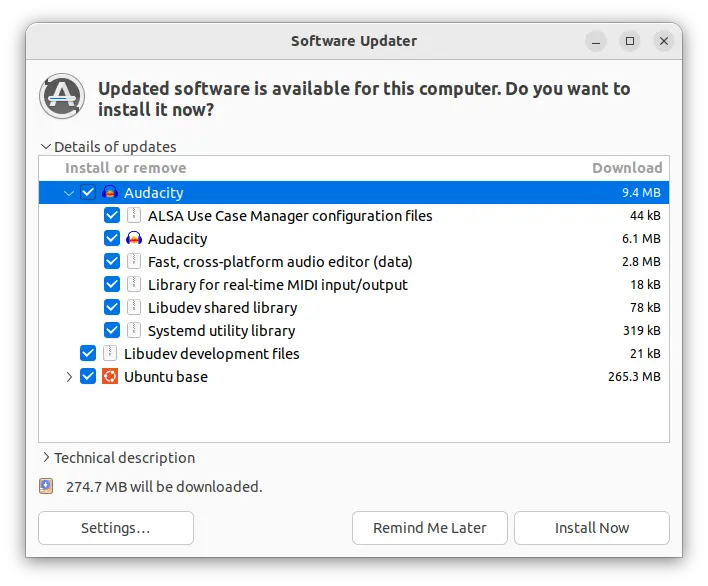
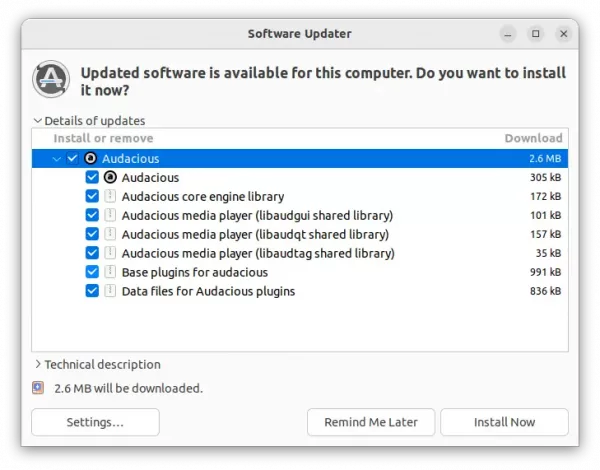
3. If you have an old version of the music player installed, you can now update the package to the latest using “Software Updater” utility.
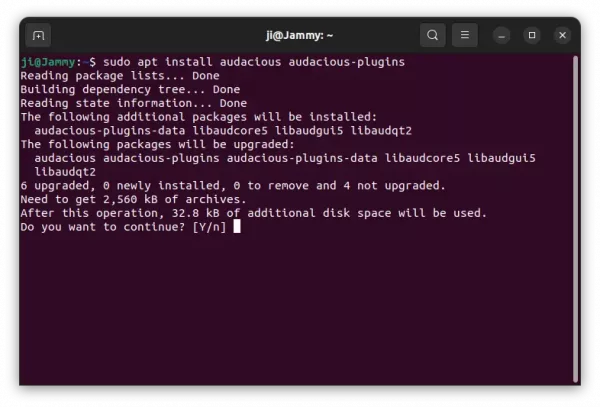
Or, run the command below in terminal to install or upgrade the package:
sudo apt install audacious audacious-plugins
NOTE: For Ubuntu 22.04 runs into “Error opening output stream” issue, open “Settings” and set audio output plugin to “PulseAudio” output.
Uninstall Audacious
To remove the audio player installed as Flatpak, open terminal (Ctrl+Alt+T) and use command:
flatpak uninstall --delete-data org.atheme.audacious
Also clean up runtime library via flatpak uninstall --unused.
If you want to restore the music player to the stock version available in system repository. Run command below to purge PPA as well as downgrade installed packages:
sudo apt install ppa-purge && sudo ppa-purge ppa:ubuntuhandbook1/apps
Or, simply remove the software packages by running command:
sudo apt remove audacious audacious-plugins-data
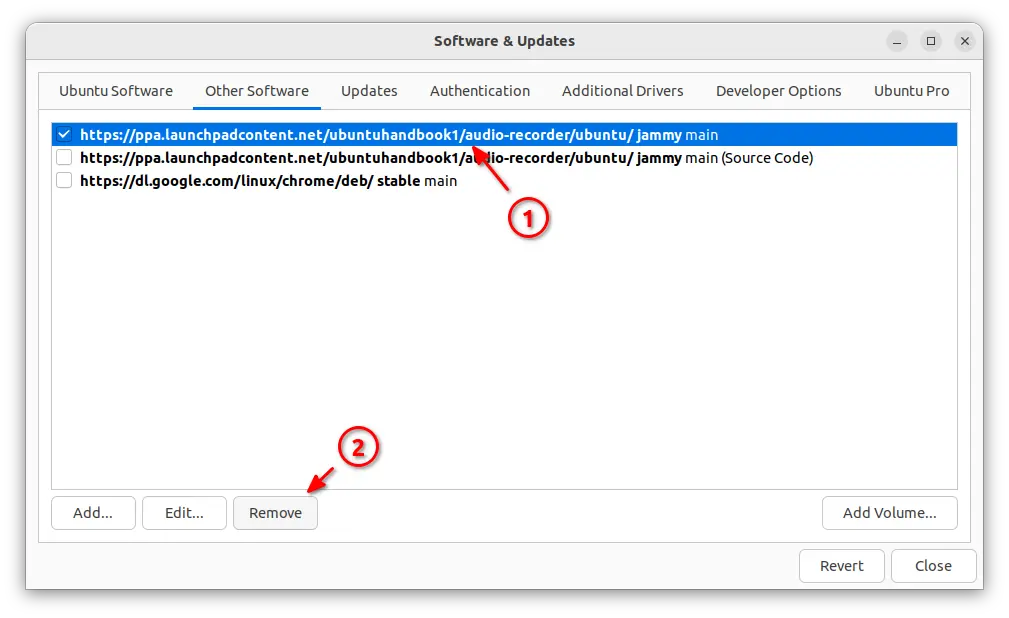
And remove the PPA either via “Software & Updates” under ‘Other Software’ tab or use command:
sudo add-apt-repository --remove ppa:ubuntuhandbook1/apps
That’s all. Enjoy!