This tutorial shows how to set custom screen resolution in current Ubuntu releases, including Ubuntu 20.04, Ubuntu 22.04, and Ubuntu 24.04, on either Wayland or Xorg session.
So this tutorial is going to show you another way to add your favorite screen resolution if it’s not available in Display settings.
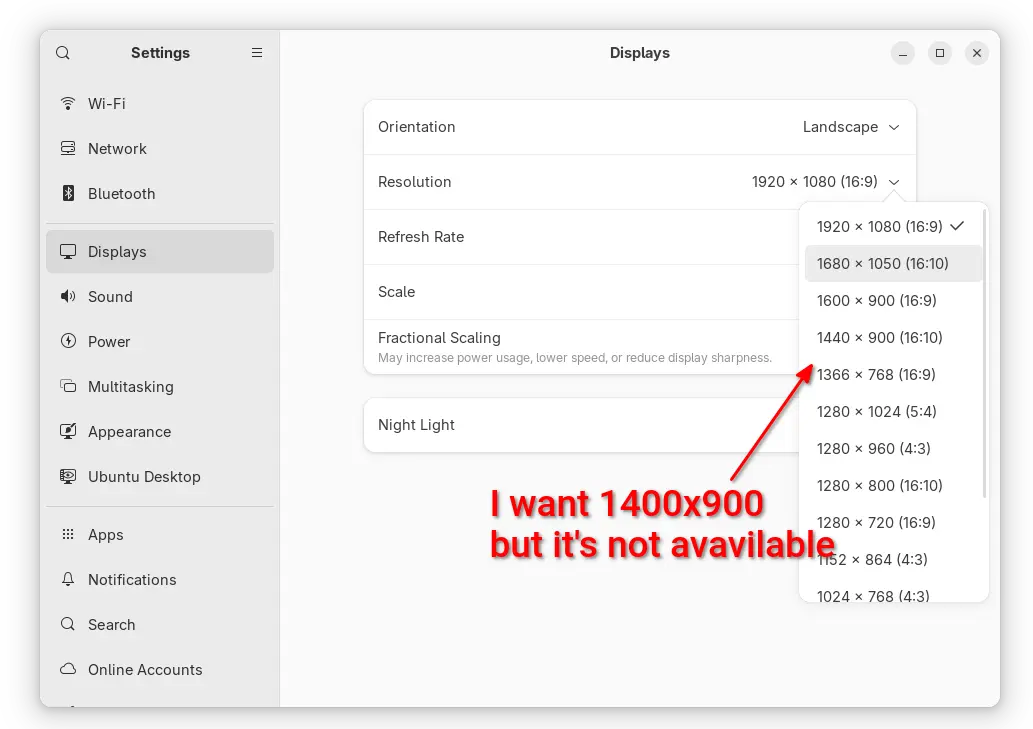
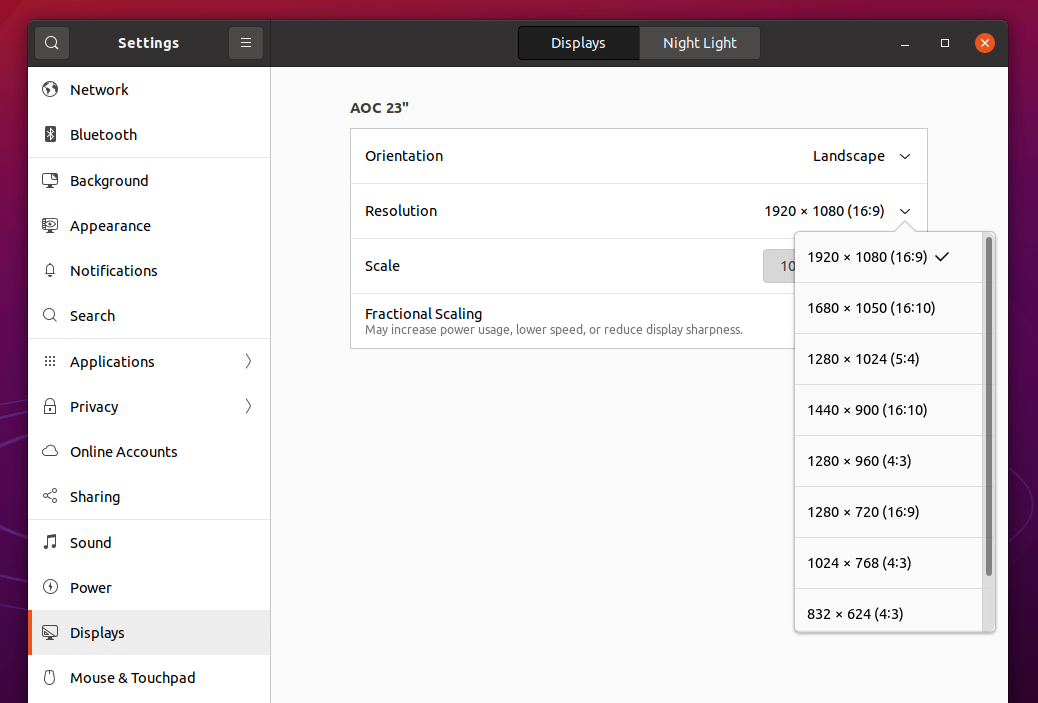
In the case, I’ve the default 1920X1080 (16:9) resolution. However, I prefer 1600X900 (16:9) a little more which is not available in settings.
Before getting started:
In this tutorial I’m going to add video mode option as Kernel parameter. The good side is that it works on both Wayland and Xorg.
Downsides includes:
- You can’t set custom resolution higher than the maximum one in Display settings. In my case (see the picture above), X resolution must be less than 1920, and Y resolution have to less than 1080.
- If you have dual-boot or multi-boot systems, below steps may not work for “other Linux” in Grub boot menu. For instance, I’ve Ubuntu 21.04 and Ubuntu 20.04 dual-boot in my laptop, the startup boot menu is handled by Grub for Ubuntu 21.04. It lists Ubuntu 21.04 as the first menu entry, custom Kernel parameter does not work for Ubuntu 20.04 in my case.
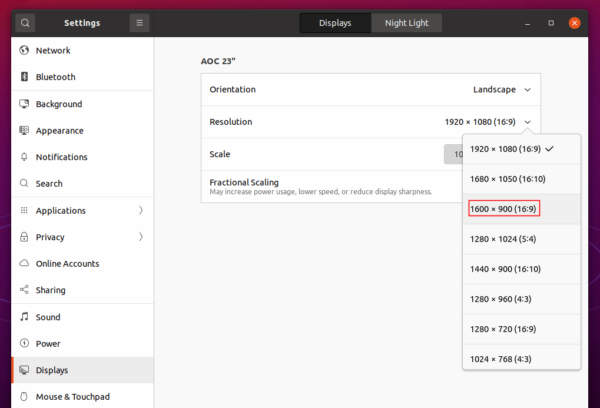
And after adding the parameter, the custom resolution should appear in Display settings, 1600×900 for instance:
How to Tell the Display Device Name in Ubuntu:
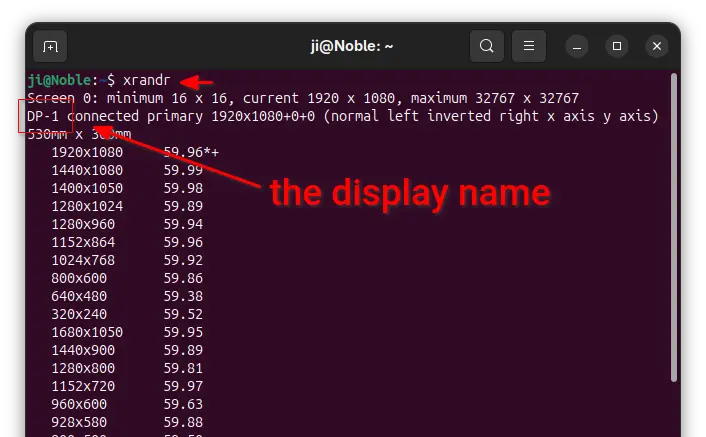
Firstly, you have to find out the current Display name. To do so, open terminal from the system application launcher:

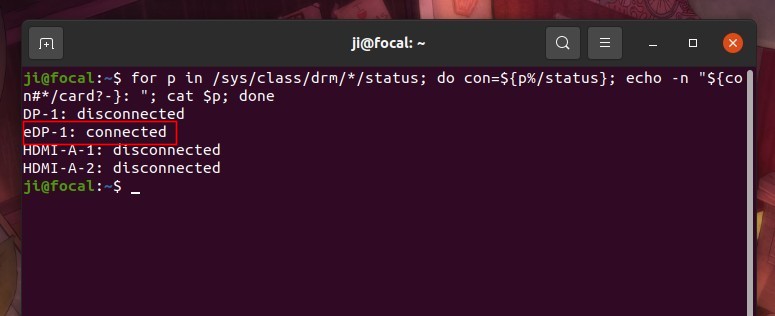
When terminal opens, run command:
for p in /sys/class/drm/*/status; do con=${p%/status}; \

echo -n "${con#*/card?-}: "; cat $p; done
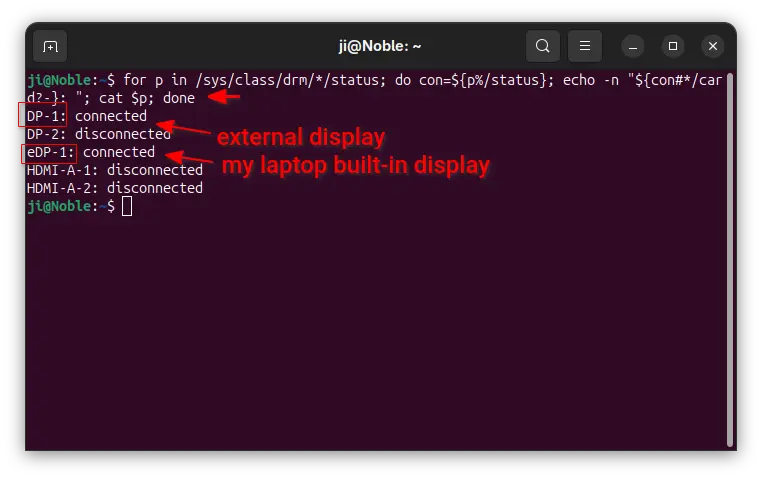
This is a single command separated into 2 lines. It checks all the sub-folders under ‘/sys/class/drm‘ directory. For the sub-folder includes ‘status‘ file with ‘connected‘ as content, the folder name exclude ‘card?-‘ part is the device name we need.
As the picture shows, it’s eDP-1 in my case.
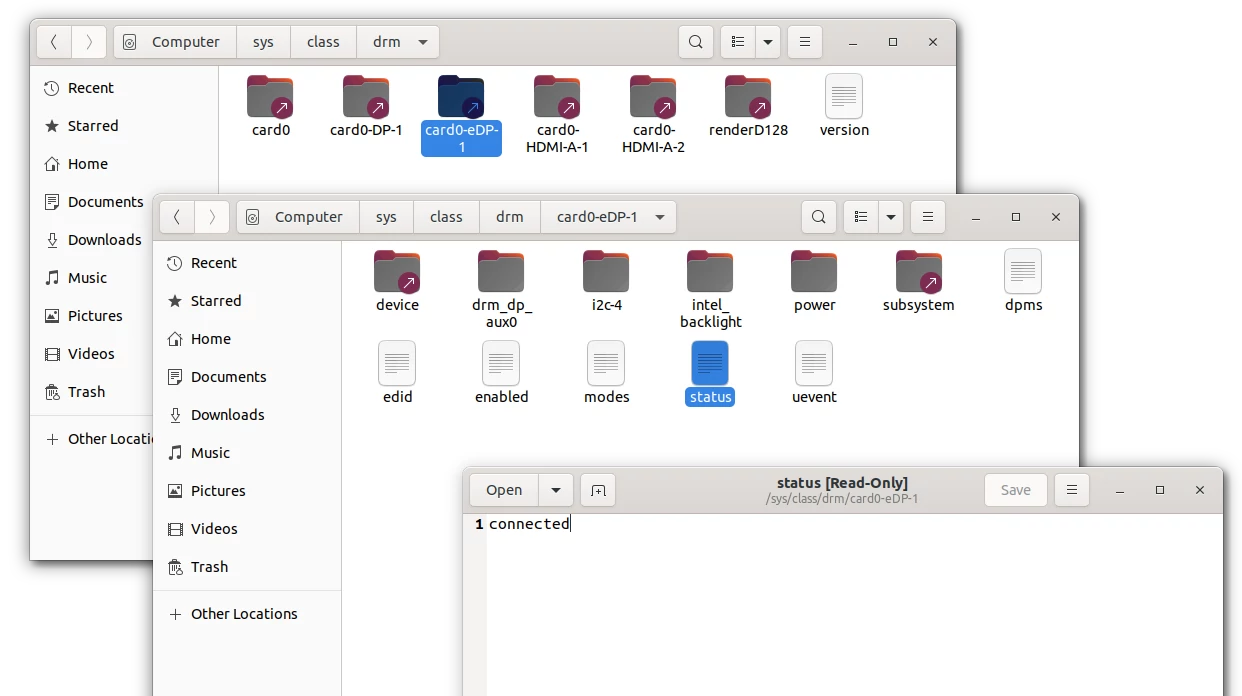
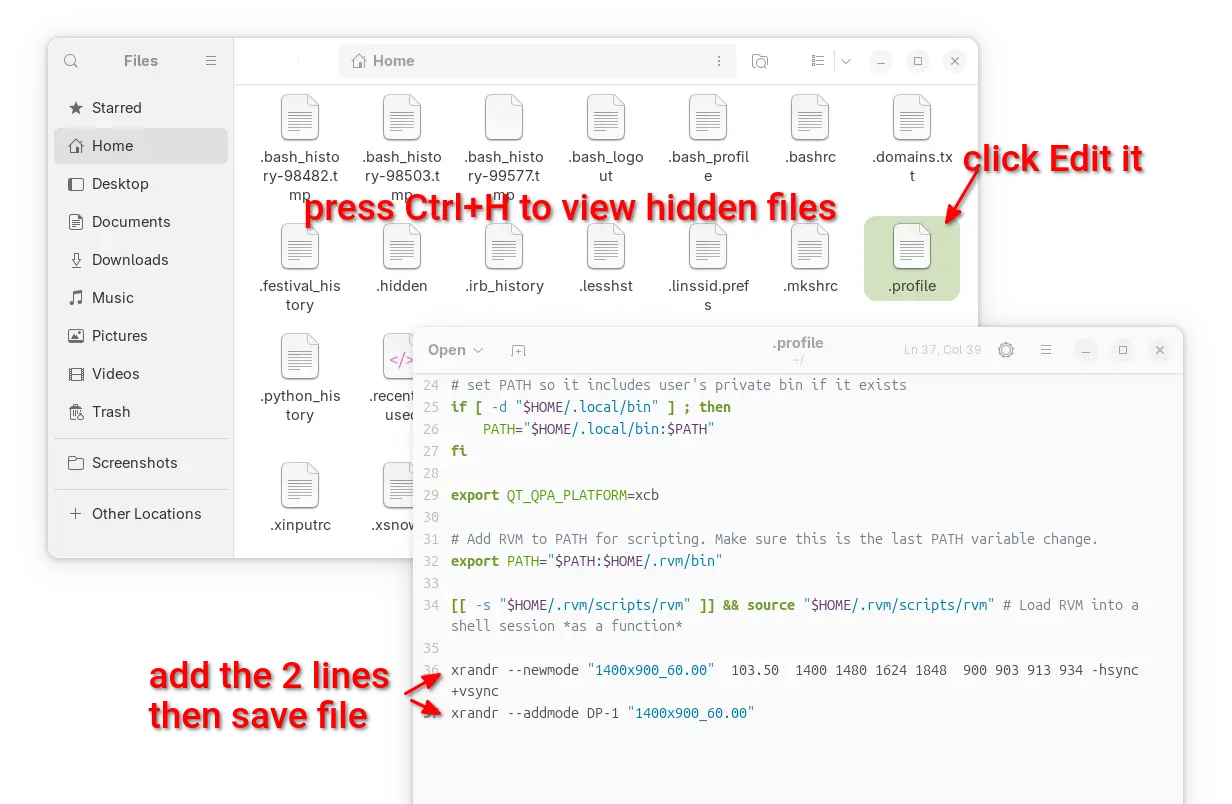
DON”T edit the files
How to add video mode kernel parameter:
Option 1.) edit Grub configuration file.
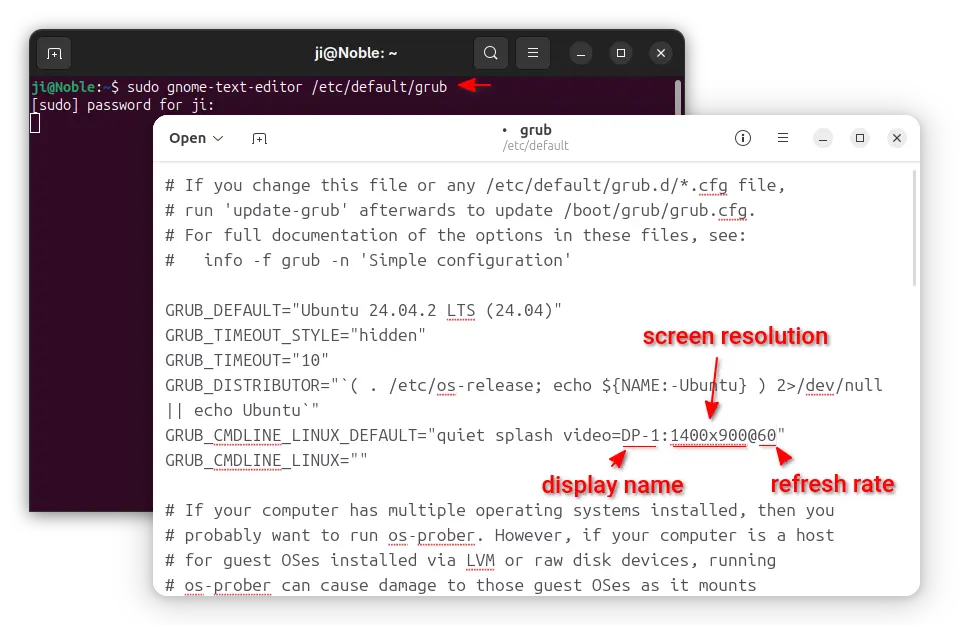
a.) Open terminal from system app launcher. When it opens, run command to edit the config file:
sudo gnome-text-editor /etc/default/grub
Replace gnome-text-editor depends on your DE or Ubuntu edition, such as gedit for Ubuntu 22.04 and earlier, or nano command line text editor for most desktops.
When it opens, add video=eDP-1:1600×900@60, in my case, as value for “GRUB_CMDLINE_LINUX_DEFAULT”.
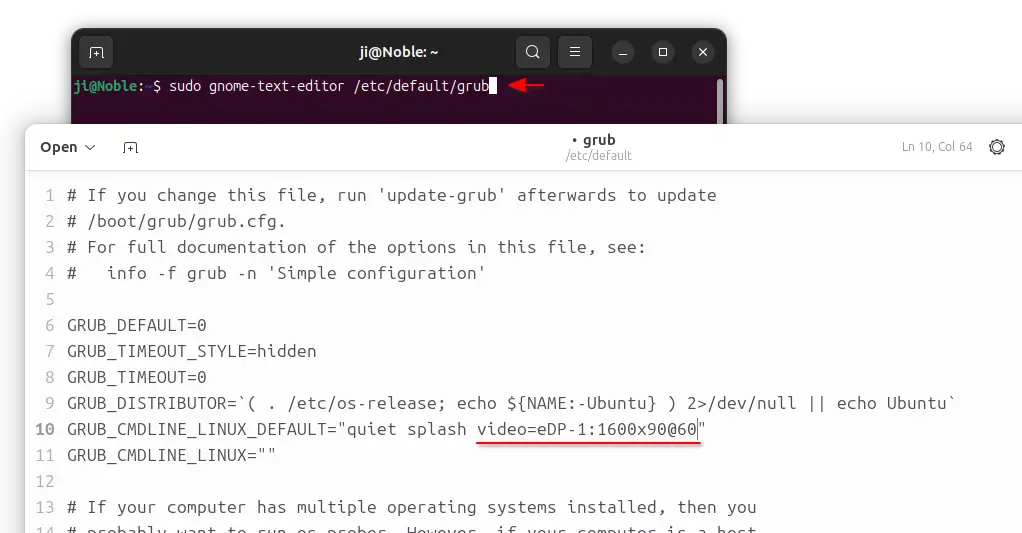
IMPORTANT: you have replace video=eDP-1:1600×900@60:
- eDP-1 is the Display Device Name, you can find it in previous step.
- 1600×900 is the desired screen resolution. Replace it with yours.
- 60 is the refresh rate. It’s OK to skip it, so it will be video=eDP-1:1600×900
There are more flags for the video mode kernel parameter. See the documentation for detail.
b.) After saving the changes (for nano, press Ctrl+S, then Ctrl+X.) Finally apply changes by running command:
sudo update-grub
And reboot.
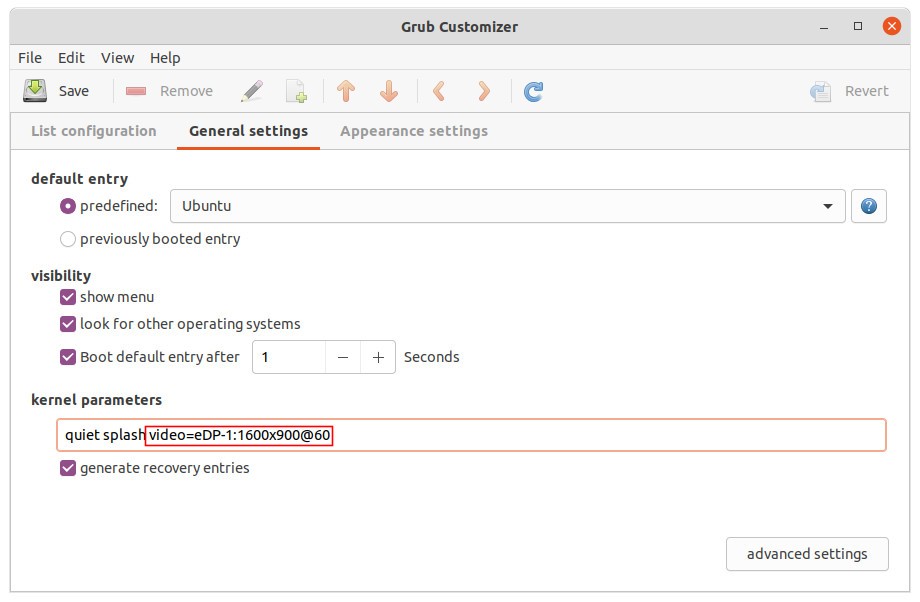
Option 2.) use Grub Customizer:
Grub-Customizer, the popular graphical tool offers an option to add the Kernel parameter.
Install it from Ubuntu Software if you don’t have it. Then launch it and navigate to General Settings tab. Finally add the value and click on Save button.
Set Custom Resolution for Multiple Displays:
If you have multiple monitors connected to your Ubuntu machine. It’s OK to set one screen resolution for all displays, or use more “video=” parameter for each display.
a.) To set one screen resolution for all displays, just skip the device name. For instance:
video=1600x900@60
It will add 1600×900 screen resolution with 60 Hz refresh rate for all the connected displays.
b.) To add more “video=” parameter. For instance, I have two displays: eDP-1 and DP-1 connected. And to add 1360×700 for eDP-1 and 1600×900 for DP-1, use:
video=eDP-1:1360x700@60 video=DP-1:1600x900@60

That’s all. Enjoy!