


![]()
Want to create desktop wallpaper slideshow in Ubuntu 20.04 so it changes background wallpaper automatically with your photo images and given time interval?
This quick tip is going to show you how to easily setup a custom desktop slideshow without installing anything, though there are a few applications can do the job (e.g., wallch which is available in software center).
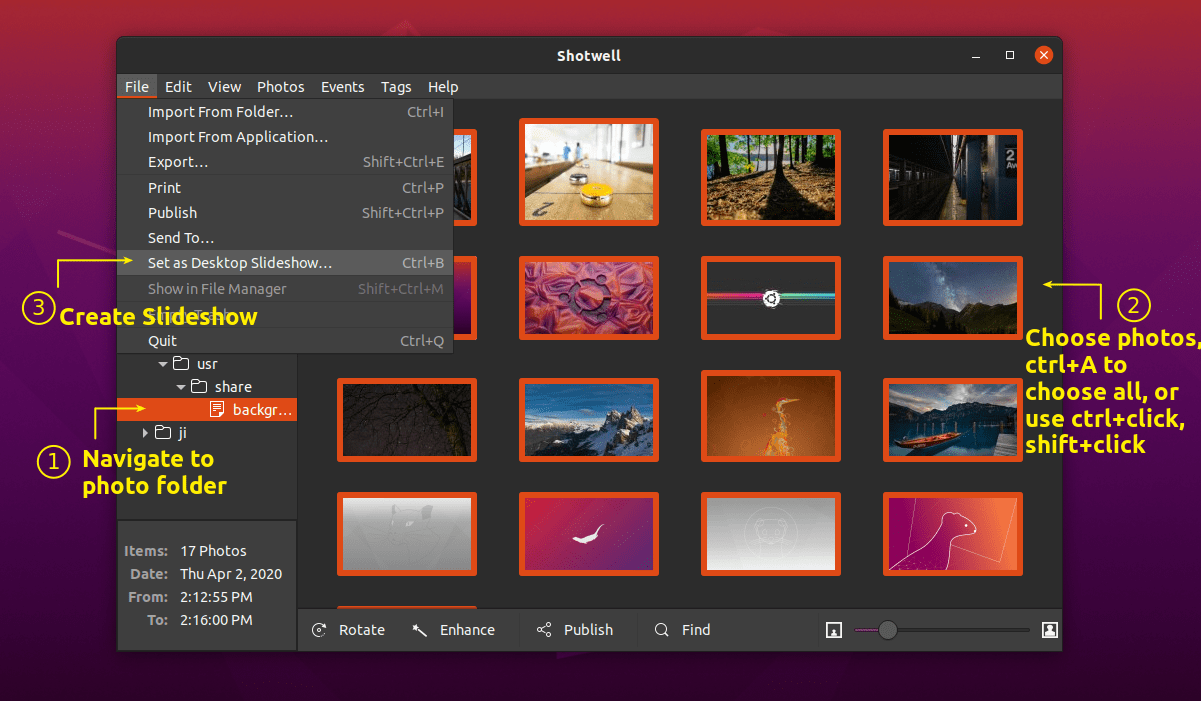
1. First open the pre-installed shotwell photo manager from system application menu.

2. Then import your photo images via menu File > Import From Folder.
3. Then you can easily set a custom desktop slideshow via:
- choose a selection of (Ctrl+click or Shift+click) or all photos (Ctrl+A).
- go to menu File > Set as Desktop Slideshow
4. In next pop-up, set time interval, and click OK.
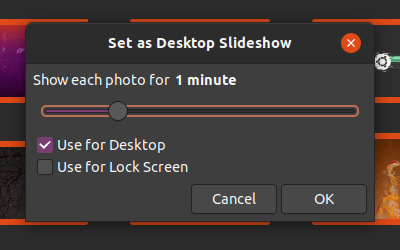
The desktop slideshow starts immediately and also automatically in next boot, until you change background wallpaper via System Settings > Background.


There is no “set as desktop slideshow” under file in my version of Shotwell on Ubuntu 20.04
it appears to me that if you select too many (don’t know how many makes “too many”) pictures, the selection will grey out – I got up to 64 photos to work, so far —
First, you need to select all the images “by pressing ctrl select” – “images”, then only “set as desktop slideshow” will show up.