


![]()
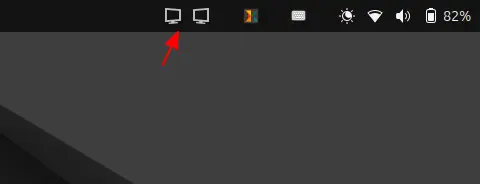
Have Ubuntu computer connected with multiple monitors? Here’s how to make the top panel show in all displays!
GNOME, the default desktop in Ubuntu, so far only shows the top-panel in the primary display. For users with multiple monitors, besides working in mirror mode, here are few extensions to make the top-panel available in all screens.
For Ubuntu 24.04 & Higher with GNOME
For Linux Distributions with recent GNOME 45 ~ 50 desktop, e.g., Ubuntu 24.04, Ubuntu 26.04 and 25.10, Fedora Workstation 42~44, the new Multi Monitor Bar extension can do the job.
Besides the top-bar, it also shows following items in additional displays:
- Activities button (dot and pill icon).
- date and time menu.
- system tray icons and indicators.
- the overview screen.
To install it, simply launch App Center, search & install Extension Manager (filter by Debian package).
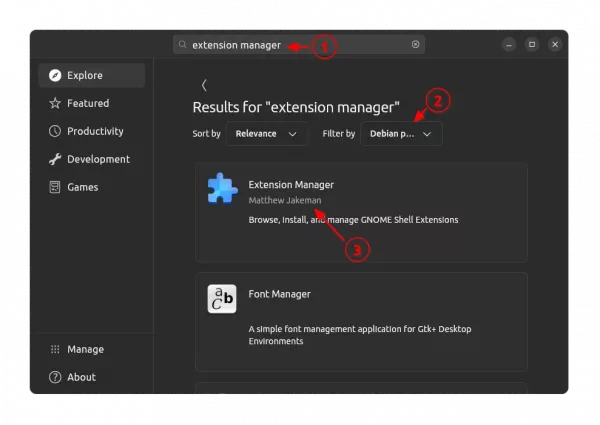
Install Extension Manager in Ubuntu Software/App Center
Then, launch Extension Manager, switch to “Browse” tab, finally search & install the “Multi Monitor Bar” extension.
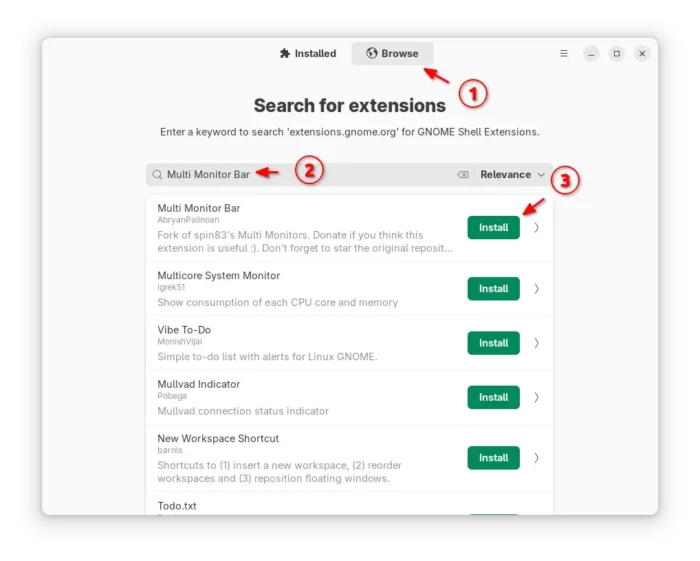
The top-bar should appear in all your monitors immediately after installed the extension. While other Linux may go to the extension page in EGO, then use the ON/OFF toggle to install it.
For Ubuntu 22.04 with default GNOME 42
For old GNOME, there is a multi-monitors-add-on extension, allowing to make it work in all displays. However, it’s no longer in development and supports end at GNOME 3.38.
Thankfully, there’s open-source fork of that extension with GNOME from version 42 to 46 support, meaning for Ubuntu 22.04 and Ubuntu 24.04, Debian 12, Fedora Workstation, RHEL 9 , and other Linux with recent GNOME.
NOTE: The extension for GNOME 42 ~ 44 (meaning for Ubuntu 22.04) lacks system tray indicators for additional displays.
1. First, click here to download the forked extension.
2. After downloaded the Zip archive. Open file manager and navigate to Downloads folder.
Finally extract and move the “multi-monitors-add-on@spin83” sub-folder into ~/.local/share/gnome-shell/extensions directory.
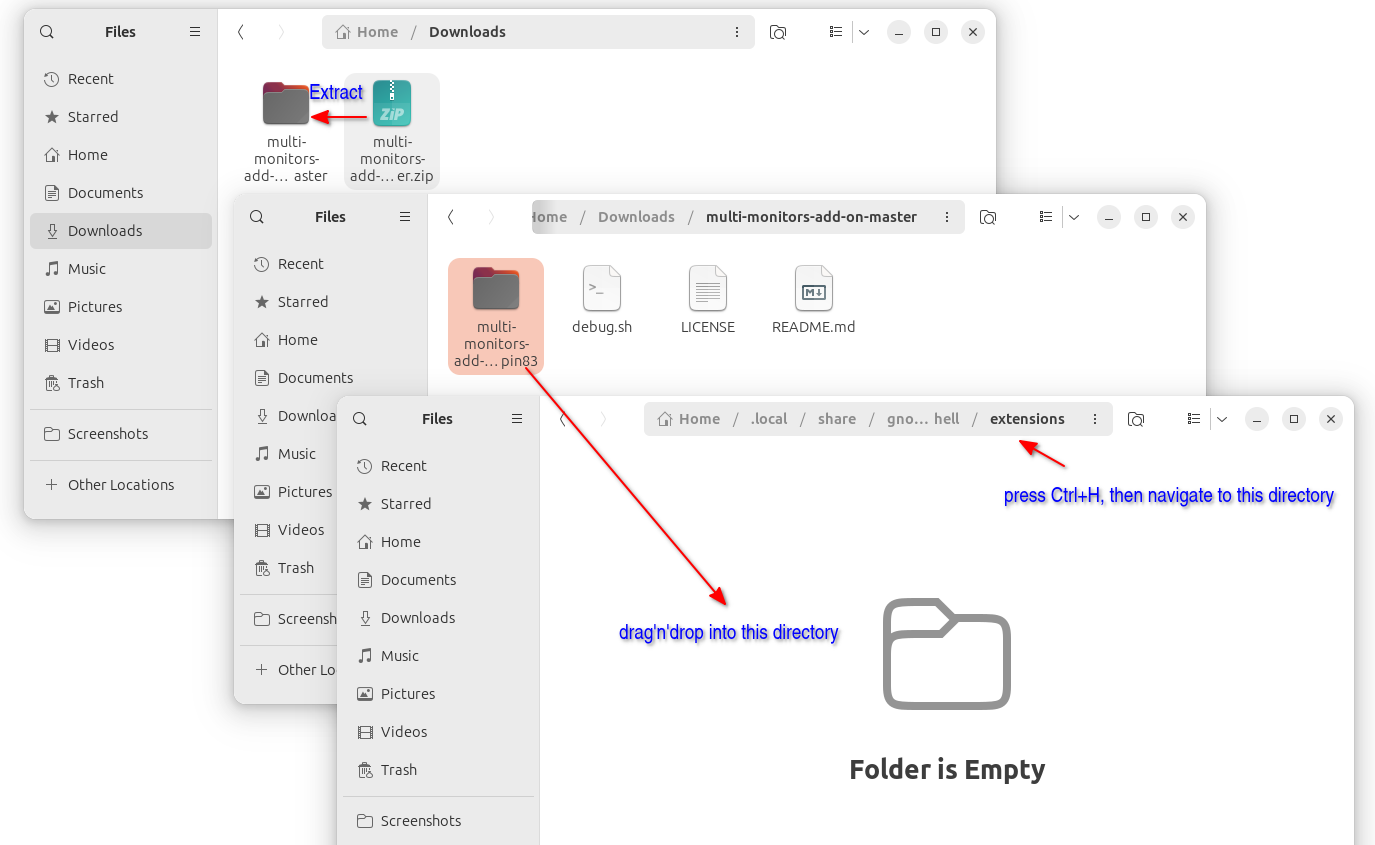
3. After installed the extension manually, log out and back in.
Then, install Extension Manager (or Gnome Extensions) from either Ubuntu Software or App Center.

Install Extension Manager in Ubuntu Software/App Center
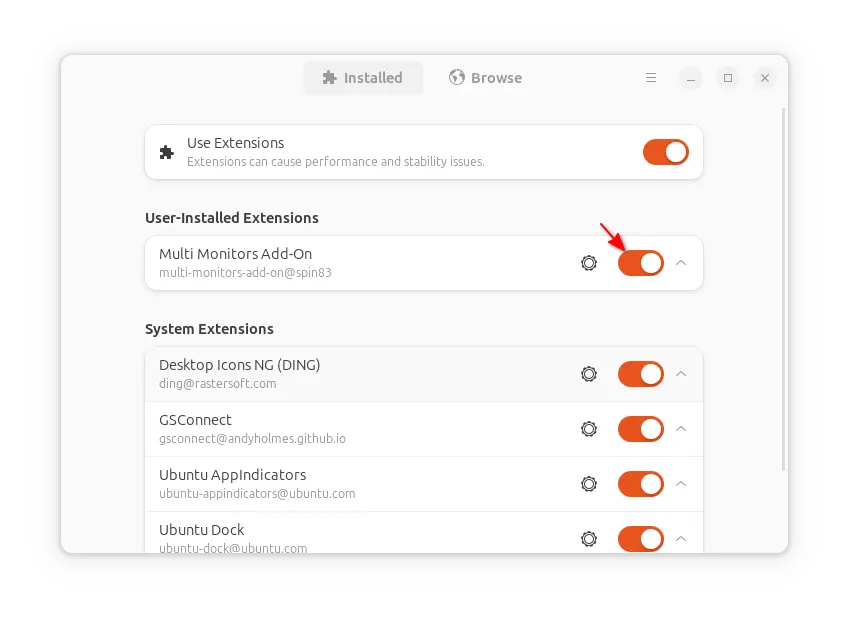
Finally, launch the tool and turn on “Multi-Monitors Add-on” extension. NOTE that in Ubuntu 22.04 it may show an error and turn off the toggle automatically, though the top-panel do works in all displays in my case.
The extension by default shows an indicator applet in top-right, with option to trigger its “Preferences” dialog.
If you don’t like it, just click on it to open Preferences, then turn off the “Show Multi Monitors indicator on Top Panel” option.
For old Ubuntu 20.04 & 18.04
Old GNOME from 3.14 to 3.38 can simply install the Multi Monitors Add-On extension to get top-bar in multiple monitors.
1. First, open terminal (Ctrl+Alt+T) and run command to install the agent package for being able to install extensions from web browser.
sudo apt install chrome-gnome-shell
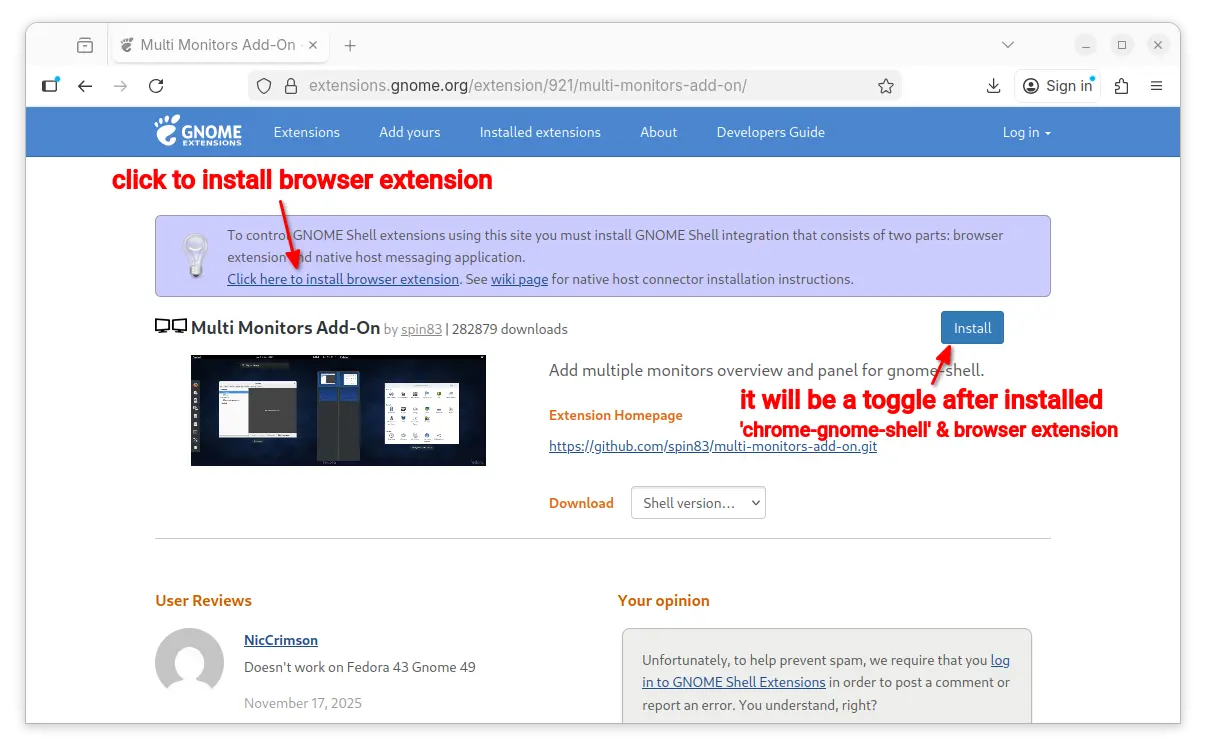
2. Then, go to the extension page via the link below:
Install browser extension (if it asks) via the link in the page and refresh. Finally, use the ON/OFF toggle to install the extension.
Another Workaround: Dash to Panel
As mentioned, the extension above for Ubuntu 22.04 is not perfect, as it does NOT show the top-right indicators.
If you’re OK to merge the left dock and top-bar into a single panel, then the popular “Dash-to-panel” extension is a workaround that can do the job with a simple on/off switch.
Dash to Panel
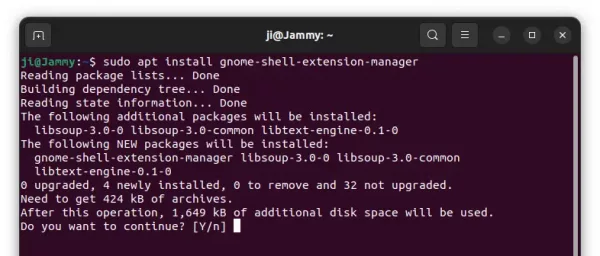
To install the extension, first press Ctrl+Alt+T on keyboard and run command in pop-up terminal to install ‘Extension Manager’:
sudo apt install gnome-shell-extension-manager
Then search for and launch extension manager in ‘Activities’ overview screen:

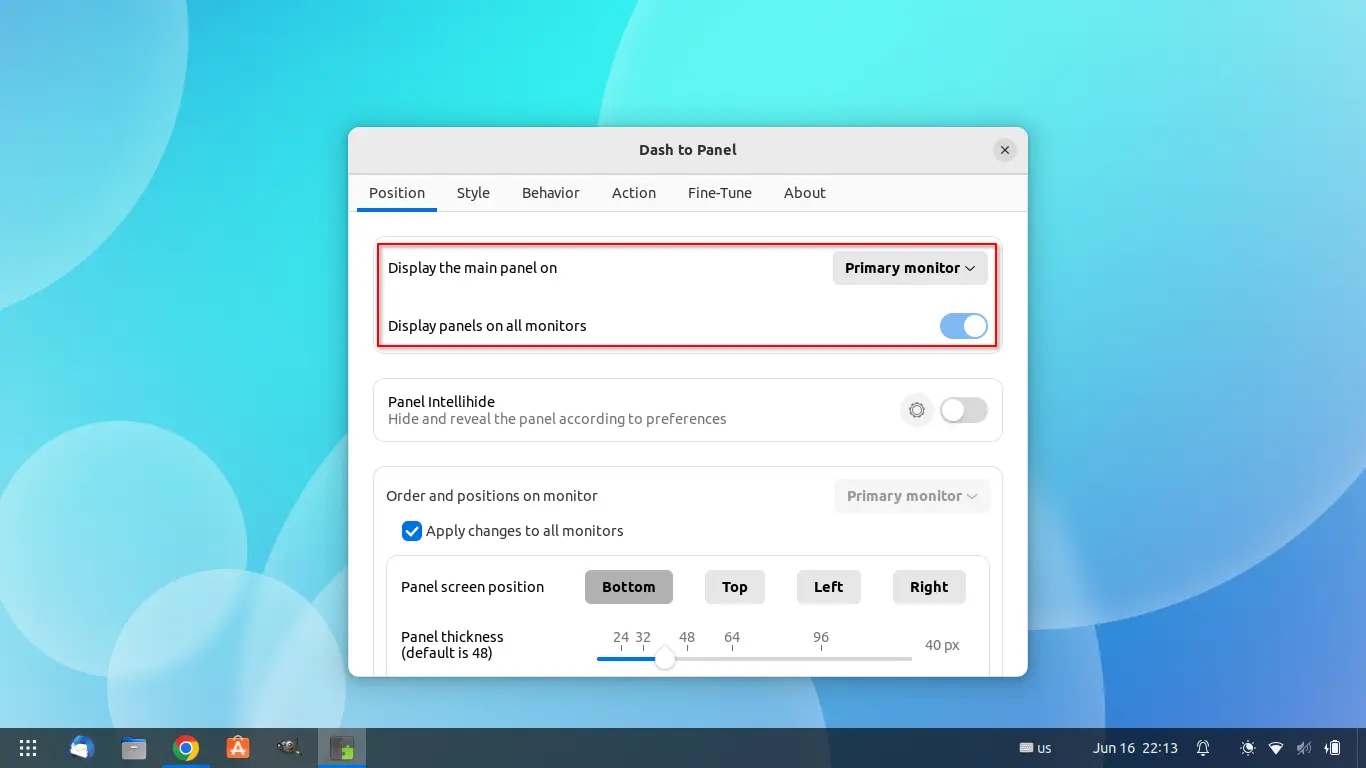
Finally, search for and install ‘Dash to panel’ extension from the app window under ‘Browse’ tab.
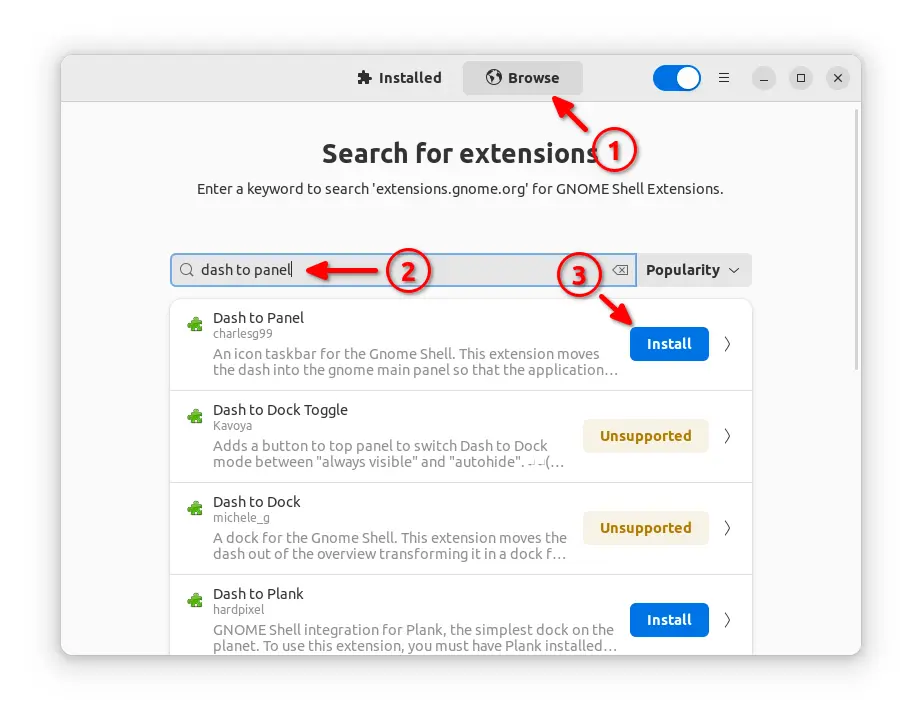
Once successfully installed the extension, your panels change automatically. And, you can right-click on panel and select the last menu option to open the configuration dialog.


Hi, this extension run in ubuntu 24.04 ?
The fork is working good in my case in 24.04
yes i just used it
Works fine on 24.04.
Awesome! I finally have my panel on both monitors in Ubuntu 24.04 – I still can’t believe this isn’t the default behaviour in Gnome!
Note: 24.04 + German + Extension Manager didn’d worked for me, manager won’t find Extension
– Dash to Panel worked for me
– “Extension Manager” is translated in app store, german user have to search for “Erweiterungs-Manager” or “Extension Manager” will show null results