


![]()
This tutorial shows how to automatically run custom command, script, or other actions after resuming your Linux PC/laptop from suspend or hibernate.
As you may know, there are quite a few ways to run something automatically at Ubuntu startup. You can use “Startup Applications” utility to run apps or custom commands at login, use crontab to schedule startup jobs, udev rules to auto-configure devices on detection, and systemd-tmpfiles service to auto create, delete, and write configuration files.
But what if your computer does not function properly, or some personal settings do not persist after waking up from sleep?
Without waiting for upstream fixes, you can workaround by creating custom systemd services, to auto-restart the function, or re-configure the settings, and trigger it automatically when waking up from sleep.
NOTE: not only for Ubuntu, this tutorial should work for most Linux that uses systemd, including Debian, Linux Mint, Fedora, Arch, and their based systems.
Create wake up actions for root / system wide
1. Create a systemd service file by running command below in a terminal (for Ubuntu, press Ctrl+Alt+T) window.
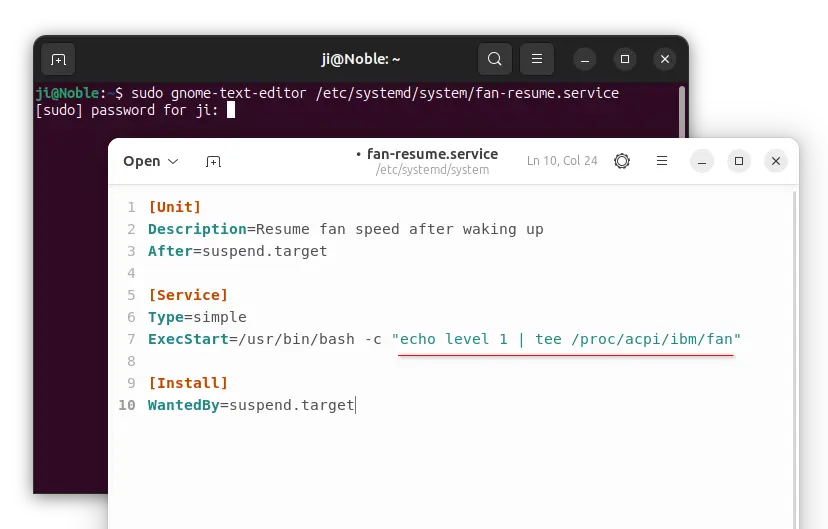
sudo gnome-text-editor /etc/systemd/system/fan-resume.service
Here I use gnome-text-editor to create (and edit) a fan-resume.service file under /etc/systemd/system directory.
You may replace the text editor according to your desktop environment, for example, use mousepad for XFCE, pluma for MATE, nano command line text editor that works in most desktops and server.
Depends on what you want to do, you may replace the file-name fan-resume to whatever that you want. When file opens in text editor, add following lines and edit accordingly:
[Unit]
Description=Resume fan speed after waking up
After=suspend.target

[Service]
Type=simple
ExecStart=/usr/bin/bash -c "echo level 1 | tee /proc/acpi/ibm/fan"

[Install]
WantedBy=suspend.target
The lines above tell to trigger the action after waking up from suspend. You may replace the 2 suspend.target with:
hibernate.target,hybrid-sleep.target,suspend-then-hibernate.target,- or use
sleep.targetthat works for resuming from all the sleep states above.
When it triggers, it runs echo level 1 | tee /proc/acpi/ibm/fan command in my case in bash shell with root permission to set my Thinkpad fan speed to level 1.
You need to replace the value of “ExecStart” with custom command, script, or other actions, such as restart a service via:
ExecStart=/usr/bin/systemctl restart xxx.service
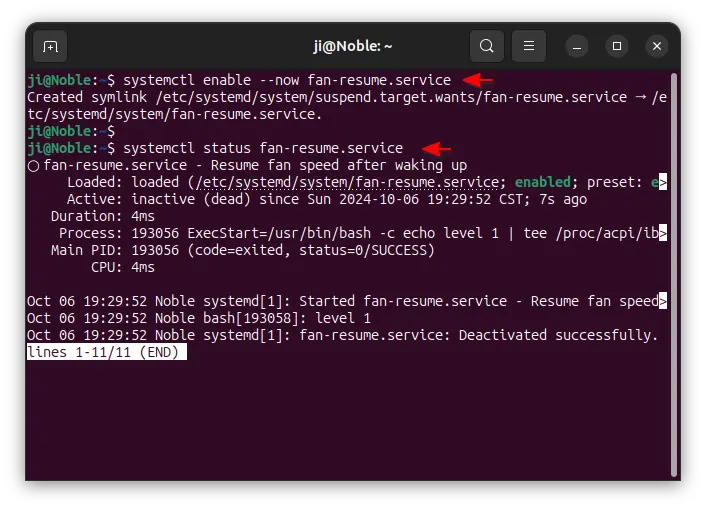
2. Enable the service. After saving the file above (for nano, press Ctrl+S to save then Ctrl+X to exit), run the command below to enable the service:
sudo system enable --now fan-resume.service
Here, replace the service name fan-resume according to what you created.
The --now option in the command above will try to run the service action at once. It’s good for debugging purpose, though you may skip it.
And, run the command below to check the service status.
sudo system status fan-resume.service
If the service is loaded and enabled (though inactive) without any error, you can then suspend your computer then resume to see if it functions.
For user only actions:
Some actions need to be run as user rather than root. For example, restart a service with --user flag, or auto-connect to a VPN network.
1. In the case, run command in terminal (Ctrl+Alt+T) to create a service file:
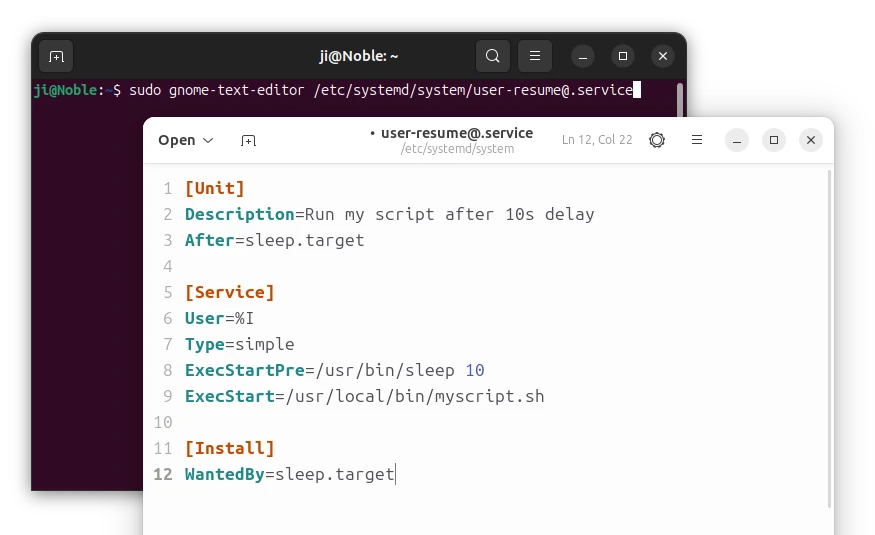
sudo gnome-text-editor /etc/systemd/system/[email protected]
Here, also replace gnome-text-editor accordingly. And, “@” is required in the end of file-name.
When file opens, add similar lines below and edit accordingly.
[Unit]
Description=Run my script after 10s delay
After=sleep.target

[Service]
User=%I
Type=simple
ExecStartPre=/usr/bin/sleep 10
ExecStart=/usr/local/bin/myscript.sh

[Install]
WantedBy=sleep.target
Different to system-wide action, here it includes @ in file-name and User=%I in content under Service section. So, the service can be run via specific user by starting user-resume@USER_NAME.service.
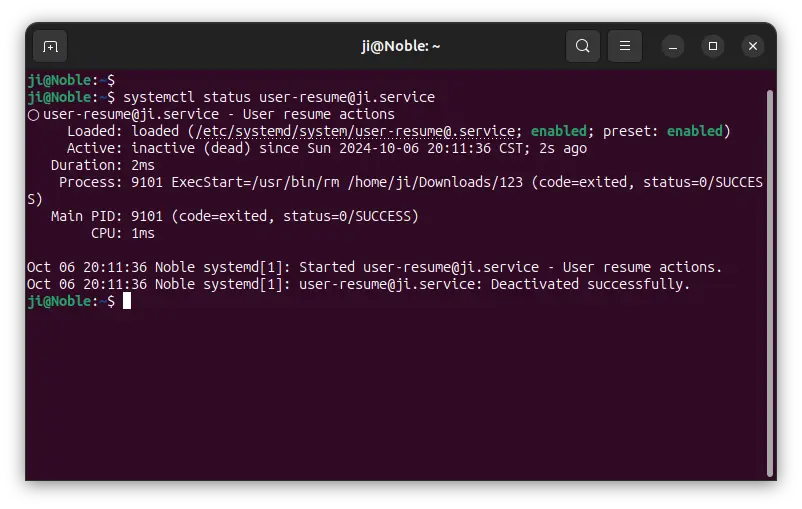
2. To run the action for user ji only (replace with your username), run command to enable the service:
systemctl enable --now user-resume@ji.service
Then run systemctl status [email protected] to check if it’s enabled without error.
In addition, depends on what action you need to do, you may need more options for the custom service. See the official documentation for details.
Undo:
To undo the things you did above, first open terminal (Ctrl+Alt+T) and run command to disable the service:
sudo systemctl disable --now xxx.service
Depends on what service you added and enabled, replace xxx in command with the service name or service-name@user-name.
After disabled the service, then delete the corresponding file by running command:
sudo rm /etc/systemd/system/xxx.service
Also replace xxx with the service name you created.


