This tutorial shows how to share either the Public or certain user folder for local network access in Ubuntu 24.04 or Ubuntu 24.10 with default GNOME desktop.
There are quite a few applications designed for local network file sharing/transferring, but for Ubuntu and other Linux with GNOME, there are built-in services to share user specific folder/folders for local access.
NOTE: This tutorial is written for the default GNOME Desktop, while option 2 also works for MATE.
Option 1: Share Public Folder
In user’s home directory, there’s by default a “Public” folder specifically designed for sharing files over local network. It is handled by gnome-user-share, a small package that creates a dav server with Apache2 run in the background.
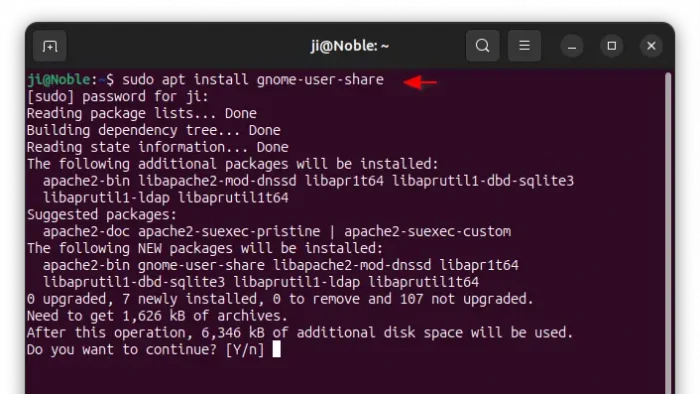
1. First, open terminal (Ctrl+Alt+T) and run command to make sure you have installed the gnome-user-share package:
sudo apt install gnome-user-share
Run sudo apt update to refresh cache if it says ‘Unable to locate package’.
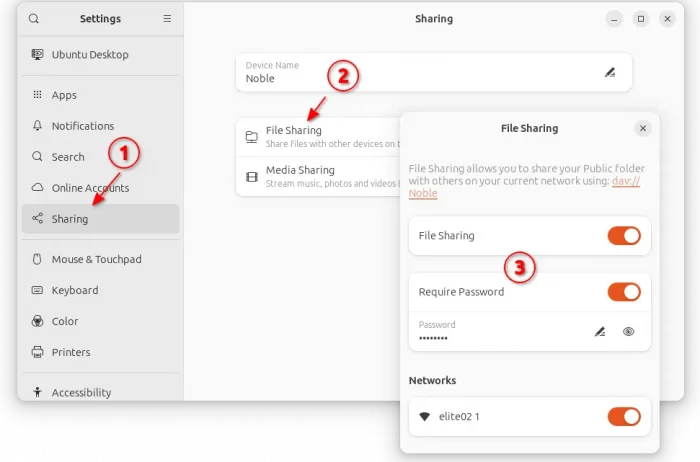
2. Next, launch or re-launch Settings (GNOME Control Center) and navigate to “Sharing” in left. Then, you can click “File Sharing” in right and enable the service.
That’s it. You can now try to access the ‘Public’ folder in this computer from other machines in the same network.
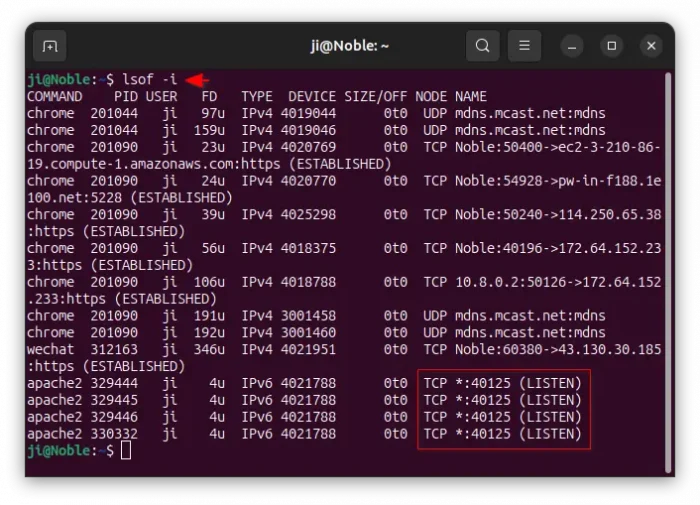
Though, you need first to find out which port the service is listening on by running command:
lsof -i
Wait a few seconds for the command done, and check the TCP port for ‘apache2’.
NOTE: The port is NOT fixed! It changes every time you start/restart the ‘File Sharing’ service, such as log out and log back, or connect and disconnect to VPN. It’s NOT a good choice if the Ubuntu computer is running behind firewall.
How to Access the ‘Public’ folder from other machines
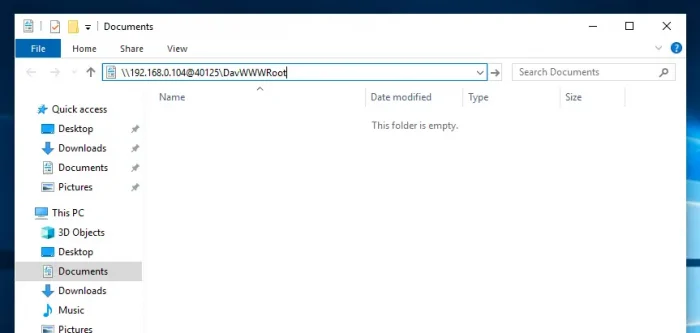
For Windows (tested in Windows 10), simply open file explorer and type \\server-ip-address@port-number\DavWWWRoot (e.g., \\192.168.0.104@40125\DavWWWRoot) in address bar and hit enter. Then, input user guest and the password you set in last step to get access.
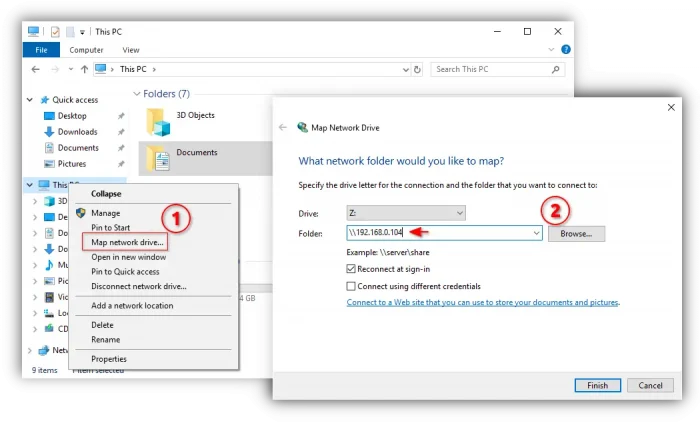
Or, right-click on “This PC” in the file explorer window and choose “Map network drive…”. Then, type the address above as the folder path and mount it on left pane.
For Linux with GNOME or KDE desktop, your file manager should automatically find the shared folder. Just open file manager and look for it under either “Other Locations” or “Network”.
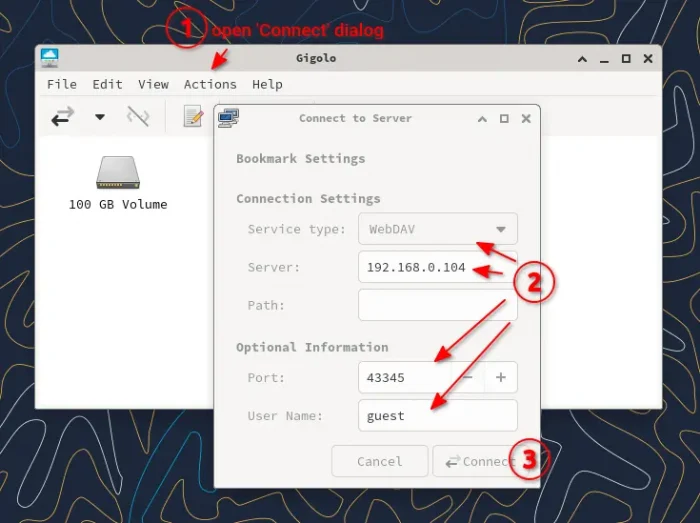
If your Linux file manager does not show you the remote share folder, try installing gigolo tool via the command below:
sudo apt install gigolo gvfs gvfs-backends
Then launch gigolo, and go to menu “Actions -> Connect”. In pop-up dialog, choose WebDAV service, input server IP, listen port, user (guest) and connect.
For macOS, try this step to get access, though I don’t have a mac computer to try it out. For Android and iOS, you need to install a dedicated app such as WebDAV Navigator from Google Play or App Store.
Option 2: Share a Certain Folder via samba
If you want to share a certain folder and its content, then try samba with nautilus extension.
Tips: this option also works for MATE Desktop (e.g., Ubuntu MATE, Linux Mint MATE edition). Just replace nautilus-share with caja-share in the command below.
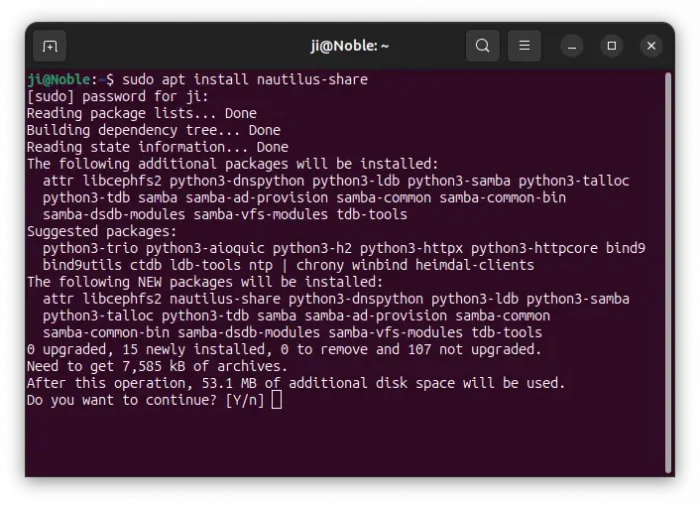
1. First, press Ctrl+Alt+T on keyboard to open up a terminal window. Then, run command to install the extension for Nautilus file manager:
sudo apt install nautilus-share
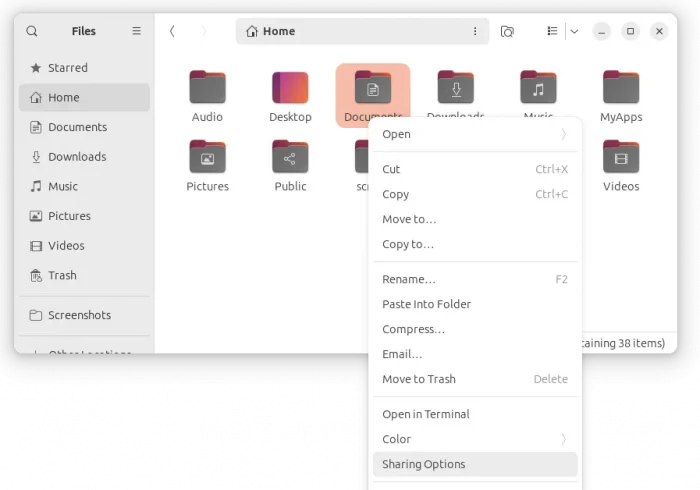
2. Next, run command nautilus -q to quit nautilus file manager and then re-launch it. Right-click on the target folder and you’ll see the “Sharing Options” option.
Tips: For Ubuntu 22.04 and earlier, the context menu option is “Local Network Share”.
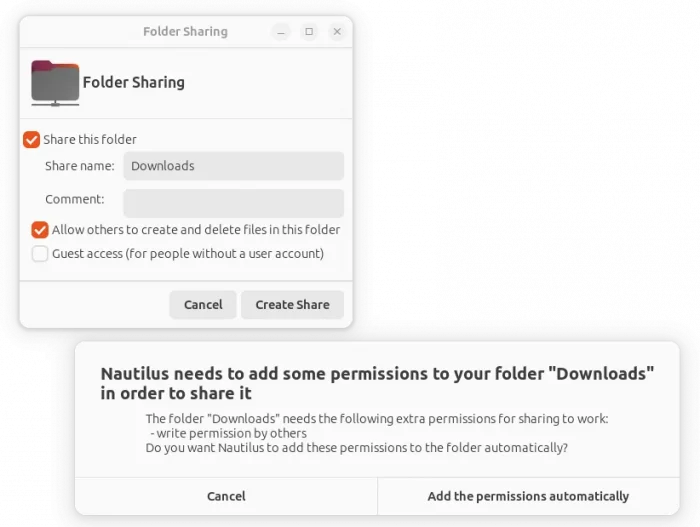
3. Just click on that option will pop-up the dialog to enable folder sharing for the selected folder.
If you want to grant both read & write permission, then enable “Allow others to create and delete files in this folder”. And, it will ask to confirm adding that permission once you clicked “Create Share”.
To allow anyone to access without authentication from the same network, also enable “Guest access”.
If you got “‘network share’ return 255” error, open terminal (Ctrl+Alt+T) and run command to add current user to ‘sambashare’ group.
sudo gpasswd --add $USER sambashare
Also run command to add a separate password to current user for share folder authenticate purpose:
sudo smbpasswd -a $USER
After that, restart your computer and re-do the last step 2 and step 3 to enable folder sharing.

How to access this certain share folder:
For Windows, open either “Run” command box or file explorer , type \\ubuntu-machine-ip in address bar and hit Enter. Then, type username (your user in Ubuntu) and password (the separate password you set in previous step) to get access.
For choice, you may right-click on “This PC” in file explorer, and use “Map network drive” option to map the share folder into left pane.
For Linux user (only tested in GNOME), open “Files -> Other Locations” and type smb://ubuntu-machine-ip in button to connect.
For MacOS, press command + K on keyboard to open Connect to Server dialog, type smb://ubuntu-machine-ip and hit Enter to access.




No, it’s not working. The option 1 to share a folder doesn’t work at all. It can’t be seen from any other computer from the network. sharing a folder on multiple computer on the same network is such a mess i will never understand why its so impossible for common users.
The option 1 works great! Using connecting from ubuntu 22 there is no need for ip addr, it’s just works. But also i’m curious if using device name on windows would work? (dev://{Device name})
Switching from Windows to Ubuntu for the first time, work as instructed thank you