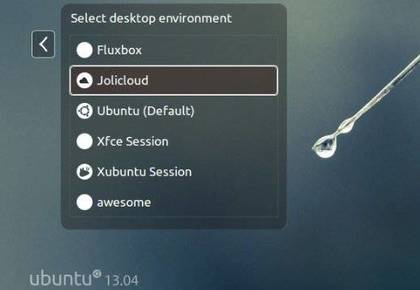
The JoliCloud Desktop Environment finally is available for Ubuntu 12.04 Precise, 13.04 Raring and 12.10 Quantal. Here’s how to install it via ppa repository.
As you may know, JoliCloud Desktop Environment puts a HTML5 launcher with shortcuts to popular websites and services front and center, such as Facebook, Twitter, Gmail, Wikidedia, Angry birds, and more.
Install JoliCloud Desktop
To get started, press Ctrl+Alt+T on your keyboard to open terminal. When it opens, run below command to add the JoliCloud official ppa repository:
sudo add-apt-repository ppa:jolicloud-team/ppa
After that, update the package lists to make it avaiable and finally install the session. To do so, run below command:
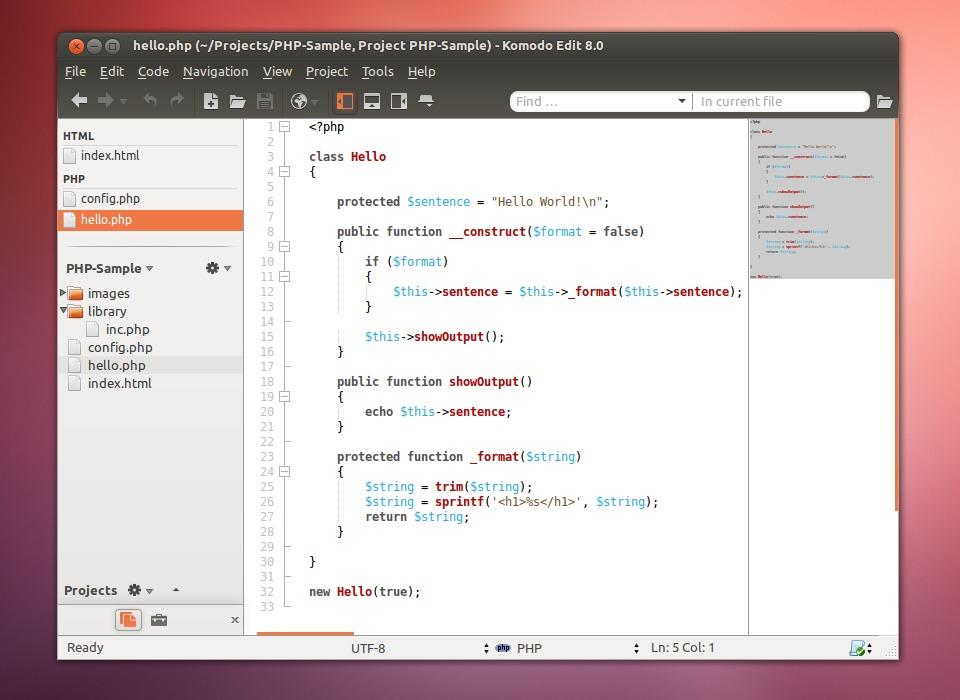
This simple tutorial shows how to install latest Komodo edit on Ubuntu 13.04 Raring, 12.10 Quantal, 12.04 Precise via ppa repository.
Komodo Edit, based on the award-winning Komodo IDE, offers sophisticated support for all major scripting languages, including in-depth autocomplete and calltips, multi-language file support, syntax coloring and syntax checking, Vi emulation, Emacs key bindings. It provides dynamic language expertise for Perl, PHP, Python, Ruby, and Tcl, plus JavaScript, CSS, HTML, and XML, and template languages like RHTML, Template-Toolkit, HTML-Smarty and Django.
Install Komodo Edit
A PPA repository has been created for Ubuntu users. So far it supports Ubuntu 13.04, 12.04 and 12.10.
To add the repository, press Ctrl+Alt+T on your keyboard to open terminal. When it opens, run below commands:
This is a picture guide for beginners to set static IP address on Ubuntu 13.04 Raring Ringtail, both wireless and wired connection.
Ubuntu by default uses DHCP (Dynamic Host Configuration Protocol) to obtain IP address when your computer is connected to a network. You may required to change to static IP address in some network environments. This tutorial will show you how to do this step by step.
Tutorial Objectives:
Setup Static IP Address in Ubuntu 13.04 (both wireless & wired)
Enjoy!
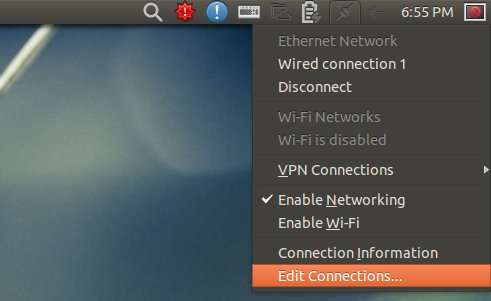
To get started, move your cursor to top-right corner network icon on panel. Click to expand the menu and choose Edit Connections…
In next window, choose your wired connection or wifi network then click Edit button.
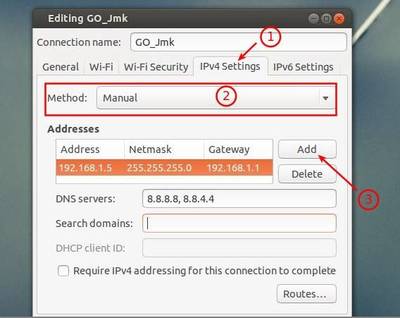
Then navigate to IPv4 Settings tab. Switch Method to “Manual” from the drop-down box. Click Add button and type in IP address, netmask and gateway. Finally click “Save” when everything’s done.
This simple tutorial shows you how to install the latest RawTherapee 4.0.11 on Ubuntu 13.04 Raring, 12.10 Quantal, 12.04 Precise using PPA repository.
RawTherapee is a cross-platform raw image processing program written in C++, using a GTK+ front-end and a patched version of dcraw for reading raw files. It is notable for the advanced control it gives the user over the demosaicing and developing process.
“The 4.0.11 release includes a number of new features which you can read about below, but just as importantly it contains a large number of speed improvements and bug fixes, so we recommend you update straight away!”
New features:
CIECAM02 “Adaptation scene luminosity” now calculated automatically
CIECAM02 hot/bad pixel fixer to prevent bright pixels from appearing
The Defringe tool is now able to target a range of specific colors without touching others
New bundled processing profiles
New keyboard shortcuts to apply rank and color labels and a new direct popup menu for color labels, all in the File Browser
“Profile Fill Mode” button controls whether to replace missing processing profile values with default ones or not
Keyboard shortcuts to open the next/previous image and to synchronize the File Browser strip with the currently opened image
New demosaicing algorithms for noisy photos:
LMMSE
IGV
More zoom levels
Redesigned save window
New functionality of the minima/maxima control points curves editor, see the RawTherapee Manual
Support for TIFFfiles with alpha channels
Support for 32-bit TIFF files (HDR)
Preferences/Batch processing options: all to ‘Add’ and all to ‘Set’
Support for
Nikon D5200
Nikon D7100
Nikon COOLPIX A
Panasonic Lumix DMC-G5
Install RawTherapee:
The latest release is available for Ubuntu 13.04 Raring, 12.10 Quantal, Ubuntu 12.04 Precise from the ppa repository.
To add the ppa, press Ctrl+Alt+T on your keyboard to open a terminal window. When it opens, run below command:
sudo add-apt-repository ppa:dhor/myway
Then update package lists and install via Synaptic Package Manager. Or you can run below command instead:
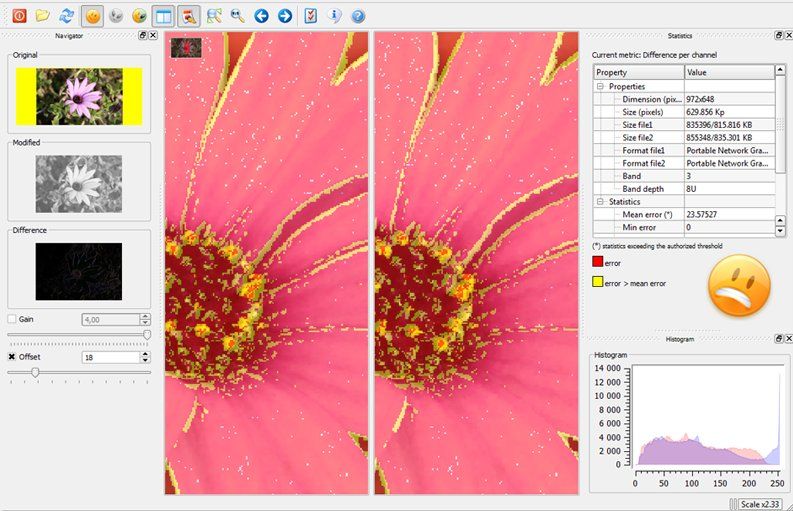
DiffImg is a simple image comparison tool which take two images with the same size as input. Some statitics are computed and the positions where pixel differ are displayed as a color mask.
There are very few image difference tools for Ubuntu Linux. DiffImg is one of them which has a user friendly GUI. It uses OpenCV as backend so it can read and compare 8/16/24/32 bits images without problem but only single channel and RGB image has been take into account, so alpha channel isn’t supported.
Because DiffImg is written with Qt, it runs on Windows and Linux (MacOSX isn’t tested yet) and OS/2. It can read basic formats as BMP, PNG, JPG but also Tiff and OpenExR.
Current Features:
Image difference display : a yellow/red mask can overlay the original/modified images.
Single/Dual panels mode.
Statistic computation: Mean error, RMS error and min/max are computed.
Several metrics can be used for computing image difference.
Histogram of error.
“Slideshow” : DiffImg can compare directory of image, so you can switch to the previous/next comparison if you have two folders with the same image list.
Supported files :DifffImg uses Qt plugins to load images, so by default it can read basic formats as BMP, PNG, JPG and OpenCV supported formats (Tiff, OpenExR).
Basic batch mode
Install DiffImg:
A PPA repository has been created to make it easy to install for Ubuntu and Linux Mint users. So far, it supports Ubuntu 13.04 Raring, 12.10 Quantal, 12.04 Precise and Linux Mint 13 Maya, 14 Nadia, 15 Olivia.
To add the ppa, press Ctrl+Alt+T on your keyboard to open terminal. When it opens, run below commands:
sudo add-apt-repository ppa:dhor/myway
Then you can update package lists and install the tool via Synaptic Package Manager, or run below command:
sudo apt-get update; sudo apt-get install diffimg
That’s it.
For other systems, Diffimg source code and exe file can be download from SourceForge.
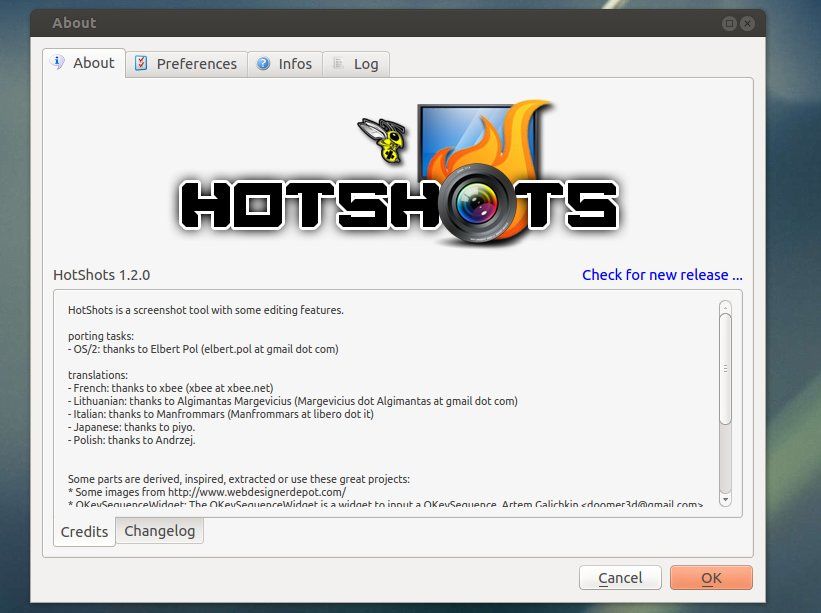
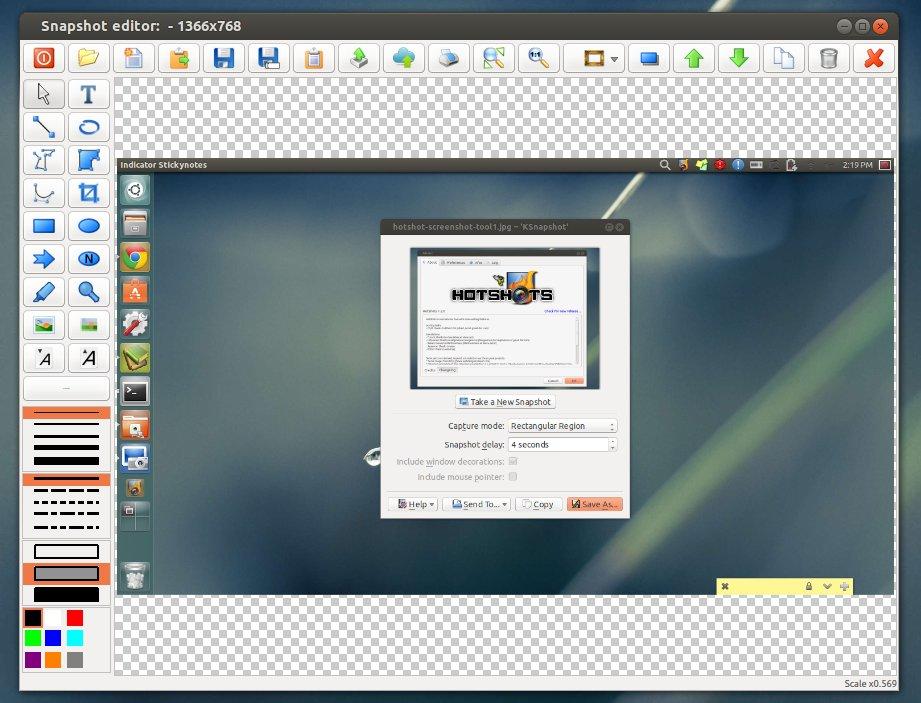
The HotShots screenshot tool 1.2.0 has been released. This simple tutorial shows you how to install or upgrade to this version on Ubuntu 13.04 Raring, 12.04 Precise and 12.10 Quantal.
HotShots is an application for capturing screens and saving them in a variety of image formats as well as adding annotations and graphical data (arrows, lines, texts, …). Because HotShots is written with Qt, it runs on Windows and Linux
The new release has some layout changes. The editor has multi-selection, the ability to select shadows on each item, the ability to edit some items (polygon, polyline, and curve) more easily, and the ability to add post-effects to the image background. The uploader adds a user field to define the output template for FTP uploader. The ability to send a document directly to the printer has been added. Slovak, Turkish, Russian, Sinhala, Serbian, Czech, Vietnamese, Basque, Spanish, and Chinese translations have been added.
Install HotShots:
A PPA repository has been created to make it easy to install for Ubuntu and Linux Mint users. So far it supports Ubuntu 13.04 Raring Ringtal, 12.10 Quantal Quetzal, and Ubuntu 12.04 LTS Precise Pangolin.
Press Ctrl+Alt+T on your keyboard to open terminal. When it opens, run below commands to add the ppa:
sudo add-apt-repository ppa:dhor/myway
After that, update package lists and install HotShots screenshot tool via below command:
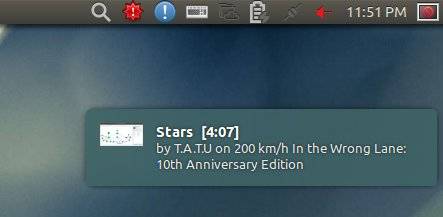
Pogo is an ultra lightweight music player for Ubuntu Linux. It is a fork of Decibel Audio Player and supports most common audio formats. Pogo is written in Python and uses GTK+ and gstreamer.
Pogo plays your music. Nothing else. It is both fast and easy-to-use. The clear interface uses the screen real-estate very efficiently. Other features include: Fast search on the harddrive and in the playlist, smart album grouping, cover display, desktop notifications and no music library.
Install Pogo Audio Player:
The developer has created a ppa repository to make it easy to install for Ubuntu and Linux Mint users. So far it supports Ubuntu 13.10 Saucy, 13.04 Raring, 12.10 Quantal, 12.04 Precise, 10.04 Lucid.
To add the ppa, press Ctrl+Alt+T on your keyboard to open terminal. When it opens, run below commands:
sudo add-apt-repository ppa:pogo-dev/daily
After that, update package lists and install Pogo via command below:
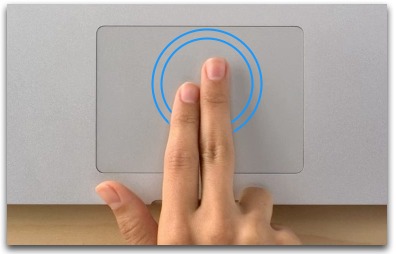
This brief tutorial shows you how to change your laptop touchpad tap actions in Ubuntu, including single tap, two and three finger tap as well as tap on corners..
I’m only using single tap and touchpad scrolling feature on my laptop. As you may know, Ubuntu acts as middle click when tapping on top-right corner of touchpad. It is annoying that I was always ‘corner-tapping’ on my Google Chrome tabs, and they vanished all of a sudden. More over, two finger tap brings up righ-click menu, quick tapping twice on title-bar, browser tabs allows to move items. Due to these useless and annoying tap actions (only for me), I’m determined to tweak my touchpad settings. That’s why I’m writting this tutorial.
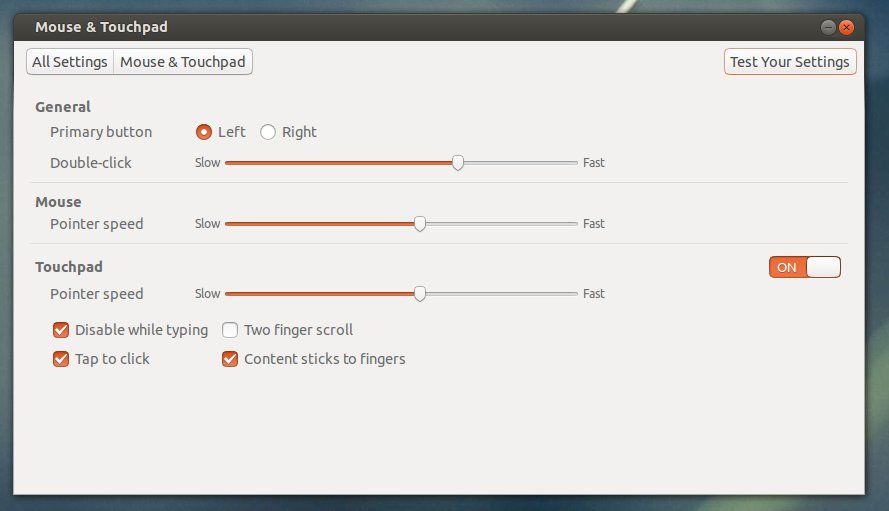
The default Mouse & Touchpad utility in Ubuntu Unity is getting better now, but it’s not powerful enough. So far it only has the ability to switch on / off touchpad, Tap to click, Disable while typing, Two finger scroll, Contents sticks to fingers as well as point speed settings.
I found synaptiks, which is a simple utility that covers almost all settings of Synaptics Touchpad, including multi-tapping, tapping on corners. It is available on Ubuntu Software Center by default since Ubuntu 12.04 Precise. Click link below to install it:
When installed, open the tool and go to Touchpad Configuration -> Tapping. There provides options to change tapping on 4 corners, single tap, two finger tap, three finger tap, drag items by tapping, etc.
This latest stable Kernel 3.10.2 has been released. All users of the 3.10 kernel series are urged to upgrade as soon as possible. This tutorial shows how to install / Upgrade Kernel 3.10.2 for Ubuntu 13.04, 12.04, 12.10 and Linux Mint users.
Linux Kernel 3.10.2 is also a small release that includes a few updated drivers, fixes for the ext3 and ext4 file systems, as well as other small changes. Read the announcement.
Install / Upgrade Kernel 3.10.2
The Kernel PPA has updated with latest DEBs for Ubuntu and Linux Mint users.
Press Ctrl+Alt+T on your keyboard to open a terminal window. When it opens, run below commands to download the Debs. For 32-bit system:
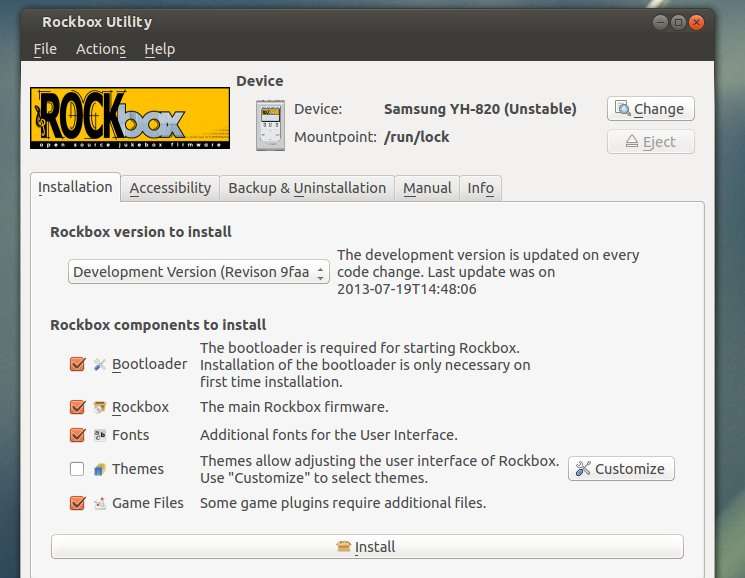
This simple tutorial shows you how to install Rockbox Utility on Ubuntu 22.04, Ubuntu 22.04, and Ubuntu 20.04.
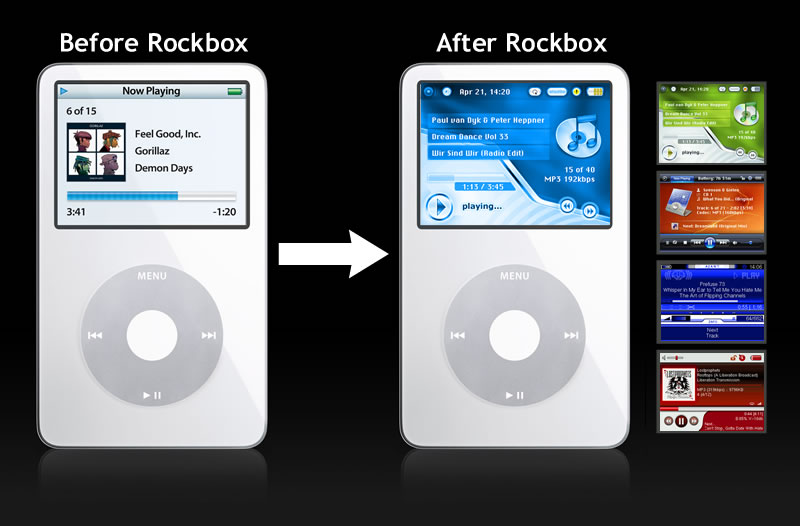
What is Rockbox:
As you may know, Rockbox is a free and open source replacement for the standard firmware in various forms of digital audio players (DAPs). It offers an alternative to the player’s operating system, in many cases without removing the original firmware, which provides a plug-in architecture for adding various enhancements and functions. Enhancements include personal digital assistant (PDA) functions, applications, utilities, and games. Rockbox can also retrofit video playback functions on players first released in mid-2000. Rockbox includes a voice-driven user-interface suitable for operation by visually impaired users.
What is Rockbox Utility
Rockbox Utility is a free computer application that is used to install and manage Rockbox on DAPs. It provides automatic installation of Rockbox, as well as themes and voice files, directly onto a DAP with minimal user interaction.
Rockbox Utility is updated frequently as support for new devices is added. Currently supported devices include iPod, iPod Mini, iPod Nano, Archos Jukebox series, Cowon X5, M5, M3, iRiver H10/H100/H300, Mpio HD200, Packard Bell Vibe 500, Philips GoGear, Samsung YH, SanDisk, Toshiba, Olympus. Read more
Features:
Base
Bootloader installation
Rockbox installation
Extras
Fontpack installation
Theme installation
Game files installation (i.e. freedoom)
Accessibility
Install voice file (from the webpage)
Create voicefile
Create .talk clips
Uninstallation
Uninstall bootloader
Uninstall Rockbox (partial, or full)
Manual
Access to the Manual of your device
Info
Shows all installed parts of Rockbox
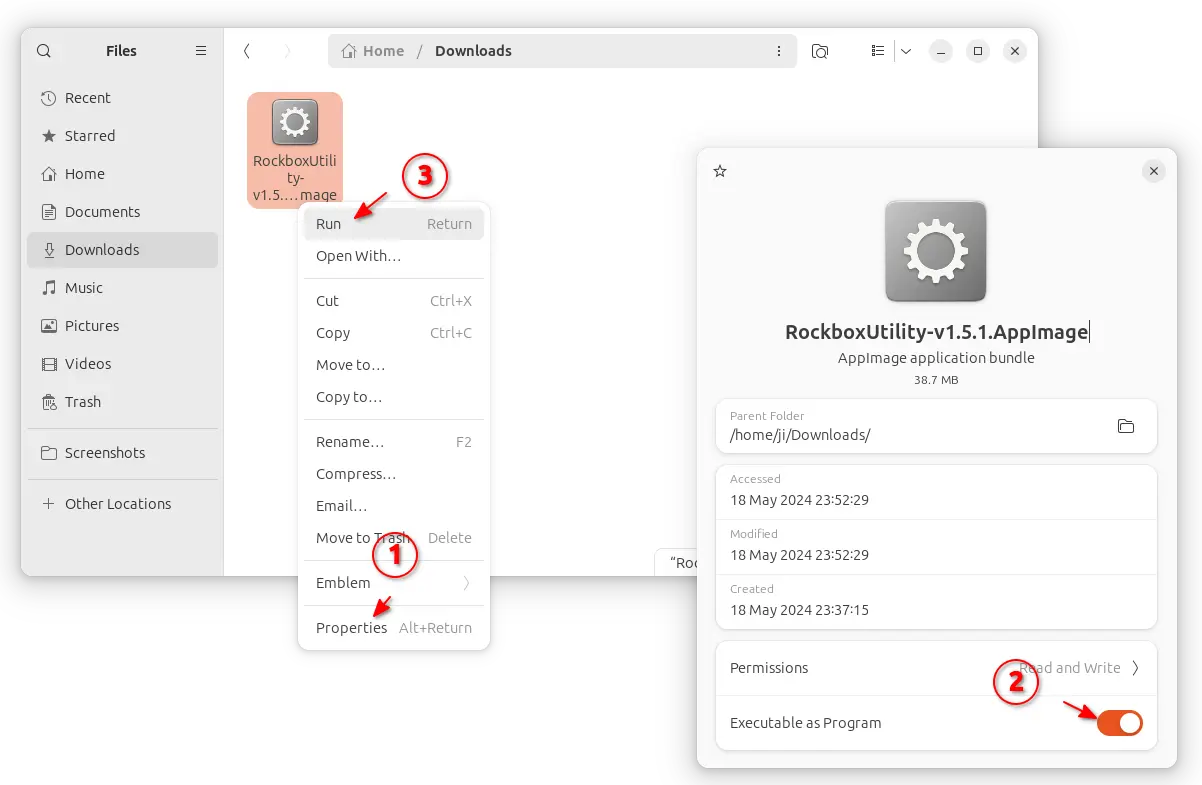
Install Rockbox Utility:
The Rockbox Utility now provides universal AppImage package for Linux users.
Then click the link to download the package for Linux. At the moment of writing, the latest is RockboxUtility-v1.5.1.AppImage.
After downloaded the package, right-click on it in file manager, go to “Properties”, and enable “Executable as Program” option (under Permissions tab for 22.04 and earlier). Finally, click Run the AppImage will launch the app.
NOTE: Ubuntu 22.04 and higher does NOT support AppImage out-of-the-box. You need to press Ctrl+Alt+T on keyboard to open terminal, then run command to get it support: