Archives For 12.04

This simple guide shows how to install latest LightZone 4.0 on Ubuntu 13.04 Raring, 12.10 Quantal, 12.04 Precise, and Linux Mint from its official repository.

LightZone 4.0 from official repository

LightZone is professional-level digital darkroom software for Windows, Mac OS X, and Linux. Rather than using layers as many other photo editors do, LightZone lets the user build up a stack of tools which can be rearranged, turned off and on, and removed from the stack. It’s a non-destructive editor, where any of the tools can be re-adjusted or modified later — even in a different editing session. A tool stack can be copied to a batch of photos at one time. LightZone operates in a 16-bit linear color space with the wide gamut of ProPhoto RGB.

LightZone 4 Main Window

Features:

  • edit both RAW and JPEG format images.
  • has ability to create and apply pre-determined image transformations, called “styles”, to an entire batch of images in a single operation.
  • It’s a non-destructive RAW editor. It treats the digital image original (typically a RAW file) as precious and non-editable.
  • outputs JPEG files which contain metadata references to the original image file location and a record of the transformations applied during editing.
  • Because the JPEG output files contains the entire transformation history, edits can always be undone in a new edit session, long after they were saved
  • Read more on Wikipedia

Install LightZone 4 via Official Repository

UPDATE: Thanks to Otto Meier, now LightZone is available in PPA for Ubuntu 14.04 Trusty, Ubuntu 13.10 Saucy, Ubuntu 13.04, Ubuntu 12.10, Ubuntu 13.04, Ubuntu 12.04 and their derivatives. Just run below commands one by one in terminal.

sudo add-apt-repository ppa:otto-kesselgulasch/lightzone
sudo apt-get update
sudo apt-get install lightzone

1.) Press Ctrl+Alt+T on your keyboard to open terminal. When it opens, run below command to add the repository and install keyring:

For Ubuntu 13.04, 12.10 and Linux Mint 14, 15

sudo sh -c "echo 'deb http://download.opensuse.org/repositories/home:/ktgw0316:/LightZone/xUbuntu_13.04/ ./' > /etc/apt/sources.list.d/lightzone.list"

wget -O - http://download.opensuse.org/repositories/home:/ktgw0316:/LightZone/xUbuntu_13.04/Release.key | sudo apt-key add - 

For Ubuntu 12.04 and Linux Mint 13

sudo sh -c "echo 'deb http://download.opensuse.org/repositories/home:/ktgw0316:/LightZone/xUbuntu_12.04/ ./' > /etc/apt/sources.list.d/lightzone.list"

wget -O - http://download.opensuse.org/repositories/home:/ktgw0316:/LightZone/xUbuntu_12.04/Release.key | sudo apt-key add -

2.) Update package lists and install the software:

sudo apt-get update; sudo apt-get install lightzone

For other Linux distributions, install LightZone photo editor 4.0 from the GitHub.

Canon Drivers for Ubuntu and Linux Mint

Last updated: December 8, 2014

In this tutorial I’ll show you how to install official drivers of commonly used Canon Printers on Ubuntu 13.04, 12.10, 12.04, and Linux Mint.

There’s a ppa repository that provides the official drivers of Canon printers and multifunction devices which are not available on Canon’s website.

The supported Canon printers include:

  • bjf9000, bjf900, bjs300, bjs500, bjs700 series
  • e500, e510, e600, e610 series
  • i250, i255, i550, i560, i850, i860, i950, i990 series
  • ip100, ip1800, ip1900, ip2200, ip2500, ip2600, ip2700, ip3000, ip3300, ip3500, ip3600, ip4000, ip4200, ip4300, ip4500, ip4600, ip4700, ip4800, ip4900, ip5000, ip5200, ip6600, ip7200, ip7500, ip8500, ip90 series
    ix6500 series
  • mg2100, mg2200, mg3100, mg3200, mg4100, mg4200, mg5100, mg5200, mg5300, mg5400, mg6100, mg6200, mg6300, mg8100, mg8200 series.
  • mp140, mp160, mp190, mp210, mp230, mp240, mp250, mp270, mp280, mp490, mp495, mp500, mp510, mp520, mp540, mp550, mp560, mp600, mp610, mp620, mp630, mp640, mp750, mp780 series.
  • mx320, mx330, mx340, mx350, mx360, mx370, mx390, mx410, mx420, mx430, mx450, mx510, mx520, mx710, mx720, mx860, mx870, mx880, mx890, mx920 series.
  • pixmaip1000, pixmaip1500 series.
  • pixus250, pixus255, pixus550, pixus560, pixus850, pixus860, pixus950, pixus990 series
  • pixusip3100, pixusip4100, pixusip8600 series

To install the drivers:

Make sure to disconnect the Canon printer from your computer first. Press Ctrl+Alt+T to open terminal, copy and paste this command and run to add the ppa:

sudo add-apt-repository ppa:michael-gruz/canon-stable

update: For Ubuntu 14.04 and Ubuntu 13.10, please use the daily PPA (only cnijfilter-xxxseries packages available):

update 2: For Ubuntu 14.04 users, below PPA miss the packages for ScanGear MP, see this guide.

sudo add-apt-repository ppa:michael-gruz/canon-trunk

Then update:

sudo apt-get update

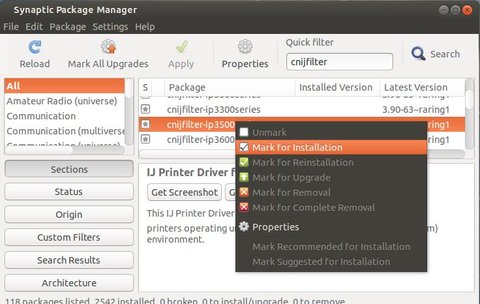
Install Synaptic Package Manager from Ubuntu Software Center, then open it.

Then search for and install cndrvcups-common to install Common Modules, search cnijfilter and find your driver to install. Also search and install scangearmp to install ScanGear MP.

Canon-drivers-Synaptic

Once installed, connect your printer to the computer. Your printer will be automatically detected by Ubuntu.

Sublime Text

This simple tutorial will show you how to install Sublime Text 3 on Ubuntu 13.10 Saucy, 13.04 Raring, 12.10 Quantal, and 12.04 Precise from ppa repository.

Sublime Text is a popular text and source code editor. Sublime Text 3 Public Beta is now available to both registered users and the general public. The Webupd8 team created a ppa repository containing the installer for Ubuntu and Linux Mint users.

To get started, press Ctrl+Alt+T to open terminal, then follow below steps:

1.) Copy and paste this command into terminal and run to add the ppa repository:

sudo add-apt-repository ppa:webupd8team/sublime-text-3

2.) Update:

sudo apt-get update

3.) Below command will automatically download and install the latest Sublime Text 3 Beta in your system.

sudo apt-get install sublime-text-installer

Enjoy!