Archives For November 30, 1999

How to Install Local .deb file in Ubuntu 24.04

Last updated: September 1, 2024 — 3 Comments

Since Ubuntu 23.10, there’s no longer “Software Install” option for opening/installing .deb files in your Downloads folder. This is probably due to switch to the new ‘App Center’, that some features are not fully implemented.

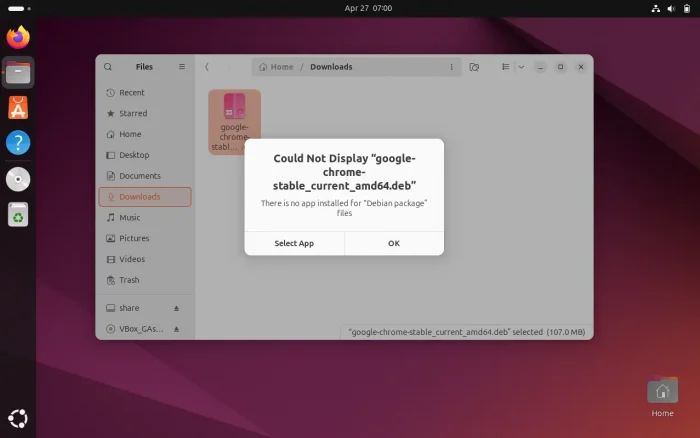
When you double-clicking a .deb file from Downloads folder, it will pop-up a dialog saying “Could Not Display ‘file_name.deb’ There’s no app installed for ‘Debian package’ files“. And, neither option will work for installing the package.

UPDATE: App Center in Ubuntu 24.04 finally added back the feature to install local .deb! Just double-click on the package in file manager to launch and install.

So, if you’re trying to install an application using local .deb format package, here are 3 workarounds for you.

Option 1: use Gdebi package installer

Gdebi is a simple tool to view and install local .deb file. It’s a popular application that’s using as default in Linux Mint.

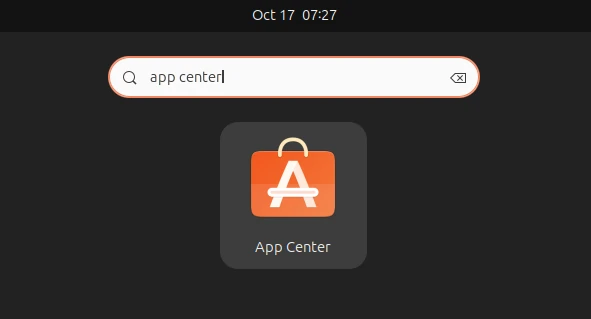
1. First, press Super (Windows logo) key to open overview screen. Search for and launch “App Center”.

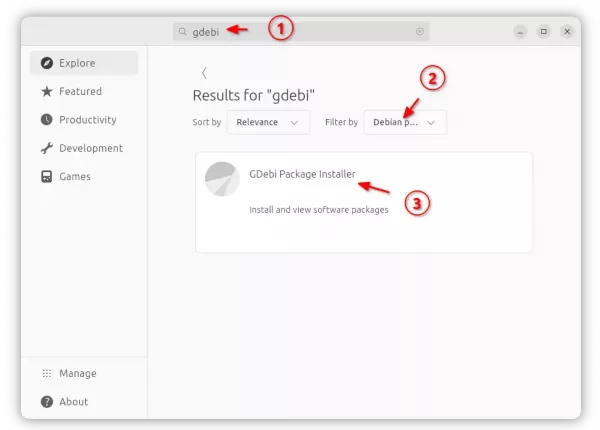
2. When ‘App Center’ opens, use it to search and install Gdebi. You may need to select “Filter by Debian packages” to make it visible.

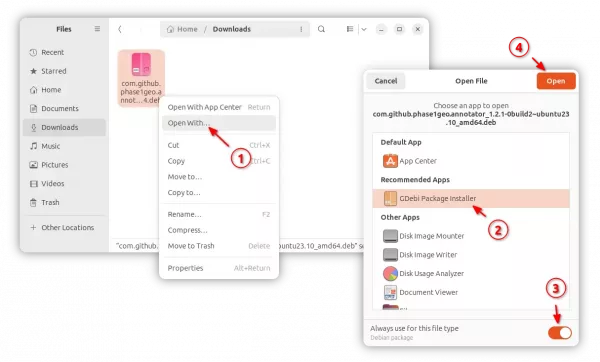
3. Once you installed the tool, right-click on your local .deb file, and click on “Open With…” option.

In next pop-up dialog, find out and select “Gdebi Package Installer” and turn on “Always use for this file type“, finally click Open.

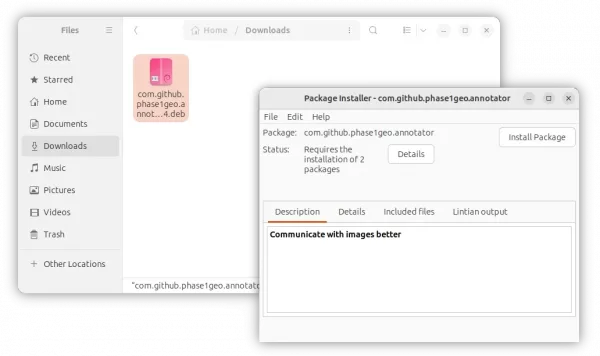
4. After that, you can double-click any .deb file to open with the Gdebi package installer. When the tool opens, you may view the package info and  click “Install Package” to install it into your system.

Option 2: Use apt command

For those who are familiar with Linux command, your local .deb file is easy to install via a single command.

It’s:

sudo apt install /path/to/file.deb

Definitely, you need to replace ‘/path/to/file.deb‘ to yours.

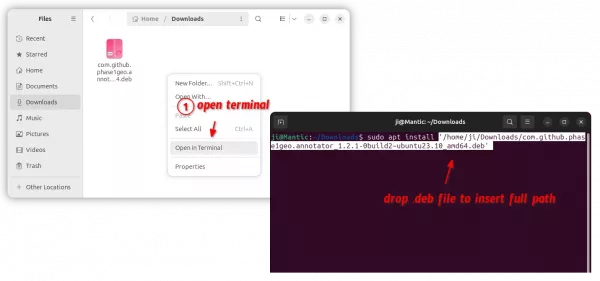
Instead of typing manually, simply open terminal (via either Ctrl+Alt+T shortcut or ‘Open in Terminal’ context menu), then drag and drop .deb file into terminal after typing sudo apt install plus a blank space.

Finally, hit Enter to run the command, type user password (no asterisk feedback) to authentication, and answer y if it asks to confirm.

When installation done, it will output something like ‘N: Download is performed unsandboxed as root as file ‘/path/to/file.deb’ couldn’t be accessed by user ‘_apt’. – pkgAcquire::Run (13: Permission denied)’. Just skip the non-fatal warning. Your app should be properly installed when you see the terminal output message.

Option 3: Use GNOME Software

If you want to restore the new App Center to classic Ubuntu Software, then GNOME Software can be a better choice.

GNOME Software supports Deb, Flatpak, and Snap packages. However, it will be always run in background that takes about 200 MB memory in my case.

If you don’t care about the memory consumption, then press Ctrl+Alt+T to open terminal, and run command to install GNOME Software:

sudo apt install --install-suggests gnome-software

Skip --install-suggests if you don’t want to enable Flatpak support.
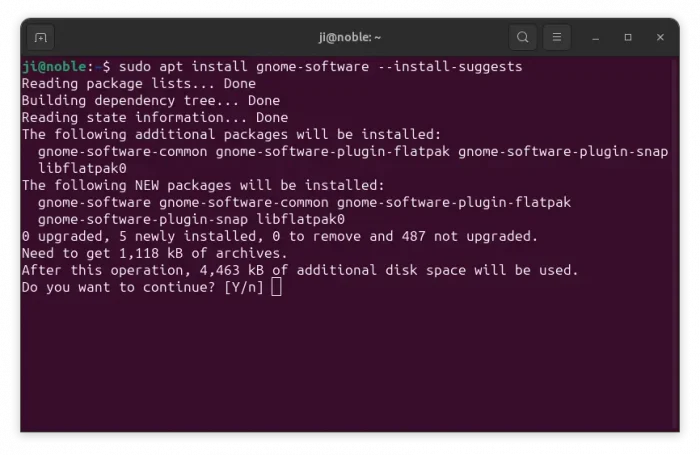
After that, you can right-click on local .deb file, and select “Software Install” from Open With dialog to launch GNOME Software to install it.

Uninstall:

If you don’t use Gdebi or Gnome Software anymore, open terminal (Ctrl+Alt+T) and run command to uninstall:

Uninstall Gdebi:

sudo apt remove --autoremove gdebi

Or, uninstall Gnome Software via command:

sudo apt remove --autoremove gnome-software

Want to install an app via classic DEB package, but it’s not available in Ubuntu’s own repository? There’s a new command line tool “deb-get“, makes installing apps from 3rd party repositories as easy as single command.

Many applications (e.g., Google Chrome, 1Password, Teamviewer and more) provide DEB packages for Debian/Ubuntu either in their own apt repositories / PPAs or for downloading directly in website.

Besides setup the repositories or find and download .deb packages manually, then install apps via apt (or apt-get), “deb-get” do all the things via a short single command.

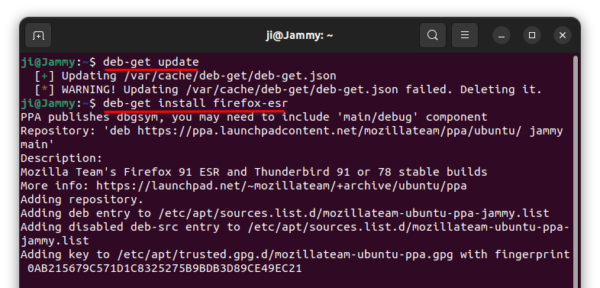
For example, run the command below in terminal will add Mozilla Team PPA and install Firefox ESR automatically:

deb-get install firefox-esr

Install Firefox ESR via Deb-get

It’s a free open-source tool developed by Martin Wimpress (leader of Ubuntu MATE project) and many other contributors.

Install Apps via Deb-get

For those familiar with apt or apt-get, Deb-get is quite easy to use as it has similar command options.

Update package index:

Before installing any package, you may first run the command to update the package index for the latest sources:

deb-get update

sudo seems to be not required, though you may add it in the beginning in case of permission issue.

Install/Remove packages:

The tool so far supports for 107 apps including 1password, brave-browser, cawbird, discord, docker-ce, docker-desktop, expressvpn, keepassxc, mailspring, onlyoffice-desktopeditors, obs-studio, skpyeforlinux, sublime-text, whatsapp-for-linux. And, it keeps adding more and more apps support.

You may firstly, run the command below to get a full list of supported packages:

deb-get list

Or use deb-get search KEYWORD to find out if your app is supported.

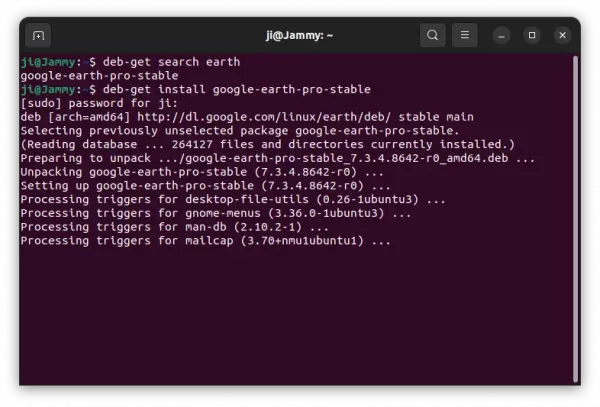
And, to install an app package (google-earth in the case) use command:

deb-get install google-earth-pro-stable

You’ll see it’s setting up repository and use apt command to install the package. If the package is available via direct download link, it will download via curl and then install it via apt.

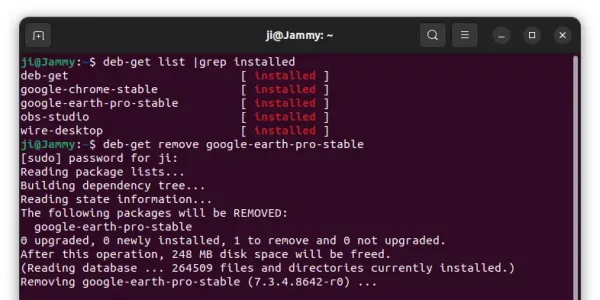
To find out all installed packages, use command:

deb-get list |grep installed

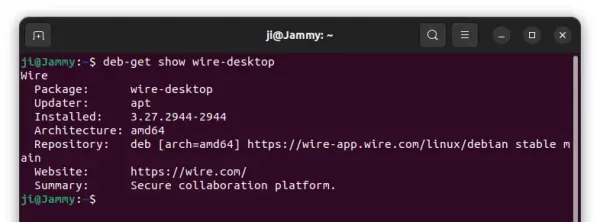
You may get info about an installed app, including package version, source, website and summary via command:

deb-get show PACKAGE_NAME

Like apt, to remove a package use command with either remove or purge (also delete configuration files) flag:

deb-get remove PACKAGE_NAME

The command will also remove the repository (if any) that was added for the package.

There also many other options, including upgrade to install available updates for all installed packages, reinstall to re-install a package, clean to clear out the local repository of retrieved package files. And, you may just run deb-get in terminal to get more about this command line tool.

How to install Deb-get in Ubuntu:

The tool is designed specially for Ubuntu and its based systems. The project page provides .deb package that installs in all current Ubuntu releases (Ubuntu 18.04, 20.04, 21.10, and 22.04).

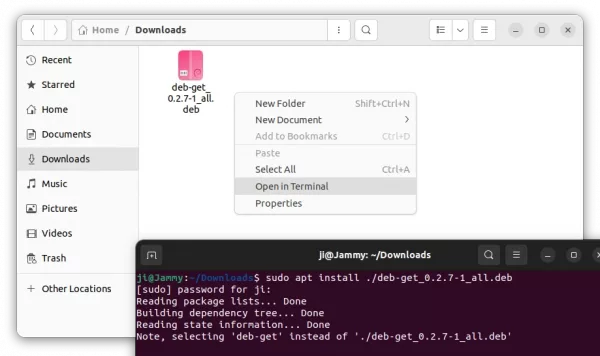
Download the package, and open terminal via right-click menu in your ‘Downloads’ folder. And finally, run the command below to install it:

sudo apt install ./deb-get*.deb

Got a deb file download from the web? This is a beginner’s guide shows you how to install the file in Ubuntu.

DEB is the software package format for Debian / Ubuntu based systems. Besides Ubuntu main / universe repositories and Ubuntu PPAs, some applications offer .deb files for downloading in their project pages or websites.

Option 1.) Directly install via double-click.

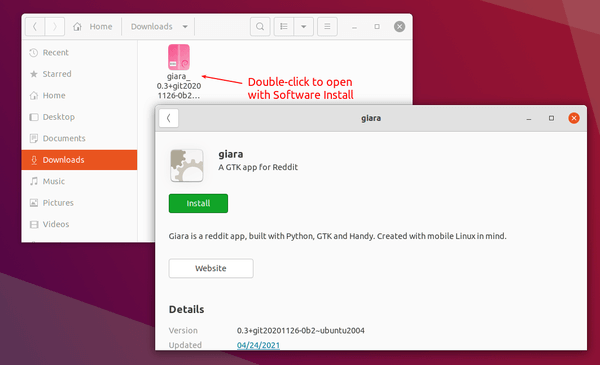
Like EXE file for Windows, you can simply double click on a deb file. By default, it opens Ubuntu Software with an option to install the software package.

This is the easiest way. However Ubuntu Software is buggy, it’s one of the top core apps being criticized for years.

Option 2.) Use Gdebi Package Installer.

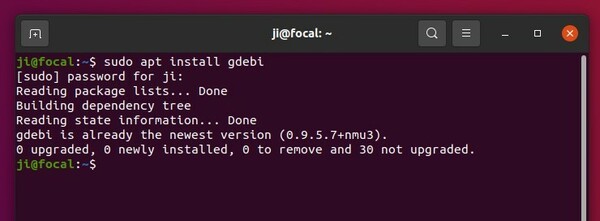
Gdebi package installer is the most recommended way to handle .deb packages. It’s default in Linux Mint. Ubuntu users can either install it from Ubuntu Software or by running command in terminal (Ctrl+Alt+T):

sudo apt install gdebi

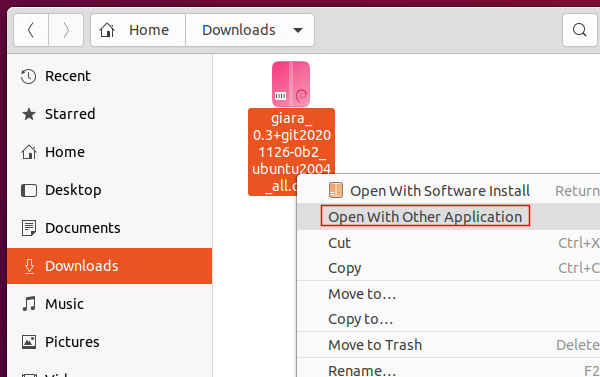
After installed it, just right-click on a deb file, select “Open With Other Application” and choose Gdebi package installer to open the file.

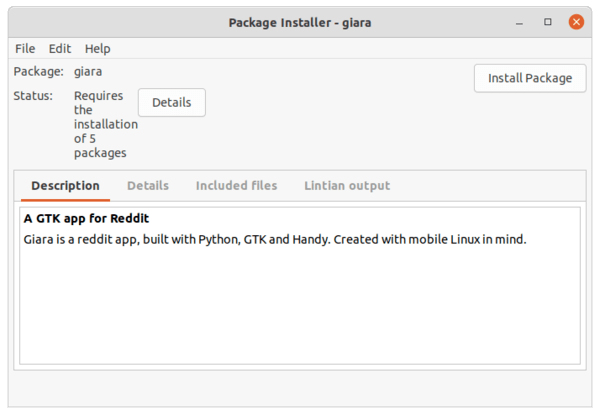
When Gdebi opens, it shows the package details including app description, dependency libraries, and installed files. To install it, click on “Install Package” button.

And a ‘Remove Package’ button will be available once you installed it.

Option 3.) Using apt command:

Apt is the most commonly used command to install, remove, and manage software packages from Ubuntu repositories, PPAs, and third-party apt repositories.

It seems to start from Ubuntu 20.04, the apt command added support for installing local deb files.

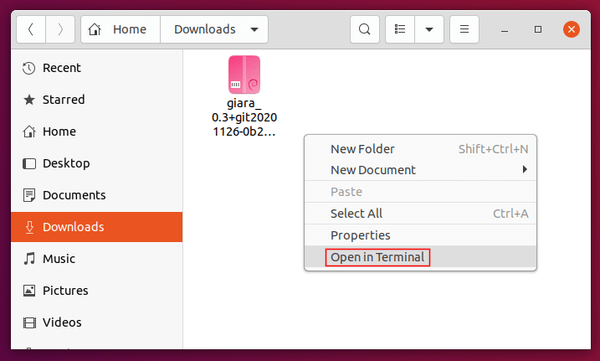
Firstly, right-click on blank area of the folder that contains the deb file. Then select ‘Open in Terminal’

When terminal opens, run command to install local deb file:

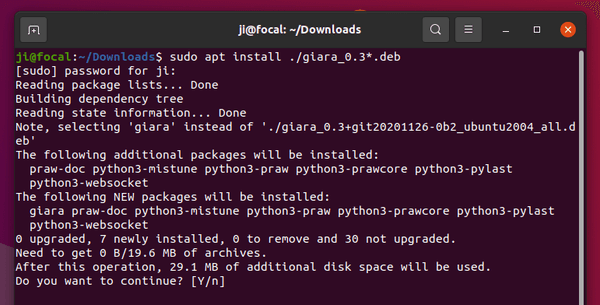
sudo apt install ./PACKAGE_NAME.deb

You can use wildcard character * in file name. In my case, the command can be:

sudo apt install ./giara_0.3*.deb

Option 4.) Using dpkg command:

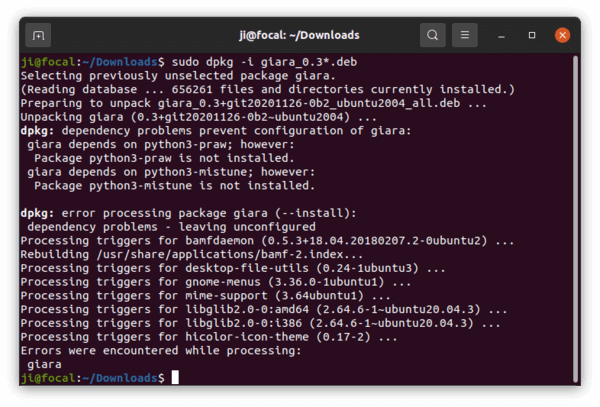
dpkg is the command line package manager for Debian. I used to use the command to install local deb files in Ubuntu. The downside is that dpkg does not install missing dependency packages automatically.

To install a deb file via dpkg command, run:

sudo dpkg -i /path/to/file_name.deb

Same to the previous option, you can use “Open in Terminal” option to open folder in terminal and then run command:

sudo dpkg -i giara_0.3*.deb

Since it does not handle dependency automatically, the command often output error and leave package unconfigured. You have to run one more command to fix it:

sudo apt -f install

Conclusion:

Since Ubuntu Software is buggy and dpkg command does not handle dependency packages, Gdebi and apt command can be the best choices to install local deb file in Ubuntu via either graphical or command line.