Linux Kernel 6.7 is finally released! Linus Torvalds announced the release on Sunday night:
So we had a little bit more going on last week compared to the holiday week before that, but certainly not enough to make me think we’d want
to delay this any further.
End result: 6.7 is (in number of commits: over 17k non-merge commits, with 1k+ merges) one of the largest kernel releases we’ve ever had, but the extra rc8 week was purely due to timing with the holidays, not about any difficulties with the larger release.
The new Kernel release has many new and improved hardware support!
For Intel, the Turbostat command utility now supports Lunar Lake and Arrow Lake (15th gen) processors; LPSS (Low-Power Sub-System) driver now support Lunar Lake M processors; The Meteor Lake (14th gen mobile processors) graphics support now considered stable.
All the newest AMD Radeon RDNA2 and RDNA3 GPUs with Display Core Next 3.0 has Seamless Boot enabled.
And, NVIDIA has GSP support in the open-source Nouveau driver for initial GeForce RTX 40 acceleration support and improved RTX 20/30 series hardware support.
Linux Kernel 4.14 stable was released yesterday. Linus Torvalds announced that:
No surprises this week, although it is probably worth pointing out how the 0day robot has been getting even better (it was very useful before, but Fengguang has been working on making it even better, and reporting the problems it has found).
Sure, some of the new reports turned out to be just 0day doing things that just don’t work (ie KASAN with old gcc versions, but also doing things like loading old ISA drivers in situations that just don’t make sense – remember when you couldn’t even ask if the hardware existed or not, and just had to know), but even then it’s been all good.
The appended shortlog is obviously only for the (small) haul since rc8, and it really is tiny. Not very many commits, and they are small. The biggest thing that stands out in the diffstat is the “leaking_addresses” perl script, which is actually under active development, but I put the first version in for 4.14 just so that people could see that initial state and start looking at the end result and perhaps ask themselves “should my code make these kernel addresses visible to user space”.
…
How to Install Kernel 4.14 in Ubuntu / Linux Mint:
The mainline kernel PPA has made the new kernel binaries for Ubuntu, available for download at the link below:
Depends on your OS type, download and install the packages in turns:
Select generic for common system, and lowlatency for a low latency system (e.g. for recording audio), amd64 for 64bit system, i386 for 32bit system, or armhf, arm64, etc for other OS types.
To get the Kernel 4.14 from the command console, run the commands below one by one:
Start/restart your machine and select boot with the previous kernel in Grub2 -> Advanced menu. Then use Ubuntu Tweak, or other system tool to remove the Kernel 4.14, or you may see this how to remove old kernels tutorial.
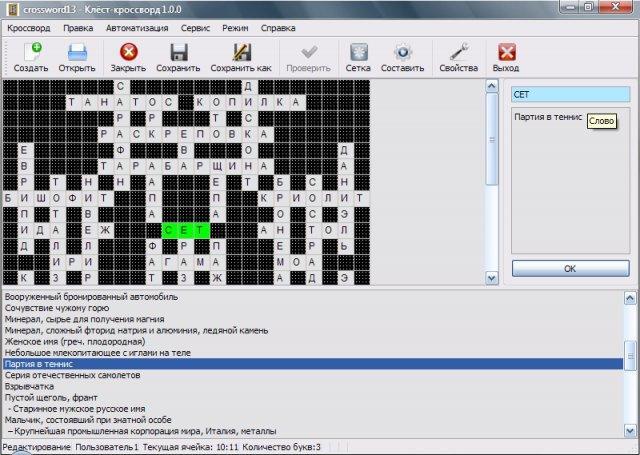
Klest-crossword is a game for professional compiling, editing and easy guessing american and classic the crossword puzzles.
It contains more than 1,000 crossword puzzles to guess and provides a lot of tools for creating a crossword puzzle. It a dictionary of 31 000 Russian words and a dictionary of 41 000 English words.
All functions:
Creating and guessing a crossword puzzle;
Check correctness of guessing a crossword puzzle;
Save state incompletely guessed crossword puzzle;
Automatic creation of crossword puzzle grid (beta)
Automatic compiling;
Semi-automatic compiling;
Creating and editing a dictionary;
Adding / removing words from the dictionary;
Saving created a crossword puzzle grid, as a template for the new;
Editing the font crossword;
Editing the grid of crossword puzzle;
Export crossword: RTF, PDF, PostScript(*.ps), HTML, Text format across Lite, JPG, JPEG, TIFF, BMP, XPM, PNG, XBM, PPM, OpenKlest(*.ok);
Import crossword: Texthttp://qt-apps.org/content/show.php/Klest-crossword?content=144254 format AcrossLite, OpenKlest(*.ok);
Print crossword;
Statistics;
Install Klest-crossword:
The source code and Deb installer are available from SourceForge.
When you’re running your laptop on battery, Ubuntu dims the screen after a few seconds of inactivity. It annoying and here’s how to increase the timeout.
Objectives:
Increase Ubuntu screen dimming timeout on your laptop
Enjoy!
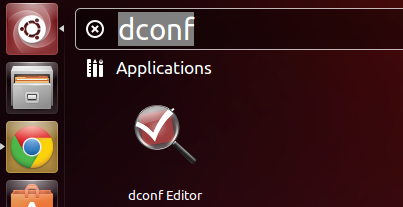
To get started, open dconf Editor from the dash search results.
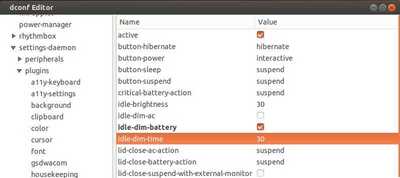
In next window, navigate to org -> gnome -> settings-daemon -> plugins -> power. You’ll find the key which says “idle-dim-time”, change its value to what you want.
Getdeb is an unofficial project which provides the latest open-source and freeware applications for Ubuntu Linux, and PlayDeb provides games. As Ubuntu based Linux distribution, Linux Mint users are available to install software from this repository.
Objectives:
Install / add / enable GetDeb & PlayDeb repository on Linux Mint
Enjoy!
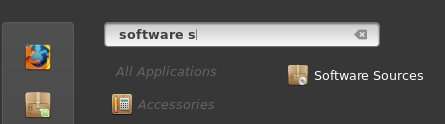
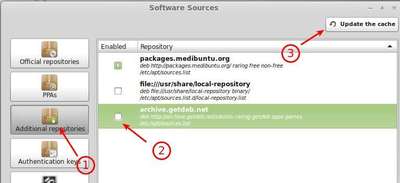
To get started, go to Start menu, search and open Software Sources
Navigate to Additional repositories, check the box where it says ‘archive getdeb.net’. Click ‘update the cache’ button to update package lists.
That’s it!
If it is not there in your Linux Mint edition, click ‘Add a new repository’ and type in
deb http://archive.getdeb.net/ubuntu raring-getdeb apps games
In the line, change raring to yours based Ubuntu release code name.
Linux Mint 14 Nadia based on Ubuntu 12.10 quantal
Linux Mint 13 Maya based on Ubuntu 12.04 precise
Linux Mint 12 Lisa based on Ubuntu 11.10 oneiric
Linux Mint 11 Katya based on Ubuntu 11.04 natty
Linux Mint 10 Julia based on Ubuntu 10.10 maverick
Linux Mint 9 Isadora based on Ubuntu 10.04 lucid
And get the key by running below commands in terminal (Ctrl+Alt+T):
UltraStar Deluxe is a free and open-source singing game. It allows up to six players to sing along with music using microphones in order to score points, depending on the pitch of the voice and the rhythm of singing.
Objectives:
Install UltraStar Deluxe on Ubuntuor Linux Mint
Enjoy!
There used to be a PPA repository maintains the game packages for Ubuntu & Linux Mint users, which however has no longer been updated for years.
For the most recent 2025.2.1 release, it can be installed by using Flatpak package which runs in sandbox environment.
Tips: Linux Mint 21/22 may simply launch Software Updater, then search & install the UltraStar Deluxe package.
While, Ubuntu users may run the 2 commands below one by one to install:
First, install the flatpak daemon package:
sudo apt install flatpak
For old Ubuntu 18.04, add this PPA first for the updated Flatpak package.
After installation, either search & launch the game from system application launcher (may need a log out and back in), or run the command below in terminal instead:
flatpak run eu.usdx.UltraStarDeluxe
(Optional) To uninstall the package, use command (Ctrl+Alt+T):
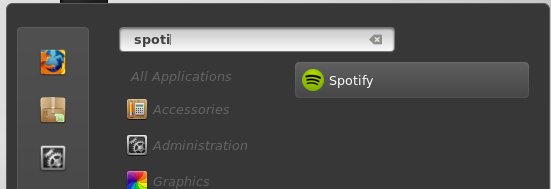
This simple tutorial will show you how to install the Spotify Client on Linux Mint 13, 14, 15 from the official repository.
Spotify is a digital music-streaming service that gives you on-demand access to millions of songs on all your devices. It works on Windows, Mac, Linux, Android, iOS, Windows Phone 7/8 (7 no longer updated), BlackBerry (GSM only), Symbian.
To install it from the official repository, press Ctrl+Alt+T to open terminal.
1.) Run below command to add the repository to Linux Mint:
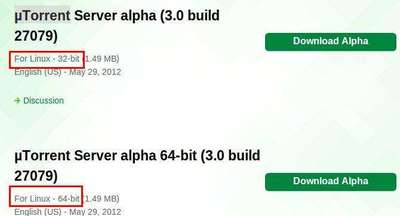
Here’s a beginner’s guide to install and setup uTorrent server on Linux Mint 15. There’s no command in tutorial, just a few clicks!
1.) First, download uTorrent server for Linux: www.utorrent.com/downloads/linux. You may check 32-bit or 64-bit by going to Start Menu -> System Tools -> System Settings -> System Info. Where “Distribution Linux Mint 15: olivia (i686)” means 32-bit. x86_64 means 64-bit system.
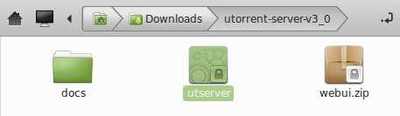
2.) Decompress the package in Downloads folder, then navigate to the extracted folder.
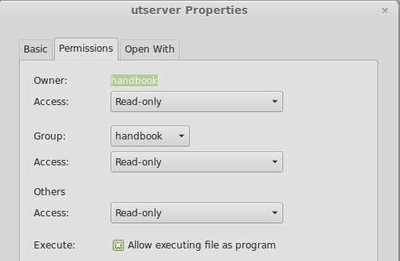
3.) Right-click on utserver and goto its Properties window. Make sure “Allow executing file as program” is checked.
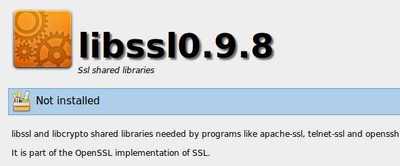
4.) Before running the utserver, install ssl share libraries from Start Menu -> Software Manager.
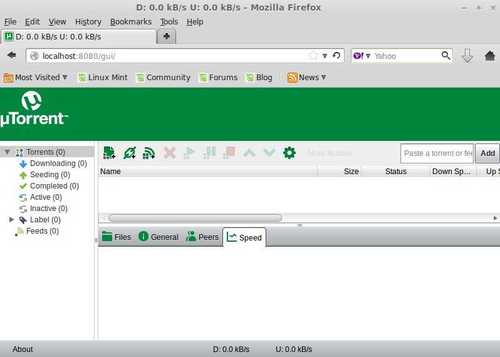
5.) Now double-click on utserver file to start it. That’s right you see nothing happens because the server is running as a background program.
6.) Open your file browser and go to http://localhost:8080/gui/. Type:
According to this Adobe support page, HARMAN have taken over the development and support for the Adobe AIR SDK, a cross-platform framework used by a wide range of applications and games.
It’s now a free and open-source project, with SDK support for Window, Linux, and macOS, and runtime support for only Windows and macOS.
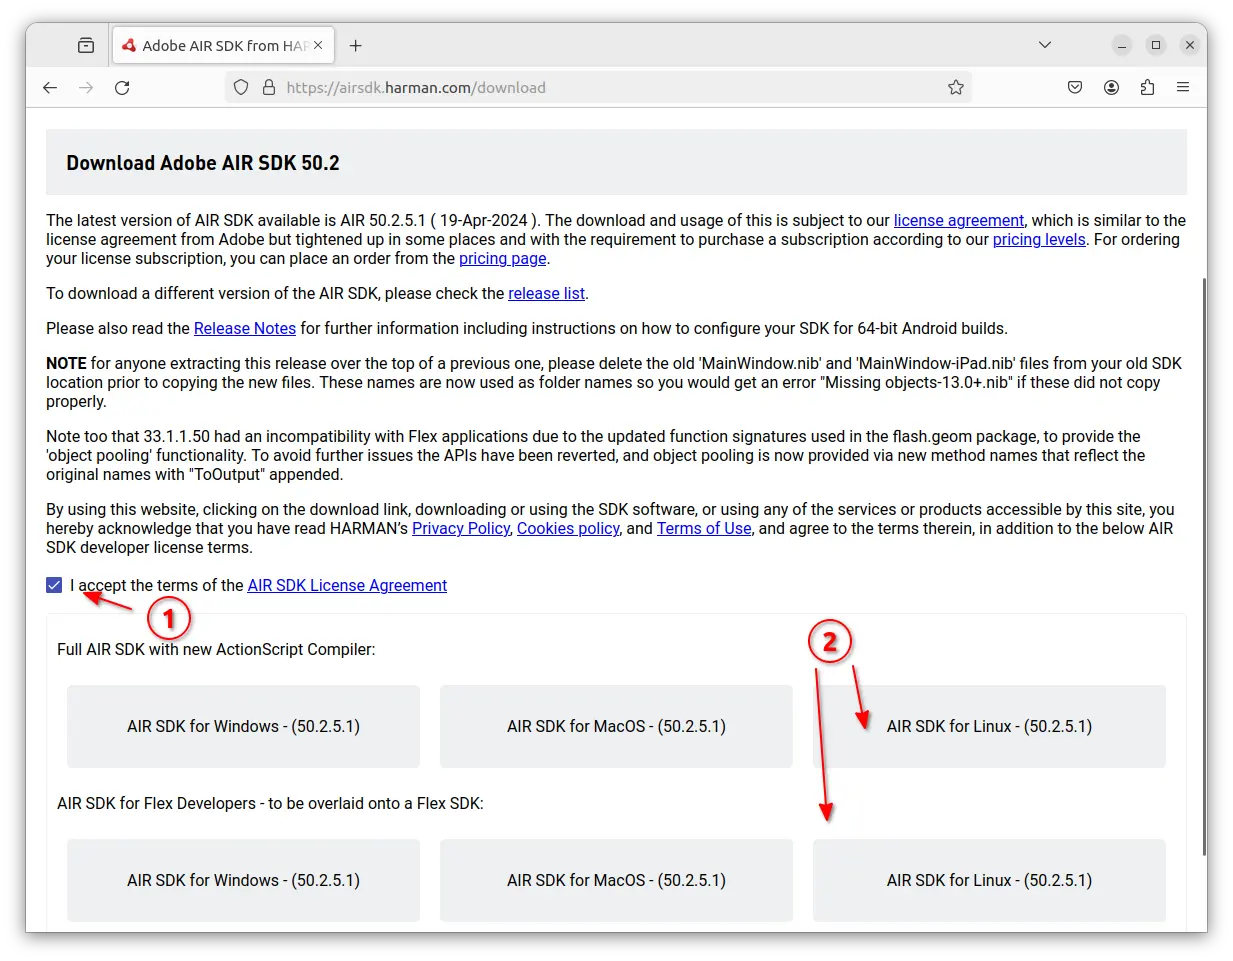
To download AIR SDK, go to the link page below, accept the term and click download the SDK for Linux:
Then, extract the package, go to bin sub-folder, finally use either adl or adl_linux from terminal (right-click in blank area of that folder and click “Open in Terminal”) to test an AIR application without having to package and install it.
T ocreate an Air native extension, go to this discussion page, try to download and extract the path over the top of the SDK.
for Ubuntu 20 we need to provide a build of curl and to have the runtime know to look for this in the appropriate folder first. Should be able to provide an update for this although with a few other fixes that have gone in to the Linux build just now (crashes when using Worker objects) I’m wondering about creating another release just for the Linux build of the AIR SDK…. we may do a few more bits of real-world testing with applications that folk are sending in…