Archives For November 30, 1999

This tutorial shows how to disable the touchpad in Ubuntu with GNOME, XFCE, MATE, and any other desktop environments.

Most desktops today have an option to “disable touch while typing”. But if you always have your computer with a mouse connected and rarely use the touchpad, then it can be a good choice to disable the touchpad to avoid mis-operation.

And, here’s how to do the job in Ubuntu either by using desktop setting options, or globally by using Linux command or config file.

Continue Reading…

This simple tutorial shows how to increase or decrease the touchpad 2-finger scrolling speed in Ubuntu 22.04, Ubuntu 24.04 with default GNOME on Wayland session.

GNOME, the default desktop for Ubuntu, Fedora, and optional in many other Linux, so far lacks option to configure the mouse/touchpad scroll speed.

For Ubuntu 20.04, Ubuntu 18.04, and other Linux with GNOME on classic Xorg, there’s a command line tool imwheel available to do the job. And, here’s a step by step guide show you how.

For Ubuntu 22.04 and higher and other Linux with GNOME Wayland, this tutorial may help by settings virtual touchpad size.

IMPORTANT: This tutorial is tested and works in Ubuntu 24.04 & 22.04 on my old HP & ASUS laptop. However, some users report it does NOT work. Don’t do it on production machine!

Step 1: Measure & Set virtual touchpad size

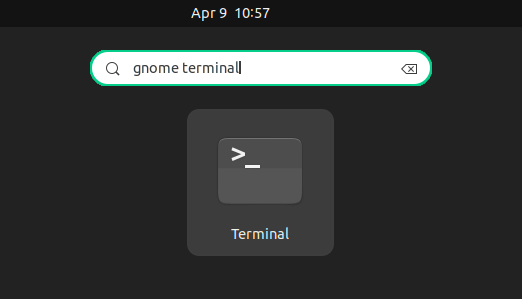
1. First, open terminal either by pressing Ctrl+Alt+T on keyboard, or by searching from ‘Activities’ overview screen.

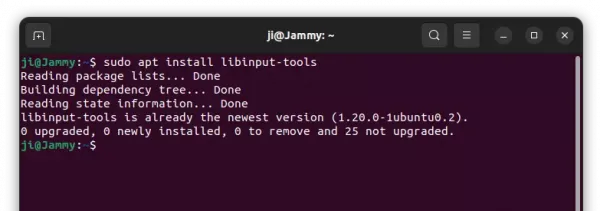
2. When terminal opens, run command to install ‘libinput-tools’ package in case you don’t have it:

sudo apt install libinput-tools

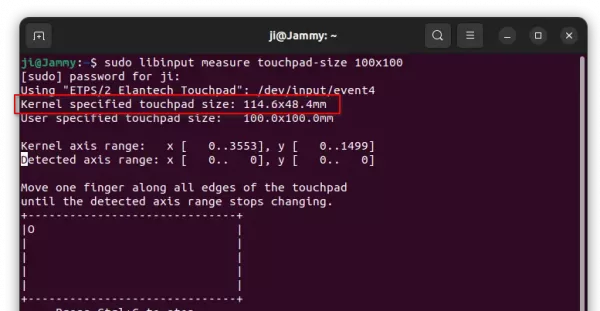
3. Next, run command to tell your touchpad size (width and height in mm):

sudo libinput measure touchpad-size 100x100

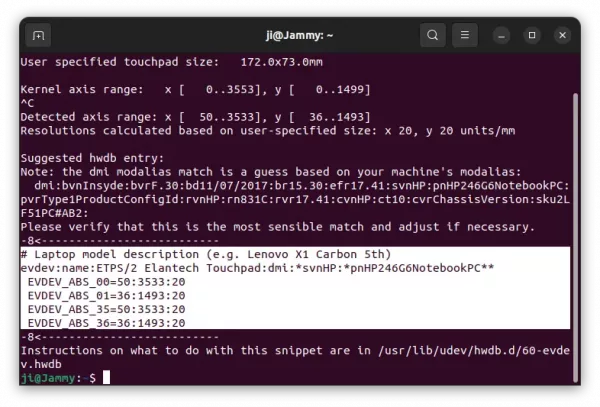
As the screenshot shows, may laptop has touchpad with 114.6 mm width and 48.4 mm height. Once you got the value, press Ctrl+C to exit.

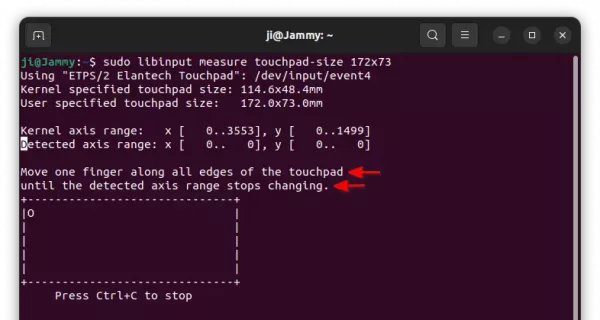
4. Finally, re-run the command in step 3, but with different args. For example, use 172×73 for 1.5x scroll speed (Here 172 ≈ 114.6 x 1.5, and 73 ≈ 48.4 x 1.5), run command:

sudo libinput measure touchpad-size 172x73

Or use 92×39 for 0.8x scroll-speed (92 ≈ 114.6 x 0.8, 39 ≈ 48.4 x 0.8):

sudo libinput measure touchpad-size 92x39

NOTE: You have to change the “width x height” number in command. Depends on your need to either increase or decrease scroll-speed, calculate them according the original size of your touchpad!!

Once you hit run the command, follow the terminal output to “Move one finger along all edges of the touchpad until the detected axis range stops changing.  You’ll see the little ‘0’ in the terminal output moves correspondingly when you moving finger on touchpad.

5. When done, press Ctrl+C to stop it. And, you should get similar output as the screenshot shows, if you’ve done correctly.

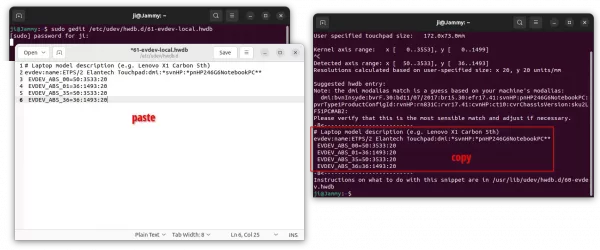
And, you need to copy the lines between the 2 “-8<————–” lines (in my case, the section with white background).

Step 2: Apply Changes

1. Now, open terminal (Ctrl+Alt+T) and run command to edit the config file:

sudo gedit /etc/udev/hwdb.d/61-evdev-local.hwdb

Replace gedit in command with gnome-text-editor for Ubuntu 24.04 and Fedora, or use nano instead that works in all desktops.

When file opens, paste the lines you just copied in ‘Step 1’ and save it.

2. Finally, update hardware database by running command:

sudo systemd-hwdb update

And, reload udev rules by running command:

sudo udevadm trigger /dev/input/event*

When everything’s done. Restart your computer to see the effect!

As the steps above also increase or decrease the cursor movement speed, you may also need to open “Settings -> Mouse & Touchpad” and adjust ‘Touchpad Speed’ slider-bar.

How to Restore

To undo the changes you made via the previous steps, first open terminal (Ctrl+Alt+T) and run command to delete the config file:

sudo rm /etc/udev/hwdb.d/61-evdev-local.hwdb

Then update database and reload udev rules by running 2 commands one by one:

sudo systemd-hwdb update
sudo udevadm trigger /dev/input/event*

Finally, restart your computer and done.

via: reddit thread.

While typing in my Ubuntu laptop, I was often making mistakes by tapping on touch-pad accidentally. The text cursor (aka caret) jumped to another place, and/or app window lost focus. It made me crazy since the built-in ‘disable touchpad while typing‘ option does not function in my HP laptop.

Option 1: system built-in option

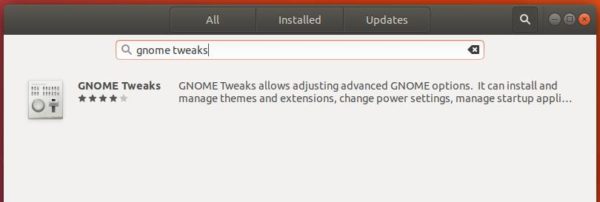
GNOME has the option to disable touchpad while typing, which is enabled out-of-the-box in current Ubuntu releases. Users may access the settings either via ‘/org/gnome/desktop/peripherals/touchpad/‘ in Dconf Editor or using Gnome Tweaks tool.

Both configuration tool available to install in Ubuntu Software.
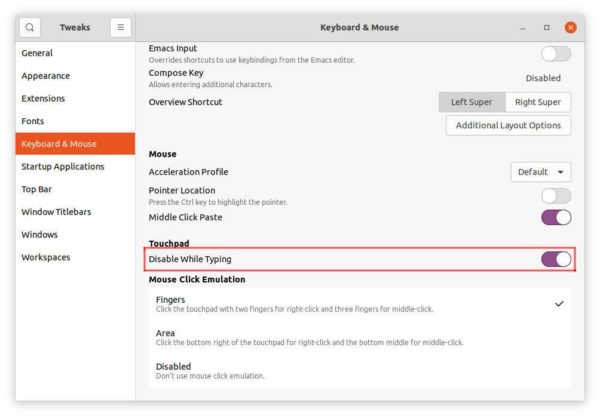
Disable touchpad while typing via Gnome Tweaks Tool

For Synaptics touchpad running on Xorg, like me, this option may not work. And, here are the few other choices I’m going to show you in this tutorial.

Option 2: Disable touchpad while typing via Touchpad-Indicator

A ten years old app, Touchpad-Indicator, has ability to toggle this function for all Ubuntu users.

It’s a free and open-source project developed and maintained by atareao team from Spain. It has option to disable touchpad while typing and set milliseconds to wait after the last key press before enabling touchpad.
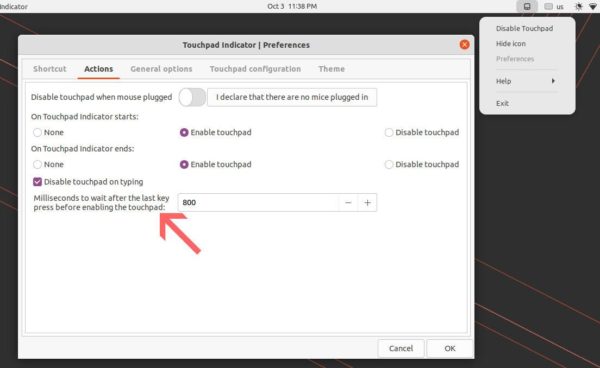
It also allows to disable touchpad while mouse is plugged, toggle scrolling options and remap one-, two- and three-finger tap actions.

How to Install Touchpad Indicator in Ubuntu:

The software developer maintains an official PPA contains the software packages for all current Ubuntu releases (Ubuntu 18.04, 20.04, 21.04, 21.10) and old releases such as Ubuntu 12.04, Ubuntu 14.04, and Ubuntu 16.04.

1.) Firstly, open terminal from start menu or by pressing Ctrl+Alt+T on keyboard. When it opens, run command to add the PPA:

sudo add-apt-repository ppa:atareao/atareao
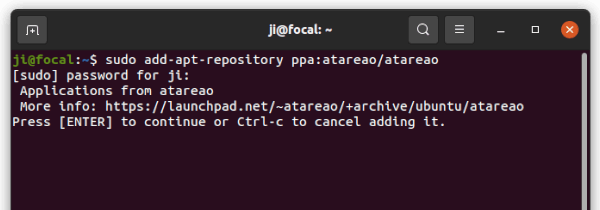
2.) Next, refresh package cache and install the app:

sudo apt update && sudo apt install touchpad-indicator
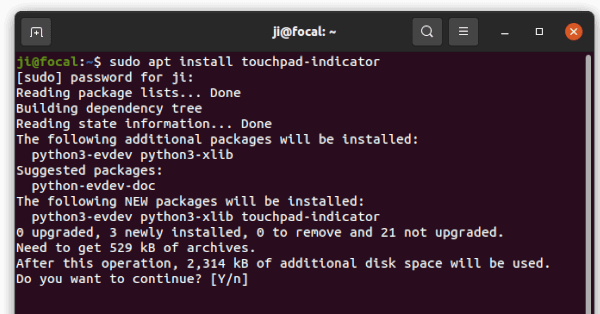
Once installed, search for and open it from the overview screen and go to Preferences to change its settings.

Uninstall Touchpad-indicator:

To remove the applet, open a terminal window and run command:

sudo apt remove --autoremove touchpad-indicator

Also remove the Ubuntu PPA by running command in terminal:

sudo add-apt-repository --remove ppa:atareao/atareao

Option 3: Single command to disable touchpad while typing (for synaptics)

Touchpad indicator is great, however it’s a little bit heavy for the single function only. Without installing any third-party app, a single command can also do the trick!

The synaptics touchpad driver for Xorg server offers a command line tool “syndaemon” that monitors keyboard activity and disables the touchpad when the keyboard is being used.

Users can simply open terminal and run the command below to test it out:

syndaemon -i 0.8 -K -t -d

The command will run the service silently in background. And the parameters are:

  • -i 0.8 tells to wait 0.8 second after last key press before re-enabling the touchpad.
  • -K makes it ignore Modifier+Key combos, such as Ctrl, Alt, and/or Shift + key combinations.
  • -t tells to disable tapping / scrolling only. Mouse movement is still possible while typing.
  • -d runs the command as daemon, in background.

Syndaemon works until reboot. If you like this method, you may make it running automatically at start up via following steps:

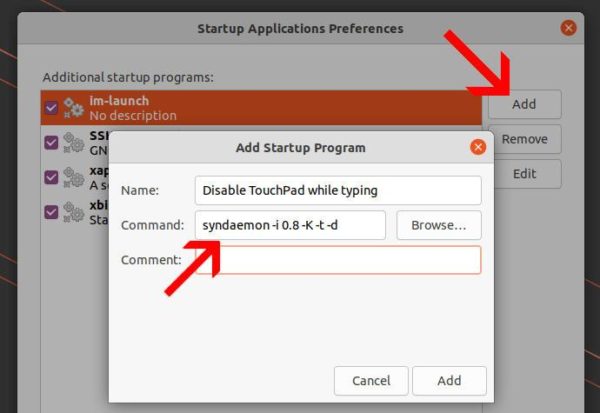
1.) Firstly, search for and open ‘Startup Applications’ utility from overview screen.
2.) When it opens, click ‘Add’ button and type:

  • Name: Disable TouchPad while typing
  • Command: syndaemon -i 0.8 -K -t -d
  • Comment: optional

And finally click on ‘Add’ button will make it auto-start at login.
NOTE: It has downside in my case in Ubuntu 20.04 LTS. When trying to stop syndaemon either via “System Monitor” or using sudo kill -i Process-ID command, it causes touchpad tap to click not working until reboot!

Option 4: For Ubuntu with Xorg session (Libinput driver)

The function works out-of-the-box in my Ubuntu 22.04 with the default Wayland session. User may use Gnome Tweaks to toggle the option, see screenshots in Option 1.

If you’ve switch back to “Ubuntu on Xorg” session, then this method may help for those using libinput driver.

1. First, press Ctrl+Alt+T on keyboard to open terminal. When it opens, run the command to edit the config file:

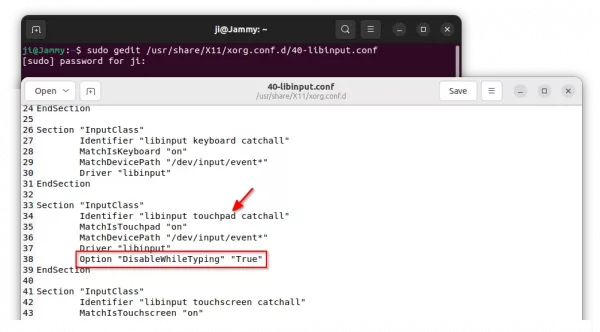
sudo gedit /usr/share/X11/xorg.conf.d/40-libinput.conf

If you’re trying this in Ubuntu 22.10, replace gedit with gnome-text-editor or nano.

2. When the file opens in text editor, find out the section that contains “Identifier “libinput touchpad catchall”“. Add rule Option “DisableWhileTyping” “True”, so it will look like:

Section "InputClass"
             Identifier "libinput touchpad catchall"
             MatchIsTouchpad "on"
             MatchDevicePath "/dev/input/event*"
             Driver "libinput"
             Option "DisableWhileTyping" "True"
EndSection
3. Make sure you don’t have the synaptics driver installed, or the previous change will be overridden.

Open terminal (Ctrl+Alt+T) and run command to list the config file in that directory:

ls /usr/share/X11/xorg.conf.d/

If you see 70-synaptics.conf file in the terminal output, run command to remove the Synaptics driver package:

sudo apt remove xserver-xorg-input-synaptics<.pre>

Finally, restart computer and done!

gnome shell

After doing a fresh install of Ubuntu 18.04 on my old ASUS laptop, I found that the touchpad right-click does not work. This is because Ubuntu 18.04 by default acts right-click when you perform two-finger click on touchpad.

While my laptop touchpad does not have physical buttons, I have to do two-finger click to perform right-click.

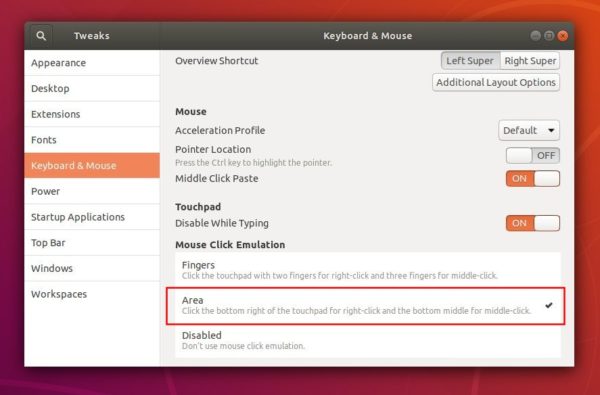
So following steps will show you how to make right-click (clicking on the bottom right area of the touchpad) working again in touchpad without a physical button in Ubuntu 18.04.

1. Open Ubuntu Software, search for and install Gnome Tweaks.

2. Launch Gnome Tweaks and navigate to Keyboard & Mouse settings page.

Under Mouse Click Emulation, simply click enable the second option: “Area – Click the bottom right of the touchpad for right-click and the bottom middle for middle click.”

That’s it. Enjoy!

Install Touchpad Indicator in Ubuntu 16.04

Last updated: November 3, 2016

touchpad

Looking for an app to easily control and configure your touchpad in Ubuntu Desktop? Touchpad Indicator, an open-source system tray applet, is well worth a try.

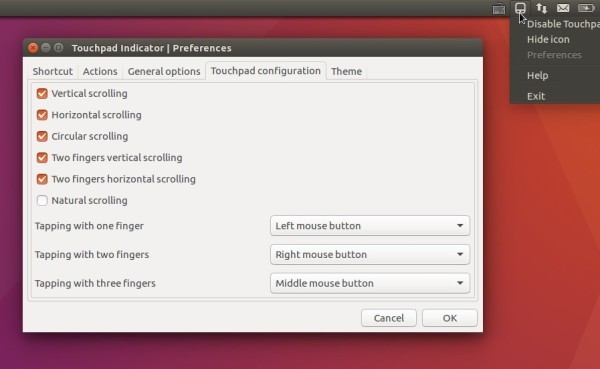
Touchpad indicator is a great simple applet that indicates your touchpad status, which also offers:

  • Keyboard shortcut to quickly disable/enable touchpad.
  • Ability to disable touchpad on typing.
  • Basic touchpad configuration like:
    • vertical scrolling
    • horizontal scrolling
    • two fingers vertical or horizontal scrolling
    • one finger, two fingers and three fingers tapping actions

touchpad-indicator

How to install Touchpad Indicator in Ubuntu:

The software can be easily installed from the developer’s PPA repository. Simply open terminal from Unity Dash, App Launcher, or via Ctrl+Alt+T shortcut keys, and run commands below one by one:

1. Run command to add the PPA:

sudo add-apt-repository ppa:atareao/atareao

Type in your password when it asks and hit Enter.

touchpad-ppa-xenial

2. Then update and install touchpad indicator via command:

sudo apt update

sudo apt install touchpad-indicator

For those who don’t want to add PPA, grab the .deb package from HERE and click install via Ubuntu Software.

Uninstall:

To remove the software, simply run apt command with remove flag:

sudo apt remove touchpad-indicator && sudo apt autoremove

The PPA can be removed by going to System Settings -> Software & Updates -> Other Software tab.