Archives For November 30, 1999

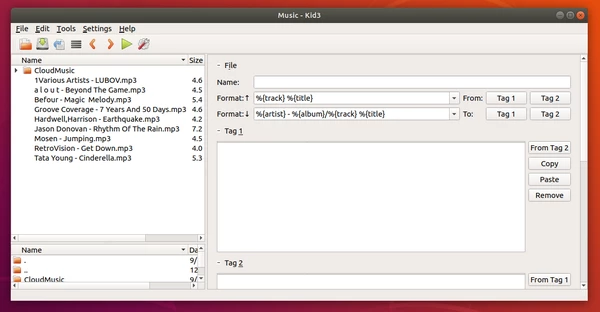
Kid3, the free and open-source Qt app for editing audio tags, now is 20 years old!

It was January 12, 2003, exactly 20 years ago, when the first version 0.1 of Kid3 was released. And, it’s the first app that I used to edit music tags in Ubuntu when in 2008.

To celebrate it, the developer team announced the new 3.9.3 release, but with only following changes:

  • Add user action script to fix ID3v2 standard violations.
  • Accept letters in track numbers when setting tags from filename.
  • Embed lyrics: Use letras.com instead of lyrics.wikia.com.
  • Fix crash upon termination when qml and qmlview actions have been used
  • Abort when invalid keys are used for FLAC Vorbis comments.
  • Use of non-BMP Unicode characters with TagLib.
  • Fix error description when saving files fails.
  • Fix Discogs import.
  • Windows: Handling of common path in multiple command line arguments.

How to Install Kid3 via PPA in Ubuntu:

The software offers official binary packages available to download at the sourceforge page.

For all current Ubuntu releases (Ubuntu 18.04, Ubuntu 20.04, Ubuntu 22.04 and Ubuntu 22.10), there’s an official PPA repository contains the latest package.

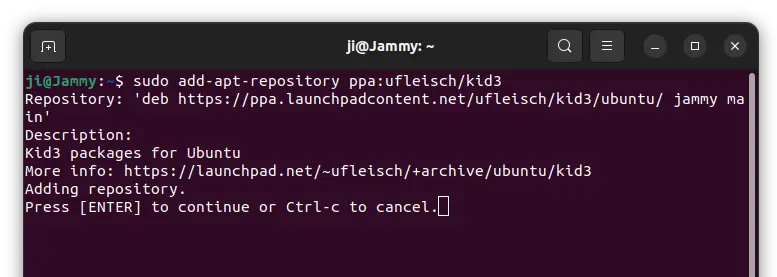
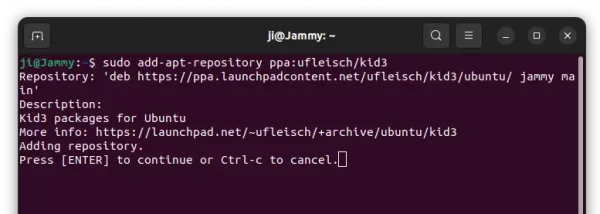
1. First, open terminal by pressing Ctrl+Alt+T on keyboard. When it opens, run command to add the PPA:

sudo add-apt-repository ppa:ufleisch/kid3

Type user password (no asterisk feedback) when it asks and hit Enter to continue.

2. For the old Ubuntu 18.04 and Linux Mint, you have to manually update the package cache by running command in terminal:

sudo apt update

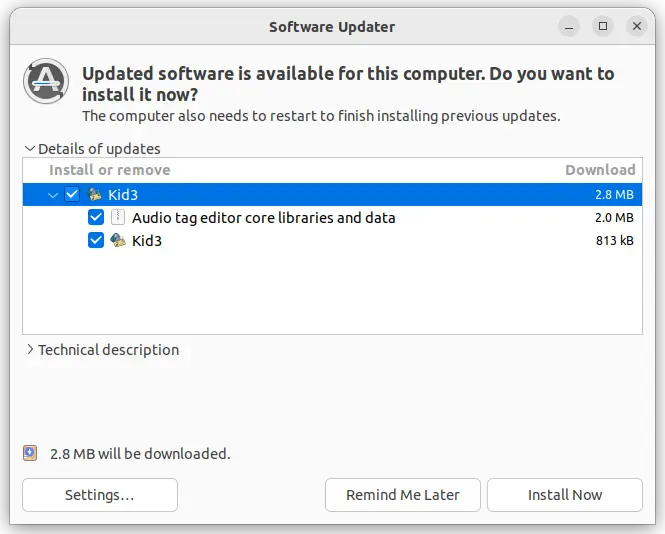
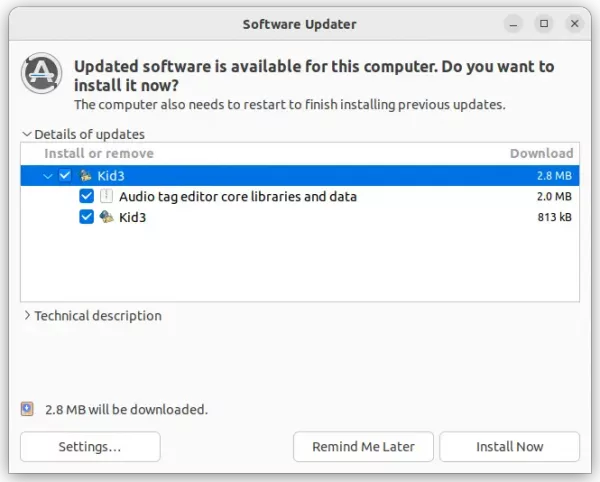
3. Finally, either update Kid3 using Software Updater (Update Manager) if an old package installed on your system.

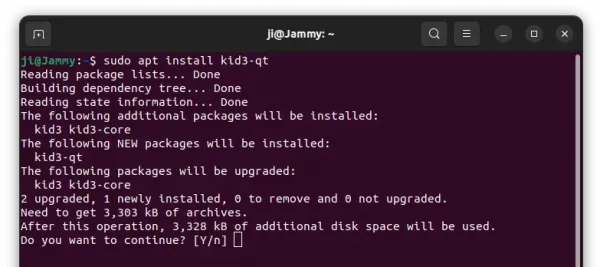
Or, run command in terminal to install the tag editor.

sudo apt install kid3-qt

Uninstall Kid3

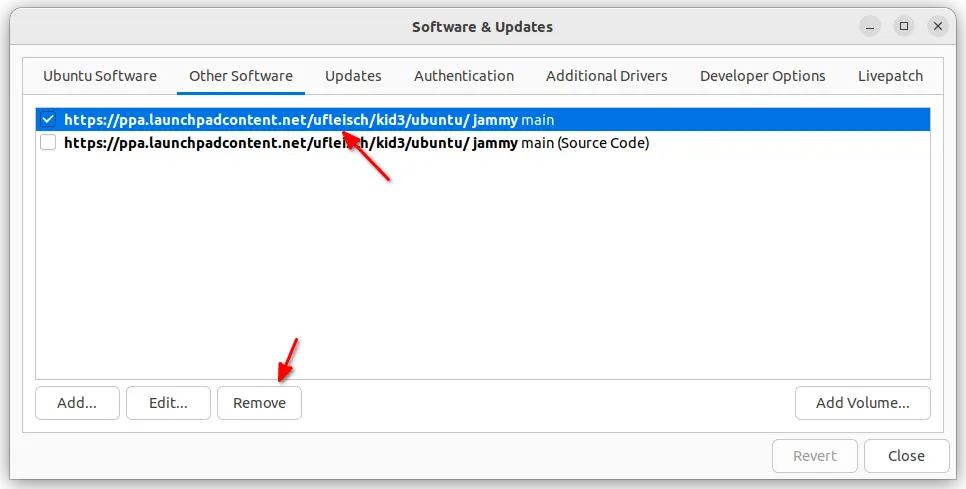
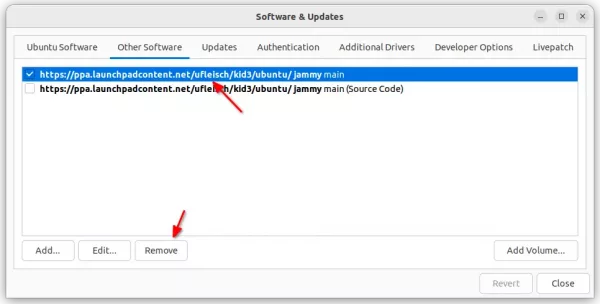
To remove the PPA repository, either open ‘Software & Updates‘ and remove the source line under ‘Other Software’ tab:

Or, open terminal and run the command instead to remove the PPA:

sudo add-apt-repository --remove ppa:ufleisch/kid3

To remove the audio tag editor, run command:

sudo apt remove kid3 kid3-qt kid3-core

That’s all. Enjoy!

DeaDBeeF audio player 1.8.8 was released as the 8th bugfix release for the 1.8 series.

The new release introduced some new features, including reading WAV RIFF tags, handling of Disc subtitle frames in ID3v2 and APE tags, and handling samplerates higher than 192KHz to pulseaudio.

New context menu options “Play Next” and “Play Later” are now available to choose your favorite song to play next, or set one-time play order for songs in play list. It will add marks at the beginning that indicates the sequence.

It also redesigned the plugin page in Preferences. Now each plugin has the configuration along with basic info and license in tabs.

Other changes in DeaDBeef 1.8.8 includes:

  • Non-modal preferences window
  • $rgb() title formatting function
  • Group title colorization support via title formatting
  • Plugin report and filtering in Plugin list
  • Focusable playlist tabs with keyboard navigation support
  • Sorting plugin list alphabetically
  • Improved album path handling, especially for Windows
  • Drag-and-drop on the main window
  • Using scroll wheel with seek bar
  • Delete from disk dialog will highlight the Delete button as destructive action
  • And some stability fixes.

How to Install DeaDBeeF 1.8.8 in Ubuntu:

The software offers official .deb package for 64-bit Ubuntu & Linux Mint systems.

Grab the package, ‘deadbeef-static_1.8.8-1_amd64.deb’, then install it by running command in terminal:

sudo apt install ~/Downloads/deadbeef-static*.deb

There’s also an Ubuntu PPA for DeaDBeeF, though it’s not updated at the moment of writing. And note that the PPA package conflicts to the official ‘deadbeef-static‘ package due to packaging issue. Remove the old package first if you’re going to install it from another source.

Remove DeaDBeeF:

To remove the music player, simply run command in terminal:

sudo apt remove --autoremove deadbeef-static deadbeef

Audacity audio editor and recorder 3.0.3 was released a few days ago. Finally it adds official Linux binary via Appimage.

Audacity 3.0.3 comes with minor bug-fixes, and binary changes. For Windows users, now it provides 64-bit EXE and 32-bit plug-ins will not work on the release.

The release introduced automatic app update checking. According to the updated Privacy Notice, Audacity needs a network connection for update checking. And this shares your IP address, OS, and Audacity version. You can disable the feature in the Preferences.

And when an app error occurs, error report dialog will pop up asking you whether to send report.

For Linux users, Audacity now provides Appimage package. It’s a single executable that launches the software directly without installation required. Just right-click on file, add execute permission in “Properties” dialog, and finally run it.

How to Get Audacity 3.0.3:

For the official binary and source tarball, you can download it from the github release page:

It’s also available to install via the universal Flatpak package which runs in sandbox. And here’s how to guide for those new to flatpak.

About the Ubuntu PPA:

Audacity adds Conan package manager as the its new dependency library. It make me crazy again since it’s not available in Ubuntu repositories, and so far I can’t find any compile instruction.

So may be it’s time to abandon my personal PPA for Audacity package. :)

The Audacity audio editor 3.0.0 was release as a new major update a day ago.

Audacity 3.0.0 features .aup3 project format. The audio project was previously saved as large number of small data files, with an ‘.aup’ file to coordinate the lot. Now it saves project as the new all-in-one-file aup3 file format.

According to the Privacy Notice, Audacity may COLLECT personal data necessary for law enforcement, litigation and authorities. And it dissuade those under 13 years old from using the App.

It is incompatible with the GPL license. USE IT AT YOUR OWN RISK!

Working with the new .aup3 projects editing audio should be a little faster than before, however, finishing and closing a project at the end can be quite a lot slower.

You can open your older .aup projects in the new version, where they will be converted to the new .aup3 format.

Other changes in the Audacity 3.0.0 include:

  • Improved ‘Noise Gate’ effect
  • Add new analyzer ‘Label Sounds’ to label sounds and silences.
  • Import and export macros
  • New commands for using the last used tool or analyzer
  • Over 160 bug-fixes since version 2.4.2.

Download Audacity 3.0.0 for Linux:

No binary package for Ubuntu at the moment of writing, only the source tarball is available to download at the link:

Download Audacity Source

And you can follow this guide to build it on Linux.

Kid3 audio tag editor released version 3.8.2 a few days ago. Here’s how to install it in Ubuntu 16.04, Ubuntu 18.04, and Ubuntu 19.10.

Kid3 3.8.2 is a small but important release for those who have a lot of M4A files. The release fixes a crash that happens when frames are removed from M4A files. Additionally it brings new Catalan, Portuguese and Ukrainian translations.

How to Install Kid3 3.8.2 in Ubuntu:

The official Kid3 PPA has built the packages for Ubuntu 16.04, Ubuntu 18.04, and, Ubuntu 19.10.

1. Open terminal either from application launcher or by pressing Ctrl+Alt+T on keyboard. When it opens, run command to add the PPA:

sudo add-apt-repository ppa:ufleisch/kid3

Type user password (no asterisk feedback) when it prompts and hit Enter to continue.

2. If an old version was installed, upgrade Kid3 using Software Updater:

upgrade kid3 via software updater

or run commands one by one in terminal to install or upgrade to the latest tag editor:

sudo apt update

sudo apt install kid3-qt

You may replace kid3-qt with kid3 in the code for KDE integration, or with kid3-cli for the command-line interface

Uninstall

To remove the PPA repository, either open Software & Updates -> Other Software tab, or run command:

sudo add-apt-repository --remove ppa:ufleisch/kid3

To remove the audio tag editor, either use your system package manager or run command:

sudo apt remove --auto-remove kid3 kid3-*

Kid3 audio tag editor released version 3.8.1 today with some improvements, fixes for Linux and Android binary packages.

According to the changelog, Kid3 3.8.1 includes following changes:

  • Show number of files in status bar.
  • Support regular expressions in string replacements.
  • Support format codes in “Filename for cover” in “Extract Album Art” script.
  • The order of string replacements is respected.
  • Show RVA2 identifier in frame table.
  • Show UFID owner and values in frame table.
  • Support setting file name with “Import from Tags”.
  • QML scripts: Skip “–” argument, which is used when passing parameters from qml tool.

The official PPA has built the packages for Ubuntu 16.04, Ubuntu 18.04, Ubuntu 19.04, Ubuntu 19.10.

1. Open terminal either from application launcher or by pressing Ctrl+Alt+T on keyboard. When it opens, run command to add the PPA:

sudo add-apt-repository ppa:ufleisch/kid3

Type user password (no asterisk feedback) when it prompts and hit Enter to continue.

2. If an old version was installed, upgrade Kid3 using Software Updater:

upgrade kid3 via software updater

or run commands one by one in terminal to install or upgrade to the latest tag editor:

sudo apt update

sudo apt install kid3-qt

You may replace kid3-qt with kid3 in the code for KDE integration, or with kid3-cli for the command-line interface

Uninstall

To remove the PPA repository, either open Software & Updates -> Other Software tab, or run command:

sudo add-apt-repository --remove ppa:ufleisch/kid3

To remove the audio tag editor, either use your system package manager or run command:

sudo apt remove --auto-remove kid3 kid3-*

Kid3 audio tag editor 3.8.0 was released today. Here’s how to install it in Ubuntu 16.04, Ubuntu 18.04, Ubuntu 19.04, and derivatives.

According to the changelog, Kid3 3.8.0 features:

  • kid3-cli: Support JSON output.
  • Format codes %{modificationdate} and %{creationdate}.
  • Support ID3v2 GRP1 frame introduced with iTunes 12.5.4.
  • Import from Tags function which operates on selected files.
  • Explicit frame names can be used by prepending a ‘!’ character.
  • Adapt unified frame type mapping for better iTunes compatibility.
  • Support multiple covers in M4A files.
  • kid3-cli: Remove dependencies to GUI libraries.
  • Android: Show info how to write to SD card.
  • Android: Support Qt 5.12.

Kid3 Audio Tagger

How to install Kid3 3.8.0 in Ubuntu 16.04/18.04:

The official Kid3 PPA has made the new release packages for Ubuntu 16.04, Ubuntu 18.04, Ubuntu 19.04, and derivatives.

Open terminal either via Ctrl+Alt+T keyboard shortcut or by searching for ‘terminal’ from application menu. When it opens, do following steps one by one.

1. Copy and paste following command in terminal and hit run to add the PPA:

sudo add-apt-repository ppa:ufleisch/kid3

Type user password (no asterisk feedback due to security reason) when it prompts and hit Enter to continue.

2. Then you can upgrade Kid3 from a previous version via Software Updater:

upgrade kid3 via software updater

or run commands one by one in terminal to install or upgrade to the latest tag editor:

sudo apt update

sudo apt install kid3-qt

For KUbuntu user, replace kid3-qt with kid3 in the last command for KDE integration.

Uninstall

To remove the PPA repository, either open Software & Updates -> Other Software tab, or run command:

sudo add-apt-repository --remove ppa:ufleisch/kid3

To remove the audio tag editor, either use your system package manager or run command:

sudo apt remove --autoremove kid3 kid3-*

Audacity audio editor and recorder released version 2.3.2 a day ago with some improvements and various bug-fixes. Here’s how to install it in Ubuntu 16.04, Ubuntu 18.04, and higher.

Audacity 2.3.2 release highlights:

  • Include LAME mp3 encoder (though it’s there in PPA build for long time).
  • New ‘Select’ button in the track panel to select the whole track.
  • Audacity mod-script-pipe for driving Audacity from Python now comes with Audacity and can be enabled via preferences.
  • Type to Create a Label is now off by default.
  • A plug-in installer for Nyquist now provides a file browser for selecting ‘.NY’ files to install.
  • And over 20 bugs were fixed in the release.

How to Install Audacity 2.3.2 in Ubuntu:

The unofficial PPA has built the 2.3.2 packages for Ubuntu 16.04, Ubuntu 18.04, Ubuntu 18.10, Ubuntu 19.04, and their derivatives, e.g., Linux Mint 18.x and 19.x.

1. Open terminal either via Ctrl+Alt+T keyboard shortcut or by searching for ‘terminal’ from application menu. When it opens, run command:

sudo add-apt-repository ppa:ubuntuhandbook1/audacity

Type user password (no asterisk feedback due to security reason) when it prompts and hit Enter to add the PPA.

2. If you have a previous version installed, you can upgrade Audacity via Software Updater after adding the PPA.

upgrade audacity

or run following commands one by one to check updates and install (or upgrade) audacity 2.3.2:

sudo apt-get update

sudo apt-get install audacity

Uninstall:

To remove the PPA repository, launch Software & Updates utility and navigate to ‘Other Software’ tab.

To remove Audacity audio software, either use system package manager or run command in terminal:

sudo apt-get remove --autoremove audacity audacity-data

Audacity audio editor and recorder 2.3.0 was released one day ago. Here’s how to install it in Ubuntu 18.10, Ubuntu 18.04, Ubuntu 16.04, Linux Mint 18 and 19.

New features in Audacity 2.3.0 according to the release note:

  • New feature – “Punch and Roll Recording”
  • Pinned-play-head can now be repositioned by dragging
  • Play-at-speed now can be adjusted whilst playing.
  • Toolbars controlling volume and speed can now be resized for greater precision
  • Macros (formerly ‘Chains’) substantially extended
    • New Macro palette
    • Macros can be bound to keyboard keys
  • New commands: New ‘Tools’ menu, and new ‘Scriptables’ commands
  • Nyquist gains AUD-DO command
  • Nyquist effects are now translatable and translated
  • More dialogs have help buttons now
  • Increased legibility of trackname display
  • Half-wave option for collapsed tracks
  • Sliding Stretch
  • Dialog (option) for entering labels
  • And numerous bug-fixes.

Audacity 2.3.0

How to Install Audacity 2.3.0 in Ubuntu:

Audacity 2.3.0 for Linux is considered ‘experimental’ and may crash. I’ve revert the PPA package to Audacity 2.2.2.

For Ubuntu 16.04 and higher, the new release package can be easily installed from this third-party PPA.

1. Open terminal via Ctrl+Alt+T or by searching for ‘terminal’ from app launcher. When it opens, run command:

sudo add-apt-repository ppa:ubuntuhandbook1/audacity

Type your password (no asterisks feedback while typing) when it prompts and hit Enter to add the PPA.

2. If you have a previous version installed, you can upgrade Audacity via Software Updater after adding the PPA.

upgrade audacity

or run following commands one by one to check updates and install (or upgrade) audacity 2.3.0:

sudo apt-get update

sudo apt-get install audacity

Uninstall:

To remove the PPA repository, launch Software & Updates utility and navigate to ‘Other Software’ tab.

To remove Audacity audio software, either use system package manager or run command in terminal:

sudo apt-get remove --autoremove audacity audacity-data

A new bug-fix release for the Kid3 audio tag editor 3.6 series was released earlier today. Here’s how to install it in Ubuntu 18.04, Ubuntu 16.04, Ubuntu 14.04, Linux Mint 19/18, and their derivatives.

This bug-fix release fixes the use of free form MP4 atoms, import from CSV with DOS line endings, the application icon in KDE wayland sessions and other bugs. The generation of file names from tags is improved by supporting conditional text around a value from the tags, which is only inserted when the corresponding value exists.

Changes in Kid3 3.6.2 include:

  • Format from tags with custom strings prepended / appended when replaced format code is not empty %{“t1″code”t2”}.
  • Fix MP4 free form names longer than 4 characters with TagLib.
  • Support DOS line endings with “Import CSV”.
  • Set CTOC and CHAP element ID from values in the frame table.
  • Correctly add frame when “Edit” is clicked on non existing frame.
  • Show correct icon in Wayland session.
  • Improve editing of ISO date/time values with validation enabled.
  • Bundle OpenSSL libraries with self-contained Linux package.

How to Install Kid3 3.6.2 in Ubuntu:

The developer maintains a PPA repository with the software packages for all current Ubuntu releases.

Open terminal either via Ctrl+Alt+T shortcut key or by searching for ‘terminal’ from software launcher. When it opens, do following steps one by one.

1. Copy and paste following command in terminal and hit run to add the PPA:

sudo add-apt-repository ppa:ufleisch/kid3

Type your password (no asterisks feedback due to security reason) when it prompts and hit Enter to continue.

2. Then you can upgrade Kid3 from a previous version via Software Updater:

upgrade kid3 via software updater

or run commands one by one in terminal to install or upgrade to the latest tag editor:

sudo apt update

sudo apt install kid3-qt

For KUbuntu, you may replace kid3-qt with kid3 in the last command for KDE integration.

Uninstall

To remove the PPA repository, either open Software & Updates -> Other Software tab, or run command:

sudo add-apt-repository --remove ppa:ufleisch/kid3

To remove the audio tag editor, either use your system package manager or run command:

sudo apt remove --autoremove kid3 kid3-*