![]()
Merry Christmas to all my dear readers! In this tutorial I’m going to introduce the new Ubuntu PPA for Geany IDE.
Geany is a free open-source lightweight IDE for BSD, Linux, macOS, Solaris and Windows. It supports many programming languages including C, C++, Java, PHP, HTML, LaTeX, Python, Perl, and more.
Geany does not provides official Linux packages. And, Ubuntu includes fixed versions in its repositories which are always old. For request, I created an unofficial PPA that contains the latest Geany 2.0 as well as its plugins, while the “Geany Developers” team PPA has not been updated for a year.
The PPA supports all current Ubuntu releases, including Ubuntu 20.04, Ubuntu 22.04, Ubuntu 23.10, and their based systems, e.g., Linux Mint 21, and Zorin OS 17. And, you can install it on 64-bit modern PC, and/or arm64/armhf devices (e.g., Apple Silicon and Raspberry Pi).
As not a programmer, I’m not very sure, but the IDE package seems working good in my case in Ubuntu 22.04.
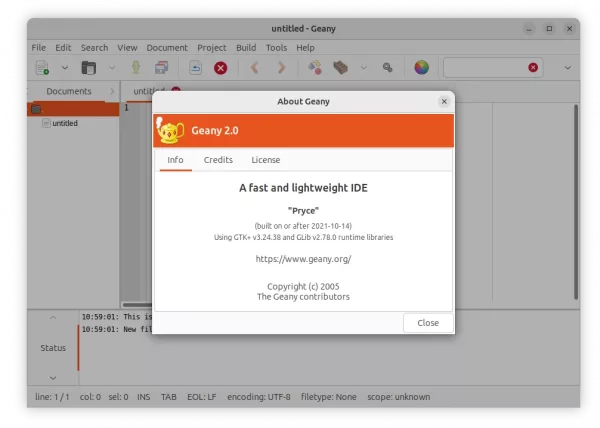
What’s New in Geany 2.0:
- Split “session data” into session.conf, preferences are written to and read from geany.conf.
- Re-add ability to scroll over document tabs.
- Use new tree view as default for the document list in the sidebar.
- Dark-theme friendly colors for compiler message
- Filter entry for symbol tree.
- Simplify project creation from existing directories with sources.
- Add option to show symbols in symbol tree without category groups.
- Add option to only show line endings if they differ from file default.
- Make tab label length and window title length configurable.
- Make Go to Symbol commands show signature list.
- Scintilla 5.3.7 and Lexilla 5.2.7
- Add “Change history” feature (disabled by default)
- Sync many parsers from the Universal Ctags project
- Improved support for the ctags file format
- Update Kotlin, Nim, PHP, Python filetype config
- Apply Markdown header style to the complete header
- Add AutoIt, GDScript filetype
- Remove Ferite filetype
- Enable local variables and improve autocompletion for C/C++ and some other languages
- Use “Prof-Gnome” GTK theme and GTK dialogs on Windows.
Install Geany 2.1 in Ubuntu via PPA:
Firstly, press Ctrl+Alt+T on keyboard to open a terminal window. Or search for and open terminal from start menu if you’re not on Ubuntu. When it opens, run the commands below one by one.
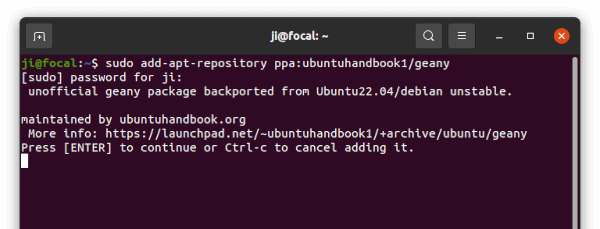
1. Add the PPA
Copy and paste (Ctrl+Shift+V) the command below into terminal and hit run will add the PPA repository:
sudo add-apt-repository ppa:ubuntuhandbook1/geany
As sudo command, you have to type user password (no visual feedback) to authenticate. After that, hit Enter to continue.
2. Update system package cache:
Since Ubuntu 20.04, it does automatically update the package cache while adding PPA. However, old Ubuntu releases (18.04) and some based systems may not. So, run command below to check updates manually:
sudo apt update
3. Install or Upgrade Geany:
If you already have an old version of the IDE package installed on your system, launch “Software Updater” (or Update Manager) to upgrade it:

Or, run command below in terminal to install/upgrade the package:
sudo apt install geany geany-plugins
Uninstall / Remove Geany:
You have two choices to get rid of the Geany packages from this Ubuntu PPA.
Option 1: Purge the Ubuntu PPA:
User may purge the Ubuntu PPA, which also downgrade all installed package (from that PPA) to the stock version in Ubuntu main repositories. To do so, run command:
sudo apt install ppa-purge && sudo ppa-purge ppa:ubuntuhandbook1/geany
Option 2: Remove the Ubuntu PPA and/or Geany package:
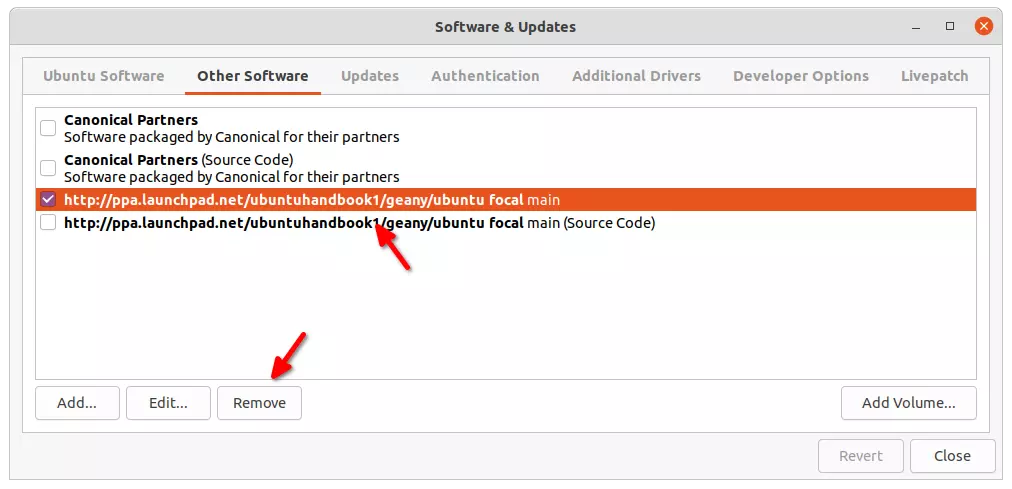
To remove the Ubuntu PPA without affecting all installed packages, either open “Software & Updates” and remove relevant line from “Other Software” tab.
Or, just run the command below in a terminal window:
sudo add-apt-repository --remove ppa:ubuntuhandbook1/geany
For choice, you may also remove the Geany IDE via command:
sudo apt remove --autoremove geany geany-plugins
That’s all. Enjoy!