This is a step by step guide shows how to install and use Scrcpy, the Android screen mirroring and remote control application, in Ubuntu desktop.
Scrcpy, pronounced “screen copy“, is a popular free open-source application works on Linux, Windows, and macOS. With it, user can mirror Android screen on computer desktop and control it with mouse, keyboard, and/or gamepad.
The Android device is connected either wired with USB cable or wirelessly through TCP/IP network protocol. Nothing needs to be installed on Android, as it uses Android Debug Bridge (ADB) to implement the core features.
Besides mirroring Android screen on your desktop, it also features:
- Audio mirroring or forwarding (Android 11+).
- Screen/Audio recording.
- Copy and paste in both directions.
- Mirroring with Android screen off.
- Camera mirroring.
- OTG mode, that only run physical keyboard, mouse and gamepad simulation, as if the computer keyboard, mouse and gamepads were plugged directly to the Android device.
- Mirror Virtual Display rather than device screen.
- Gamepad support.
- Keyboard and mouse simulation.
NOTE: This tutorial is tested and works in Ubuntu 22.04/Ubuntu 24.04, though it should also work in all current Ubuntu releases.
Step 1. Enable USB Debugging in Android device
To use the software, you need to first enable USB Debugging Mode in Android, unless you need to run only in OGT mode.
1. First, go to Settings in Android. Navigate to “About Phone/Device”, and tap on “Build Number” several times (usually 7 times). It should prompt you something like “You are now in Developer Mode“.
NOTE: there’s NO security issue or performance loss with developer mode enabled.
2. Then navigate to “Developer Options” in Settings menu or ‘Additional Settings’ sub-menu, and turn on the option for “USB Debugging“.
Step 2. Install adb & Scrcpy
ADB, stands for Android Debug Bridge, is versatile command-line tool that lets you communicate with a device. Scrcpy needs adb to make connection between your PC and Android devices.
a.) Download & Install the official Linux tarball
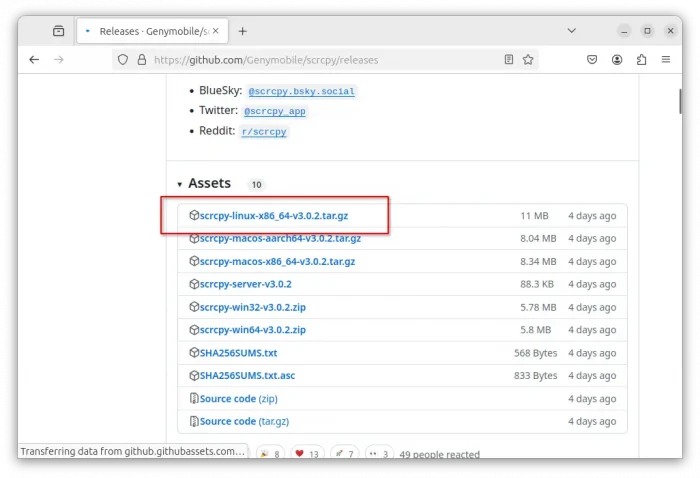
Since version 3.0.0, scrcpy offers tarball for Linux on Intel/AMD platform. To download it, just go to Github releases page via link below, then click the link under “Assets” section.
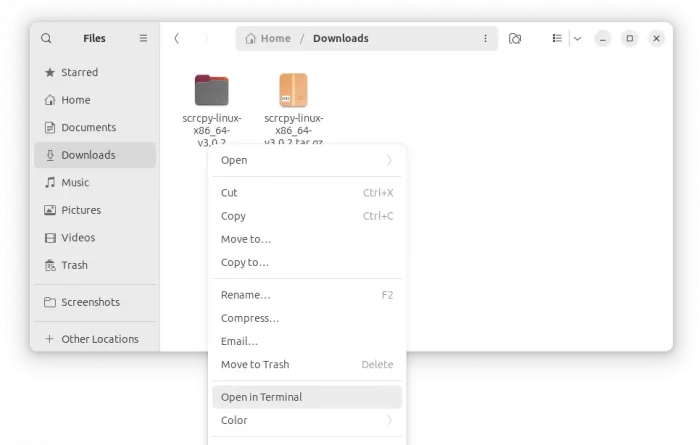
After downloaded the tarball, extract it, and then right-click on extracted folder and click “Open in Terminal“.
In the pop-up terminal window, you may use ./adb and ./scrcpy commands with desired options to start using them directly.
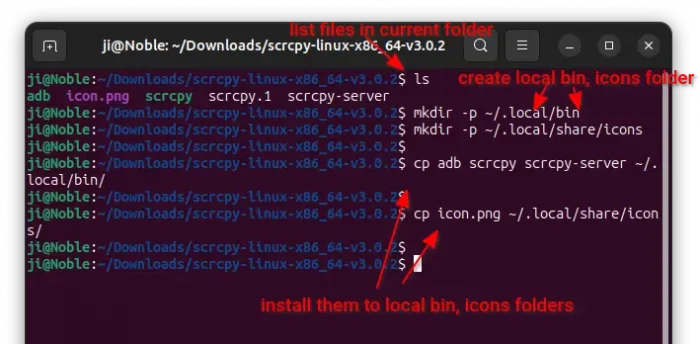
Or, “install” them by copying or moving them to your PATH! To do so, run commands:
- First, create yours own
binandiconsfolders, in case them don’t exist:mkdir -p ~/.local/bin
mkdir -p ~/.local/share/icons
- Then, copy or move
adbandscrcpy(client and server) executable files, as well as the icon files to the corresponding folders:cp adb scrcpy scrcpy-server ~/.local/bin
cp icons.png ~/.local/share/icons/scrcpy.png
NOTE: The commands above install adb and scrcpy to user’s local folder that works without admin account.
If you want to install for system-wide, then add ‘sudo‘ at beginnings, and replace ~/.local with /usr/local for all the 4 commands above.
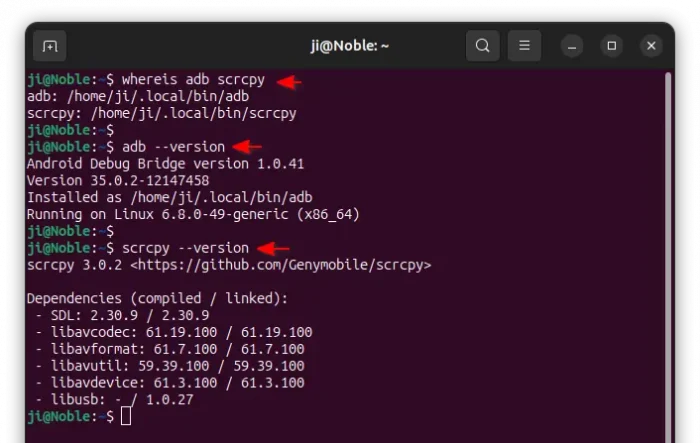
Finally, verify by running adb --version and scrcpy --version commands to check their versions.
NOTE: If ~/.local/bin folder didn’t exist before, you need to log out and back in. The default profile only adds it into PATH when exists.
b.) Add Scrcpy into start menu (Optional)
Run scrcpy from terminal is more flexible for mirroring your Android screen with different feature options. But, if you just want to start mirroring with default or fixed option, then you may create an app shortcut for it.
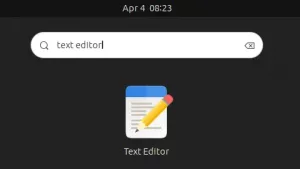
First, launch text editor and create an empty document.
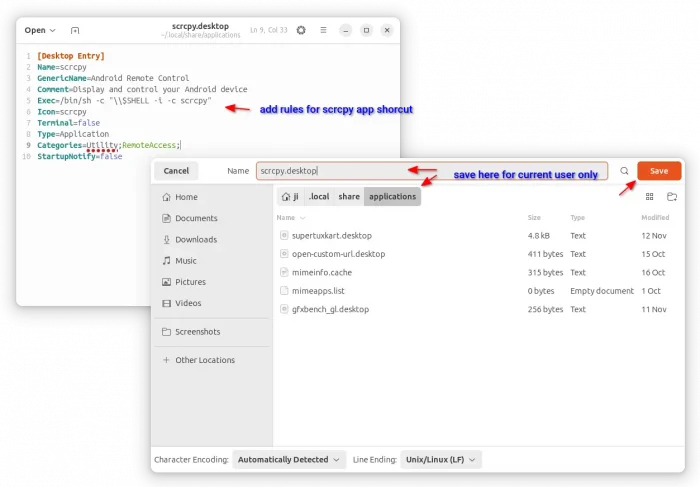
Then, add following lines:
[Desktop Entry]
Name=scrcpy
GenericName=Android Remote Control
Comment=Display and control your Android device
Exec=/bin/sh -c "\\$SHELL -i -c scrcpy"
Icon=scrcpy
Terminal=false
Type=Application
Categories=Utility;RemoteAccess;
StartupNotify=false
Finally, press Ctrl+S to open save dialog, and choose save as scrcpy.desktop file under .local/share/applications directory.
NOTE: text colors only apply after saving as .desktop file, and .local is hidden folder that needs Ctrl+H to show/hide in file-chooser dialog.
After that, you should be able to search & launch scrcpy from start menu a few moments later.
Step 3. Start & Use Scrcpy
Now, connect your Android device into Ubuntu computer using USB cable. Then, click “Allow” in Android to confirm the “Allow USB Debugging” dialog.
NOTE: When connecting Android to PC, select either File Transfer or Media Transfer mode, rather than just charging!! If “Allow USB Debugging” prompt does not pop-up, then make sure USB Debugging is enabled, and try “Revoke USB debugging authorizations” option under Settings -> Developer Options.
1. First, open terminal (Ctrl+Alt+T) and start adb connection in your favorite mode:
- To remote access via USB cable, run command:
adb usb
- Or, remote access using wireless network, run commands instead:
adb tcpip 7676
adb connect 192.168.0.150:7676
Here, change port number 7676 and the Android’s IP address accordingly! For the wireless mode, you can then remove the USB cable after connection established.
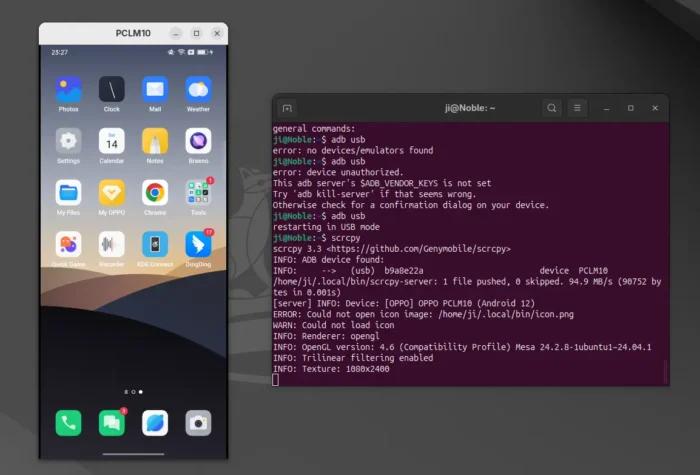
2. If the previous steps go well without any error! You can now start scrcpy by searching from either start menu or GNOME overview depends on your desktop environment.
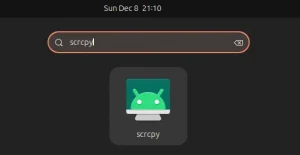
Scrcpy includes many optional features that are NOT enabled by default. You may alternatively start it from terminal window with custom options. For example, play audio on both Android and computer sides:
scrcpy --audio-source=playback --audio-dup
Or, start mirroring with rotated screen and enable gamepad input:
scrcpy --display-orientation=90 --gamepad=uid --audio-source=output
For more options, either run scrcpy --help in terminal or see the official project page.
Uninstall scrcpy
To uninstall scrscpy, simply remove all the files installed through step 2.
And, to remove the executable files, use command in terminal (Ctrl+Alt+T):
rm ~/.local/bin/adb ~/.local/bin/scrcpy ~/.local/bin/scrcpy-server
To remove the app icon and shortcut files, use command:
rm ~/.local/share/icons/scrcpy.png ~/.local/share/applications/scrcpy.desktop







Thanks for installation instructions!
I can connect my phone, play a video, and see the video on my desktop. But have no audio.
Would you know if and how to cast the audio?
thanks.
The Scrcpy package in Ubuntu repository somehow stuck at v1.2x. However, audio support needs v2.0 and higher.
So you can try to install the latest version by following this guide:
https://github.com/Genymobile/scrcpy/blob/master/doc/linux.md
Will this work if the phone is on a different network than the PC? Also, assuming I can get the connection working, can I start and use CHROME through the PC?
Thanks
Hello,
scrpcy seems not to be working on Linux Mint 22 (Ubuntu 24.04) when I upgraded from Mint 21.3.
It keeps complaining:
scrcpy: error while loading shared libraries: libavformat.so.58: cannot open shared object file: No such file or directory
Installing livavformat58 does not work (not available)
Installing dependency libraries do not work either.
Do you have any suggestions?
If scrpcy was installed before the process upgrading from Mint 21.3 to 22. Then, try re-installing scrpcy, since the dependency libraries changed in different Mint releases.
hi dev, i cant see scrcpy ( console ) anywhere