![]()
For Ubuntu 18.04, Ubuntu 19.10, and higher with the default Gnome desktop environment, there’s a built-in screen recording tool you may not know.
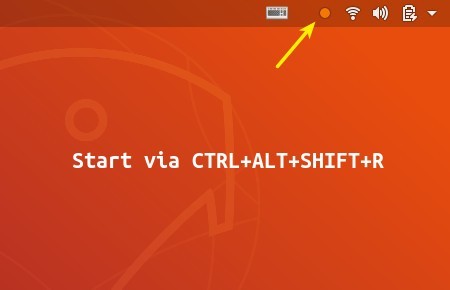
For Ubuntu 23.10, Ubuntu 24.04, and later, the built-in screen recorder is now available in top-right system tray menu.
There’s no app shortcut or manual page for the hidden video recording tool. It has limited features that include:
- Start recording by pressing Ctrl+Alt+Shift+R on keyboard.
- Stop recording also by pressing Ctrl+Alt+Shift+R.
- Maximum video length is 30s (change it via following steps).
- Full-screen recording only.
- Record to WebM only.
- Automatically saved videos to user’s Videos folder.

Change video length time limit:
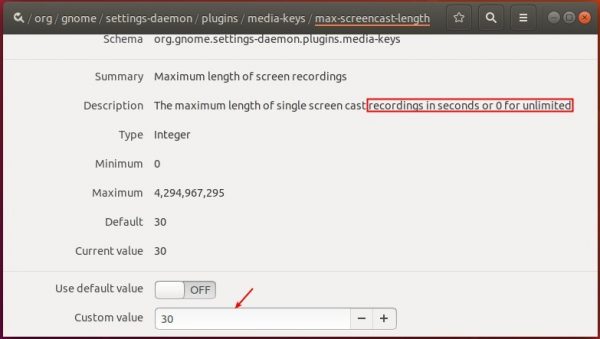
The maximum video length is 30 seconds by default. You can change 30 to any number in seconds or 0 with no time limit. Then you can press the shortcut key again at any time to stop the recording process.
1. Install Dconf Editor from Ubuntu Software and then launch it.
When it opens, navigate to org/gnome/settings-daemon/plugins/media-keys.
Screen down and click to change the value of ‘max-screencast-length’ as you want.

2. Alternatively, run single command in terminal (Ctrl+Alt+T) to change the value:
gsettings set org.gnome.settings-daemon.plugins.media-keys max-screencast-length 0
You may replace number 0 in the command as you want.


Does’t work with my Ubuntu 19.10 — when I press Ctrl+Alt+Shift+R nothing happens
You will find a file with extension .webm inside your folder. Type ls -l ~/cin*
You can play the video using celluloid or a browser.
You have to define the shortcut in the keyboard settings as it seems to be unset by default now. Go to the Gnome shortcut settings and find the one for screen recording, set it to whatever you like (e.g. ctrl+alt+shift+r) and you can use it.
Doesn’t work for my Ubuntu 20.04.
On my system, it saves the videos to the my home directory. One day Gnome developers will sort this mess out. Doesn’t seem to be a way to correct this looking in dconf.
olo,
same here, videos are in ‘home’ dir, one would expect them to be in ‘home/videos’ dir instead.
using mint 20 linux, and ctrl+shift+alt+r for toggling record/stop
would like to know if/how to change recording directory.
thx for article, and sharing
aum
s love nia
screen recording working but audio not getting recorded,
How to record audio
works for me but it does not record the sound. Any alternative suggestions working under wayland?
Until GNOME’s new built-in screencast UI in upcoming Ubuntu 22.04, try Kooha which works also on Ubuntu 21.10 with Wayland:
https://ubuntuhandbook.org/index.php/2021/10/record-screen-ubuntu-wayland-kooha/
How to get the audio sound
Thank you, the software works. It always recordes both of my monitors at the same time, and in the finished video, they appear side by side. Can one limit the recording area to one monitor only? Or even to a specific application window – or any rectangular area? Thank you.